21 Magical Gingerbread House Ideas for the Holidays
A good gingerbread house comes down to three things: firm pieces, thick icing, and a clear idea before you start. The 21 designs in this list range from a plain candy covered house to a castle and a train, and none of them need specialist equipment.
Some are quick enough for a weekday evening with children. Others, like the mansion and the lighthouse, are weekend projects that you bake one day and build the next.
Each idea explains the build order and the small detail that makes the design work. Follow the order even when it feels slow, because most gingerbread problems come from rushing the setting time.
This post contains affiliate links. If you buy through them, I may earn a small commission at no extra cost to you.
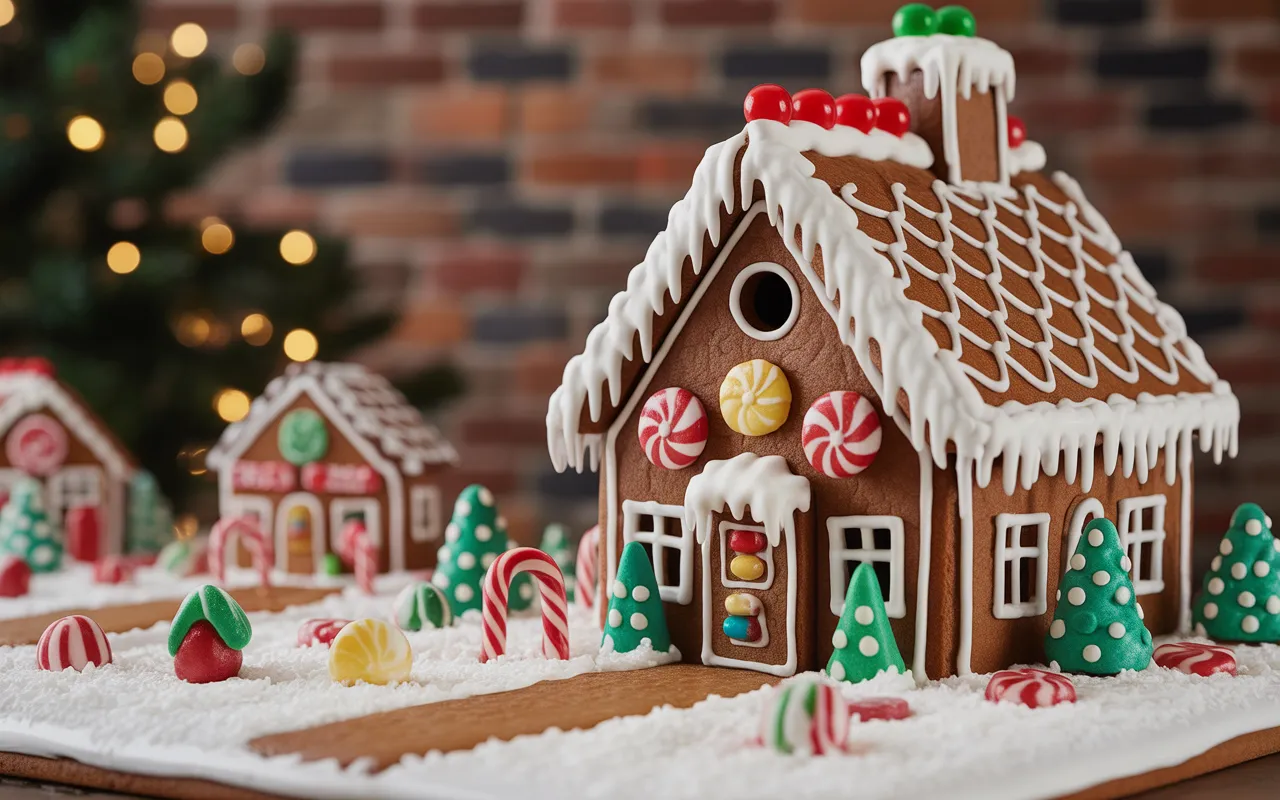
1. Classic Candy-Coated Gingerbread House

This is the standard house most families start with: plain gingerbread walls, white icing, and as much bright candy as the roof will hold. It is forgiving, because any wobbly line can be covered with another sweet.
Start with the roof: Decorate the roof first while the panels are flat, then assemble the walls. Roof candy is heavy, and adding it after assembly is where most collapses happen.
Fill every gap: Work around the house with a bag of mixed small sweets and fill bare spots as you find them. Stand back every few minutes, because gaps show more clearly from a distance.
- Decorate roof panels flat before assembly
- Use mixed small sweets to fill bare spots
- Check the house from a distance as you work
Shop This Look
2. Snow-Covered Winter Wonderland
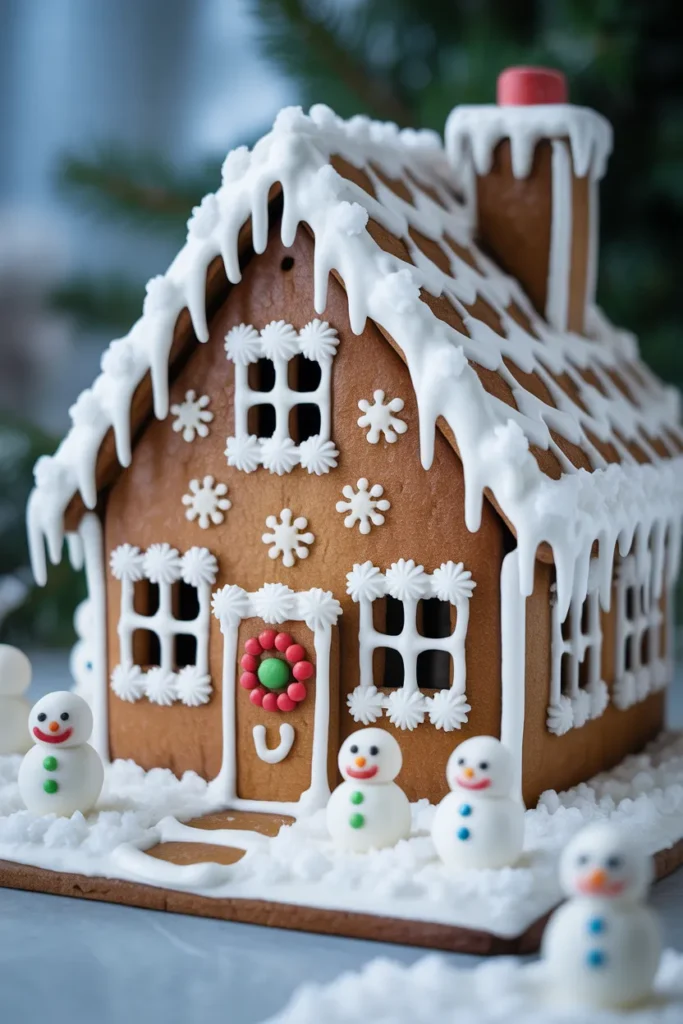
White on white is the whole idea here. Thick icing snow covers the roof, the board, and the tops of the fences, and the only colour comes from a few red berries or a single wreath.
Spread snow thickly: Use a palette knife or the back of a spoon to spread icing snow rather than piping it. Leave it rough and uneven, which reads as real snow better than smooth lines.
Add one colour accent: Place a few red candies at the door and windows and stop there. The restraint is what makes this version look calm next to brighter houses.
- Spread icing snow with a spoon, not a piping bag
- Leave the snow rough and uneven
- Limit colour to a few red candies at the door
Shop This Look
3. Candy Cane Cottage
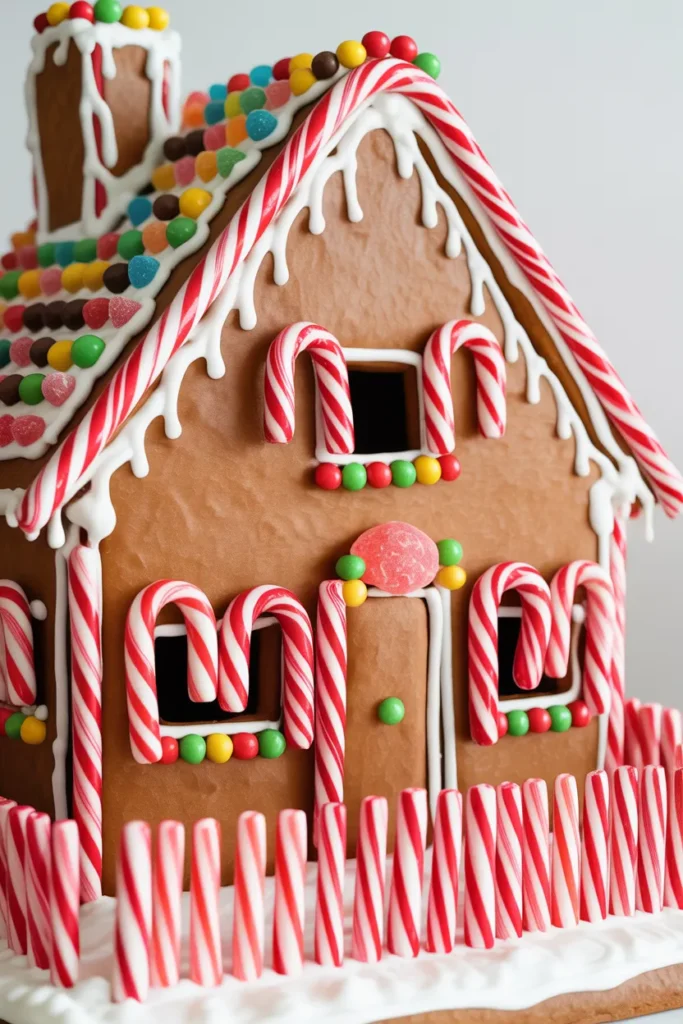
Red and white stripes cover this cottage, from candy cane pillars at the corners to a striped icing roof. Peppermint sweets make the roof pattern and crushed candy cane fills the path.
Set the corner pillars: Fix full size candy canes upright at the four corners with thick icing. They add support as well as decoration, but only if the icing has time to harden.
Crush candy for the path: Crush spare candy canes in a sealed bag and scatter the pieces over wet icing for the path. Press them down lightly so they stay put when the board moves.
- Use candy canes as corner pillars with thick icing
- Scatter crushed candy cane over wet icing paths
- Keep stripes red and white only, no extra colours
Shop This Look
4. Chocolate Lovers’ Gingerbread House
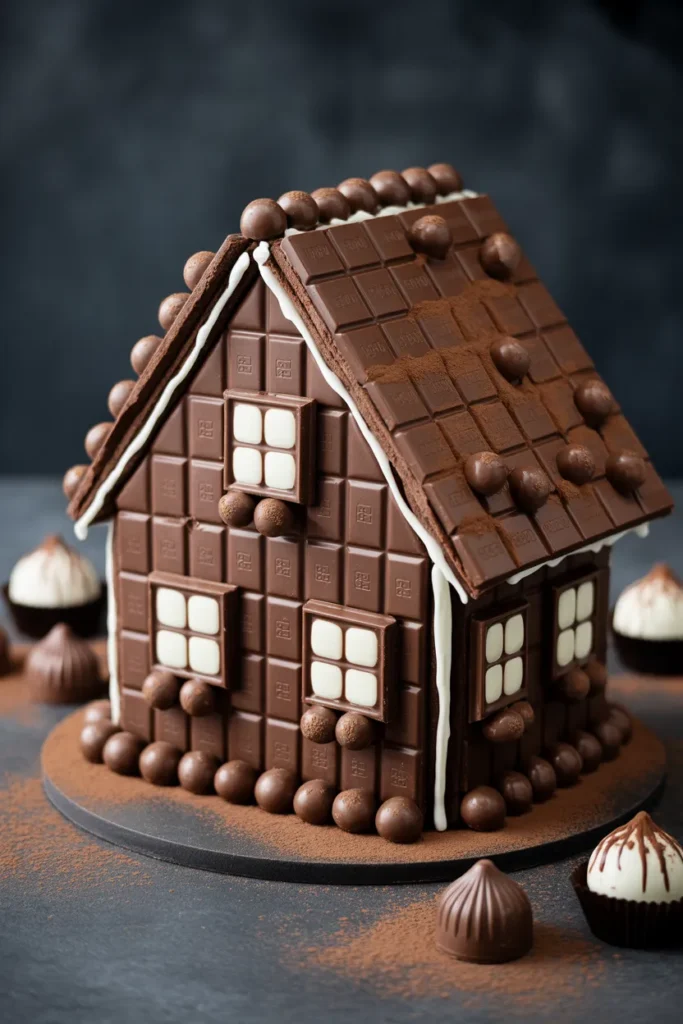
Chocolate replaces most of the candy here. Chocolate fingers line the walls, a chocolate bar makes the door, and the roof is covered with chocolate buttons or shavings.
Work in a cool room: Chocolate softens in warm hands and warm kitchens, so keep pieces in the fridge until you need them. Attach them with chocolate icing or melted chocolate rather than white royal icing.
Mix dark and milk pieces: Alternate dark and milk chocolate on the roof for a simple pattern. A dusting of cocoa on the board around the house finishes the look without more sweets.
- Keep chocolate pieces chilled until you use them
- Fix chocolate with melted chocolate, not white icing
- Alternate dark and milk pieces for the roof pattern
Shop This Look
5. Whimsical Forest Gingerbread House

Green icing trees, a twig fence, and a roof of overlapping leaves or green candies put this house in a forest clearing. The gingerbread shows through in places, which suits the theme.
Pipe simple trees: Pipe zigzag triangles of green icing onto wax paper and let them dry before standing them up. Flat dried trees are easier to place than piping directly onto the scene.
Build a twig fence: Cut pretzel sticks to one length and join them with icing into short fence sections. Set the sections into the board icing at slight angles for a handmade look.
- Pipe trees on wax paper and dry before placing
- Cut fence sticks to one length for tidy sections
- Leave some bare gingerbread showing on walls
Shop This Look
6. Peppermint Wonderland

Peppermint discs cover the roof in rows, and everything else stays red and white. The round sweets overlap like tiles, so start at the bottom edge of the roof and work upward.
Tile the roof in rows: Fix the bottom row first and let each new row overlap the one below it. Overlapping hides the icing and keeps rain, or in this case loose crumbs, out of the gaps.
Match the door and path: Frame the door with two candy canes and use crushed peppermint for the path. One colour family throughout keeps a busy roof from looking messy.
- Start roof rows at the bottom edge and overlap upward
- Frame the door with two candy canes
- Use crushed peppermint for the path to match
Shop This Look
7. Nutcracker-Inspired Gingerbread House
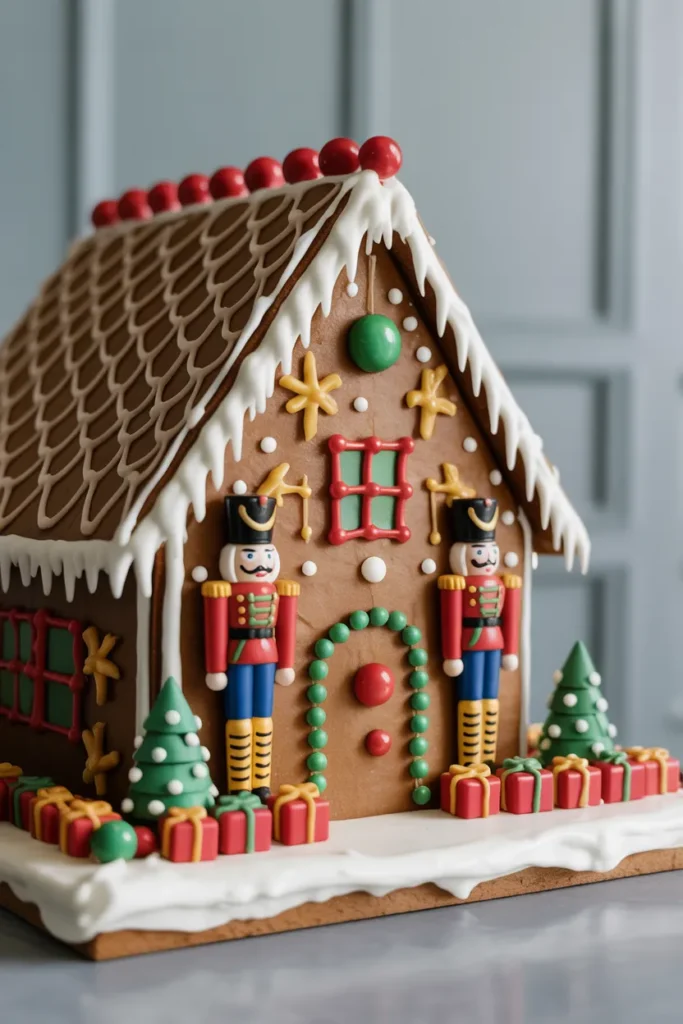
This house takes its colours from nutcracker uniforms: red walls trimmed with gold and dark blue or green. Small toy soldier figures made from cookies or fondant stand on either side of the door.
Pipe the uniform trim: Pipe gold lines along the roof edges and around the windows to suggest braid and buttons. Metallic icing or edible gold paint gives a cleaner finish than yellow icing alone.
Make simple soldier figures: Use two rectangular cookies, iced in red with dark hats, as guards by the door. Keep the faces as simple dots, small figures look better with less detail.
- Use edible gold paint for trim lines and buttons
- Keep soldier figures simple with dot faces
- Stick to red, gold, and one dark colour
Shop This Look
8. Frosted Winter Cabin
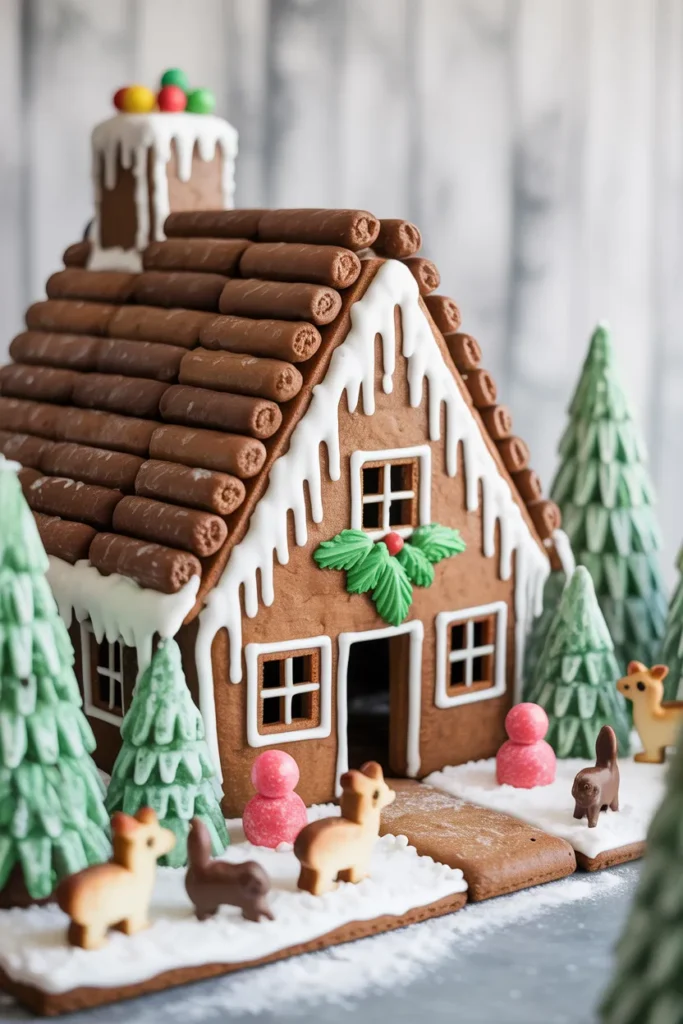
A plain cabin shape with a heavy white roof and a warm light inside is enough for this one. The windows are backed with yellow candy so the house glows on the table in the evening.
Back windows with yellow candy: Melt yellow or amber hard candy into the window holes as the panels bake. Put a battery tea light inside once the house is assembled and the icing is dry.
Pile snow on one side: Drift the icing snow deeper on one side of the cabin, as wind would. A small stack of chocolate logs by the wall adds to the sheltered feel.
- Use amber candy windows plus a battery light inside
- Drift icing snow deeper on the windward side
- Stack chocolate logs beside the cabin wall
Shop This Look
9. Rainbow Candy Roof Gingerbread House

Rows of coloured sweets run across the roof in rainbow order. It is a good choice for children, because the pattern is simple to follow and mistakes are easy to fix by swapping one sweet.
Lay rows in colour order: Sort the sweets into colour piles first, then fix one row at a time from the roof edge to the ridge. Check the order before the icing sets, not after.
Keep walls plain white: Leave the walls with white icing only, so the roof carries all the colour. A plain door and path stop the house from looking overloaded.
- Sort sweets into colour piles before starting
- Fix roof rows one at a time, edge to ridge
- Leave walls white so the roof stands out
Shop This Look
10. Elegant White and Gold Gingerbread House

White icing, gold trim, and a few pearl sweets make a house that suits a grown up table setting. There is no bright candy here at all, and the lines need to be neat, so take it slowly.
Pipe straight gold lines: Rest your piping hand on the table edge for support and pipe in short sections. If a line goes wrong, lift it off with a cocktail stick while it is still wet and redo that section only.
Place pearls sparingly: Set edible pearls along the roof ridge and around the door, spaced evenly. Measure the spacing with your eye from the front, and adjust before the icing dries.
- Pipe gold lines in short supported sections
- Fix mistakes with a cocktail stick while wet
- Space edible pearls evenly along ridge and door
Shop This Look
11. Candy Forest Gingerbread House
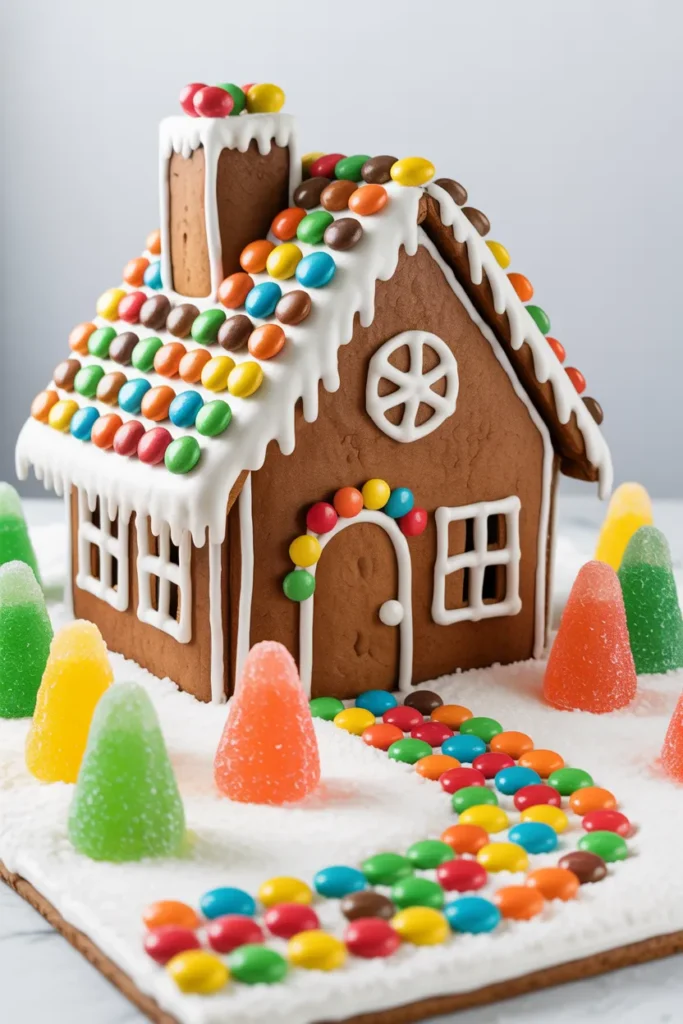
Tall candy trees surround this house on all sides, made from stacked green sweets or iced cones. The house itself is small, and the forest does most of the work.
Make trees in two ways: Use iced ice cream cones for tall trees and stacks of green gumdrops for short ones. Varying the heights keeps the group from looking like a row of identical shapes.
Leave a clear path: Keep one open path from the board edge to the front door, lined with small white sweets. A clear path gives the eye a way into the scene.
- Mix cone trees and gumdrop trees for varied heights
- Dust tree tops with powdered sugar snow
- Keep one clear path to the front door
Shop This Look
12. Gingerbread Castle
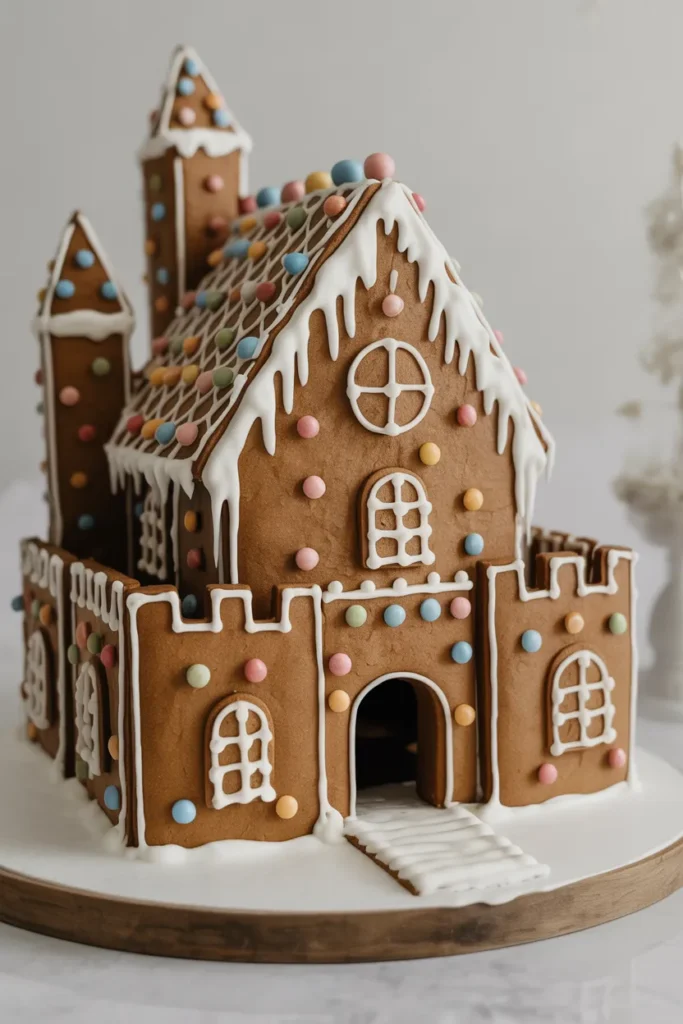
A castle version with four corner towers, a central keep, and a wall joining them together. It is a larger build, so cut all the pieces on day one and assemble on day two.
Use one wall template: Cut the curtain walls from one template so both sides match in height. Mismatched walls are the main reason large builds lean, and they are hard to fix later.
Add flags on top: Small paper or fondant flags on cocktail sticks finish each tower. Push them in only after all the icing work is done, so they stay clean.
- Cut all pieces day one, assemble day two
- Use one template for both curtain walls
- Add tower flags after all icing is finished
Shop This Look
13. Frosted Candy Cottage

Soft pastel icing covers this cottage, with a thick frosted roof and small flowers piped around the door. It reads more spring than winter, which makes it stand out in a group display.
Tint icing in small batches: Colour small amounts of icing at a time, because pastel shades darken as they dry. Test a dot on paper and let it dry before committing to the whole batch.
Pipe small flowers simply: Five dots in a circle with a yellow centre makes a flower anyone can pipe. Group them in threes near the door and windows rather than spreading them thinly.
- Tint icing in small batches, pastels darken when dry
- Pipe five dot flowers grouped near the door
- Keep the roof frosting thick and roughly spread
Shop This Look
14. Holiday Village Gingerbread House
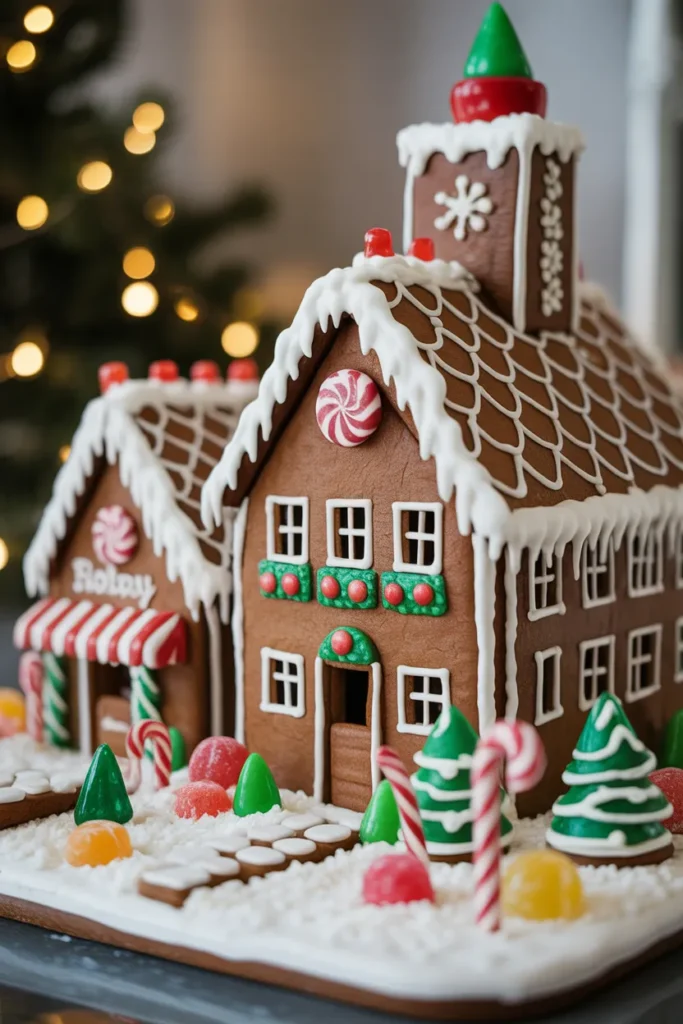
Instead of one house, build three or four small ones on a single long board, with a shared path and a few trees between them. Each house can have a different roof candy so the village has variety without chaos.
Vary one thing per house: Change only the roof candy or the door colour from house to house. Keeping the walls and icing the same across the village is what ties it together.
Run one path through it: Lay a single winding path of crushed biscuit or candy that passes every door. One shared path makes separate houses read as one village.
- Change only roof candy or door colour per house
- Keep wall icing the same across all houses
- Run one winding path past every door
Shop This Look
15. Gingerbread Chalet
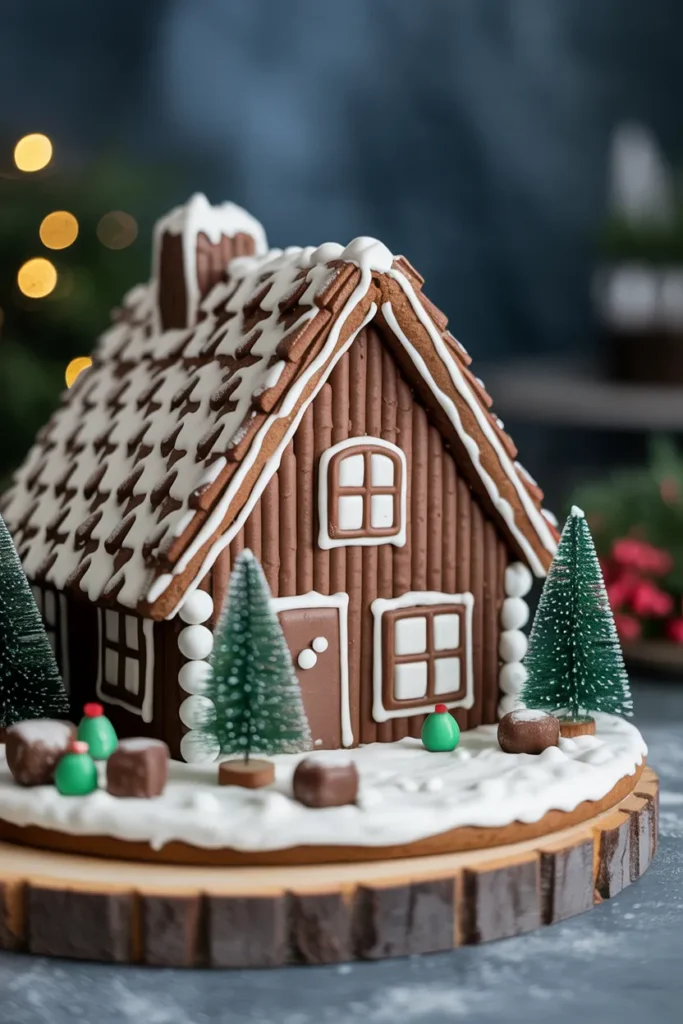
A chalet shape with a balcony, a wide roof, and shutters on the windows. Wooden details come from pretzel sticks and chocolate, and the roof carries a thick layer of snow.
Fit shutters from cookies: Cut thin cookie strips to size for shutters and fix them beside each window. Score lines into them with a knife before baking to suggest planks.
Snow the roof heavily: Spread the roof icing thick and let it drip slightly over the edges. Chalets look right with deep snow, so do not spread it thin to save icing.
- Score shutter strips before baking for plank lines
- Spread roof snow thick with drips over edges
- Use pretzel and chocolate for all wood details
Shop This Look
16. Sparkling Sugar Cookie Cottage
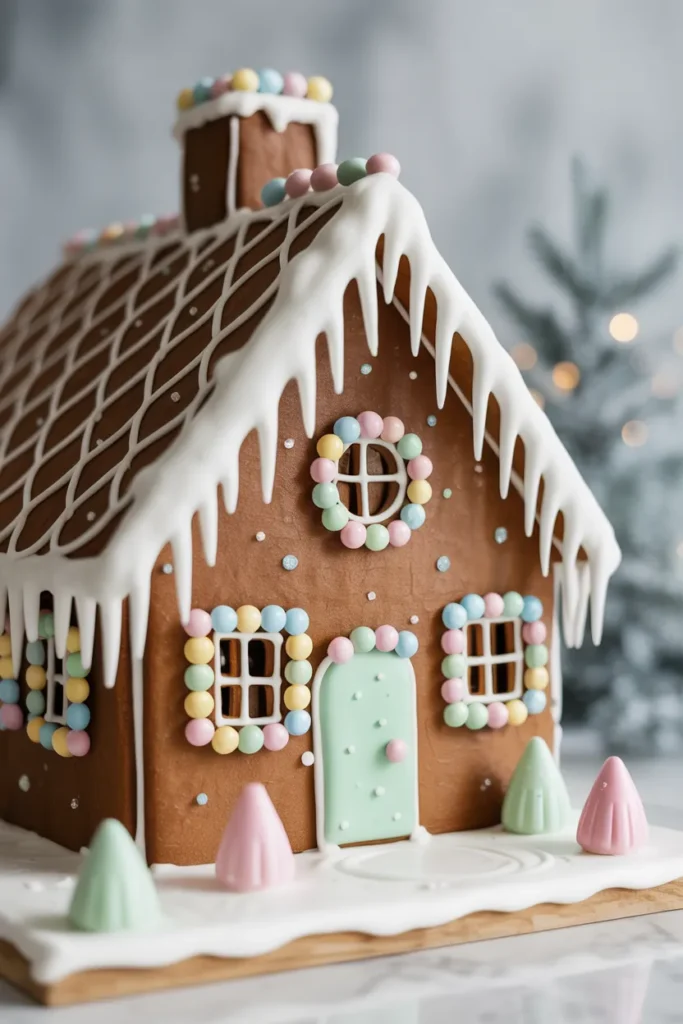
This cottage is built from sugar cookie dough instead of gingerbread, so it bakes paler and tastes milder. Coarse sugar over white icing gives it a sparkling finish that catches the light.
Chill the dough well: Sugar cookie dough spreads more than gingerbread, so chill the cut pieces before baking. Cut them slightly smaller than the template to allow for the spread.
Add sparkle with coarse sugar: Brush the iced roof with a little water and scatter coarse sugar over it while wet. The sugar sticks in a thin layer and dries with a frosted shine.
- Chill cut pieces and cut slightly small
- Brush icing with water before adding coarse sugar
- Keep pieces on the tray until fully cool
Shop This Look
17. Gingerbread Train Station
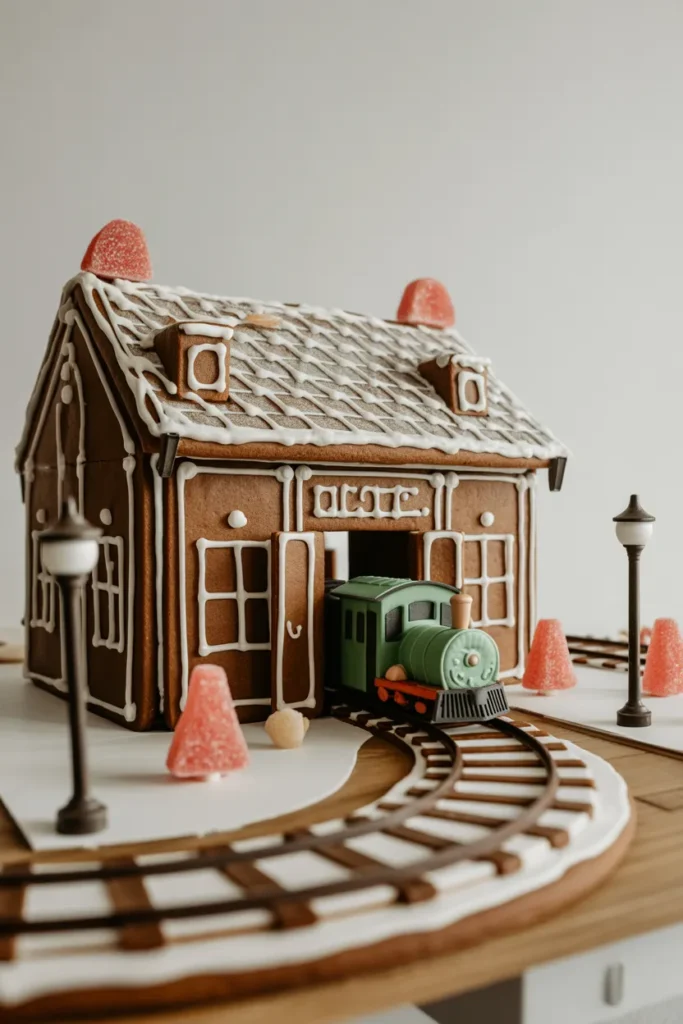
A long station building with a canopy over the platform and a small train waiting beside it. The canopy is a flat cookie resting on candy cane posts, which is simpler than it looks.
Support the canopy: Fix the canopy posts first and let them set hard before the canopy cookie goes on. Rest the canopy rather than pressing it, and pipe icing along the top joint for strength.
Keep the train simple: Build the train from three small boxes with round candy wheels. One colour for the engine and plain carriages looks tidy and takes half the time.
- Set canopy posts hard before adding the canopy
- Rest the canopy, do not press it down
- Build the train from three simple cookie boxes
Shop This Look
18. Gingerbread Lighthouse
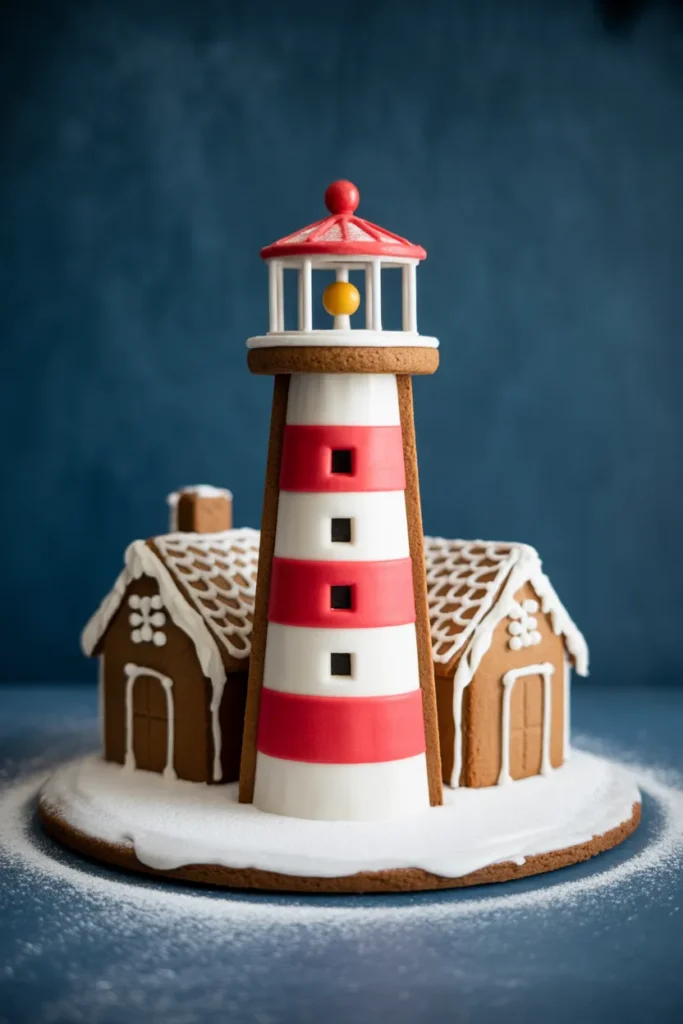
A tall round tower with a striped band, a small top room, and a light that works. This version is narrower than the shore lighthouse in most collections, so it fits on a small board.
Build the tower round: Bake the tower wall as several flat panels and join them into a ring, or stack baked rings. Either way, let each joint set before adding the next level.
Finish with a light room: Make the top room from clear candy panels with a battery light inside. A cone of gingerbread or chocolate makes a simple cap roof.
- Let each tower joint set before adding height
- Make the top room from clear candy panels
- Use a battery light, never a real flame
Shop This Look
19. Candy-Filled Gingerbread Mansion
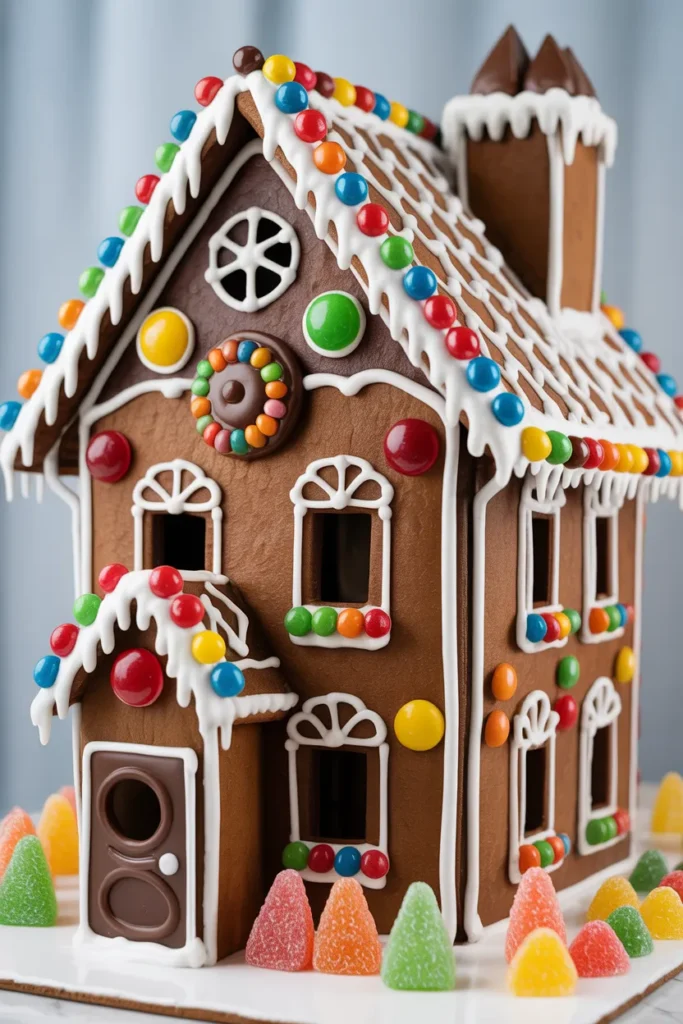
A mansion gives you room to repeat details: two wings, a central door with steps, and the same window style on every wall. It needs a large board and a free afternoon, but no new skills.
Repeat the window style: Pipe every window the same way, same size, same trim colour. Repetition is the difference between a mansion and a group of houses stuck together.
Build steps to the door: Stack three flat cookies as steps in front of the door and ice the edges. Steps add height and importance to the entrance for very little work.
- Pipe every window in the same style and size
- Stack three flat cookies as entrance steps
- Allow a large board and a full afternoon
Shop This Look
20. Holiday Train Gingerbread House

Here the train is the house: an engine and two carriages built from gingerbread, decorated as a holiday train with candy cargo. It suits a long narrow board or a mantelpiece.
Join carriages loosely: Join the carriages with a short icing link or a candy stick coupling, not a rigid wall. A slight gap looks right and stops the train cracking when the board moves.
Load the cargo cars: Fill the last carriage with wrapped sweets, mini candy canes, or small cookies as cargo. Keep the load below the top edge so it reads as a load, not a spill.
- Use a loose coupling between carriages
- Fill the last carriage with sweets as cargo
- Keep cargo below the top edge of the carriage
Shop This Look
21. Enchanted Winter Cottage
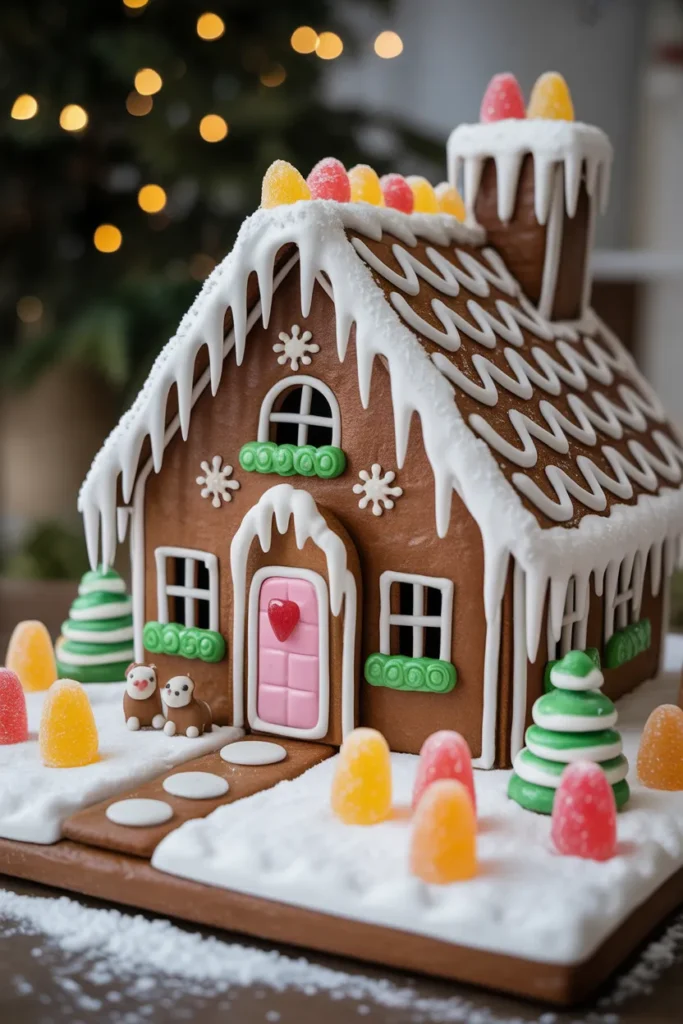
The last house in this set is a quiet cottage with heavy snow, a smoking chimney effect from a wisp of cotton wool, and warm windows. It is a good closing piece for a display because it looks calm.
Add the chimney smoke: Tease a small piece of cotton wool into a thin wisp and tuck it into the chimney top. Add it only for display or photos, and keep it away from any lights inside the house.
Soften the window light: Back the windows with amber candy and use one battery light inside. Amber gives a warmer glow than yellow and suits the quiet feel of this cottage.
- Add cotton wool smoke only for display time
- Back windows with amber candy for warm light
- Keep all decoration low key and snowy
Shop This Look
How to Start
Buy or bake your base first and decide on one design before you open any candy. A standard house needs about one batch of dough, a board to build on, and royal icing mixed thicker than you think it should be.
Mix icing thicker than piping icing: Assembly icing should hold a stiff peak and not slide off the spoon. If it runs, add more icing sugar a spoonful at a time until it holds its shape.
Build walls before the roof: Join the four walls, prop them, and leave them for at least an hour before the roof goes on. The roof is the heaviest part and it will push soft wall joints apart.
- Decide on one design before opening any candy
- Mix assembly icing to a stiff peak
- Leave walls for an hour before adding the roof
Shop This Look
Common Mistakes
- Mixing assembly icing too thin, so joints slide and walls lean
- Putting the roof on before the wall joints have set
- Handling chocolate decorations in a warm kitchen until they melt
- Piling candy on one side and leaving the other side bare
- Using real candles inside a house instead of battery lights
- Cutting matched pieces freehand instead of using one template
- Moving the finished house by lifting it instead of sliding the board
Frequently Asked Questions
How far ahead can I bake the pieces?
You can bake the pieces up to a week ahead and store them flat in an airtight tin with baking paper between layers. Build the house within a day or two of when you want to display it.
Why did my house collapse overnight?
The usual causes are thin icing, a roof added too early, or a warm room softening the joints. Rebuild with thicker icing and leave each stage to set longer than feels necessary.
Can children build these houses?
Yes, the smaller cottages and the candy roof designs suit children well. Give each child their own small house rather than sharing one large build, and do the assembly stage for them.
What can I use instead of royal icing?
Melted white chocolate or a thick glace icing can hold a small house, but neither sets as hard as royal icing. For anything tall, royal icing is the safer choice.
Where can I find more handmade gift projects for the holidays?
Baked houses make good centrepieces, but small handmade gifts are easier to give to a long list of people. For projects you can make and wrap, see these handmade Christmas gift ideas
The Finishing Touch
Pick the house that fits your time honestly. A small cottage finished neatly will always look better than a mansion that ran out of time at the roof stage.
For a tested dough recipe with step by step assembly photos, Sally’s Baking Addiction gingerbread house guide is a clear place to start. Use its base recipe, then choose your decoration from the ideas in this list.
Finish with a dusting of powdered sugar, the lights switched on, and nothing else added. Knowing when to stop is the last skill in gingerbread, and it is the one that shows.