23 Gingerbread House Ideas That Look Magical
A gingerbread house does not need to be complicated to look good on the table. Most of the designs in this list use the same basic walls and roof, and the difference comes from how you decorate them and what you build around the base.
You will find small cottages for an afternoon with children, larger village and castle builds for a free weekend, and a few quiet white designs for a calmer table. Each idea lists what to buy and the order to do things in, because order is what keeps a house standing.
Read through the list first and pick one design that matches your time and your candy supply. Trying to combine three designs into one house usually ends with a crowded roof and a leaning wall.
This post contains affiliate links. If you buy through them, I may earn a small commission at no extra cost to you.
1. Enchanted Forest Gingerbread House
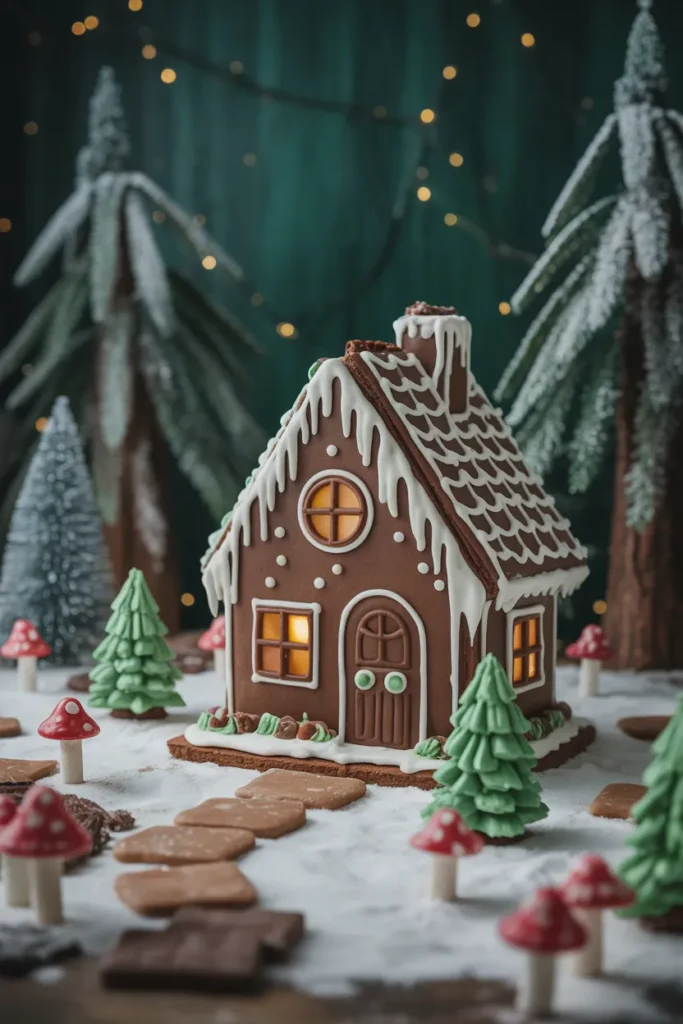
This house sits in a small clearing, with gingerbread walls, a steep roof, and trees made from rosemary sprigs and green icing all around it. A short path of crushed candy leads to the door, and the whole scene fits on one cake board.
Build the base first: Bake the walls a day ahead so they are firm before you start. Assemble the house on the board and let the royal icing set for at least an hour before any trees or heavy candy go on.
Add the forest details: Push small rosemary sprigs into blobs of icing to stand in for pine trees, and dust everything with powdered sugar at the end. A few gumdrop mushrooms near the door finish the woodland look without much cost.
- Bake walls a day early so they harden before assembly
- Use rosemary sprigs or green candy cones for the trees
- Dust with powdered sugar last, after all icing is dry
Shop This Look
2. Snowy Village Gingerbread Cottage
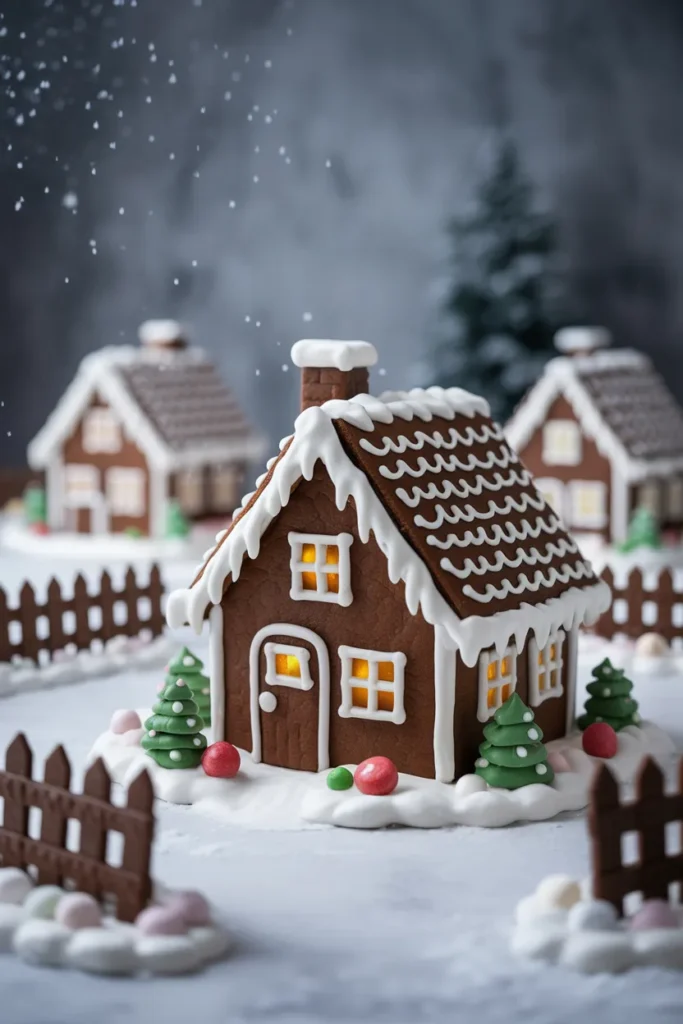
A row of small cottages works better than one large house if you are building with children. Each cottage is a simple four wall box with a plain roof, and the snow is just white icing spread thick and left rough.
Keep the cottages small: Small pieces bake faster and break less often than large panels. Cut all the pieces from one batch of dough, and let each person decorate their own cottage their own way.
Join them into a village: Set the finished cottages on a board covered with white icing or shredded coconut. Add a lamppost or two from candy sticks, and leave small gaps between houses for paths.
- Use one dough batch for all the cottage pieces
- Cover the board with coconut or white icing for snow
- Let each builder decorate one cottage start to finish
Shop This Look
3. Fairytale Castle Gingerbread House
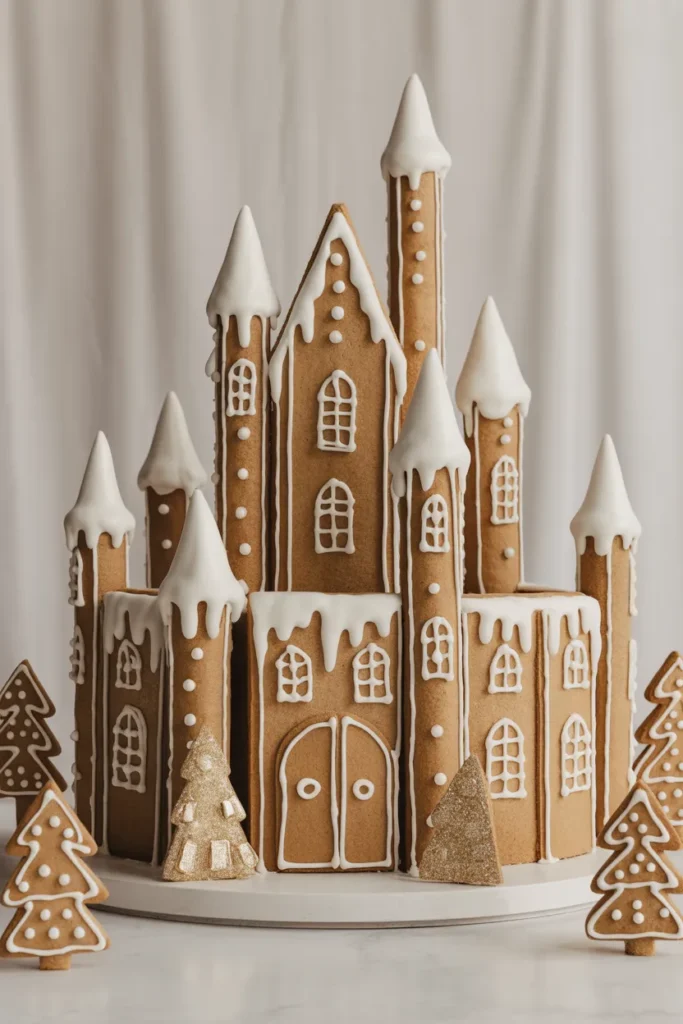
A castle needs height, so this design uses two round towers made from stacked gingerbread rings or short cylinders on either side of a main hall. Pointed roofs are simple cones of gingerbread, trimmed with white icing along the edges.
Support the towers: Towers fall over if the icing is runny, so use thick royal icing and hold each piece for a full minute. You can also hide a clean, food safe support inside each tower while it sets.
Pipe the stone effect: Pipe small dots and short lines over the walls to suggest stone blocks. A drawbridge made from a flat cookie on two licorice strings gives the front a clear focal point.
- Use thick royal icing for tall or heavy pieces
- Pipe dots and lines to suggest stone walls
- Add a cookie drawbridge on licorice string chains
Shop This Look
4. Cozy Cabin Gingerbread House
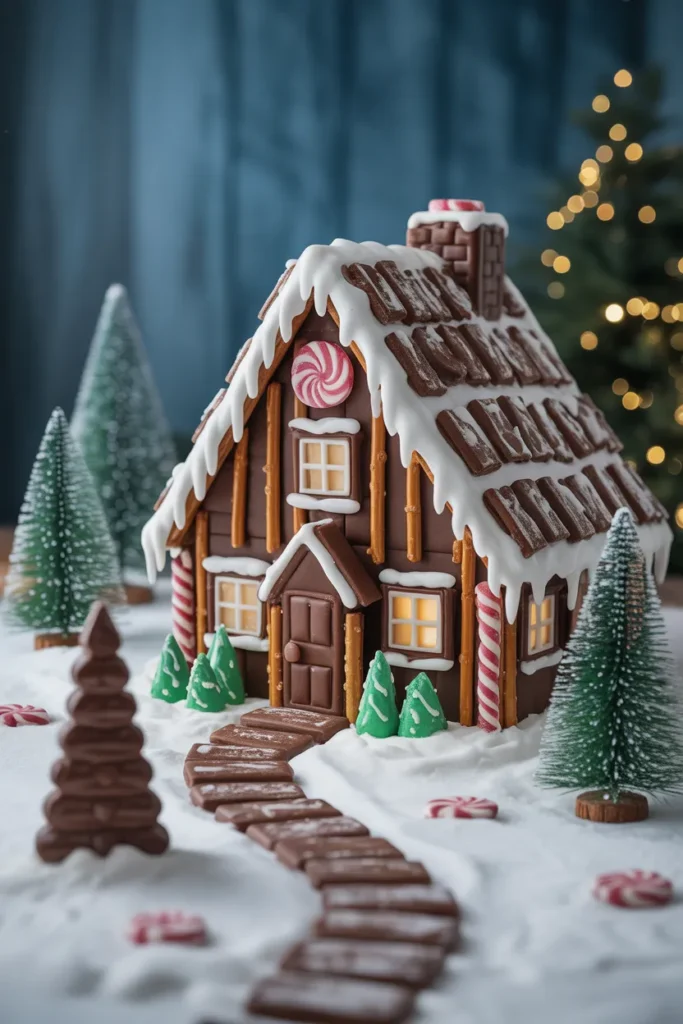
This cabin copies a log cabin, with pretzel sticks or chocolate fingers laid along the walls to look like logs. The roof is plain gingerbread with a thick layer of white icing for snow, and a small chimney sits at one end.
Lay the logs evenly: Attach the pretzel logs with icing while the walls are still flat on the table, then assemble the cabin once they set. Trim each log to length with a serrated knife so the corners meet neatly.
Keep the decor simple: A wreath made from a green gummy ring and a red candy is enough for the door. Stack a few chocolate logs beside the cabin as a firewood pile to complete the scene.
- Attach pretzel logs while walls lie flat, then assemble
- Trim logs with a serrated knife for neat corners
- Use one small wreath on the door and skip extra candy
Shop This Look
5. Candy Wonderland Gingerbread House
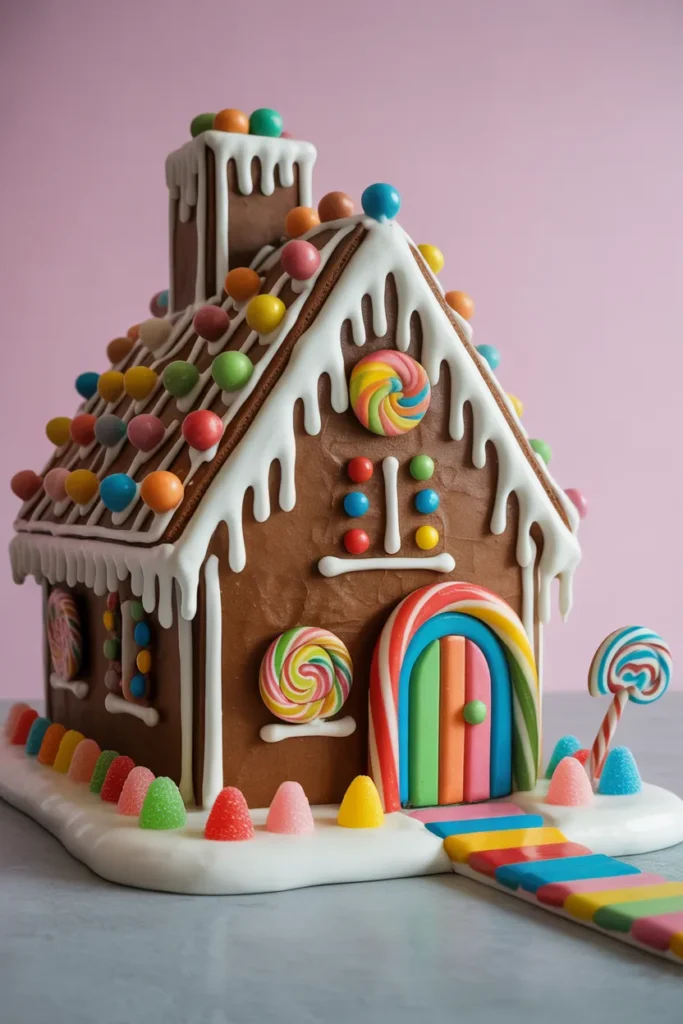
This is the house for using up leftover Halloween and birthday candy. The roof is covered edge to edge with bright sweets, the path is made of jelly beans, and no two walls look the same.
Sort candy by size: Put large pieces on the roof, medium pieces on the walls, and the smallest sweets along the edges and corners. Sorting first stops the roof from looking crowded in one spot and bare in another.
Balance the colours: Spread each colour across the whole house instead of grouping them together. If one colour runs out, fill the gap with white icing rather than a clashing sweet.
- Sort candy by size before you start decorating
- Spread colours evenly across roof and walls
- Fill gaps with white icing, not extra large sweets
Shop This Look
6. Winter Chalet Gingerbread House
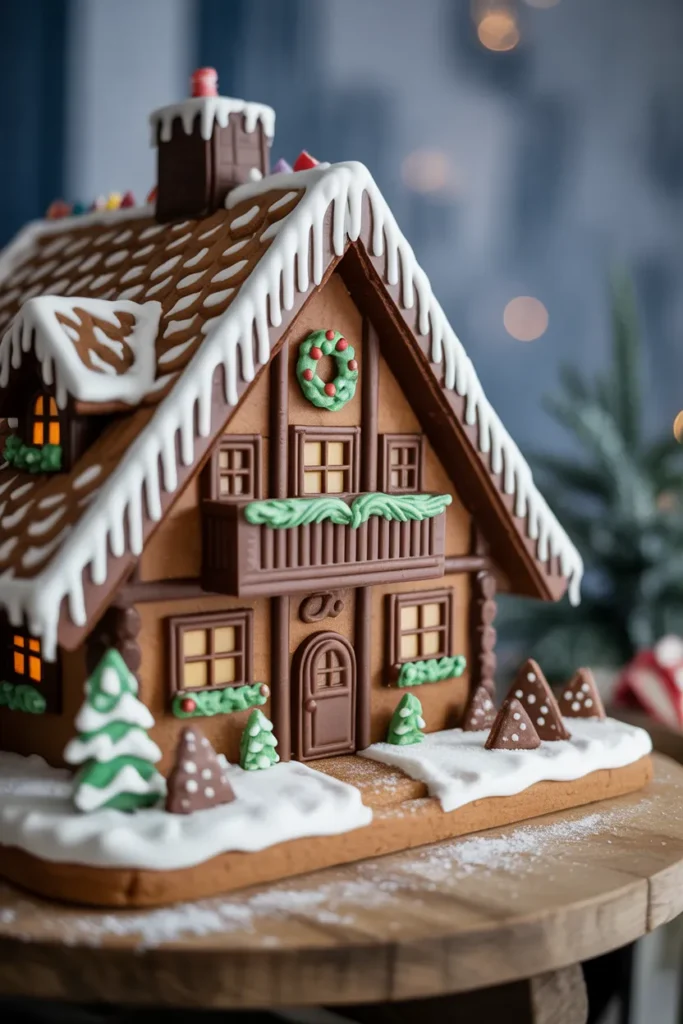
A chalet has a wide, low roof that sticks out past the walls, plus a small balcony across the front. Cut the roof panels longer than usual and add a balcony from a flat cookie on two candy supports.
Cut the roof oversize: Measure the roof panels about an inch longer on every side so they overhang like a real chalet. Support the overhang with icing and let it set fully before adding roof candy.
Add the balcony detail: Pipe a simple railing with icing, or line up small pretzel sticks along the balcony edge. A pair of tiny skis made from candy sticks can lean by the door.
- Cut roof panels oversize for the chalet overhang
- Let the roof set fully before adding weight on top
- Use pretzel sticks for the balcony railing
Shop This Look
7. Icy Crystal Gingerbread House
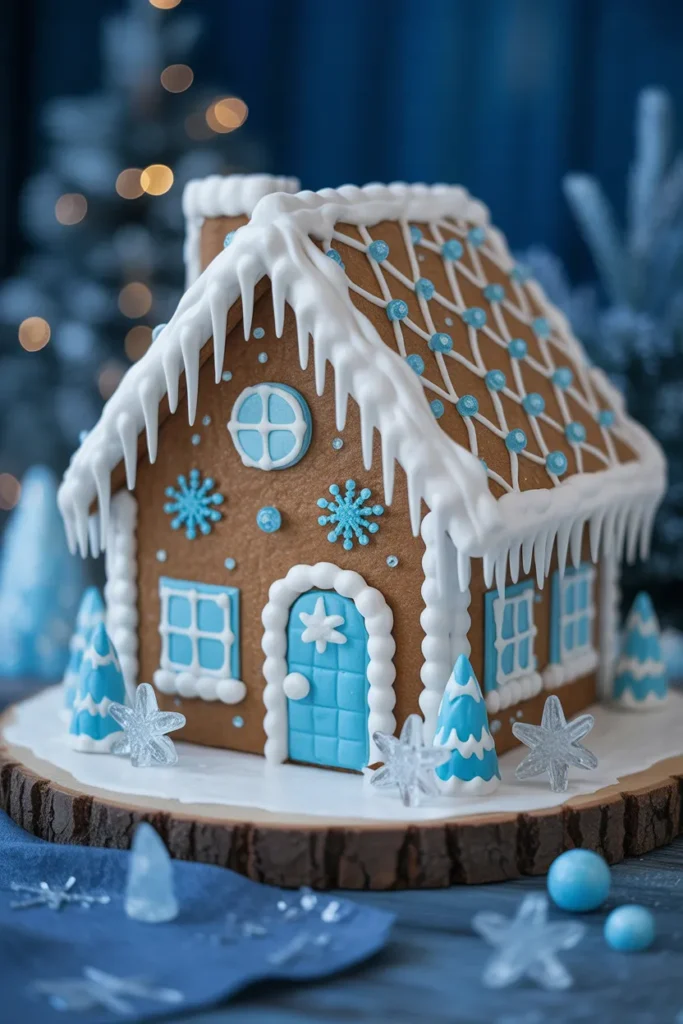
This house is mostly white and pale blue, with clear hard candy melted into the window cut outs so light shows through. Icicles made from white icing hang from every roof edge.
Melt the window candy: Place crushed clear or blue hard candy into the window holes during the last few minutes of baking. Let the panels cool completely on the tray before moving them, or the windows will crack.
Pipe long icicles: Hold the piping bag at the roof edge and squeeze while pulling down slowly to form each icicle. Vary the lengths so they look natural, and add a battery tea light inside the house at night.
- Melt crushed hard candy into window holes while baking
- Cool panels fully on the tray before moving them
- Place a battery tea light inside for the window glow
Shop This Look
8. Whimsical Elf Cottage
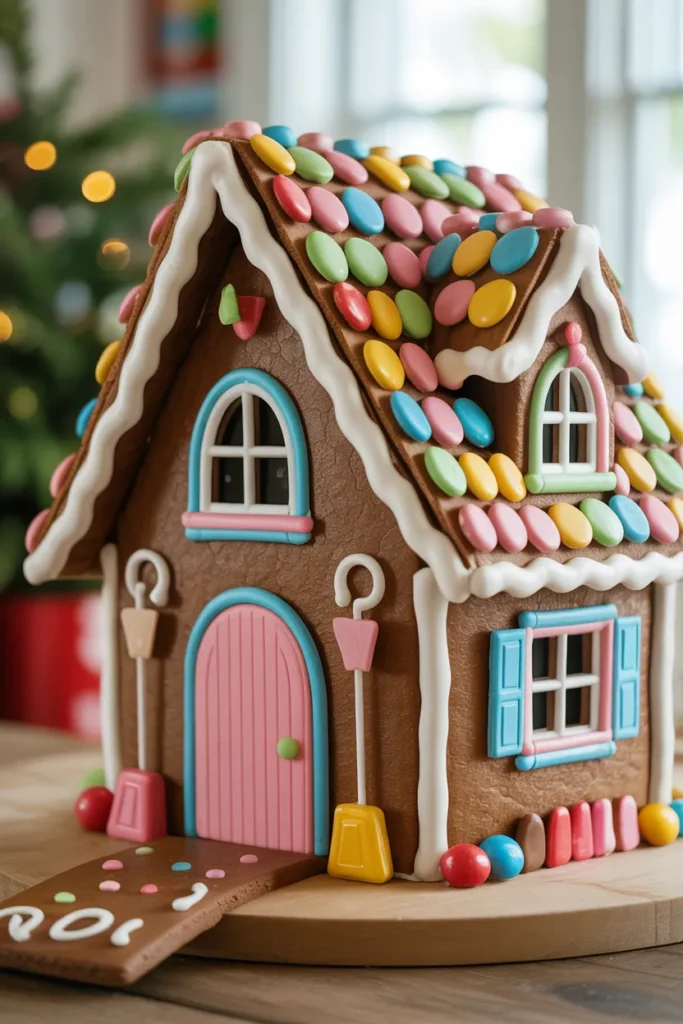
An elf cottage is small, a little crooked, and brightly coloured. The door is round, the roof curves slightly, and there is a tiny workshop sign beside the path made from a cookie and icing letters.
Make it small on purpose: Small panels are easier to cut into curved and uneven shapes. If a wall cracks, patch it with icing on the inside and cover the outside with candy.
Add workshop touches: Set a few tiny wrapped sweets outside as parcels waiting for delivery. A small candy cane hook by the door and striped icing on the roof keep the theme clear.
- Keep panels small so curved shapes are easy to cut
- Patch cracks with icing inside, candy outside
- Place tiny wrapped sweets outside as parcels
Shop This Look
9. Classic Victorian Gingerbread House
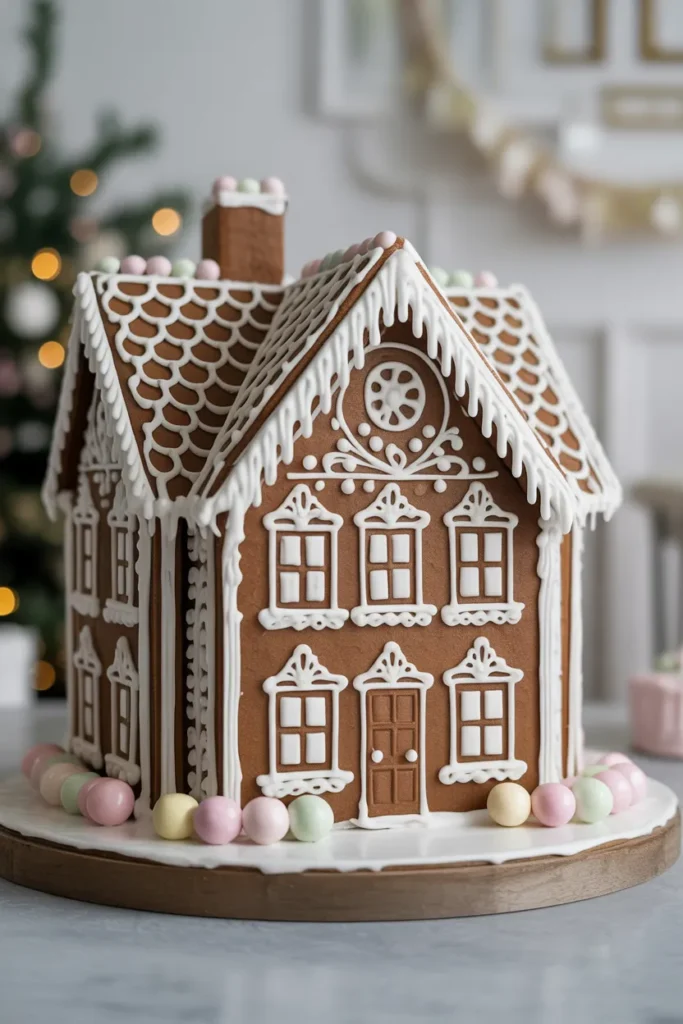
A Victorian house has a bay window, a small porch, and trim in two or three icing colours. It takes longer than the other designs here, so it suits a quiet weekend rather than a party activity.
Plan the trim colours: Pick white plus one or two colours and use them in the same order on every wall. Piping the trim while the walls are flat gives cleaner lines than working on an assembled house.
Build the porch last: Assemble the main house first and let it set overnight if you can. Add the porch and bay window after, using small pieces and thick icing, so a slip does not damage the main walls.
- Pipe trim on flat walls for cleaner lines
- Use white plus one or two colours throughout
- Add porch and bay window after the main house sets
Shop This Look
10. Woodland Mushroom Gingerbread House
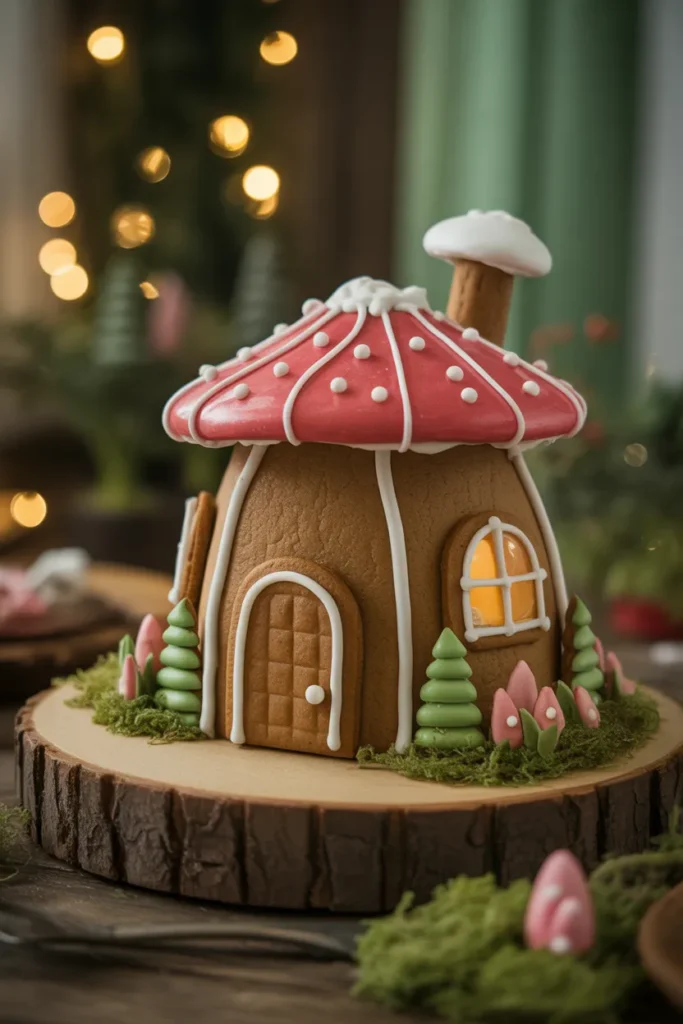
The roof of this house is a rounded mushroom cap, made from a large half dome of gingerbread baked over an oven safe bowl. White icing spots on a red candy coating give it the classic toadstool look.
Bake the dome over a bowl: Drape rolled dough over the outside of a greased, oven safe bowl and trim the edge level. Let it cool on the bowl before lifting it off, so the shape holds.
Set the scene around it: Place the house on green icing or coconut dyed green for grass. Small fondant or marzipan mushrooms and a pebble path finish the base.
- Bake the roof dome over a greased oven safe bowl
- Cool the dome fully before lifting it off
- Use green dyed coconut around the base for grass
Shop This Look
11. Snow Globe Gingerbread House

For this idea the house sits inside a large clear bowl or under a glass dome, with powdered sugar snow on the board. It looks finished from across the room and stays dust free on the table.
Build to fit the dome: Measure the inside of your bowl or dome before cutting any gingerbread. Build the house at least an inch smaller on every side so it slides in without scraping the icing.
Add snow before covering: Dust the house and board with powdered sugar before the cover goes on, because you cannot reach in later. A small paper tree or two can stand beside the house inside the dome.
- Measure the dome first and build smaller than it
- Dust with powdered sugar before covering
- Keep decorations inside the dome simple and low
Shop This Look
12. Gingerbread House with Candy Bridge
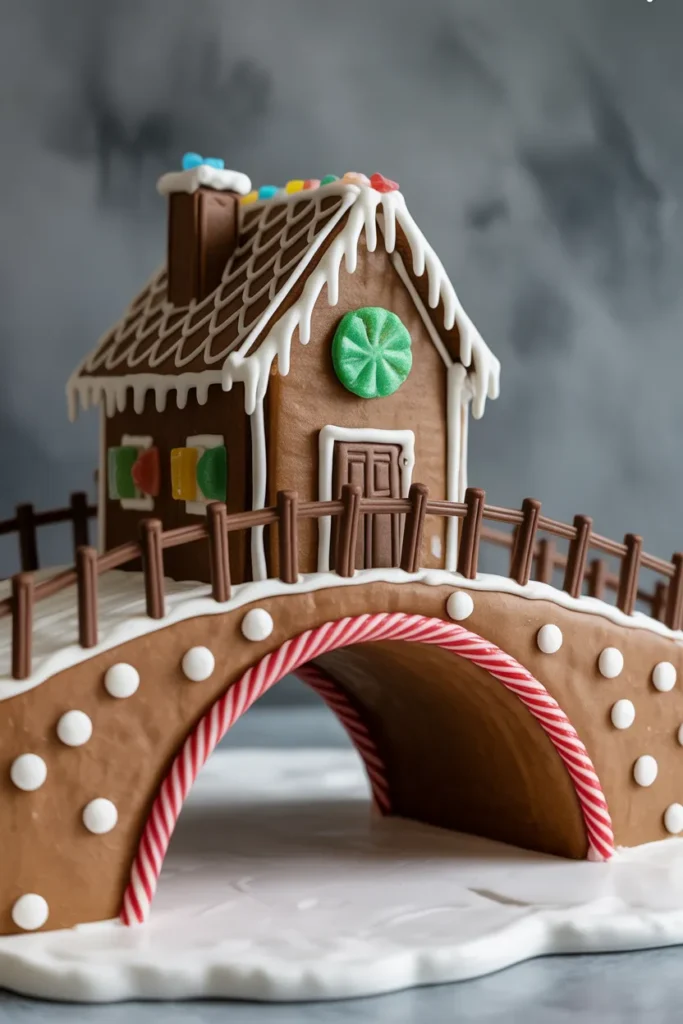
Two small houses joined by a bridge give you a bigger display without one huge structure. The bridge is a flat cookie or a strip of gingerbread resting on the roofs or on candy supports.
Level the bridge supports: Check both support points are the same height before the bridge goes on. Shim a low side with a piece of cookie rather than forcing the bridge to bend.
Decorate the gap below: Fill the space under the bridge with blue icing for a stream, or white icing for a snowy dip. A few gumdrops on the bridge edges act as lamps.
- Match the height of both bridge supports first
- Rest the bridge, do not force it to bend
- Pipe a blue icing stream in the gap underneath
Shop This Look
13. Gingerbread Lighthouse by the Snowy Shore

A lighthouse is a tall, tapered tower with stripes, a small gallery near the top, and a light room made from clear candy. Build it in two stacked sections so it is not top heavy while the icing sets.
Stack it in sections: Build and decorate the lower section first, then add the upper section once the icing is hard. Taper each section slightly so the tower narrows as it rises.
Set the shoreline: Cover the board with blue icing on one side and crushed biscuit crumbs on the other for sand. A battery tea light in the top section makes the light work after dark.
- Build the tower in two sections, lower first
- Taper each section so the tower narrows upward
- Use biscuit crumbs for sand on one side of the board
Shop This Look
14. Gingerbread Bakery Shop
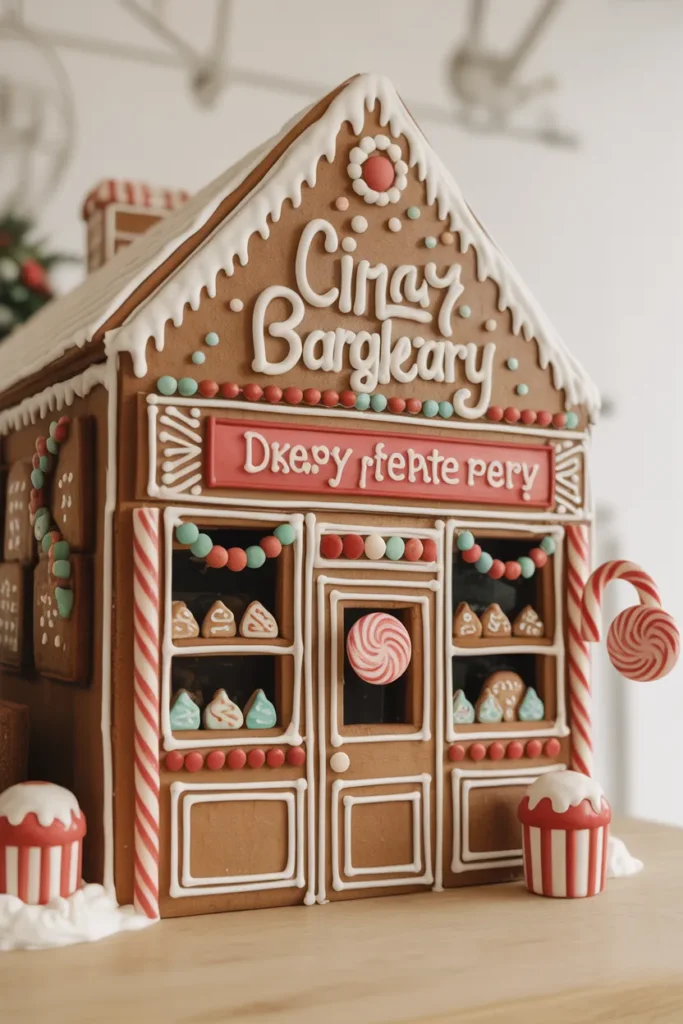
A bakery shop has a wide front window, a striped awning, and tiny baked goods in the window made from fondant or marzipan. The sign above the door is a flat cookie with the name piped in icing.
Cut a wide front window: Cut the window opening before baking, and support the front wall while it cools so it does not sag. Back the window with a clear candy pane if you want light inside.
Stock the window display: Model small loaves, cakes, and croissants from marzipan and line them on a cookie shelf inside the window. Keep the pieces small and simple, three or four shapes is enough.
- Cut the window before baking and cool the wall flat
- Back the window with a clear candy pane
- Model three or four simple marzipan bakes for display
Shop This Look
15. Gingerbread House with Northern Lights Theme
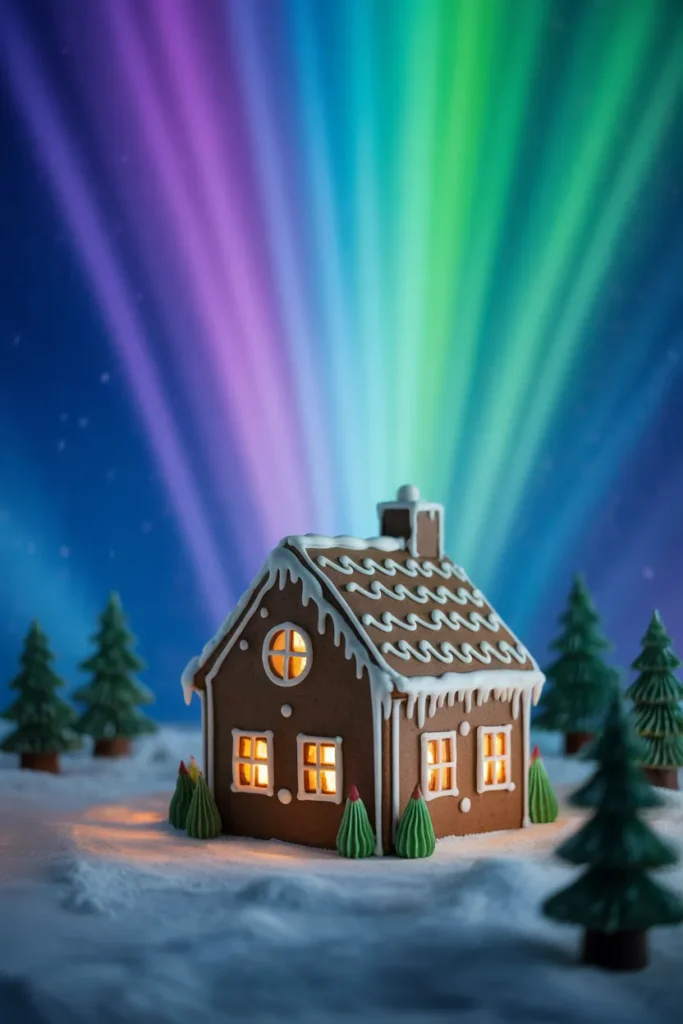
The house itself stays plain and dark, and the effect comes from the backdrop. A board painted or covered in deep blue stands behind the house, with streaks of green, purple, and pink icing or edible paint across it.
Make the backdrop board: Cover a stiff board with dark blue fondant, edible paint, or coloured paper kept away from the food. Blend the colour streaks with a damp brush while they are still wet.
Keep the house simple: Use white icing only on the house, with heavy snow on the roof. The contrast between the plain house and the coloured sky does the work, so extra candy is not needed.
- Blend backdrop colours with a damp brush while wet
- Use white icing only on the house itself
- Add heavy roof snow for contrast against the sky
Shop This Look
16. Gingerbread House with Candy Stained Glass
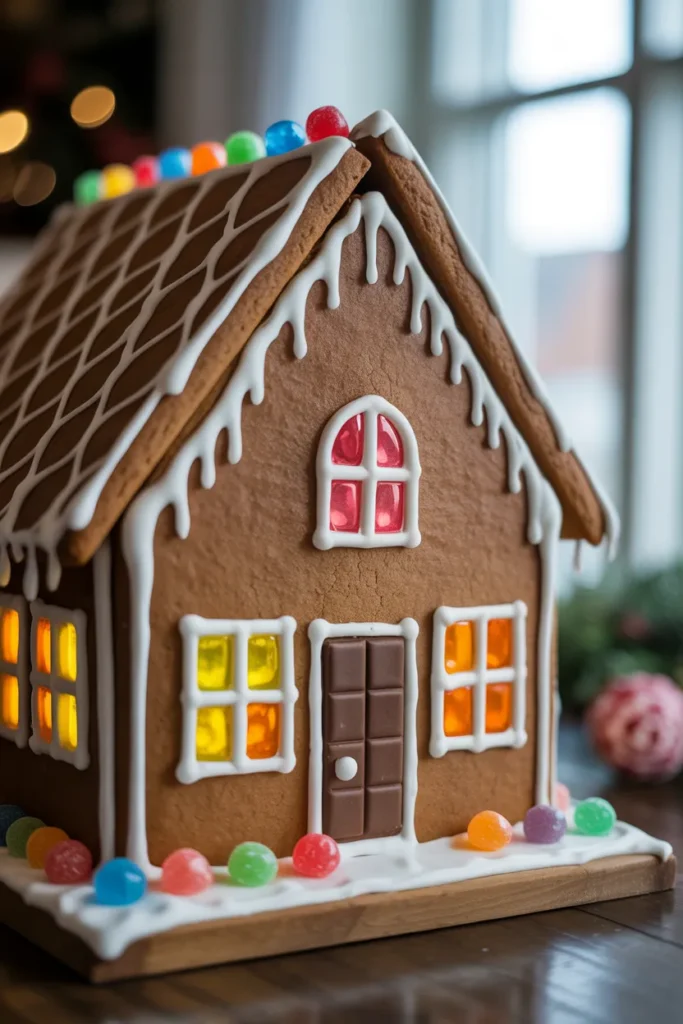
Coloured hard candy melted into window shapes makes panes that glow when a light sits inside the house. Use two or three colours per window and let them swirl slightly as they melt.
Crush the candy finely: Crush the candy in a sealed bag with a rolling pin so the pieces melt evenly. Fill each window hole in a single layer, with no gaps and no double thickness at the edges.
Protect the finished panes: Do not touch the panes until the panels are fully cold, and store the house away from steam and heat. A battery tea light gives the glow without warming the candy.
- Crush candy finely so it melts evenly
- Fill windows in one layer with no gaps
- Use battery lights only, never real candles inside
Shop This Look
17. Gingerbread Treehouse
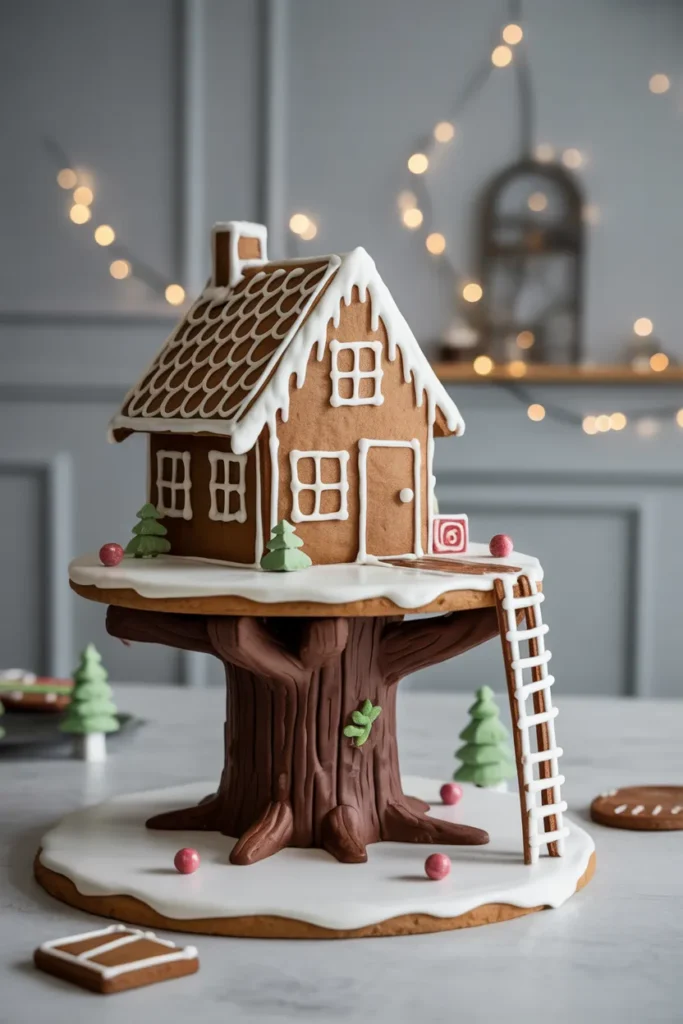
A treehouse version sits the small gingerbread house on a platform in the branches of a cookie tree. The trunk is a thick cylinder of gingerbread or stacked cookies, and a ladder of pretzel sticks leads up to the door.
Make the trunk sturdy: The trunk carries the whole weight, so keep it short and wide. Set it in a pool of royal icing on the board and let it harden before the platform goes on.
Balance the platform: Centre the house on the platform and check the balance before decorating. Add the ladder and any hanging candy last, once nothing needs to move.
- Keep the trunk short and wide for strength
- Centre the house on the platform before decorating
- Add ladder and hanging details last
Shop This Look
18. Gingerbread Ice Palace
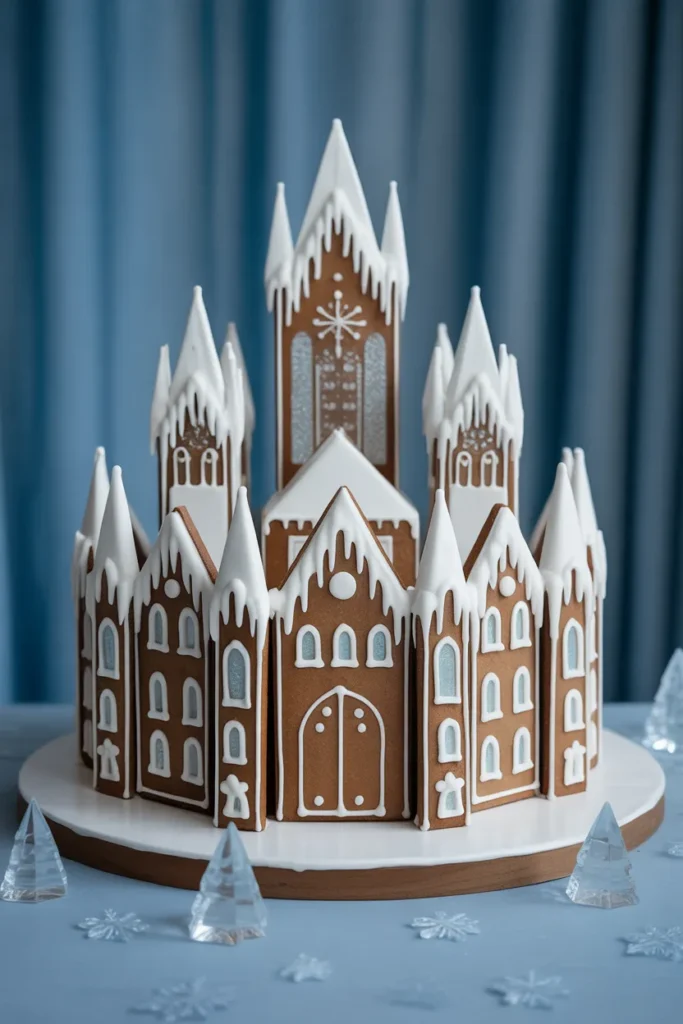
An ice palace uses pale colours, tall pointed towers, and a lot of white and silver detail. Clear candy windows and a dusting of coarse sugar give the walls a frosted finish.
Use coarse sugar for frost: Brush a thin layer of icing or corn syrup on the walls and press coarse white sugar into it. Work one wall at a time so the coating stays wet enough to hold the sugar.
Keep towers symmetrical: Cut tower pieces in matched pairs using one paper template. Symmetry is what makes this design read as a palace rather than a castle that went wrong.
- Press coarse sugar onto one wall at a time
- Cut tower pieces in pairs from one template
- Stick to white, pale blue, and silver throughout
Shop This Look
19. Gingerbread Train Station
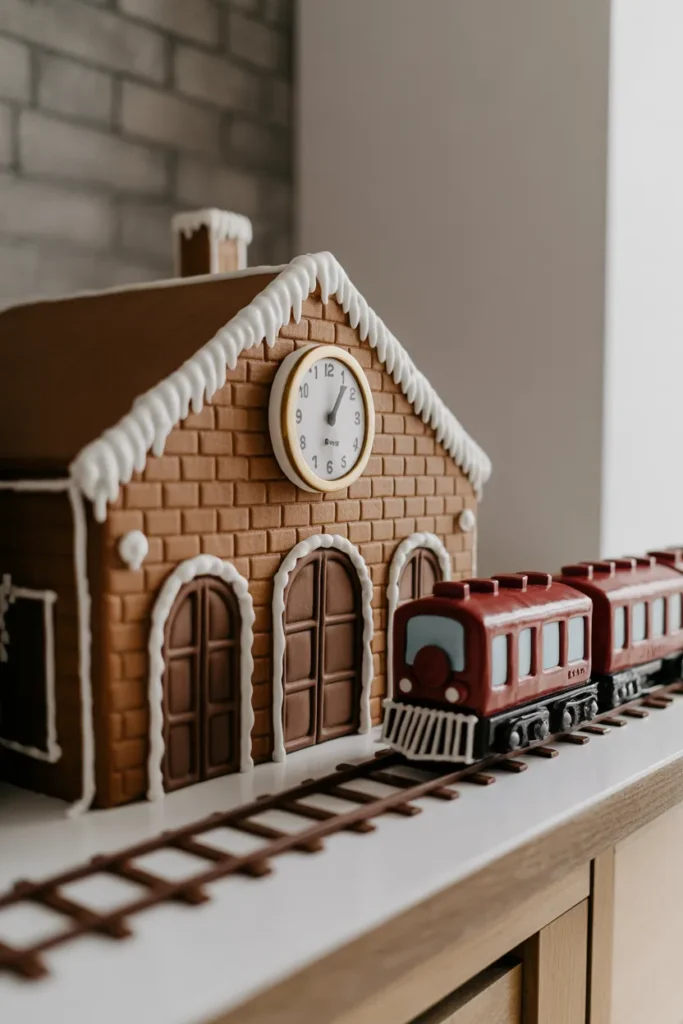
A station needs a long building, a platform, and a clock on the front. Add a small gingerbread train on candy wheels beside the platform and the scene tells its own story.
Build the train from boxes: Small rectangular cookies make the engine and carriages, joined with icing. Use round candies for wheels and a chocolate roll for the chimney, and let each car set before joining them.
Add the platform details: Lay the platform from flat cookies and pipe a white edge line along it. A clock face piped on a round cookie above the door finishes the front.
- Build train cars separately and join when set
- Pipe a white edge line along the platform
- Use round candies for wheels on every car
Shop This Look
20. Gingerbread Greenhouse
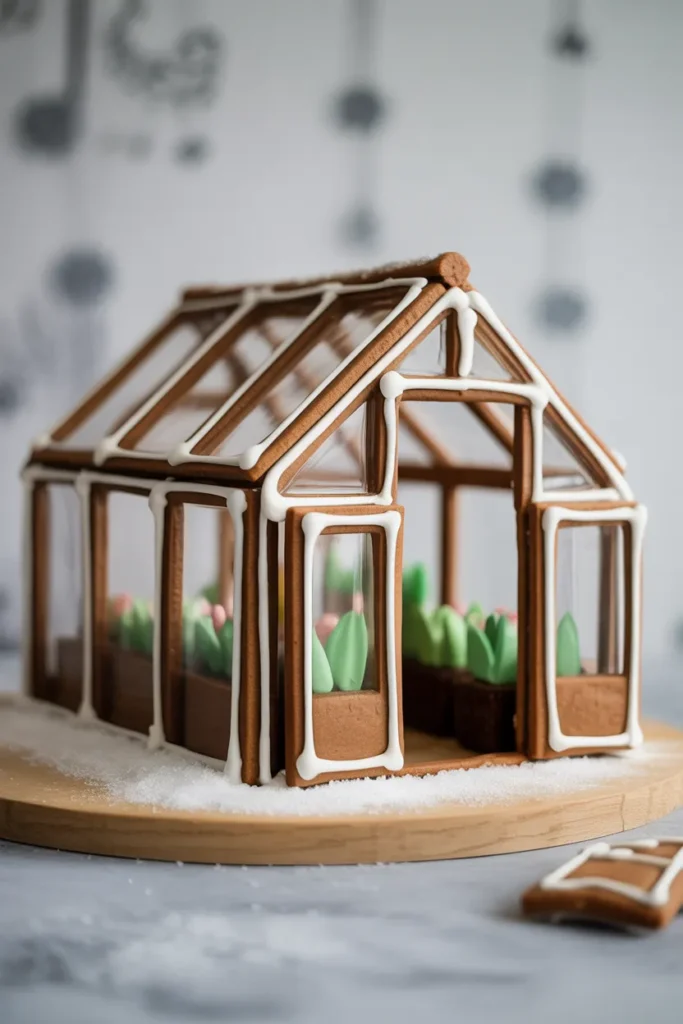
A greenhouse is mostly windows, so the walls are frames of gingerbread with clear candy panes. Inside, tiny green icing plants sit in rows on a cookie shelf.
Cut slim wall frames: Cut the frames with wide window openings and narrow gingerbread bars. Bake an extra frame or two, because slim pieces are the ones most likely to snap.
Plant the inside first: Fix the plant shelf and tiny icing plants to the base before the walls go up. Once the clear roof is on, you cannot reach inside to adjust anything.
- Bake spare frames, slim pieces snap easily
- Finish the inside display before adding walls
- Use clear candy for both wall and roof panes
Shop This Look
21. Gingerbread House on a Frozen Lake
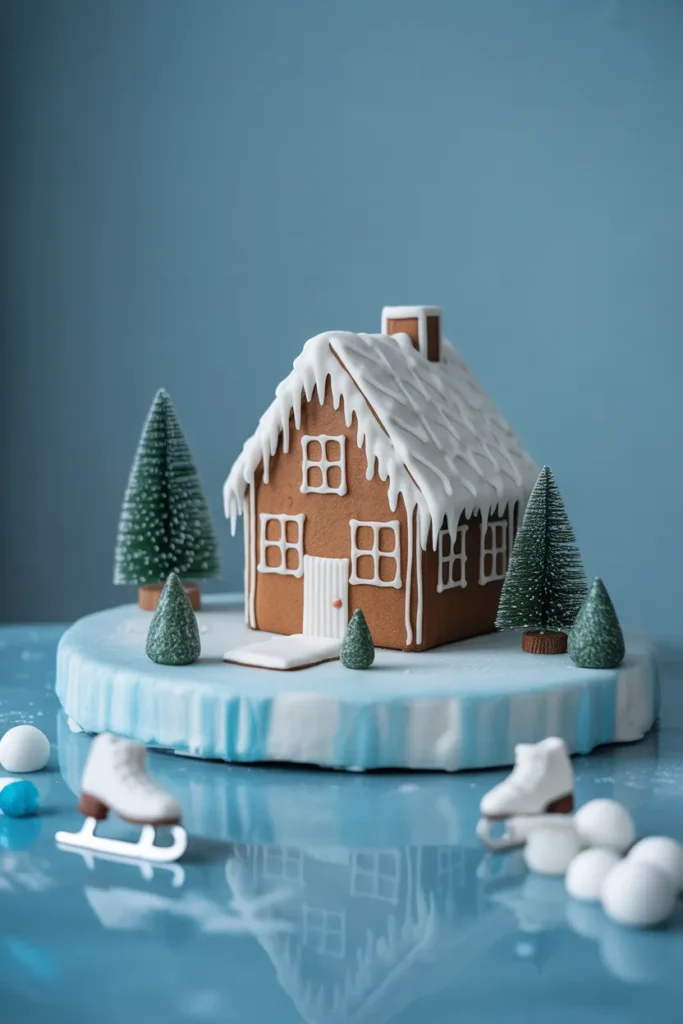
This house stands on a pale blue board that reads as ice, with white icing cracks piped across the surface. A few small figures or a sledge beside the house add scale, but the frozen lake is the main effect.
Make the ice surface: Cover the board with smooth pale blue fondant or icing and let it set hard. Pipe thin white lines across it for cracks, keeping them uneven and spaced out.
Anchor the house firmly: Set the house in a generous ring of royal icing so it looks frozen in place. Add powdered sugar snow drifts against the walls to hide the join.
- Let the blue base set hard before building on it
- Pipe uneven white lines for ice cracks
- Hide the house base join with sugar snow drifts
Shop This Look
22. Gingerbread Windmill House
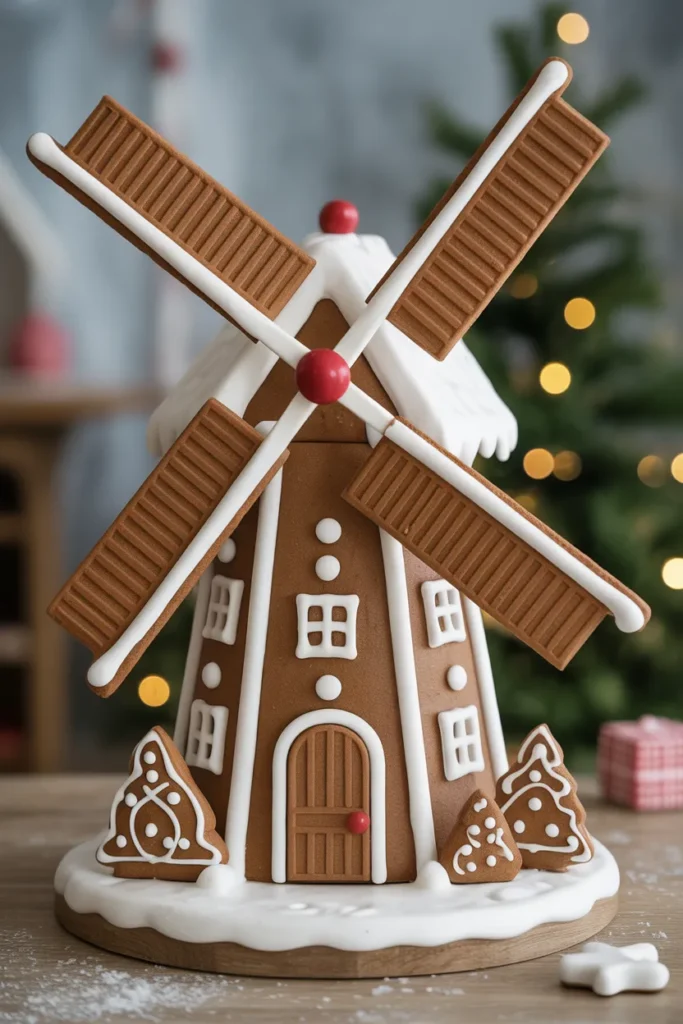
The windmill body is a tapered tower, and the sails are four long thin cookies joined in a cross. Mount the sails on a candy stick axle so they can actually turn slowly by hand.
Shape the sails evenly: Cut all four sails from one paper template so they match. Join them in a cross on the table and let the icing set fully before lifting the sail unit.
Mount sails on an axle: Push a candy stick or skewer through the tower top and fix the sail cross to its front end. Check the sails clear the tower walls through a full turn before decorating.
- Cut all four sails from one template
- Let the sail cross set flat before lifting it
- Test a full turn before adding decoration
Shop This Look
23. Magical Gingerbread Mansion
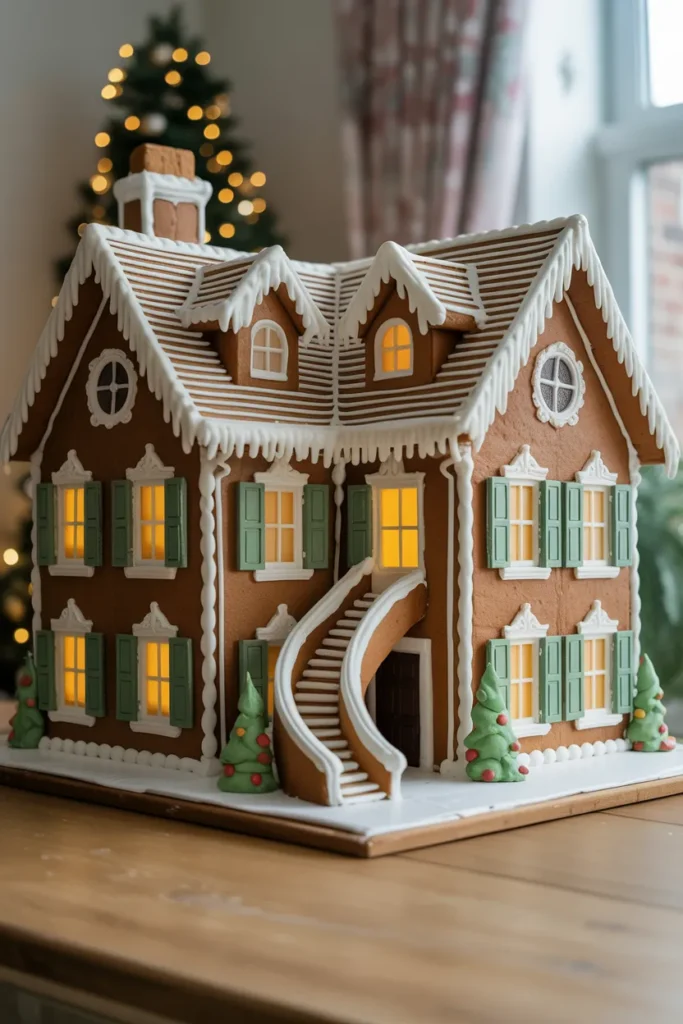
A mansion is the project for a full weekend: two storeys, wings on both sides, and a shared theme across every wall. Plan it on paper first and bake the pieces over two days.
Draw a simple plan: Sketch each wall with its size before cutting any dough. A plan stops the common problem of wings that do not match the main house in height.
Decorate in one style: Choose one colour scheme and one candy type for the roof across the whole building. Repeating the same details on each wing is what makes separate pieces read as one house.
- Sketch every wall size before cutting dough
- Bake pieces over two days, build on the third
- Repeat one roof candy and colour scheme throughout
Shop This Look
How to Start
Start by choosing one design and making the dough a day before you want to build. Gingerbread for houses needs less raising agent and more flour than biscuit dough, and it must rest in the fridge so the pieces keep their shape in the oven.
Cut pieces from a template: Draw your walls and roof on paper or card and cut the dough to the template, not freehand. Templates give you straight edges, and straight edges are what make icing joints hold.
Let pieces cool completely: Move baked pieces only when they are fully cold, and store them flat between sheets of baking paper. Warm gingerbread bends, and a bent wall never sits flat on the board.
- Make and rest the dough the day before building
- Cut every piece from a paper or card template
- Store cooled pieces flat between baking paper sheets
Shop This Look
Common Mistakes
- Using runny icing for assembly, so walls slide before the joints set
- Decorating the roof after assembly and collapsing the house with the weight
- Moving gingerbread pieces while they are still warm and bending them
- Skipping the template and cutting walls freehand with uneven edges
- Adding battery lights or candles before the icing is fully dry
- Building a house larger than the board or dome it needs to fit in
- Using every colour of candy at once instead of one scheme per house
Frequently Asked Questions
How long does a gingerbread house keep?
A built house keeps for two to four weeks on display in a cool, dry room. It is decoration after the first few days, so if you want to eat it, eat it within the first week.
Can I use a kit instead of baking from scratch?
Yes. A kit is a sensible choice for tall or shaped designs like castles and lighthouses, because the pieces are even and firm. Decorate it in exactly the same way as a home baked house.
What icing works best for assembly?
Royal icing made with egg white or meringue powder works best because it dries hard. Buttercream stays soft and joints made with it creep and fail, usually overnight.
How do I stop the walls from sliding while they set?
Use thick icing, hold each wall for a minute, and prop walls with tins or glasses while they set. Build on the final board so you never have to lift the finished house.
What else can I make as a handmade holiday gift?
Small baked and handmade gifts pair well with a gingerbread display, either as table favours or as presents for neighbours. For more projects in the same spirit, see these handmade Christmas gift ideas
The Finishing Touch
The design you pick matters less than the finish. A plain house with clean icing lines, one colour scheme, and a tidy board looks better than a large house covered in every sweet you own.
If you want a reliable base recipe and timings before you start, the simple gingerbread house guide from BBC Good Food covers dough, baking, and assembly in a clear order. Follow its structure and use the ideas here for the decoration.
Set the finished house where it will stay, add the lights last, and leave it alone for a full day before moving it. Most damage happens in the first move, not during the build.