13 Mason Jar Nursery Crafts for New Moms
Mason jar nursery crafts are small projects that turn jars you already own into storage, lighting, keepsakes, and gifts for a baby’s room. This article covers 13 of them, ordered from the cheapest and fastest to the ones that need a weekend. A starter setup (the first three ideas) costs roughly $15 to $40 depending on what you have at home, and the first jar takes about ten minutes. All 13 fit into two or three weekends if you do a couple at a time.
One rule before anything else. Glass and babies don’t mix once the baby starts rolling, and that happens sooner than most parents plan for. Every jar here goes on a high shelf or a wall mount well out of reach, and none of them go in or near the crib. I’ll repeat that where it matters.
The ideas lean on problems you actually have at a changing table or during a night feed: where the cotton balls go, what lights the room without waking anyone, where you put your water. You don’t need all 13. Pick two or three and start there.
Disclosure: This post contains affiliate links. If you buy through them, I may earn a small commission at no extra cost to you.
Jump To
- Why Mason Jar Nursery Crafts Work
- The 13 Ideas, Cheapest First
- How to Start
- What Goes Wrong When You Skip the Safety Steps
- Frequently Asked Questions
- Final Thoughts
Why Mason Jar Nursery Crafts Work
Mason jars began as canning jars in 1858. The glass is thick, the lids seal well, and the shape is simple enough to take paint, spray, paper, rope, or a strand of lights without much fuss. None of that has anything to do with preserving fruit, which is why the jars work so well for cotton balls, night lights, and keepsakes.
A nursery produces a lot of small items. Cotton pads, swabs, pacifier clips, mittens, hair ties, snacks, notes. Most of these get lost on a flat surface, and a jar fixes the size problem directly. Jars also hang and mount, so they suit small rooms where you can’t spare floor space.
The materials that look good in a nursery are mostly soft and natural: clear and frosted glass, oat and sage tints, jute rope, pale wood, and warm white light. Cool white bulbs and bright primary colors tend to feel harsh at night, so I’d skip those unless you love them.
Start at the changing table. That’s where the first jar pays you back, and it shows you what the rest of the room needs.
Quick Reference
- Best starting point: Cotton and swab jars at the changing table
- Biggest impact area: Changing station and the night-feed corner
- Budget to start: Roughly $15 to $40 (approximate, prices vary by store)
- Time: About 10 minutes for the first jar, and two to three weekends for all 13
The 13 Ideas, Cheapest First
1. Cotton-Ball and Swab Jars Within One-Hand Reach
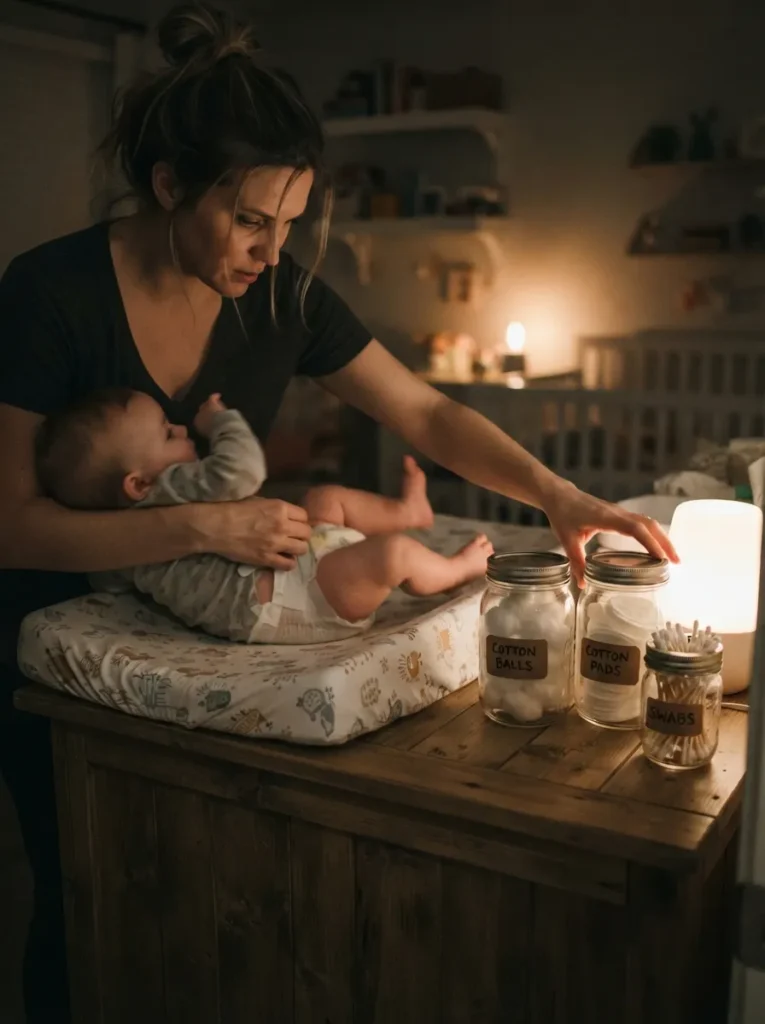
This is the one to make first. Picture a diaper change at 2 a.m. with one hand holding a wriggling baby in place and the other hand doing everything else. Two wide-mouth jars hold cotton balls or pads, and one regular-mouth half-pint holds swabs tip up. That’s the whole project, and it costs almost nothing if you have the jars.
Setup: Wide mouths matter because your whole hand needs to fit in and grab one clump without knocking the jar over. Put the jars on your dominant-hand side and push them to the back edge of the surface. A baby who just started rolling covers more ground than you expect, so back edge means actually at the back. Lids beat open baskets for a boring reason: cotton stays clean between changes.
Refill trick: When you refill, pull one cotton ball halfway out and leave it sitting on the rim. Your next grab is a single ball instead of a handful. It sounds minor, but at 2 a.m. it saves you from picking cotton out of your fingers and dropping half of it on the floor.
Shop This Look
2. Frosted Sea-Glass Jars That Hide the Clutter
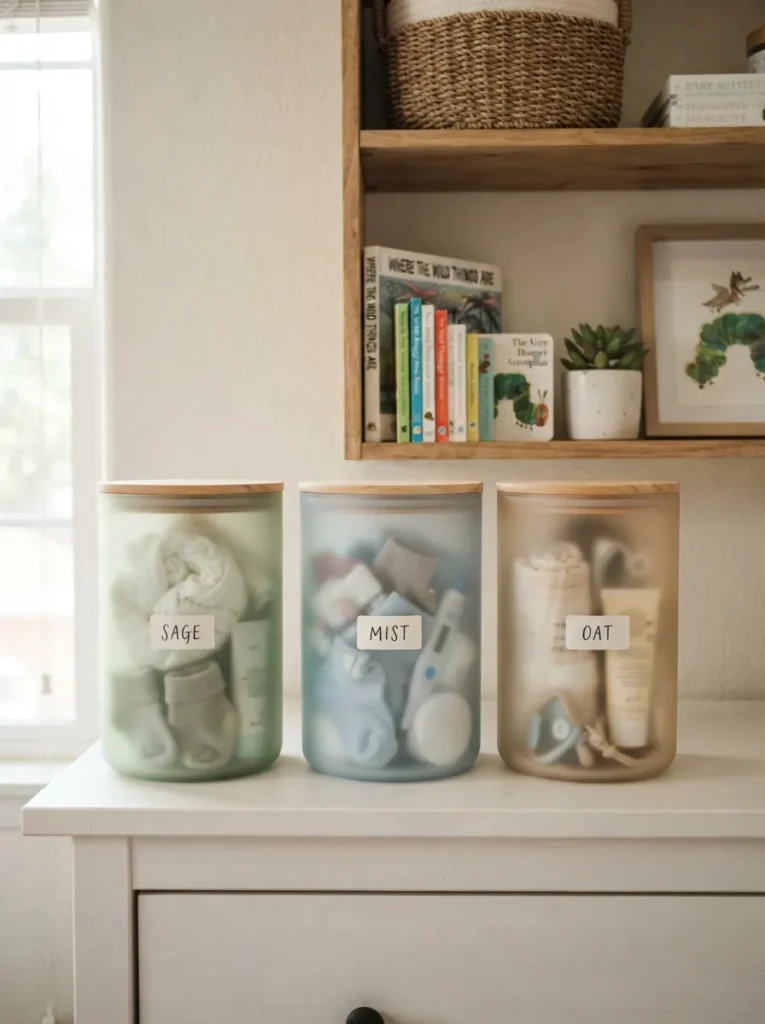
Clear jars show everything. Crumpled wipes, mismatched socks, a half-used tube of cream. That works in a pantry and gets irritating in a nursery. Frosting the glass blurs the contents into a soft shape, and the tint of the glass takes over as the main visual. You can match it to whatever palette the room already has: sage, mist blue, oat.
Spray note: Use frosted-glass spray on the outside only, in two or three thin coats, and let each coat dry before the next. Test one jar first. Pastel tints can look grayer under cool light than under warm bulbs, and it’s easier to find that out on one jar than on six. Keep the frosted jars for dry goods and decoration. Sprays aren’t made for food or skin contact, so read the can before you fill a jar with anything that touches the baby.
Drip problem: One heavy coat is the usual mistake. It runs and pools into a glossy ring at the base. Hold the can at the distance printed on the label, build the color up in light passes, and rotate the jar between passes. If you do get a ring, it’s faster to wipe it off while wet than to sand it later.
Shop This Look
3. A Baking-Soda Jar Next to the Diaper Pail
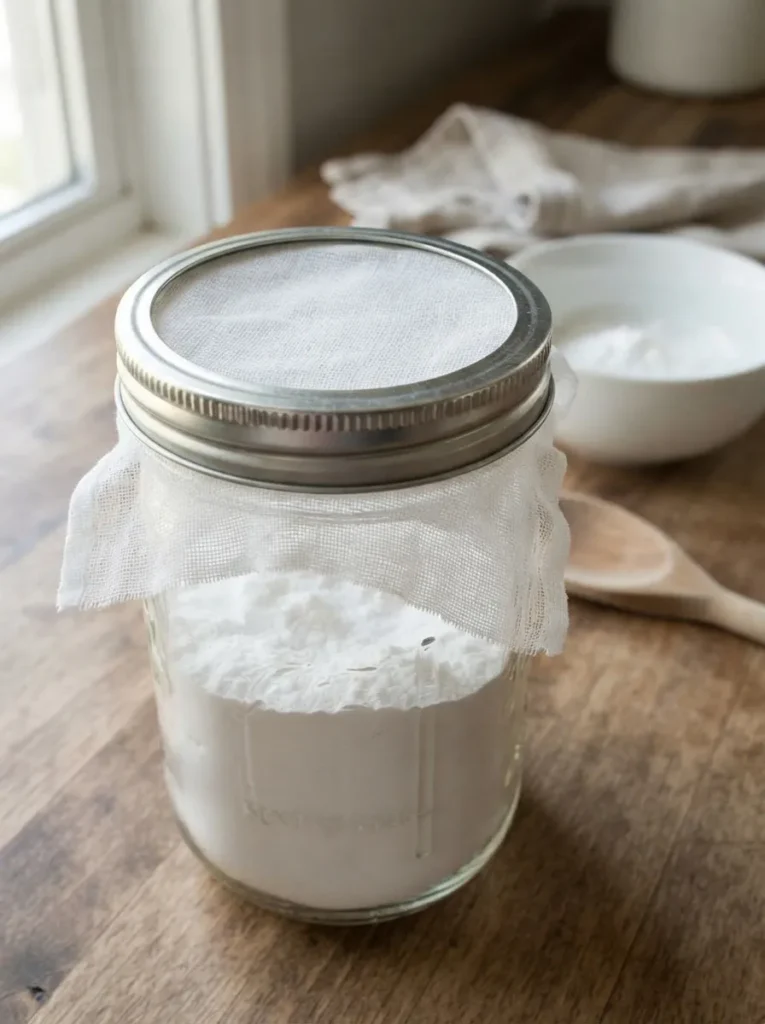
Fill a pint jar about two-thirds with baking soda. Stretch a square of cheesecloth over the mouth and screw the metal ring down over it. That’s it. No nails, no hammer, and no sharp lid edges to deal with.
Build note: Baking soda absorbs odor from the air around it, so air has to reach it. A jar with the solid lid on does nothing, and this is the number one way people get it wrong. The breathable cover is the entire point. Swap the powder when the corner stops smelling neutral. Roughly once a month is a reasonable starting point, but treat that as a guess and go by your nose.
Distance note: The jar has to sit close to the pail to work, so a wall shelf beside it makes sense, set well above where small hands can reach. Leave the essential oils out. Adding scent to an infant’s room is a question for your pediatrician, and plain baking soda does the job by itself.
Shop This Look
4. A Warm-White LED Jar Light for Night Feeds

Coil a short strand of battery-powered LED lights into a wide-mouth pint jar, tuck the battery pack in beside it, and close the lid. You end up with a low amber glow in a sealed glass object that sits on a shelf across the room. Warm-white light is generally easier on tired eyes at night than cool white, and a strand with a built-in timer shuts itself off after you’ve settled in.
Light note: Drop the strand into one of the frosted jars from idea 2 and the glow spreads out instead of showing individual bulbs. Keep it away from the changing table. Light that lands directly in your eyes while you look down at the baby is annoying, and it’s the opposite of what a night light is for. The far side of the room works better.
Battery warning: Choose a battery pack whose compartment closes with a screw. Button batteries are dangerous if swallowed, and a pack you can’t pop open by hand costs you maybe one extra minute of shopping. Keep spare batteries in a drawer or cabinet where the baby can’t get to them, and keep the jar itself on a high shelf.
Shop This Look
- Battery-operated warm-white LED string lights with timer
- Wide-mouth pint mason jars
- Small round wooden riser
5. A One-Arm-Reach Water and Snack Tray for the Rocker
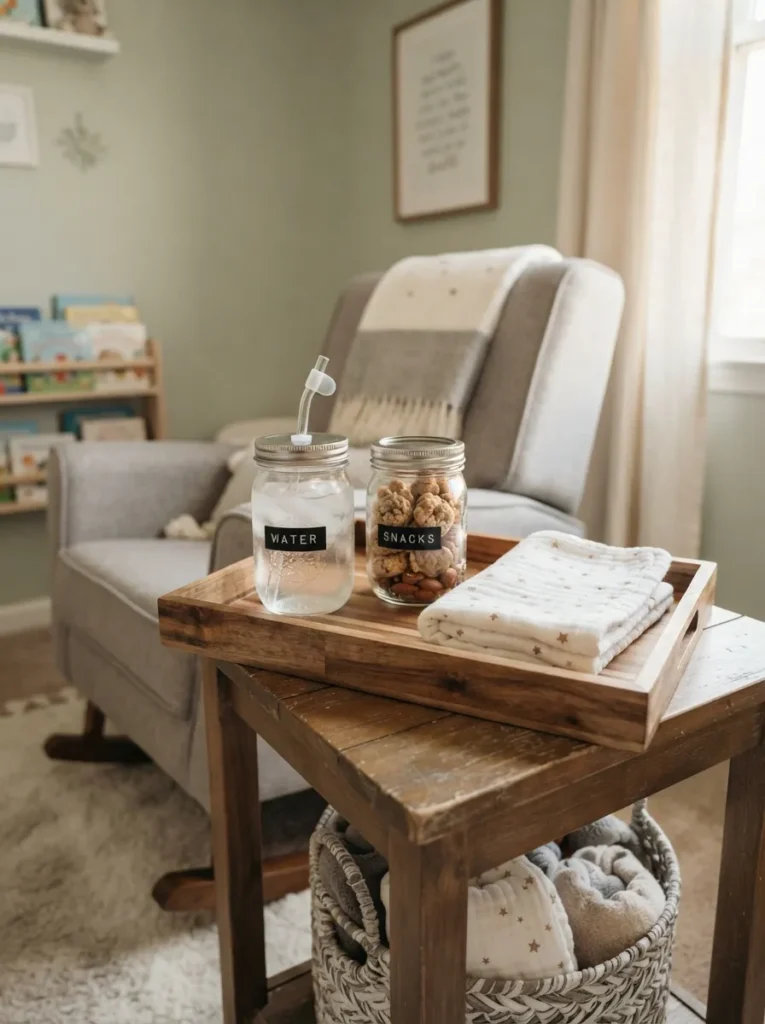
The rule behind a good feeding corner is reach. Anything you need during a feed should be within one arm’s length so you don’t have to shift the baby. A lidded straw jar handles water, a second jar holds a couple of one-handed snacks, and a tray keeps both of them plus a burp cloth together so you can carry the whole set from the rocker to the bedside.
Tray note: Pick a tray with a raised lip. A flat board sends everything sliding at the first bump, and a mason jar full of water on the floor is a bad time. A wooden tray with handles works well because you can carry it with one hand. If you don’t have a side table, put the tray on a low stool or ottoman next to the chair. Height matters less than staying in reach.
Lid size check: Straw lids come in regular-mouth and wide-mouth sizes, and they aren’t interchangeable. Check which kind of jar you own before ordering anything. This is a very common thing to get wrong, and it means a return and a week of drinking from a regular cup.
Shop This Look
- Wooden serving tray with handles and raised lip
- Plastic or silicone straw lids for mason jars
- Reusable stainless steel straws
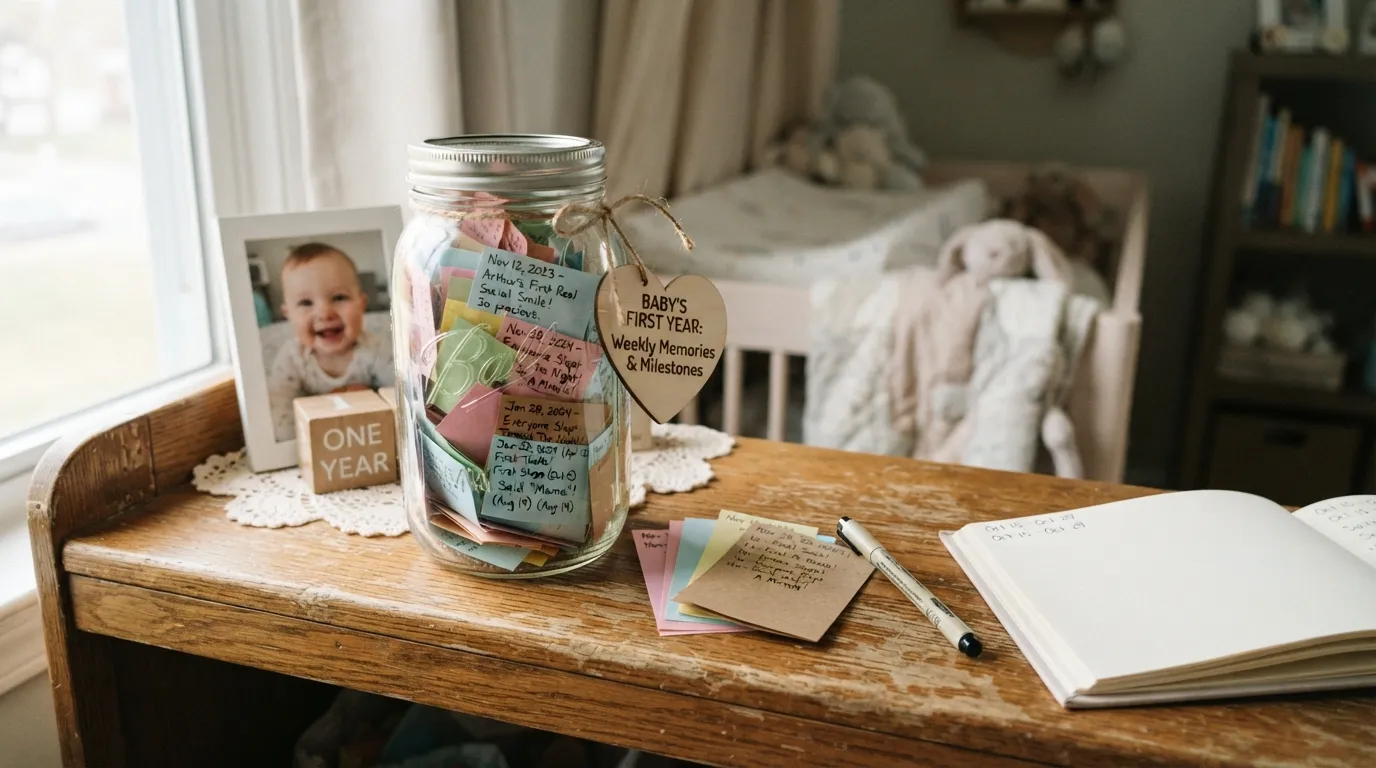
6. A Milestone Note Jar You’ll Actually Keep Up
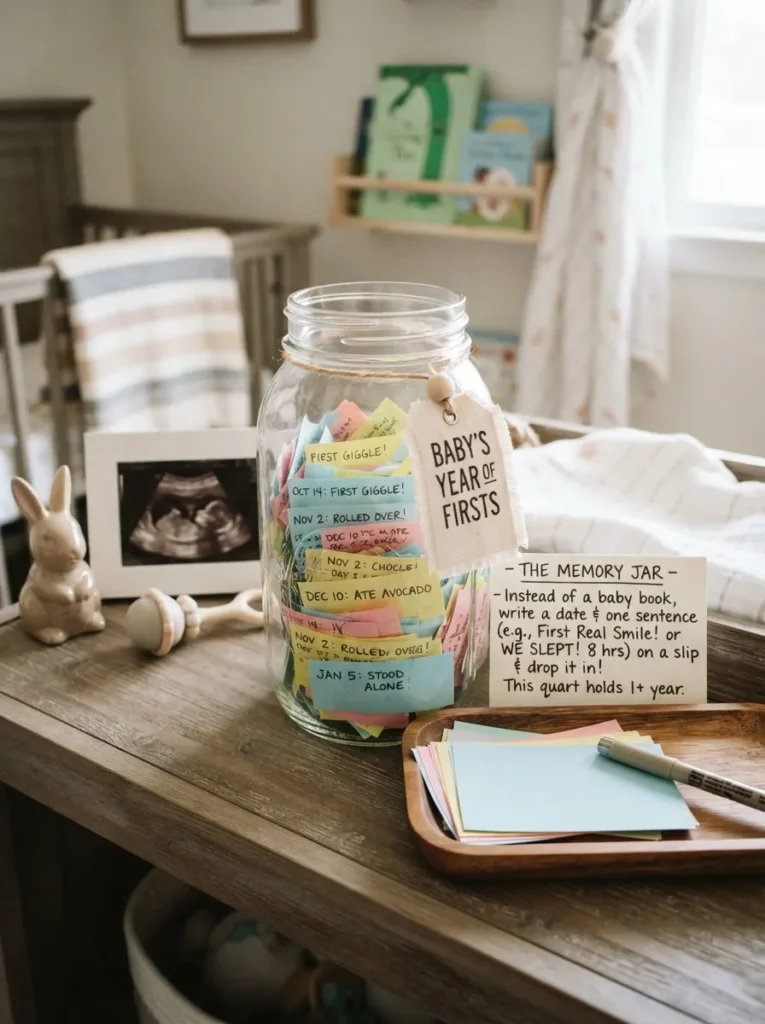
This one is for the mom who bought a baby book and stopped filling it in around week two. Instead of a page, you get a small paper slip. Write a date and one sentence, like the first real smile or the night everyone slept, and drop it in the jar. A wide-mouth quart holds a year of weekly slips with room left over.
Slip note: Tie a pencil to the jar and keep a stack of pre-cut slips next to it, so the effort stays close to zero. If you have to find paper and a pen first, you won’t do it. Date every slip. Memory gets blurry faster than you’d think, and a note that says “first laugh” with no date is only half useful.
Label note: Write the birth date on a tag around the neck of the jar. Jars end up piled on shelves with other jars, and the tag is what turns it into a keepsake instead of a jar of paper scraps. Open it on the first birthday and read through it all at once. It takes about ten minutes to set up, and the payoff is mostly later.
Shop This Look
7. A Name-Letter Jar Row on a Slim Picture Ledge
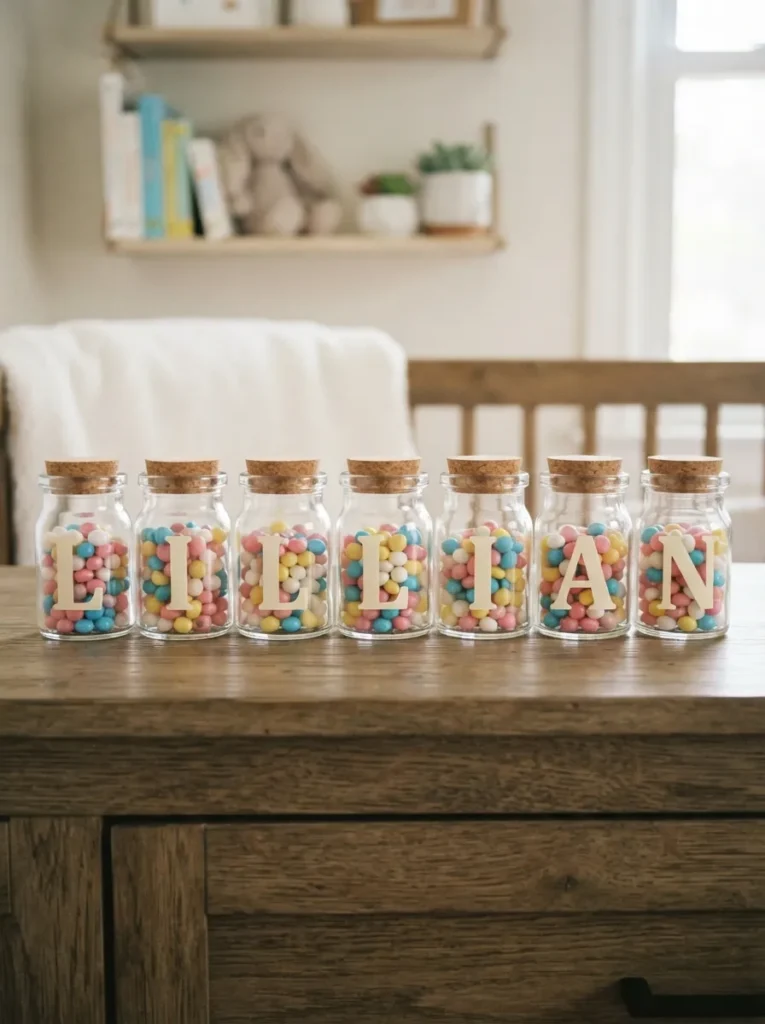
A row of jars with one letter each spells the baby’s name. It reads as a word only when the spacing is even, so use identical jars and put each letter in the center of the flat face at the same height. Leave a gap about the width of a finger between jars.
Spacing note: Name length changes which jar size you need. Pint jars work for a short name. Once you get past six or seven letters, half-pint jars keep the row inside a normal ledge. Fill every jar with the same thing, or leave them empty, because mixed contents make the letters compete with each other. Mount the ledge across the room from the crib, not above it.
Sticker note: Vinyl stickers pucker on curved glass. Press each letter on from the center outward, or find the flattest part of the jar’s face. If a sticker wrinkles, peel it off right away and start over, since vinyl that has set doesn’t come off cleanly. If you don’t have wall space for a ledge, a cube shelf can hold the row instead.
Shop This Look
8. Rope-Hung Jars With Faux Greenery on a Peg Rail
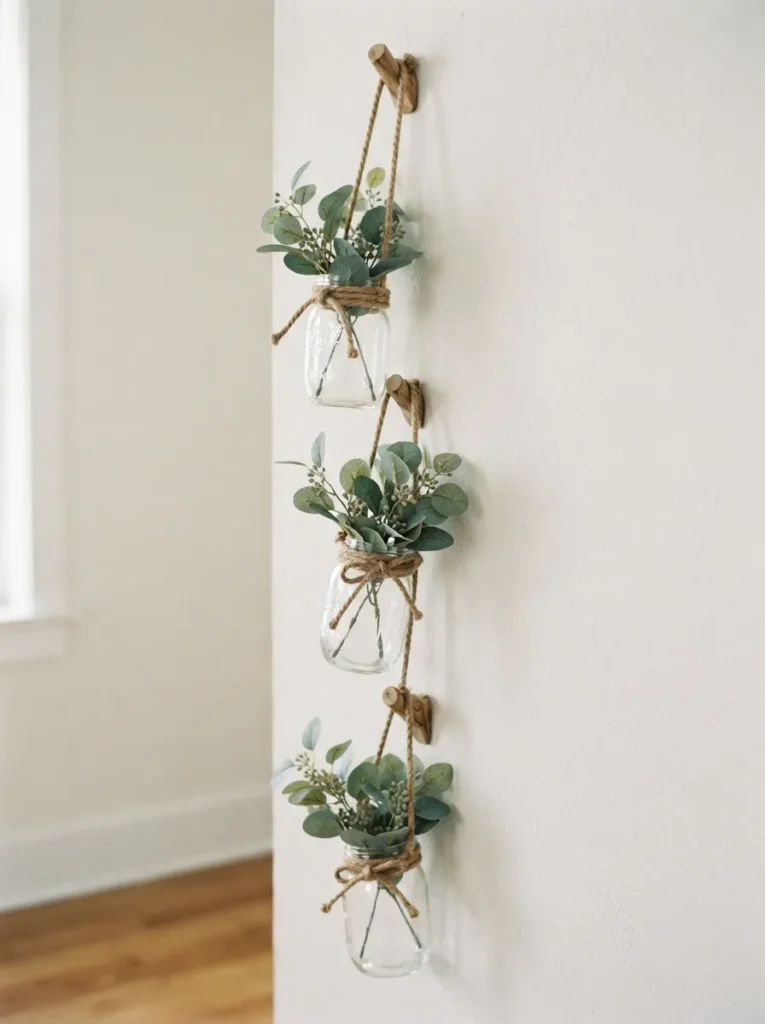
Three jars hung at different heights on jute rope, each with a few faux eucalyptus stems, makes a vertical column of soft texture against a plain wall. Wrap the rope twice around the neck of each jar, just under the threaded ridge, knot it, and loop the loose end over a peg.
Hanging note: Vary the drops by a few inches so the jars don’t knock into each other. Use faux stems. A jar full of water on a wall is heavy and a spill risk, and nobody wants to deal with that over a nursery floor. Jute rope looks good and costs very little, but check the knot by tugging firmly before you walk away.
Safety note: Hang everything well above where a baby can reach, keep the rope loops short, and stay clear of the crib and changing table. Rope and cords near a baby are a hazard on their own, and glass adds to it. If the only spot you have is within reach, skip this idea. A crochet wall hanging works as a softer substitute in that spot.
Shop This Look
9. Under-Shelf Lid-Mount Jars for Hair Ties, Clips, and Tiny Socks
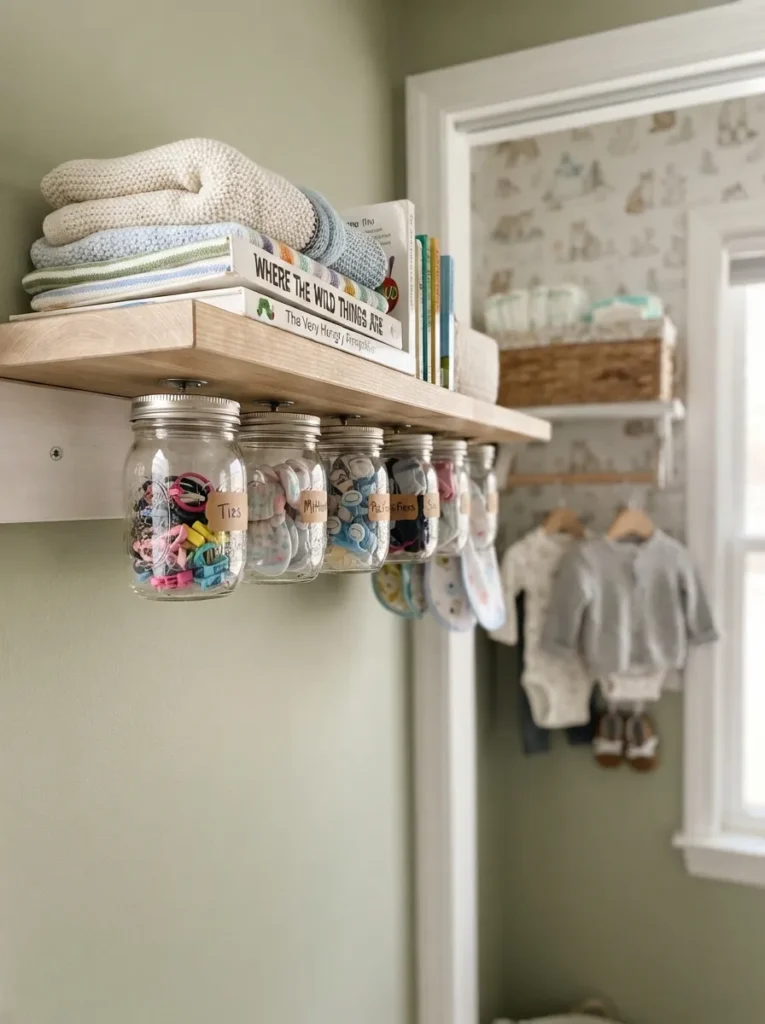
Surfaces fill up with small things that disappear: hair ties, clips, mittens, pacifier clips. For this project, screw each jar’s flat lid to the underside of a solid shelf and twist the jar into it. The contents hang below and the shelf surface stays free for larger things. It suits small nurseries best, especially a closet turned into a nursery where every inch counts.
Mounting note: Line up the jars under the shelf and mark where each lid goes. Drill pilot holes through the center of each lid and into the underside of the shelf. Use screws shorter than the shelf is thick so nothing pokes through the top. Screw each lid on, twist the jar in, and give it a firm tug before you load anything.
Load limit: Keep the contents light. Mittens and clips, not coins or anything heavy. Mount the shelf where nobody sits or stands underneath, and not above the changing table. If a jar drops, it drops onto whatever is below, so think about what’s below before you drill.
Shop This Look
10. Nursery-Rhyme Page Decoupage on a Keepsake Jar
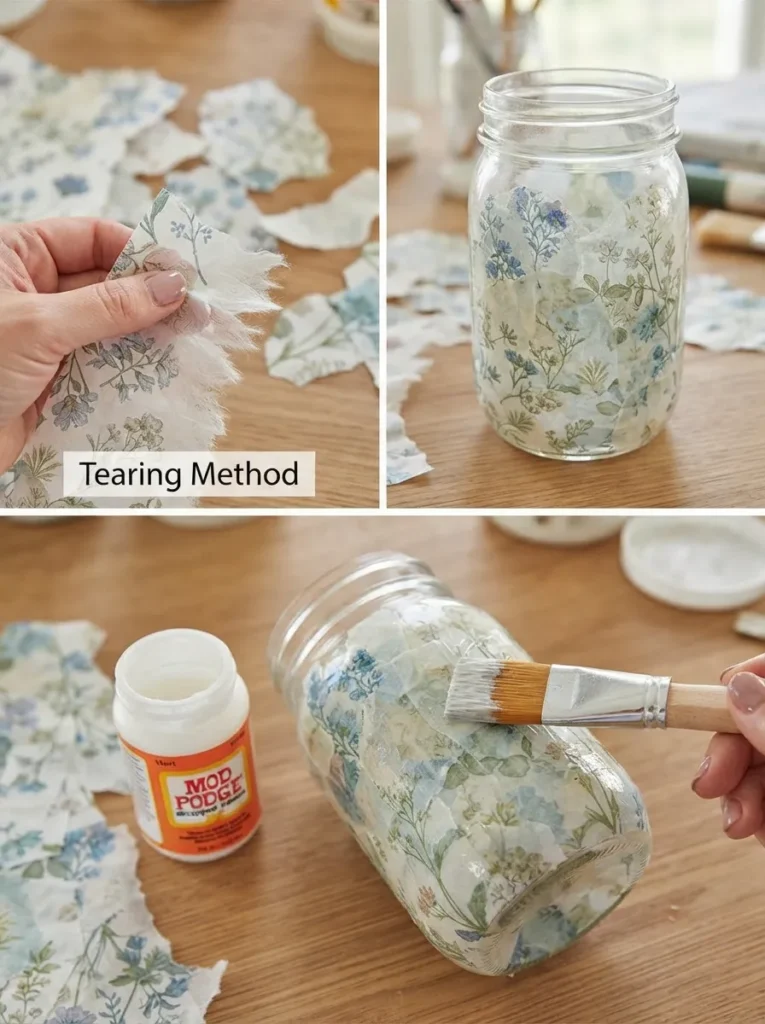
Tear the paper instead of cutting it. A torn edge has a soft, feathered rim that blends into the next piece, while a scissor cut leaves a hard line that tends to lift at the corner. Brush decoupage medium onto the jar, press each piece on from the center outward, overlap the edges a little, and finish with two thin topcoats, letting each one dry fully.
Paper note: Thin, tissue-like book pages follow curved glass. Glossy magazine paper doesn’t, and it wrinkles. A secondhand nursery-rhyme book usually gives you plenty of pages for a couple of dollars. Pick pages with a good amount of text or a simple illustration, since busy pictures get chopped up when you tear them.
Finish note: The finished jar is decorative only. Wipe it clean with a damp cloth and keep it out of the dishwasher, because the medium softens in hot water. If a full jar sounds like too much work, decoupage a single patch on one of the frosted jars from idea 2. It takes a fraction of the time and still looks planned.
Shop This Look
11. A Birth-Month Flower Jar in Dried Stems
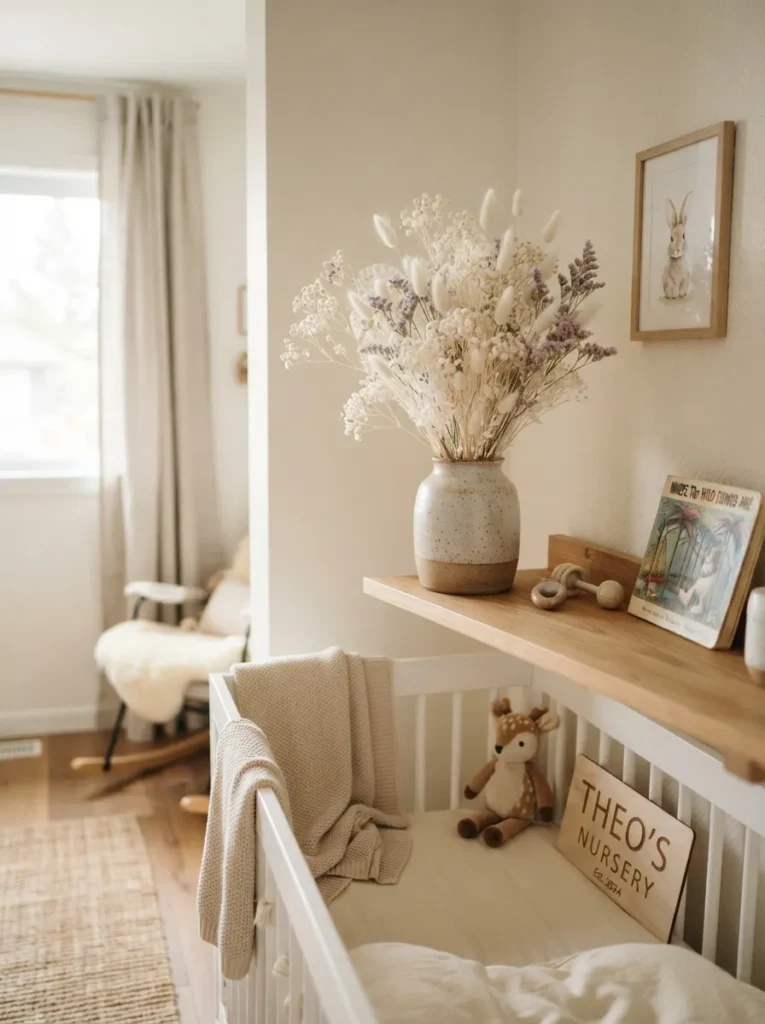
Dried stems in a pale, hazy cluster work well in a nursery: baby’s breath, bunny tail grass, statice. Pick the stems for your baby’s birth month from whichever list you trust, since the lists don’t all agree, or just match the stems to your nursery colors. Both are fine.
Stem note: Buy stems that are already dried. Some blooms change color or dull as they dry, and drying your own can mean weeks of waiting. Aim for stems about one and a half times the height of the jar. That proportion keeps the cluster from looking top-heavy. Skip water altogether.
Distance note: Dried flowers shed, so set the jar out of reach. They also fade steadily in sun, which makes a windowsill the worst place for them. Put the jar on a shelf across the room from the window. Expect them to look good for a while, but not forever. If the color goes flat after a few months, replace the stems and keep the jar.
Shop This Look
A Quick Note on Shelves
Here’s something that doesn’t match what most people expect. Mixing jar sizes for visual interest is usually what makes a nursery shelf look cluttered. It’s better to choose one jar size and one finish per shelf, then vary the contents and the shelf height. Five identical pint jars look calmer than three matching ones and two odd ones, and identical lids swap freely when one goes missing, which it will.
12. A Big-Sibling Helper Jar of Diaper-Change Jobs
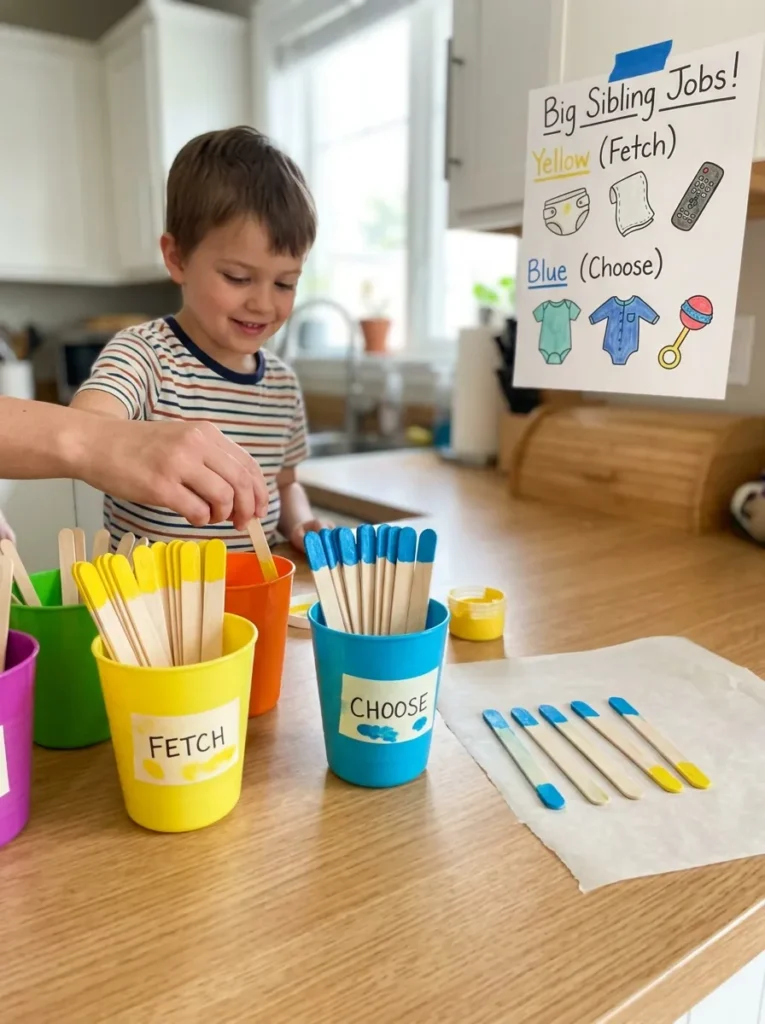
This is for homes where an older child is suddenly watching every feeding. Write small, safe jobs on craft sticks, like handing over a wipe, picking the lullaby, or choosing tomorrow’s outfit, and let the older child pull one stick at each diaper change.
Job note: Keep every job under a minute, and none of them should involve lifting or holding the baby. The point is to give the older child a role, not to hand over responsibility. Dip the top inch of each stick in paint, one color for “fetch” jobs and another for “choose” jobs. A child who can’t read yet can still sort them by color.
Handling note: Store the jar on a shelf and hold it yourself. The child draws sticks and never carries the glass. The whole project needs craft sticks, a bit of paint, and a jar you already own. It takes about ten minutes, and it tends to work better than you’d think at reducing the fuss when the baby is getting all the attention.
Shop This Look
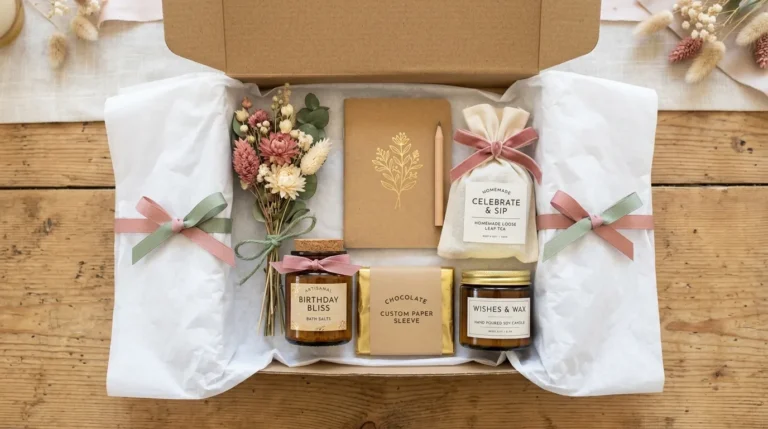
13. A Layered New-Mom Care Jar for Showers and Hospital Visits

This one is for the mom, not the baby. Gift jars look generous when the height varies and the heavy items sit low. Pack a wide-mouth quart in order: flat, dense things at the bottom (a hand-cream tube, a lip balm), rolled socks in the middle, and tall light items like single tea bags standing around the edge.
Packing note: Skip perishables. A jar can sit on a shelf for weeks before anyone opens it, and a snack that went stale doesn’t help anyone. Choose unscented items when you can, since a new mom holds a baby against her skin all day and strong scents can be unpleasant.
Tag note: Tie a small “open when” tag to each item. “Open at 3 a.m.” is a good one. Write each tag for a tired brain: one line, large letters, nothing clever that needs thinking about. A tag that takes effort to read won’t get read.
Shop This Look
How to Start
Start with idea 1. Two wide-mouth pint jars and a small tag for the changing table cost almost nothing, and the first diaper change shows you what the station is missing. Every other project in this article sits on top of that routine, from frosting to the name row.
The most common mistake is putting glass where a baby can reach it. Rolling starts sooner than most parents expect, and a jar on a low ledge or at the edge of the changing table is an accident waiting to happen. A quick way to check: kneel at floor level and look up. Anything you can see on a low surface is within reach of a crawler. Keep every jar on a high shelf, keep cords and rope loops out of range, and keep all of it out of the crib.
Three things under $50 give you the most to work with: a can of frosted-glass spray in a soft pastel, a roll of cheesecloth, and a set of adhesive chalkboard jar labels. Together they should come in comfortably under that figure, although prices vary by retailer.
For time and budget, the first jar takes about ten minutes, and all 13 spread easily across two or three weekends. A starter setup (ideas 1 to 3) runs roughly $15 to $40. The full collection lands somewhere around $60 to $150, and both numbers are approximate and drop if you already own jars. Ideas 1, 3, 6, and 12 are ten-minute jobs. Ideas 9 and 10 are the weekend projects, because of the drilling in one and the drying time in the other.
Shop This Look
What Goes Wrong When You Skip the Safety Steps
Most of the problems with mason jar nursery crafts are predictable, and most come down to the same few things.
Glass within reach is the biggest one. A jar that falls from a low ledge breaks, and a baby who’s mobile will find it. That’s why the shelf height, the wall mounts, and the rule about keeping jars out of the crib come up so often in this article.
Button batteries are the second. If a battery pack opens easily, a child can get the batteries out and swallow them, which is a medical emergency. A screw-closed compartment costs a bit more effort at the store and removes most of that risk.
Rope and cord loops are third. Even short loops near a crib or changing table are a hazard, so keep the hung jars well clear of both.
Then there’s the smaller stuff that doesn’t hurt anyone but wastes your time. A baking-soda jar with a solid lid does nothing. Frosting spray on a jar you then fill with something that touches skin is a bad idea, because the spray isn’t made for that. Heavy items in an under-shelf jar can pull the lid loose. A jar of water on a wall is a spill waiting to happen, which is why the greenery in idea 8 is faux.
None of this is complicated. It’s mostly about asking where the jar sits, how high, and whether the baby can get to it.
Frequently Asked Questions
How much do mason jar nursery crafts cost?
A starter setup of cotton jars, a frosted jar, and a baking-soda jar costs roughly $15 to $40, and the full set of 13 lands around $60 to $150. Both are approximate. Prices drop if you already have jars at home, and most of the cost goes to lights, paint, and spray.
Are mason jars safe to use in a nursery?
They can be, if you treat them as glass objects and keep them out of reach. Use high shelves or wall mounts, keep them away from the crib and the changing table’s edge, and avoid anything that needs a water-filled jar on a wall. Frosted jars should only hold dry goods or decoration.
What size jar works best for cotton balls and swabs?
Wide-mouth pint jars work best for cotton balls or pads, because your whole hand fits in. A regular-mouth half-pint is enough for swabs. The mouth width matters more than the capacity, since you need to grab one clump quickly with one hand.
Can I add essential oils to a baking-soda jar?
It’s better to leave them out. Scent in an infant’s room is something to ask your pediatrician about first. Plain baking soda under a cheesecloth cover already absorbs odor on its own, and you can swap it about once a month.
Which mason jar nursery craft should I make first?
The cotton-ball and swab jars at the changing table. They take about ten minutes, they cost almost nothing, and they solve a problem you’ll hit on the first day. Once that’s done, add the frosted jar and the baking-soda jar.
Final Thoughts
Thirteen ideas is plenty, and you won’t make all of them. They cover storage, lighting, keepsakes, wall decor, and gifts, and they use a handful of materials: glass, jute, paper, frosted spray, and warm-white light. Pick the ones that fix something in your own room.
Today, put two jars on the changing table and see how the next diaper change goes. If it feels easier, make the next one. If it doesn’t, move the jars. Save your favorite mason jar nursery crafts for new moms to a Pinterest board so the weekend projects are ready when you have the time.
Keep Exploring
- 12 Nursery Shelf Styling Ideas That Stay Baby-Safe
- 10 Mason Jar Bathroom Storage Ideas for Small Spaces
- 15 Handmade Baby Shower Gift Ideas New Moms Actually Use
These links are Amazon search links carrying your tag, so they work immediately. If you want better conversions, I can swap in exact product links once you pick specific items. Replace the Keep Exploring titles with real posts from your site before you publish.