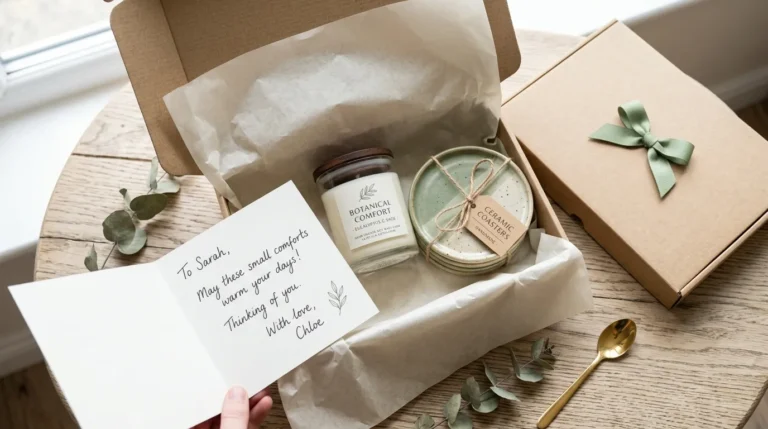
13 DIY Christmas Gift Tag Ideas to Make Gifts Special
Plain wrapping paper is nice, but the tag is what makes a gift feel loved. These DIY Christmas gift tag ideas turn paper scraps, twine, and fabric into tiny keepsakes that people actually want to keep.
This article shares 13 simple, beginner-friendly ways to finish your presents, from stamped kraft paper and pressed ferns to clay ornaments and peppermint toppers. Each idea solves a real problem: boring packages, last-minute stress, or a tight budget. I’ve noticed that people remember the little handmade touches long after the wrapping is gone. In my experience, a dozen homemade tags take less than an hour and change the whole look of a gift. Scroll through, save your favorites, and pick the one that fits your style.
Kraft Paper Stamps
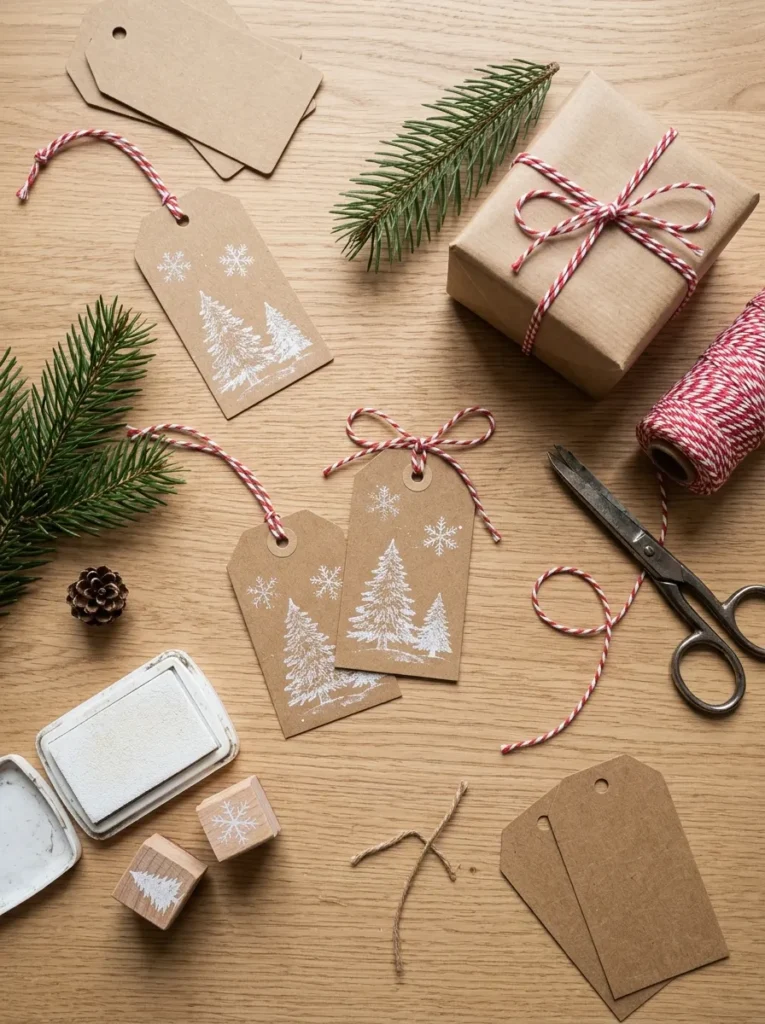
- Costs only a few dollars for stamps and ink
- Turns plain brown paper into a handmade look
- Easy for kids to help with
- Matches nearly any wrapping style
Simple supplies can look surprisingly special. Kraft paper tags and a basic stamp set are all you need for a classic, handmade look. Cut rectangles from a brown paper bag or cardstock, punch a hole at one corner, and press a pine tree or snowflake stamp in white or green ink. The rustic brown paper makes any color of ink look rich and intentional. Add a loop of baker’s twine, and the tag feels warm and charming. It costs very little, takes about twenty minutes for a dozen tags, and suits almost every wrapping style.
Small details lift the finished tag. Let the ink dry fully before stacking, since smudges show easily on brown paper. White and cream ink pop best, while metallic gold adds a festive shine. Try stamping a tiny tree in the corner and writing the name in the open space. If you do not own stamps, carve a simple shape into a potato or an eraser. Make a batch in one sitting and store them flat in an envelope. The finished tags look consistent, rustic, and polished, and they save you from scrambling on Christmas Eve.
Pressed Fern Tags
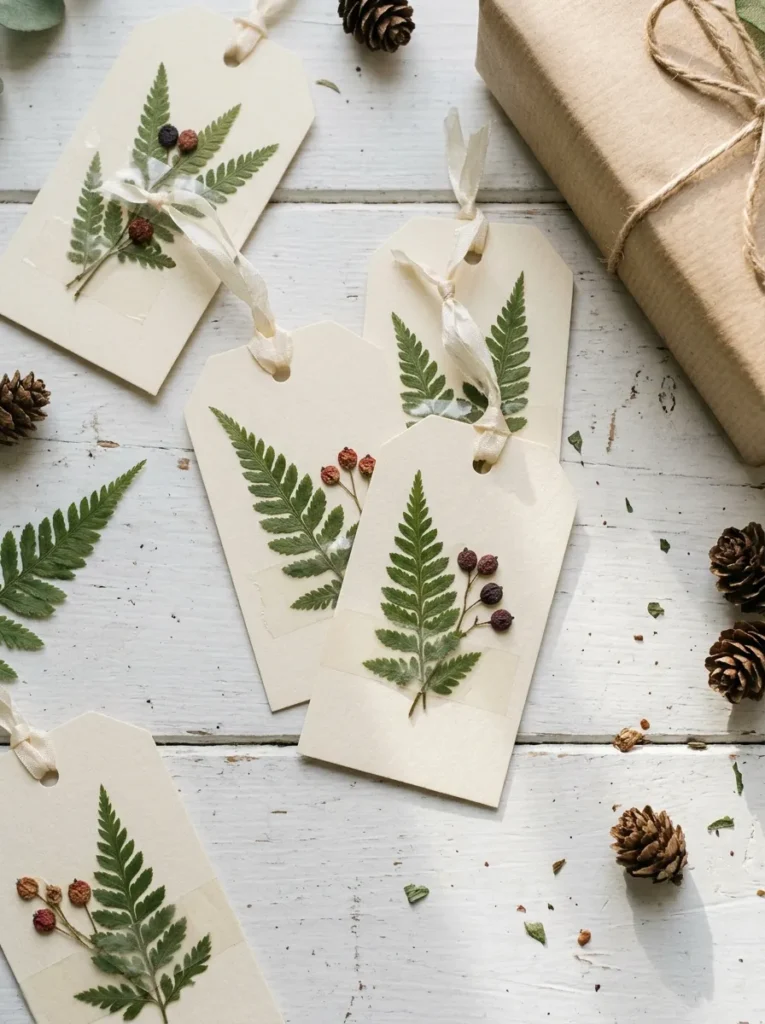
- Uses leaves and greenery from your own yard
- Adds a natural, elegant look with no paint
- Each tag is one of a kind
- Lightweight enough for any package
Nature makes the best decorations, and it is free. Press a few small ferns, holly leaves, or rosemary sprigs between heavy books for about a week. Then glue one onto cream cardstock and seal it with clear tape or a thin layer of glue. I’ve tried this with ferns from my own backyard, and the tags looked like little botanical prints. Every piece is slightly different, which gives each gift a personal feel. Add a thin ribbon, and the tag looks elegant enough for a boutique. It is calm, natural, and wonderfully simple.
Dry plants well, and the tags last for years. Keep the leaves flat between paper towels, and swap the towels after two days to prevent mold. Choose small, thin leaves, since thick ones stay bumpy. Brush a little white glue over the surface for a matte seal, or cover with clear tape for a quicker finish. Write the name on the back or on a small paper strip beside the leaf. Avoid damp rooms for storage. The finished tags look delicate, handmade, and fresh, and they pair beautifully with kraft paper, white ribbon, and a small sprig of pine.
Cookie Cutter Tags
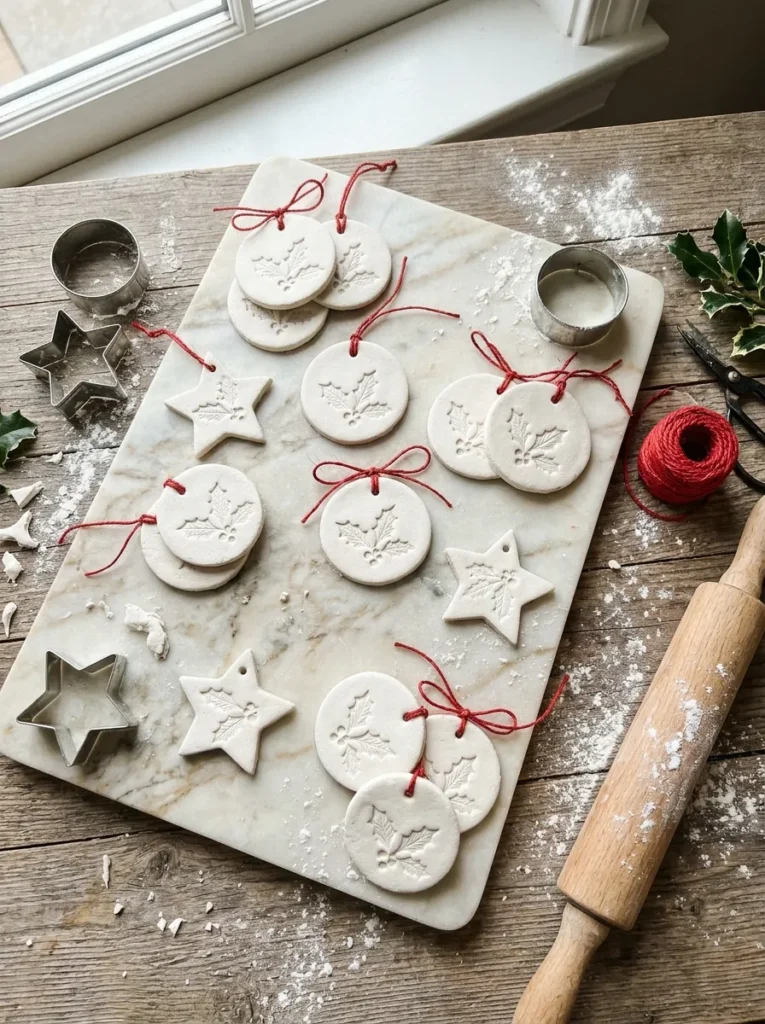
- Turns air-dry clay into sturdy keepsake ornaments
- Doubles as a tree decoration after unwrapping
- Cookie cutters make the shapes perfectly neat
- A fun, relaxed afternoon project
Here is a tag that doubles as an ornament. Roll out air-dry clay, press a cookie cutter into it, and poke a hole at the top with a straw. Let the shapes dry for a day, then tie each one with twine. Friends hang these on their trees long after the presents were opened, which makes the gift feel even more thoughtful. Stars, trees, and gingerbread shapes all work well. The smooth white finish looks clean and modern, and the weight gives the package a small, special feel that paper alone cannot match.
Texture makes these tags shine. Press a holly leaf, a lace scrap, or a rubber stamp into the clay before cutting, and the pattern stays after drying. Work on parchment paper so nothing sticks, and smooth the edges with a damp finger. Dry the tags flat, flipping them once, to prevent curling. Write names with a fine black marker or a gold paint pen once they are dry. Clay tags are not food safe, so keep them away from edible gifts and young children. The finished pieces look sweet, sturdy, and handmade, and they become keepsakes people save.
Twine Star Tags
- Simple star shape needs only scissors and a template
- Twine wrapping adds texture and charm
- Works with leftover cardstock scraps
- Easy for beginners and kids
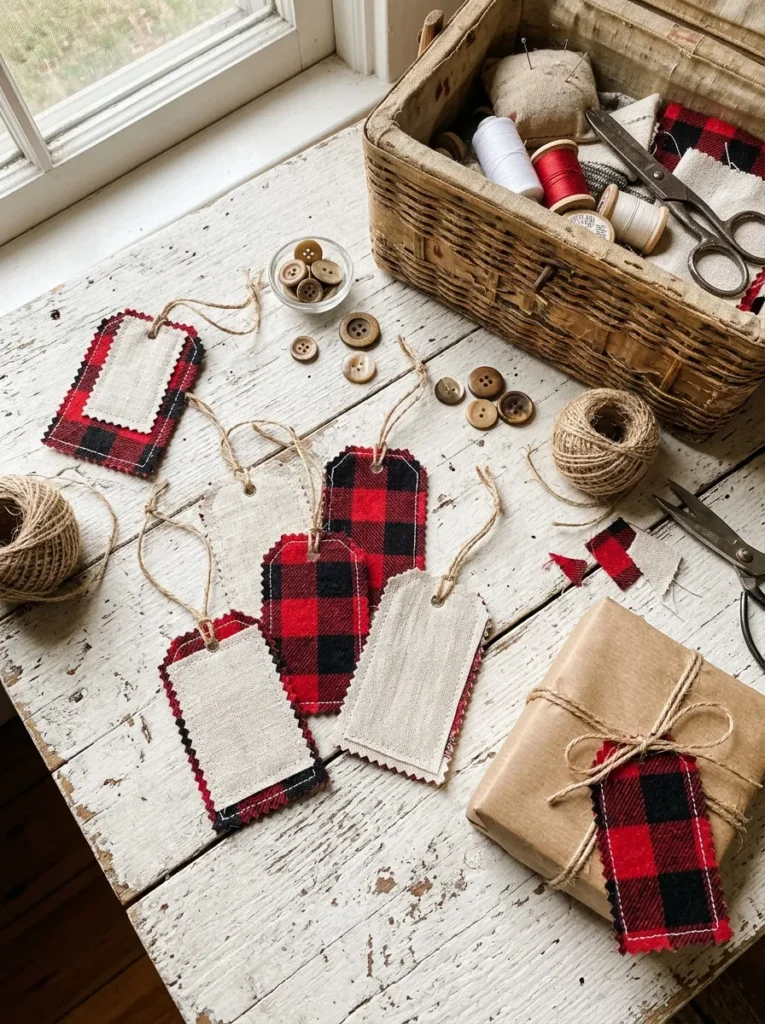
Stars are the easiest shape to love. Draw one on cardboard as a template, trace it onto cardstock, and cut out a handful in white, kraft, and green. Then wrap cream twine around the points in a loose crisscross pattern, and add a small gold bead at the center. Wrapped twine gives flat paper a lovely handmade depth that glue alone cannot. Write the name on the back or on a tiny paper label. The finished tag looks festive without feeling fussy, and it can be made from scraps you probably already have in a drawer.
A few small tricks keep the stars neat. Fold the cardstock in half before cutting so both halves match, then unfold for a symmetrical shape. Use a dab of glue to anchor the twine at the back, and trim loose ends close. Make the stars in three sizes, then clip the smallest onto the largest for a layered look. Poke a hole in one point and thread a loop of twine through it. Store extras flat in a small box. The finished tags look crisp, cozy, and a little rustic, and they suit presents of every shape.
Fabric Scrap Tags
- Gives leftover fabric a second life
- Adds soft texture to flat wrapping paper
- Plaid and linen suit a farmhouse look
- Sturdy enough to reuse as bookmarks
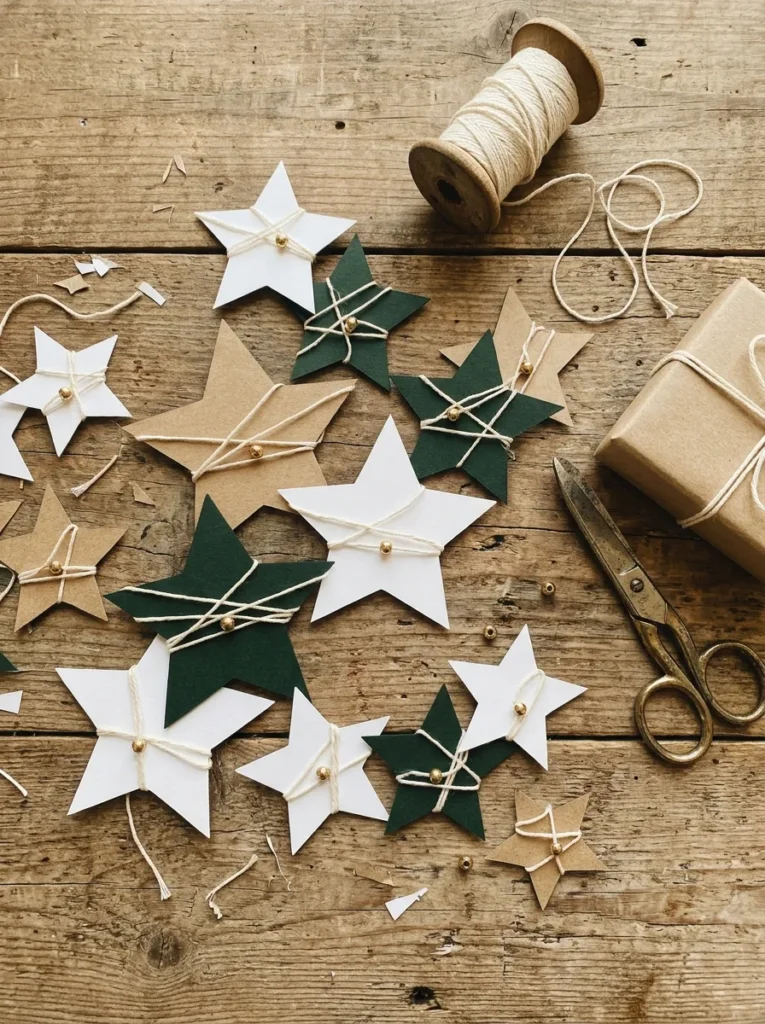
Do you have a bag of fabric scraps? Put it to work. Cut small rectangles from plaid flannel, linen, or felt, and trim the edges with pinking shears so they do not fray. Glue each piece onto a slightly smaller card, or add a running stitch around the border for a handmade finish. I’ve tried this with old flannel shirts, and the tags looked cozy and expensive. The soft texture stands out against shiny paper, and the red-and-cream palette feels classic. It is a smart way to use leftovers, and it gives every gift a warm, farmhouse feel.
Felt and tightly woven fabrics work best, because they hold their shape. Stiffen thinner cloth with iron-on interfacing or a coat of fabric glue. Cut a small notch in one corner for the string, and reinforce it with a dab of glue so it will not tear. Write the name on a paper label, or use a fabric pen for a stitched look. Add a small button for sparkle. Keep the fabric colors within a small group, such as red, cream, and green. The finished tags look soft, charming, and unique, and recipients often reuse them as bookmarks.
Watercolor Wash Tags

- No drawing skills needed, only soft color
- Each tag looks like a tiny piece of art
- Works with pastel or bold palettes
- Quick to make in big batches
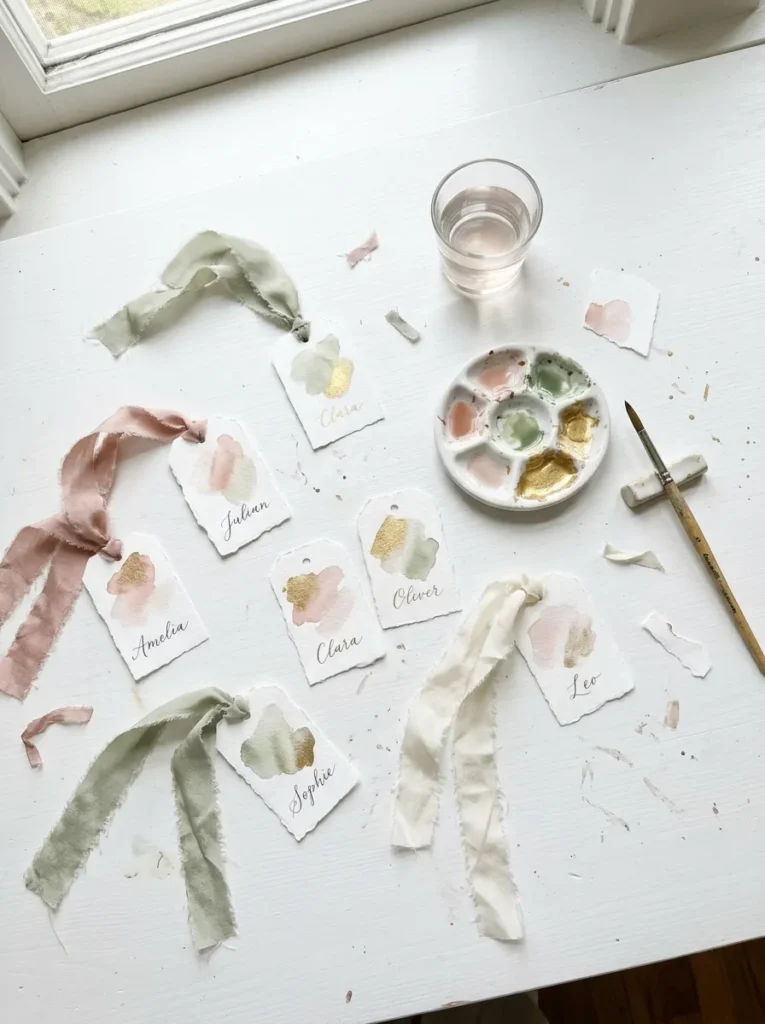
You do not need to paint well to paint beautifully. Wet a piece of watercolor paper with clean water, then drop in blush, sage, or gold paint and let the colors blend on their own. Once dry, cut the paper into tag shapes. Soft, blurry washes look intentional, even when a beginner paints them. Each tag turns out slightly different, like a tiny abstract painting. Tie it with silk ribbon, and it feels like a gallery gift. It is an ideal choice for anyone who wants a gentle, artistic touch on their holiday packages.
Work big, then cut small. Paint one large sheet of watercolor paper, and you can cut a dozen tags from it. Tape the edges to a board so the paper stays flat while it dries. Add a pinch of salt to wet paint for a snowy, speckled look. Use a gold pen or white gel pen for the name once the paint is fully dry. Choose heavy paper, about 300 gsm, to avoid warping. The finished tags look airy, soft, and artful, and they make even a plain brown package feel like something special.
Dried Orange Slices
- Adds a fresh citrus scent to the package
- Glowing color looks beautiful with kraft paper
- Costs just a couple of oranges
- Doubles as a topper and a tag
Some tags smell as good as they look. Slice an orange into thin rounds, pat them dry, and bake at a low temperature for two to three hours until they turn translucent. The slices glow like stained glass against kraft paper. I’ve seen guests stop to sniff these toppers, and that small moment makes the gift memorable. Tie one slice to the package with thin red ribbon, then add a small paper tag with the name written in ink. Citrus, cinnamon, and pine make a natural trio that feels warm, festive, and a little old-fashioned in the best way.
Prep matters for a good result. Use a sharp knife for even slices, about six millimeters thick, and blot the juice with a towel. Bake at about 95 degrees Celsius, flipping every hour, then let them cool completely so they crisp up. Poke a small hole near the edge for the ribbon. Make these within a week of gifting, since dried fruit can soften in humid rooms. Skip them on gifts for people with citrus allergies. The finished toppers look earthy, bright, and handmade, and the whole house smells wonderful while they dry.
Polaroid Photo Tags
- Turns a favorite photo into a personal message
- Recipient can keep or frame the tag
- Print at home on photo paper
- Makes group gifts feel special
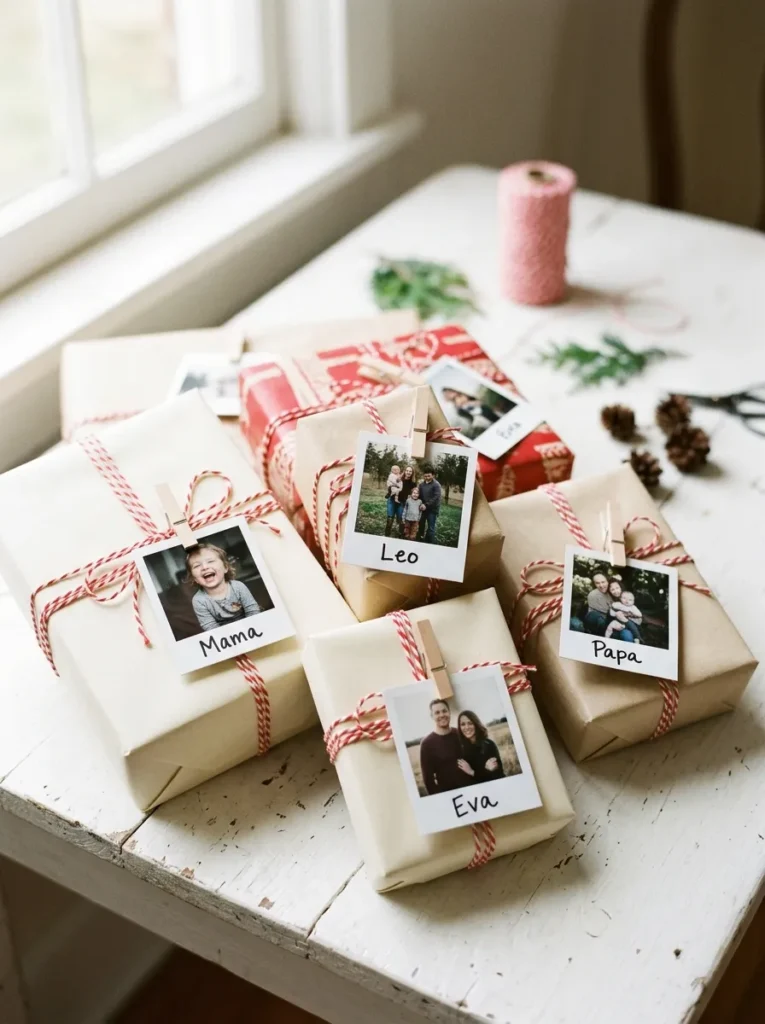
A face on the tag says more than a name. Print a small photo of the recipient, a shared memory, or the family pet on glossy paper with a white border. Cut it out, write a short line underneath, and punch a hole at the top. People hold on to these tags for months, because they feel more like keepsakes than labels. Tuck a tiny holiday sticker in the corner for extra cheer. The gift feels personal before it is even opened, and the photo gives the receiver something sweet to keep.
Size and sharpness matter here. Resize photos to about five by seven centimeters, and use a good photo paper for rich color. Choose pictures with a clear face, since tiny details blur in small prints. A white border makes the tag look like an instant photo, and a fine marker writes neatly on it. For a group gift, make one tag per person with a different memory. Keep the photo away from candles and heat. The finished tag looks playful, nostalgic, and heartfelt, and it turns a simple label into a moment of connection for the person opening it.
Wooden Bead Tags
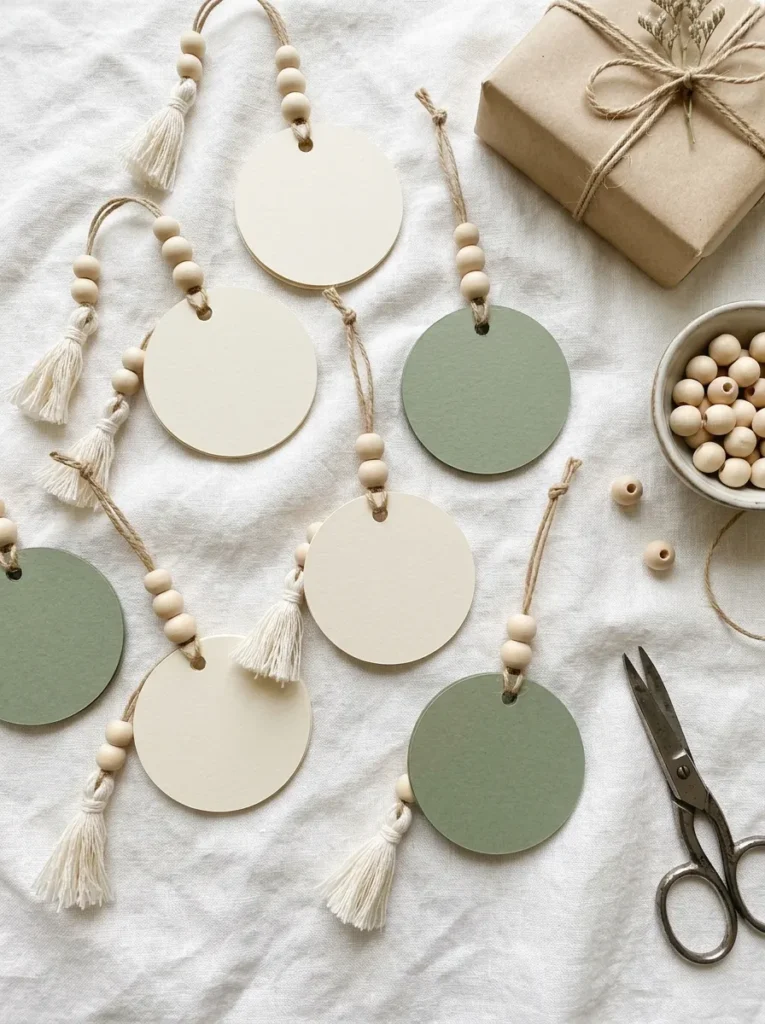
- Adds boho texture with just a few beads
- Looks high-end with almost no effort
- Tassels and beads add gentle movement
- Easy to make while watching a movie
A few beads can change the entire look. Thread three or four wooden beads onto cotton cord, then tie the cord through a round cardstock tag. Finish with a tiny tassel made from embroidery thread. Natural wood tones pair well with white, sage, and cream wrapping, and the soft clicking sound of beads adds a sweet detail. The tag looks like something from a boutique shop, yet it takes only a few minutes to finish. It is a lovely option for people who prefer a calm, boho style over bright red and green.
Choose beads with large holes, so the cord passes through easily. Dab the end of the cord with clear glue or tape it to make threading quick. Tie a knot below the last bead to keep everything in place. For a tassel, wrap embroidery thread around two fingers about twenty times, tie the top, and snip the bottom loops. Pick light beads, since heavy ones pull a tag crooked. Skip small beads on gifts for toddlers, since they are a choking hazard. The finished tags look earthy, textured, and refined, and they make a simple present feel carefully considered.
Calligraphy Name Tags
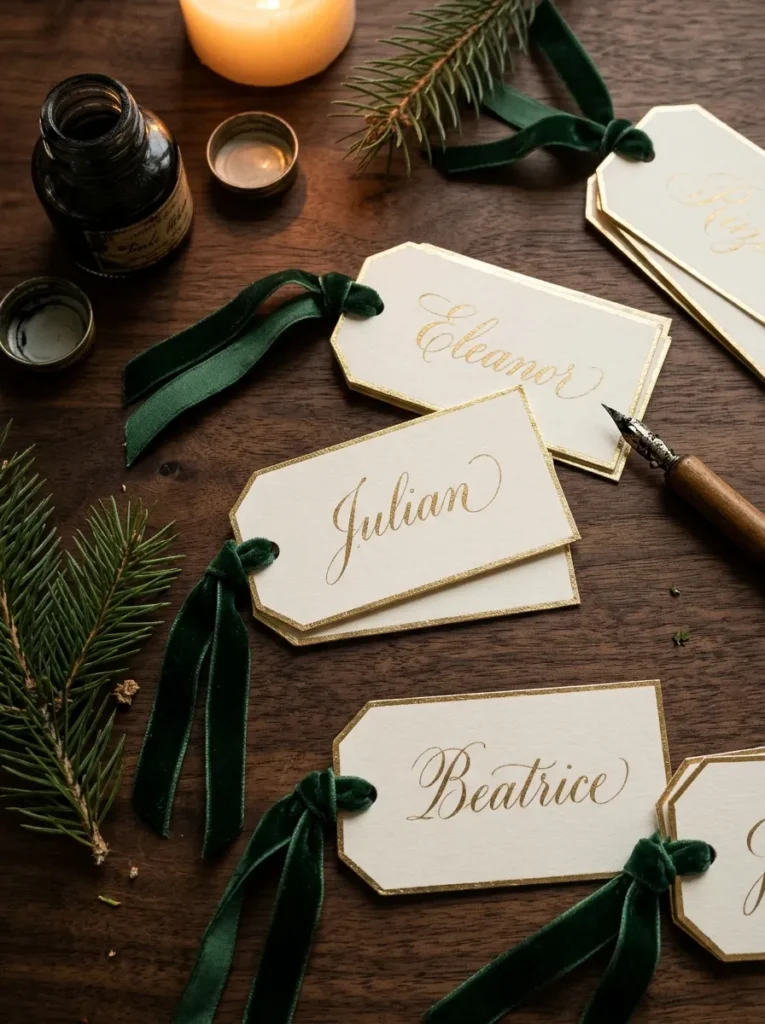
- Makes the name the star of the gift
- Faux calligraphy works with any marker
- Gold ink feels festive and formal
- Great for dinner place cards too
Beautiful handwriting is easier than it looks. Faux calligraphy uses a simple trick: write the name in cursive, then thicken every downstroke by drawing a second line beside it and filling the gap. The result looks like a professional script. I’ve tried this with a basic brush pen, and the first set looked far better than I expected. Use gold ink on ivory cardstock, or white ink on dark green paper for a dramatic look. The tag instantly feels formal and festive, and it makes the recipient feel like the gift was chosen with real care.
Practice first on scrap paper. Pencil the name lightly, trace it in ink, then erase the pencil once the ink is dry. Keep the letters slanted at the same angle, and space them evenly so the name looks balanced. Write only the first name on small tags. A metallic pen glides best on smooth, heavy cardstock. Let each tag dry flat for a few minutes before handling. Use the same tags as place cards at the dinner table. The finished tags look polished, graceful, and special, and they raise the whole look of a package.
Mini Pom-Pom Tags
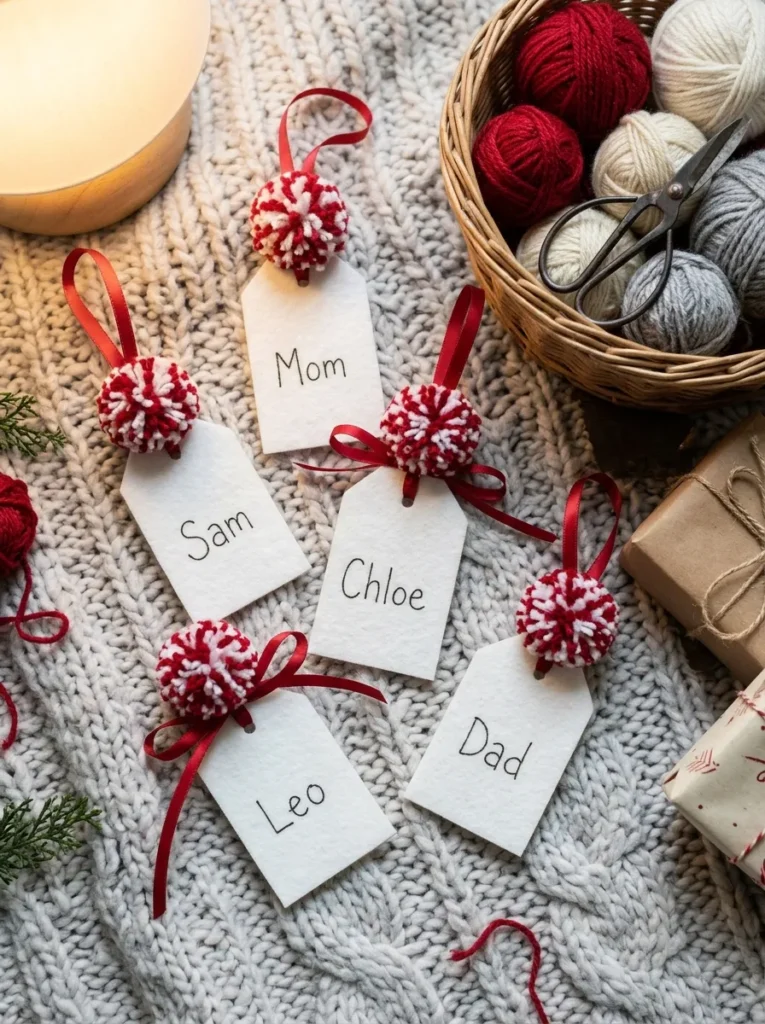
- Adds a fluffy, playful touch for kids’ gifts
- Uses leftover yarn from any project
- Soft felt tags feel cozy to hold
- Quick to make with a fork
Fluffy and fun, these tags make people smile. Wind yarn around a fork about forty times, tie the center tightly, then slip it off and trim the loops into a round pom-pom. Glue it to the corner of a felt tag. I’ve seen kids carry these around the house long after the gifts were opened, which tells me the idea works. Red and white yarn feels classic, while pastel shades suit a softer look. The tag brings a bit of texture and play to the package, and it makes even a small present feel generous and cheerful.
Little tricks make a big difference. Use a strong double knot in the center, since a loose knot sends yarn everywhere. Trim the pom-pom evenly with sharp scissors, turning it as you cut. Fluff it with your fingers, then use a drop of hot glue to attach it to the felt. Cut the felt into a simple rectangle or a mitten shape. Write names with a fine marker, which shows well on white felt. Keep small pom-poms away from babies and pets. The finished tags look soft, playful, and bright, and they bring a cheerful mood to every package.
Peppermint Candy Tags
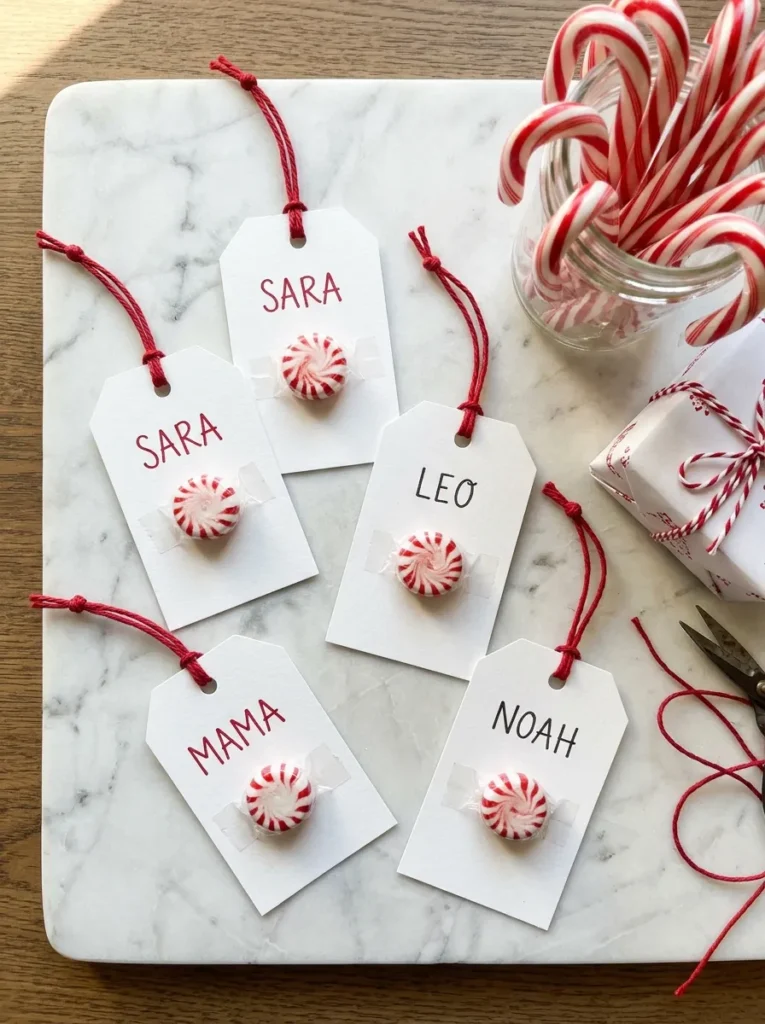
- Adds a sweet treat to every package
- Looks bright against plain wrapping
- Cheap to buy in bulk
- Great for classmates and coworkers
Why not let the tag be a treat? Tape or glue a wrapped peppermint to a white cardstock tag, and write a sweet line above it, such as “You make the season sweeter.” Coworkers and classmates love this idea, because it feels thoughtful without being expensive. Red and white swirls pop against kraft or white wrapping, so the package looks cheerful from across the room. Buy a bag of candies, cut a few dozen tags, and you can finish a whole batch in one evening. It is a small gesture that gets big smiles.
Choose individually wrapped candies, so the treat stays clean and safe to eat. Use double-sided tape or a small loop of washi tape to hold the candy in place, and add a dot of glue for extra grip. Try short, friendly lines like “Mint to be yours” or “Hope your season is sweet.” Check for allergies and dietary needs before gifting, and skip candy for young children. Store finished tags in a cool place, since heat can melt the wrappers. The finished tags look bright, playful, and generous, and they bring a bit of holiday fun to every table.
Puzzle Piece Tags
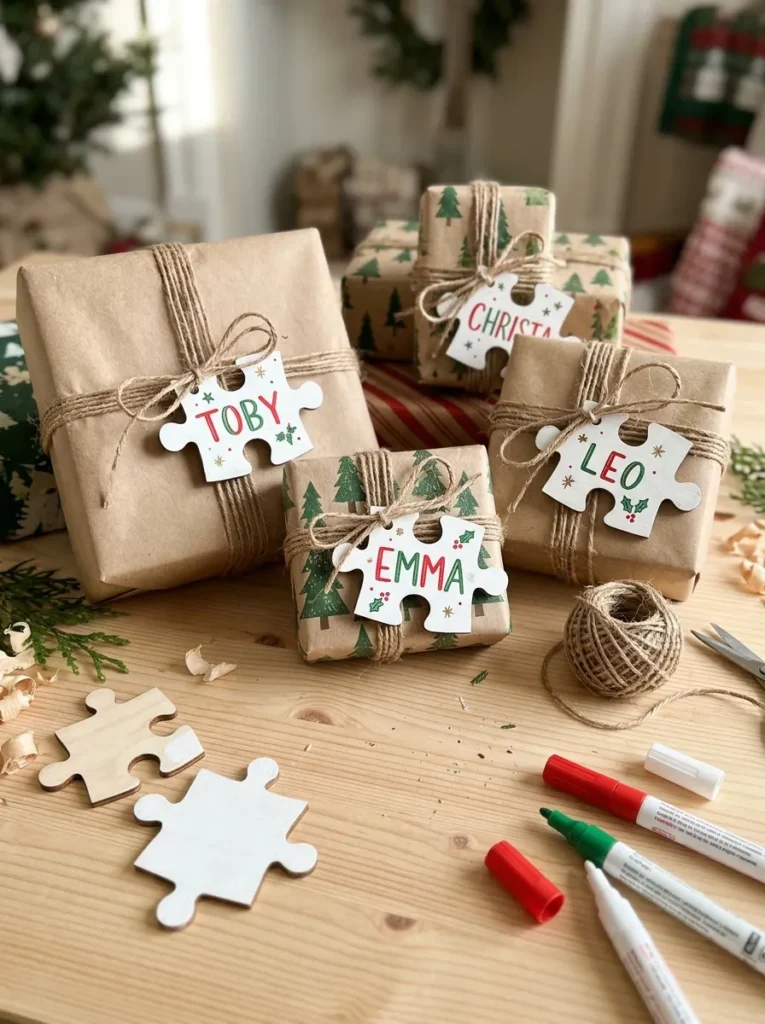
- Turns old puzzle pieces into tiny keepsakes
- Great for family sets and matching gifts
- Paint pens make quick, bright lettering
- Gives recycled items a fresh purpose
Got a puzzle with missing pieces? Do not toss it. Paint a few pieces white, then add each name with a red or green paint pen. Thread a loop of twine through the knob, or glue a tiny ribbon to the back. Families love this idea, because the pieces fit together like a real puzzle once the gifts are all under the tree. It feels playful, meaningful, and a little nostalgic. Large wooden pieces from craft stores also work well. The tag gives a second life to something old and turns it into a tiny, handmade keepsake.
Start with a coat of white acrylic paint, and let it dry fully before lettering. Cardboard puzzle pieces work best when you seal them with a thin layer of clear glue, so the paint does not soak in. Use an oil-based paint pen for a smooth, bold line, and write names in capital letters for clarity. Add a small gold dot or a tiny star for sparkle. For a family set, give each person a piece with matching colors. The finished tags look cheerful, clever, and personal, and they spark smiles as people try to fit them together.
Conclusion
A gift tag is a tiny space with a big job. It tells someone they were thought of. Whether you stamp kraft paper, press a fern, or tape on a peppermint, these DIY Christmas gift tag ideas prove that small, handmade details can make every present feel special. I’ve seen how small changes like these can completely shift the way a gift feels when it is opened. Save this post on Pinterest, try one idea this week, and share it with a friend who loves handmade holiday touches. Your next gift is only one tag away from unforgettable.