14 Small Backyard Landscaping Ideas Modern & Stylish
Small backyard landscaping does not need a big budget or a professional crew. Most of these ideas cost roughly 60 to 300 dollars if you buy the materials and do the work yourself over a weekend. Hiring help or buying premium furniture pushes the total closer to 800 dollars or more, but that is optional, not the starting point.
I have noticed that people with small yards usually overthink the planning and underthink the corners. The corners are where a small backyard gets its depth. A bench tucked into a dead corner, a planter in a spot you never look at, that is what makes a tight yard feel intentional instead of leftover. Prices vary by what you already own and how much you are willing to build versus buy, so treat every idea here as a starting point you can shrink or stretch.
Below you will find 14 modern small backyard landscaping ideas, each with an honest budget note, practical tips I would give a friend, and a short shopping list so you can price the look before you commit.
This post contains affiliate links. If you buy through them, I may earn a small commission at no extra cost to you.
1. Minimalist Patio with Concrete Pavers
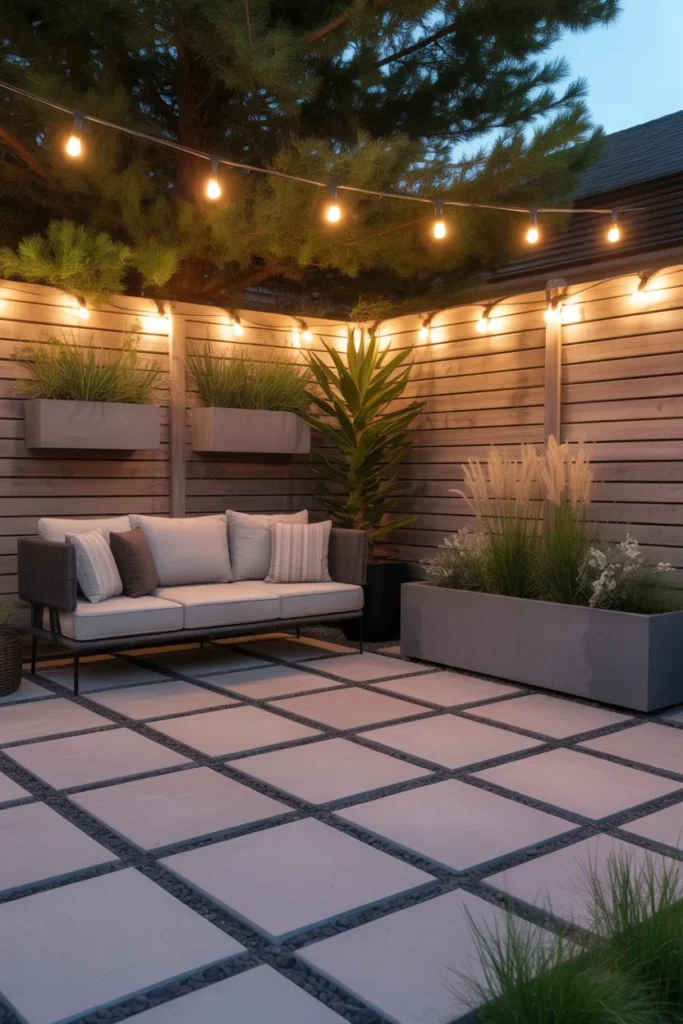
A minimalist paver patio is simply a clean rectangle or square of large concrete pavers laid close together, no curves, no mixed materials. It gives a small backyard one flat surface that works for seating, grilling, or just standing around. A basic DIY version costs roughly 120 to 350 dollars for pavers, sand, and gravel base, depending on size. Large format pavers look more modern than small brick-style ones, and they are easier to keep level.
Work the corners: leave one corner of the patio slightly empty on purpose, then fill it with a single large planter or a small bench. That gap keeps the patio from feeling like a parking lot. One honest warning: skip the cheap thin pavers sold as walkway stones if you will put furniture on them. They crack under chair legs within a season. Go for pavers at least 2 inches thick.
Keep the palette tight: two colors maximum for the whole yard, usually gray pavers plus green plants. Everything beyond that makes a small space look busy. This suits people who want a low maintenance yard with a modern look and do not garden much. If you love lots of flowers, this is not your style, and that is fine.
- Use large format pavers, 18 by 18 inches or bigger, for a cleaner look
- Lay landscape fabric under the gravel base to block weeds
- Space pavers a quarter inch apart and sweep polymeric sand into the joints
Shop This Look
2. Vertical Garden Accent Wall
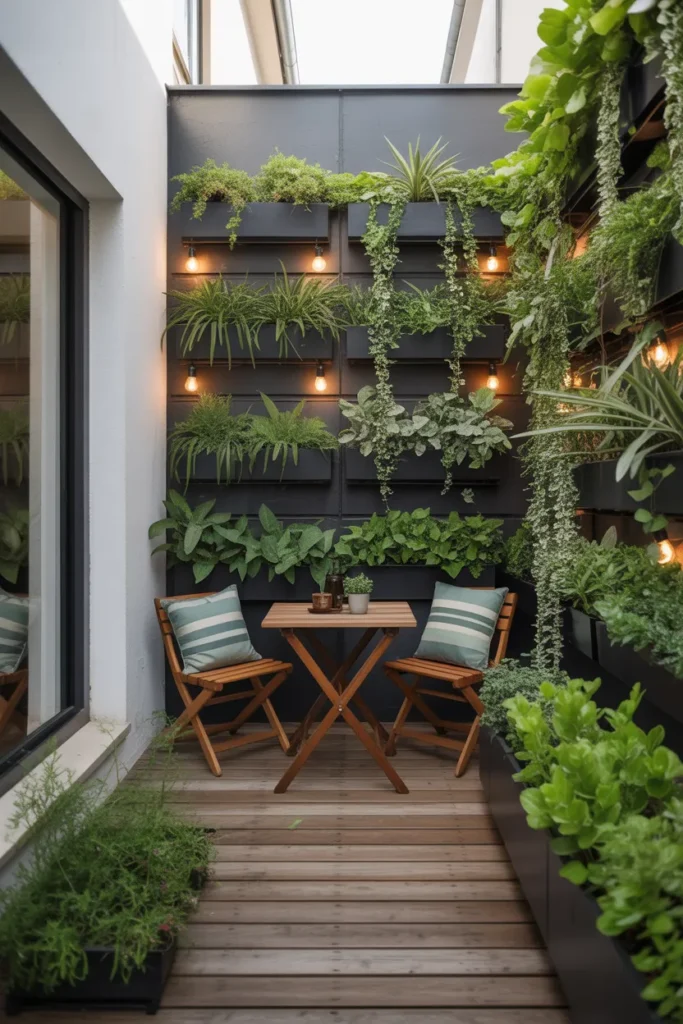
A vertical garden accent wall turns one bare fence or wall into a wall of plants using mounted planters, a trellis, or a pocket planter system. It adds greenery without taking up any floor space, which is the whole point in a small yard. A simple setup with wall mounted planters and a dozen starter plants costs roughly 50 to 150 dollars. Fancier living wall panel kits run 200 dollars or more, but the basic version looks just as good from six feet away.
Pick one wall: one full wall of green has more impact than three half filled walls scattered around. Commit to the best lit wall and leave the rest plain. Honest warning: watering is the part everyone underestimates. Pockets and small planters dry out fast in summer heat, so either choose drought tolerant plants like succulents and ferns or set up a simple drip line with a timer.
Start with trailing plants: trailing plants like pothos, string of pearls, or creeping fig cover a wall faster and look fuller sooner than upright plants. This suits renters and anyone with a tiny yard where every square foot of ground is needed for seating. If your wall gets less than four hours of sun, stick to shade loving plants and skip the herbs.
- Mount planters on a fence or wall with at least 4 hours of daily sun
- Choose plants that match the light your wall actually gets, not the light you wish it got
- Use a watering can with a narrow spout or a drip timer for hard to reach pockets
Shop This Look
| PLANTERS | TRELLIS | PLANTS |
|---|---|---|
| Wall Mounted Planters | Garden Trellis Panels | Trailing Houseplants |
| Shop → | Shop → | Shop → |
3. Modern Fire Pit Lounge
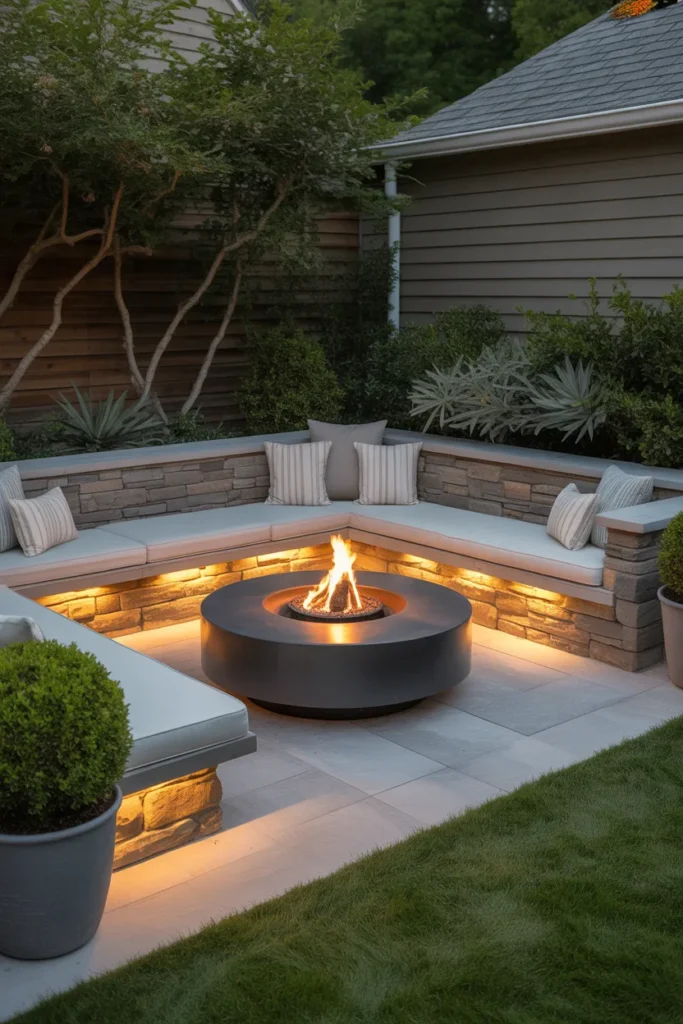
A modern fire pit lounge is a small seating circle built around a low profile fire pit, usually a bowl style or square gas pit rather than a rustic stone ring. The clean shape keeps it looking designed instead of improvised. A propane fire pit table costs roughly 150 to 400 dollars, plus seating. A simple DIY concrete block pit costs under 100 dollars, but the modern look usually comes from the ready made bowl or table style.
Keep the circle small: four chairs around a 30 inch fire pit is the sweet spot for a small yard. Anything bigger eats the whole space. Honest warning: check your local rules before buying. Many cities restrict wood burning but allow propane, and condo or HOA rules sometimes ban open flames entirely. A propane table with a cover still works as a coffee table when the fire is off, so you lose nothing.
Add texture with cushions: plain outdoor chairs look stiff, so one set of weatherproof cushions in a neutral color softens everything for about 40 dollars. This suits anyone who wants the yard to work after dark, because a fire pit extends the usable hours of a small backyard more than anything else. It is less ideal for families with very small kids who cannot be kept away from heat.
- Choose propane for easy on and off and fewer local restrictions
- Leave at least 10 feet of clearance from the house and any fence
- Store a fitted cover on the pit so it doubles as a table in summer
Shop This Look
| FIRE PIT | SEATING | CUSHIONS |
|---|---|---|
| Propane Fire Pit Table | Outdoor Lounge Chairs | Weatherproof Cushions |
| Shop → | Shop → | Shop → |
4. Compact Zen Garden Retreat
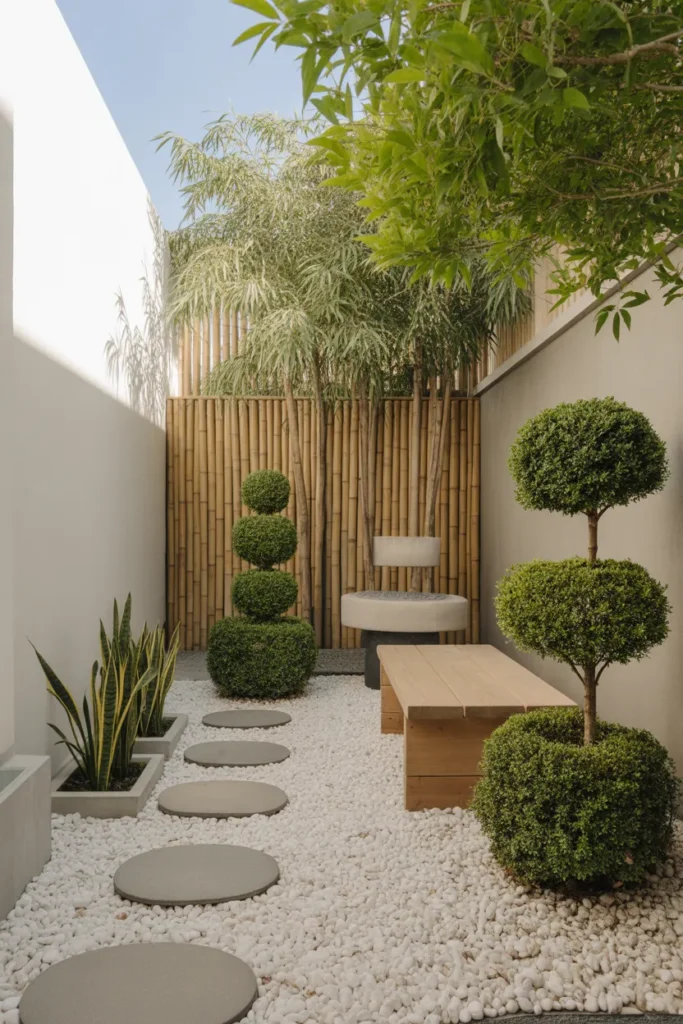
A compact Zen garden is a small gravel bed with a few well placed stones, a low plant or two, and maybe a stone lantern. The raked gravel lines are the signature look. This is one of the cheapest ideas on this list, roughly 60 to 180 dollars for gravel, a stone lantern, and one or two plants. It does not try to be a full Japanese garden. It borrows the calm look in a corner sized space.
Use fewer elements: three stones and one lantern in a 6 by 6 foot bed looks right. Ten stones in the same bed looks cluttered, and the whole calm effect disappears. Honest warning: if you have pets or kids who will walk through the gravel, this becomes maintenance, not meditation. Raking lines takes two minutes, but only if nobody rearranges the gravel daily.
Pick gravel, not sand: coarse pea gravel or crushed granite stays put better than sand and still rakes into clean lines. This suits people who want a quiet spot to sit with coffee and do not want to fuss with flower beds. It pairs well with a small wooden bench at the edge of the gravel.
- Keep the bed small, about 6 by 6 feet, so it feels intentional
- Use landscape fabric underneath to stop weeds pushing through the gravel
- Add one small bench or flat stone seat at the edge for actually sitting there
Shop This Look
5. Stylish Deck with Built-In Planters
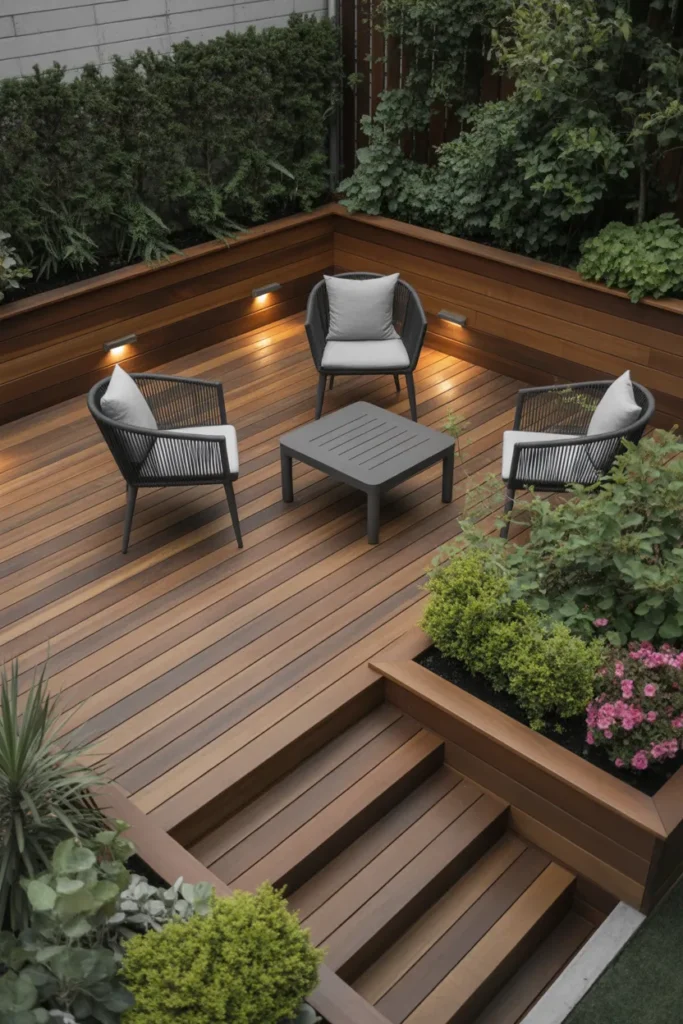
A deck with built in planters means the planting boxes are part of the deck edge itself, usually along the railing line or the outer border. You get greenery without giving up a single square foot of floor space. Building a simple platform deck with integrated planter boxes costs roughly 400 to 900 dollars in lumber and soil if you DIY. Prefab deck tile kits with matching planter boxes bring that down to about 150 to 300 dollars for a small footprint.
Line the edges: put the planters on the outer edge of the deck where they double as a low railing or privacy buffer. Do not put them in the middle where they block the walking path. Honest warning: planters built into wood decks hold moisture against the boards, so line every box with plastic sheeting and add drainage holes, or you will be replacing deck boards in two years.
Grow edibles: built in deck planters are perfect for herbs, cherry tomatoes, and salad greens because they are right by the door. This suits cooks who want fresh herbs within reach and anyone who wants plants that earn their space. Skip heavy root vegetables, the boxes are usually too shallow.
- Line wooden planter boxes with plastic sheeting and drill drainage holes
- Keep planters along the deck edge so the middle stays open for furniture
- Use lightweight potting mix, not heavy garden soil, to reduce deck load
Shop This Look
6. Artificial Turf with Stepping Stone Path
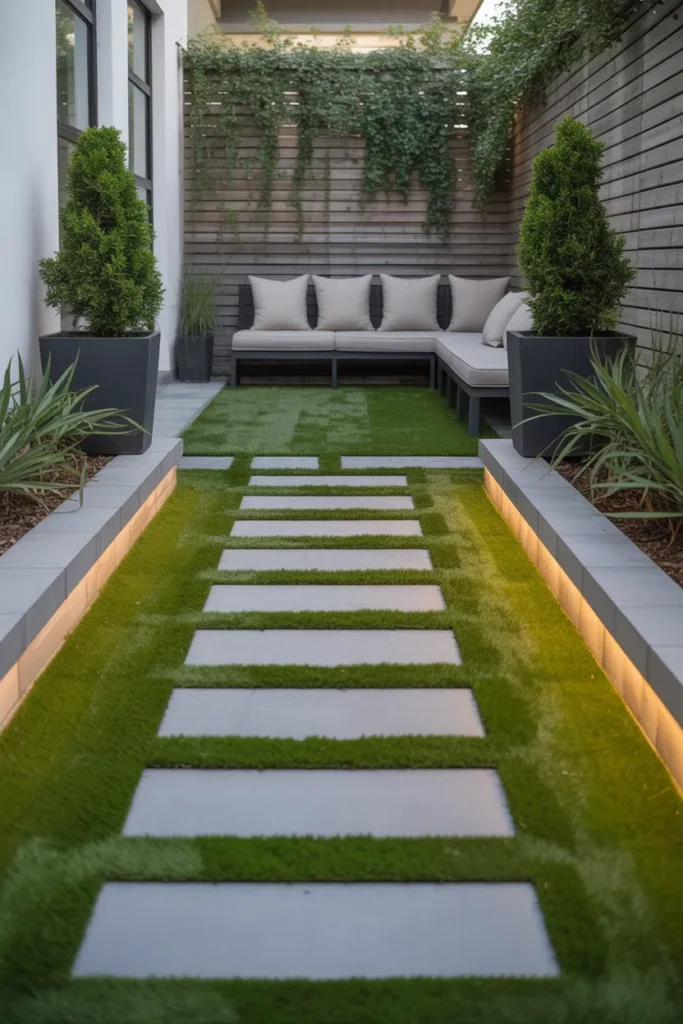
Artificial turf with a stepping stone path is a small patch of synthetic grass cut with a stone walkway running through it. You get the green lawn look with zero mowing and zero watering. Good quality turf for a small area costs roughly 100 to 250 dollars, plus stepping stones at about 3 to 8 dollars each. The look works best in yards too small or too shady to keep real grass alive.
Buy mid grade turf: the cheapest turf looks shiny and plastic from a few feet away. Mid grade with varied blade colors looks convincing, and in a small yard you are never far enough away to hide the difference. Honest warning: turf gets hot in direct sun, much hotter than real grass. If kids or dogs use the yard barefoot, put the stone path and a shade sail over the main walking area.
Curve the path: a gently curved stepping stone path makes a small yard feel bigger than a straight one because the eye follows the curve. This suits busy people who want a green yard without lawn work, and renters with shady yards where grass will not grow. It is not for gardeners who love digging in real soil.
- Level the ground and lay landscape fabric before rolling out the turf
- Pin the turf edges down with landscape staples so they stay flat
- Place stepping stones with small gaps for a natural path feel
Shop This Look
7. Raised Garden Beds with Gravel Base
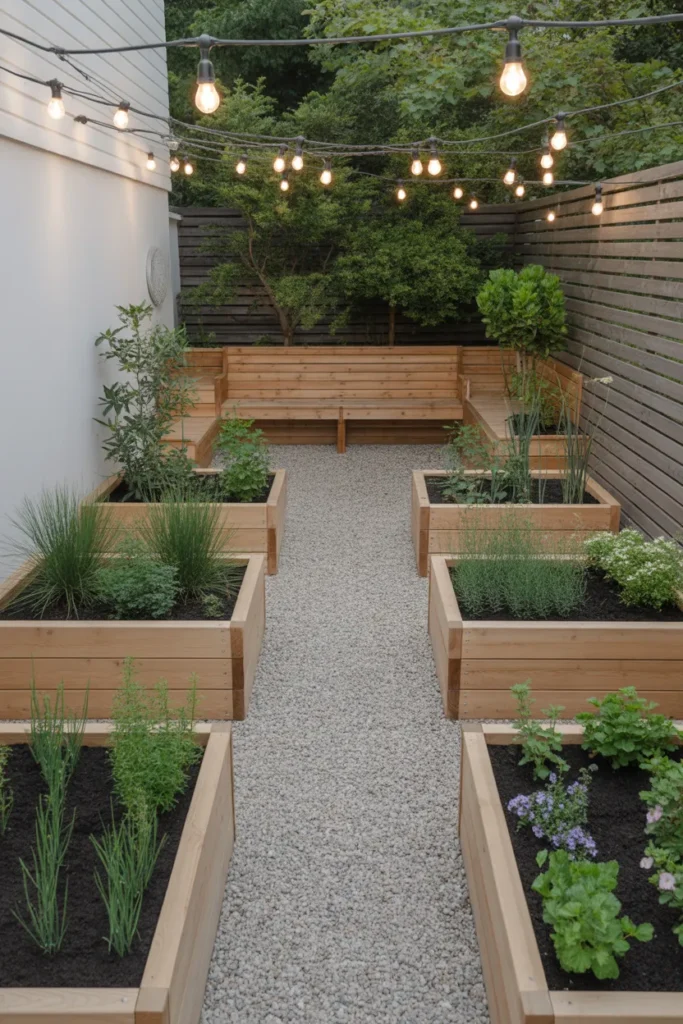
Raised beds on a gravel base means wooden or metal planting boxes sitting on a bed of pea gravel instead of muddy ground. The gravel paths between the beds stay clean and walkable year round. Two or three raised bed kits plus gravel costs roughly 150 to 350 dollars, including soil. It is the tidy version of a vegetable garden, and it suits small backyards because the whole setup has clear borders.
Keep paths wide enough: leave at least 24 inches between beds so you can walk through with a watering can and actually reach the middle of each bed. Narrower paths look fine in photos and become annoying in real life. Honest warning: raised beds dry out faster than ground soil, so in hot climates plan on watering daily in summer or add a simple soaker hose.
Use the gravel well: pea gravel is cheap, drains well, and makes the whole area look finished from day one. This suits anyone who wants to grow vegetables in a small space without the mess of dug up ground. Apartment dwellers with a small yard finally get a real garden. Skip it if you dislike bending, because beds at ground level are still low, go for waist high boxes instead.
- Space beds at least 24 inches apart for comfortable walking paths
- Fill beds with a mix of garden soil and compost, not plain topsoil
- Run a soaker hose through each bed before planting to simplify watering
Shop This Look
8. Pergola-Covered Seating Area
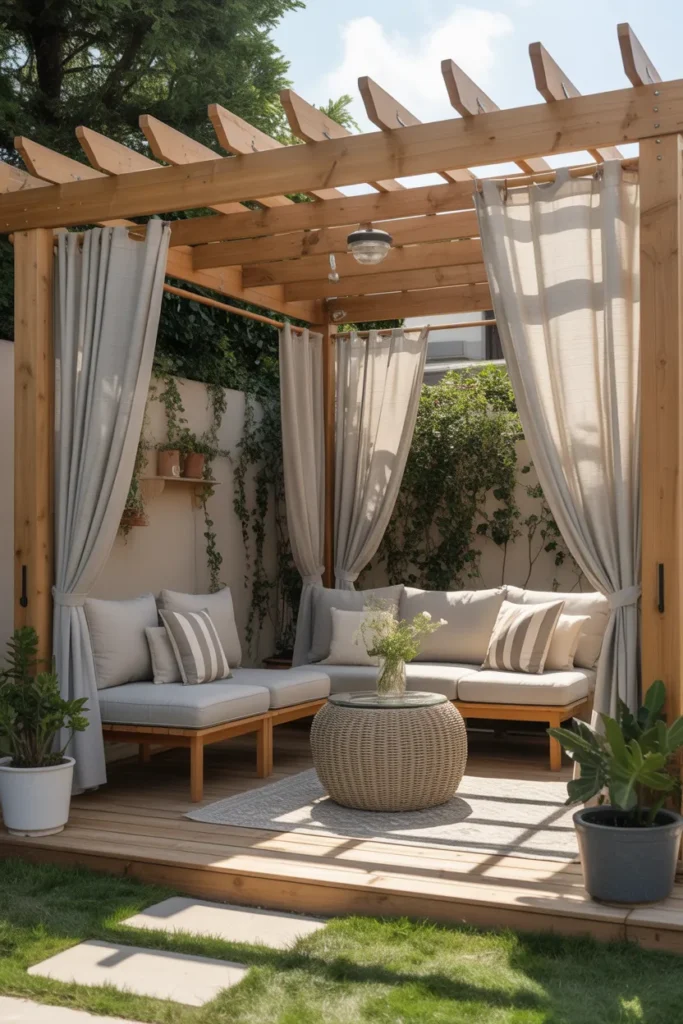
A pergola over a seating area is four posts with an open slatted roof that defines one corner of the yard as the lounge spot. It gives shade without walls, so the yard still feels open. A small metal or wood pergola kit costs roughly 150 to 500 dollars, and budget fabric ones start under 100. For a small yard, keep it to about 8 by 8 feet, big enough for a loveseat and two chairs.
Anchor it properly: a pergola that wobbles ruins the whole look and is a real safety issue. Use concrete footings or heavy ground anchors, not just the little stakes that come in some kits. Honest warning: cheap fabric top pergolas sag and collect rainwater, which then dumps on whoever sits under the edge. If you buy one, slope it slightly or remove the canopy before heavy storms.
Train a vine on it: a pergola with a climbing vine like jasmine or wisteria over the top looks twice as expensive and adds real shade within two seasons. This suits people who want an outdoor room feel without building walls, and anyone whose yard gets too much afternoon sun. If your yard is already shady, skip the pergola and go for open seating instead.
- Size it for your furniture, about 8 by 8 feet for a small lounge set
- Secure posts with concrete footings or heavy duty ground anchors
- Hang string lights along the beams for evening use
Shop This Look
9. Stone Accent Wall with Built-In Bench
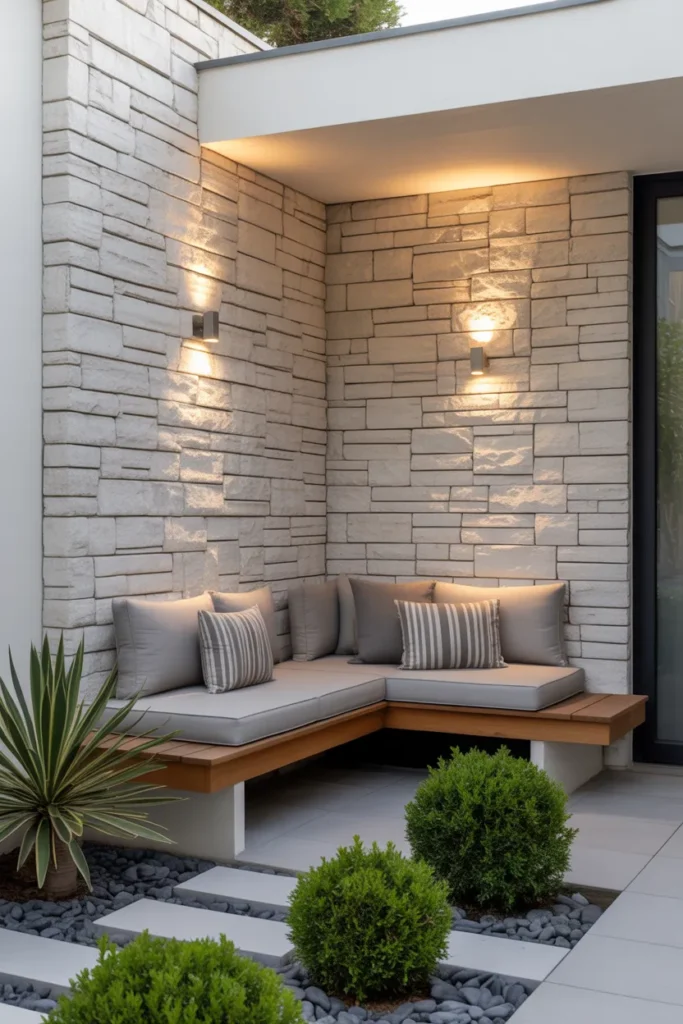
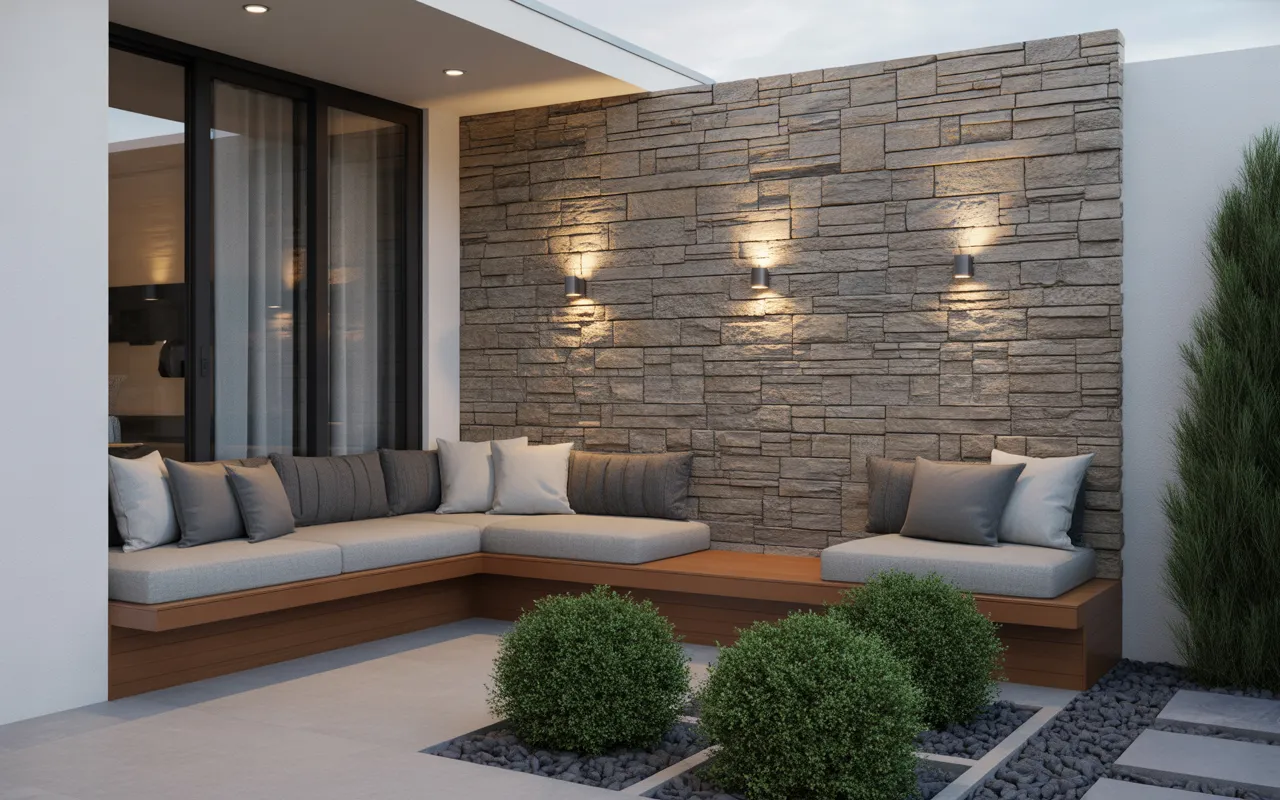
A stone accent wall with a built in bench is a low retaining style wall, usually 3 to 4 feet tall, with a flat bench top built right into it. It gives you permanent seating that never needs to be moved or stored. A DIY version with manufactured stone veneer and a wood bench top costs roughly 250 to 600 dollars in materials. A mason built wall starts around 1500 dollars, so the DIY veneer route is where the budget stays sane.
Place it against the boundary: a bench wall along the fence or property line turns dead edge space into seating and keeps the middle of the yard open. Honest warning: the bench top needs to be smooth and level or nobody will sit on it. Sand the wood top well and check the level twice before the adhesive sets, because fixing it later means taking the whole wall apart.
Add cushions in one color: one long outdoor cushion or a row of small pillows in a single neutral color makes the hard bench inviting without clutter. This suits people who entertain, because fixed seating around a small yard beats dragging chairs in and out. It also works as a planter backdrop. Less ideal if you rearrange your yard often, because this does not move.
- Keep the wall between 3 and 4 feet tall so the bench height feels natural
- Use construction adhesive plus screws for the bench top, not adhesive alone
- Seal the stone veneer yearly if your climate freezes in winter
Shop This Look
10. Compact Outdoor Dining Nook
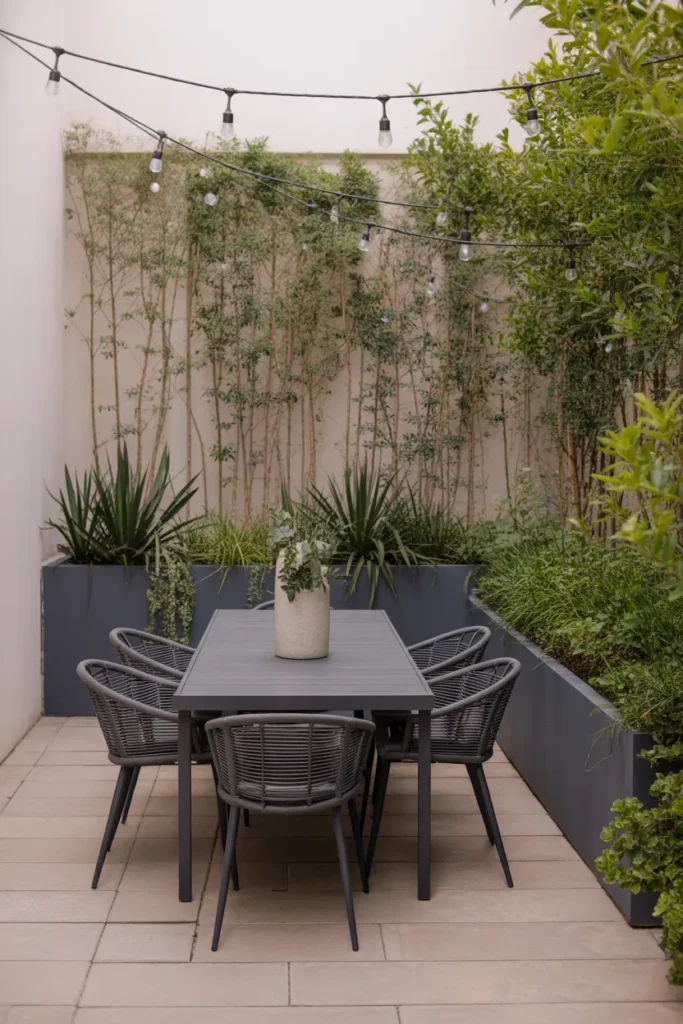
A compact outdoor dining nook is a small bistro table with two or four chairs tucked into one corner of the yard, ideally near the kitchen door. A decent bistro set costs roughly 80 to 250 dollars, and that is the whole project. The trick is placement: a dining nook in the corner feels cozy, while the same set in the middle of the yard feels crowded.
Keep the footprint tight: a 30 inch round table with two chairs needs only about a 5 by 5 foot corner. Folding chairs work if the space is really tight, and nobody minds them when they look good. Honest warning: cheap resin sets fade and go brittle in strong sun within a year or two. A metal or acacia wood set costs a bit more but lasts much longer outside.
Light it simply: one set of string lights above the table is enough to make the nook usable after dark and costs almost nothing. This suits couples and small families who eat outside in good weather, and anyone with a kitchen door opening onto the yard. If you rarely eat outside, spend the money on seating instead.
- Place the nook in a corner near the kitchen door for easy serving
- Choose metal or wood furniture over cheap resin for outdoor durability
- Hang one set of string lights above the table for evening dinners
Shop This Look
11. Sleek Water Feature Corner
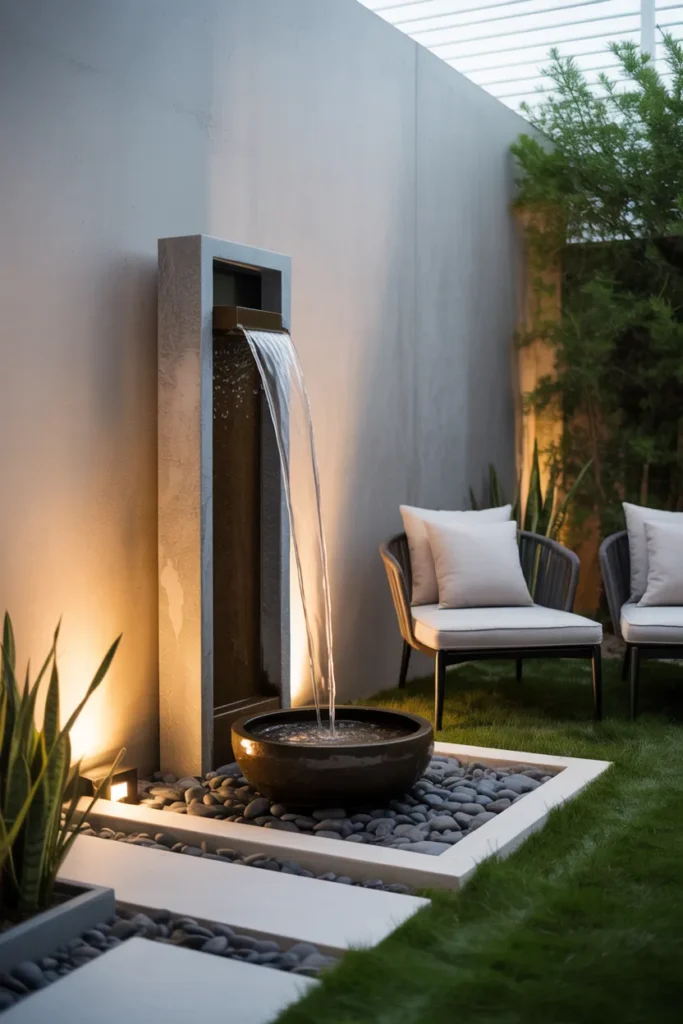
A sleek water feature corner is a modern fountain, usually a tall basin, a spill pot, or a slim wall fountain, placed in one corner with a few stones around the base. The sound of moving water makes a small yard feel calm and a bit private. A small outdoor fountain costs roughly 70 to 250 dollars. Solar powered models cost a little more but need no outlet, which matters in yards where the nearest plug is far away.
Choose one corner: a fountain in the corner you see from your main window gives you the view every day without walking out. Do not put it where you have to go looking for it. Honest warning: fountains need cleaning. Algae builds up in warm weather, so plan on a quick scrub every week or two in summer, or the sleek look turns green fast.
Go solar if you can: solar fountains work in full sun and skip the wiring hassle completely. They stop running on cloudy days, which is fine, because the yard is mostly enjoyed on sunny days anyway. This suits people who want atmosphere without plants to maintain, and anyone whose yard noise could use covering up. Less ideal where water is expensive or restricted.
- Pick a spot visible from your main indoor window or door
- Keep the fountain base level so water flows evenly on all sides
- Clean the pump filter monthly to keep the water flow strong
Shop This Look
12. Outdoor Kitchenette with Clean Lines
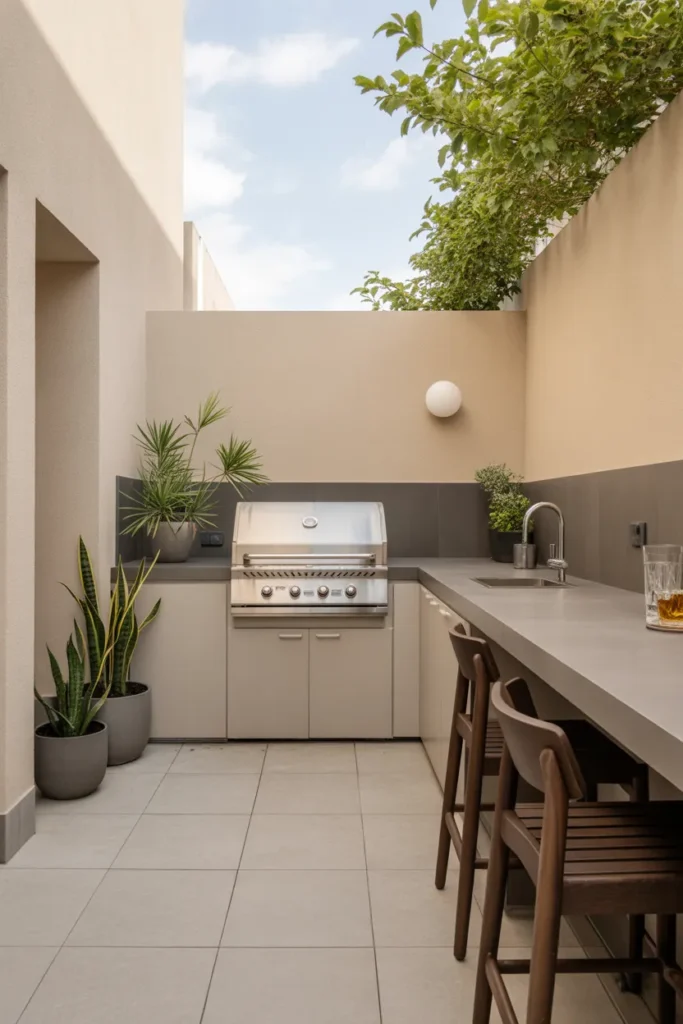
An outdoor kitchenette is a compact prep station: a small cabinet or cart with a work surface, your grill beside it, and maybe a mini fridge or storage box. No plumbing, no built in counters, just a clean work zone. A stainless steel prep cart plus a grill cover and storage costs roughly 150 to 400 dollars, assuming you already own the grill. Full modular outdoor kitchen kits start around 800 dollars, but most small yards do not have room for them.
Keep it against the house: put the prep station on the wall nearest the kitchen so you are not carrying food across the yard. Short distances make it actually get used. Honest warning: outdoor cabinets collect moisture, so skip anything made of raw particle board. Stainless steel or sealed resin cabinets survive rain, cheap wood ones do not.
One work surface is enough: a single 36 inch prep cart gives you space to plate food and hold utensils, which covers most grilling needs. This suits people who grill weekly and are tired of running back inside for every forgotten item. It also keeps grill tools organized instead of scattered. Skip it if you grill less than a few times a season.
- Place the station on the house wall closest to your indoor kitchen
- Choose stainless steel or resin storage that handles rain
- Add a small trash bin beside the cart to keep the zone tidy
Shop This Look
13. Multi-Level Deck Design
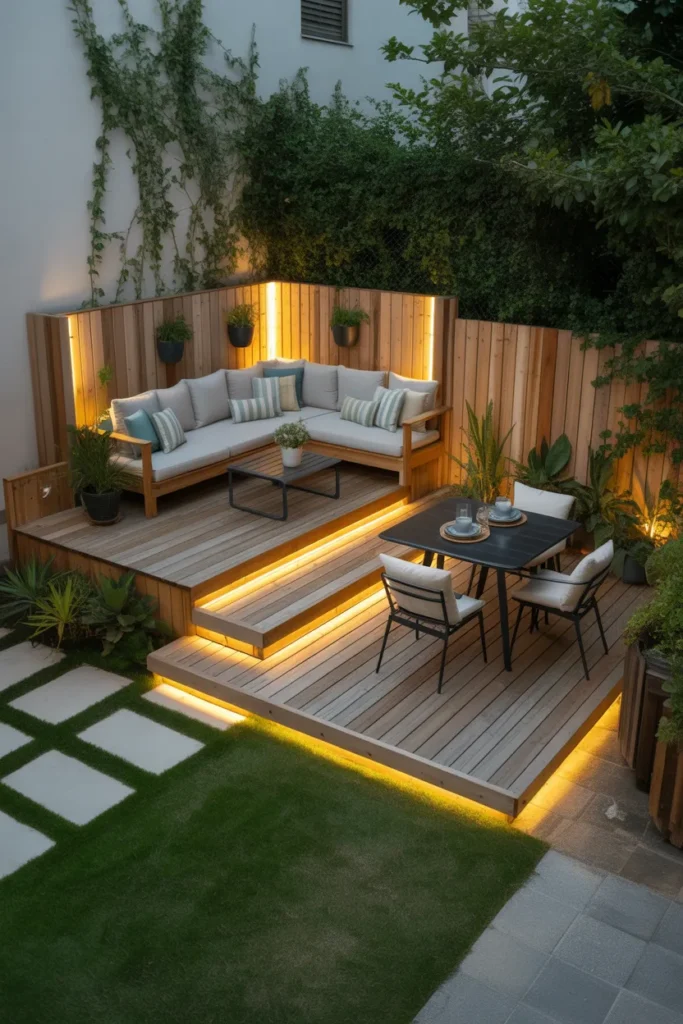
A multi level deck is two small deck platforms at slightly different heights, usually one step apart, instead of one flat deck. The levels create separate zones, one for dining and one for lounging, in a yard that has no room for that otherwise. Two small platforms with deck tiles and simple framing cost roughly 300 to 700 dollars DIY. It is more work than one flat deck, but the zoning effect is hard to get any other way in a small yard.
Keep the step low: one step of about 7 inches is enough to read as a separate level. Two or more steps in a small yard starts to feel like stairs and eats space. Honest warning: plan the step edge lighting or at least a visible edge strip. In the dark, a single step between levels is exactly the thing people trip on, and solar stair lights cost very little.
Zone with purpose: give each level one job, dining up top near the door, lounging below, or vice versa. If both levels have random furniture, it just looks like two decks. This suits yards with a slight slope, where the levels follow the natural grade and feel right. On perfectly flat ground it still works, it just needs the furniture to sell the zones.
- Make levels differ by one 7 inch step, no more
- Add solar stair lights or edge strips so the step is visible at night
- Assign one clear purpose to each level, like dining and lounging
Shop This Look
14. Contemporary Privacy Screen with Greenery
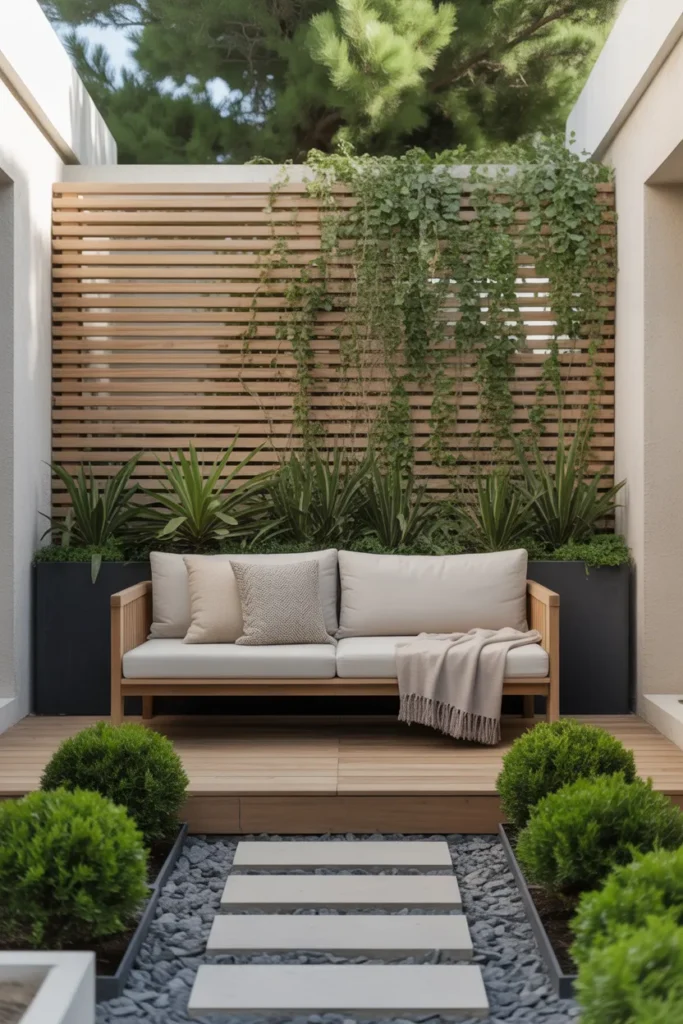
A contemporary privacy screen is a freestanding panel, usually horizontal slats in metal or wood, placed where you need privacy, with plants growing at its base or climbing through it. It reads as modern design instead of a fence. A 6 foot wide panel set costs roughly 80 to 250 dollars, plus plants. Two panels angled in a corner can hide a seating area completely in a small yard.
Angle the panels: place screens at a slight angle instead of flat against the fence. An angled panel creates a real sense of enclosure and catches light and shadow better. Honest warning: unanchored screens tip over in wind. They look light and airy, which also means they catch wind like a sail. Stake or weigh down the base properly, especially with climbing plants adding surface area.
Soften with climbers: a bare metal screen can look harsh in a small yard, so one climbing plant like clematis or jasmine at the base fixes that within a season. This suits anyone overlooked by neighbors who does not want a full tall fence, and renters who can take a freestanding screen with them. Skip it if your yard is already enclosed and private.
- Set panels at a slight angle for better enclosure and shadow play
- Anchor the base firmly so wind cannot tip the screen over
- Plant one climber per panel to soften the modern lines with green
Shop This Look
How to Start
Start by picking just one idea from this list, not three. The biggest reason small backyard projects stall is trying to do everything at once. Walk your yard for five minutes and find the spot that bothers you most. The bare corner, the ugly fence, the patch of dead grass. That spot tells you which idea to start with.
Measure the spot before you buy anything. A tape measure costs almost nothing and saves you from the classic mistake of buying a 10 foot pergola for an 8 foot corner. Write down the length and width, take a photo, and keep both on your phone when you shop. For plants, note how many hours of sun the spot gets. Full sun means 6 or more hours, part shade means 3 to 6, and guessing wrong is how plants die.
Your first shopping trip can stay under 60 dollars if you start with the basics. Most of these projects begin with preparation, not the big purchase. Clean the area, measure it, and buy the small supplies first. The furniture and plants come after the groundwork is done.
- A 25 foot tape measure and a bag of landscape fabric for the area you are starting with
- One bag of pea gravel or potting soil, depending on your chosen idea
- A set of solar path lights to see the space at night before you plan lighting
Shop This Look
Common Mistakes
- Overplanting day one: cramming in every plant you like leaves no room for growth, and within a year everything crowds together and half of it dies.
- Skipping measurements: buying furniture or structures without measuring the space first is how a pergola ends up 2 feet too wide for the corner.
- Ignoring sun direction: putting shade plants in a full sun spot or a dining nook in the hottest corner of the yard wastes money and comfort.
- Forgetting drainage: flat patios and beds with no slope or gravel base collect water, and standing water ruins pavers, wood, and plants alike.
- Mixing too many materials: stone, brick, wood, and metal all in one small yard looks chaotic. Pick two or three materials and stick with them.
- Blocking the walking path: furniture and planters placed in the natural walking line make the yard annoying to use, no matter how good it looks in photos.
- Skipping the budget buffer: projects run about 20 percent over the plan once delivery fees, extra soil, and forgotten fasteners are counted. Plan for it.
Frequently Asked Questions
How much does small backyard landscaping usually cost?
Most DIY projects in this list cost between 60 and 400 dollars in materials. Simple ideas like a gravel zen bed or a bistro nook stay under 200 dollars. Built projects like a deck with planters or a stone bench wall run 400 to 900 dollars. Hiring a landscaper usually starts around 1500 dollars for a small yard, so DIY saves real money here.
What is the cheapest way to make a small backyard look better?
Clean it up, edge the beds, and add mulch or gravel. Those three steps cost under 100 dollars and change the look more than any single purchase. After that, one set of solar string lights, around 20 dollars, makes the yard usable in the evening and instantly feels finished.
How do I make a small backyard look bigger?
Use fewer, larger elements instead of many small ones. One big paver patio reads larger than lots of small sections. Keep the color palette tight, curve paths instead of running them straight, and put the tallest plants and screens at the far end so the eye travels. For more layout ideas, see these backyard landscaping designs that show the same principles in bigger spaces.
Can I landscape a small backyard myself with no experience?
Yes, most of these ideas need no special skills. Laying pavers, filling raised beds, and hanging string lights are all beginner friendly. The projects that need care are the stone bench wall and the multi level deck, because level matters and mistakes show. Start with one of the easy ideas to build confidence first.
What plants work best in a small backyard?
Compact and vertical plants give the most green for the space. Dwarf shrubs, columnar evergreens, climbing vines on trellises, and herbs in containers all fit tight yards. Avoid aggressive spreaders like mint in open beds, and match every plant to the actual sun hours of its spot before buying.
The Finishing Touch
Before you call the project done, do one slow walk through the yard at the time of day you will actually use it. Morning coffee people should check in the morning. Evening diners should check at dusk. Look at the lighting, the seating, and the walking path with fresh eyes. Small things show up on this walk that you missed while building.
Here is the change one thing tip: if something looks slightly off, it is almost always the lighting or one oversized item. Move the biggest piece of furniture 2 feet in any direction before you buy anything new. Nine times out of ten, the arrangement was the problem, not the item.
Your one action today is simple. Pick your idea, measure the spot, and order the smallest supply on your list. Momentum comes from starting small, not from planning perfectly. The tape measure and one bag of gravel arrive this week, and by the weekend you have a real project underway.
Small yards reward people who commit to one good idea and finish it. You do not need more space, you need the right plan for the space you have. If you want more inspiration before you start, Houzz has a solid guide to small backyard ideas from landscape designers that pairs well with this list. Now pick your corner and get started.