22 Luxury Kitchen Design Inspirations High End Homes
A luxury kitchen is not about spending the most money. It is about materials that age well, proportions that feel right, and details that make daily cooking easier. Marble, custom cabinetry, and thoughtful lighting show up again and again in high end kitchens because they work, not just because they photograph well. The kitchens in this article share that practical foundation beneath the polished look.
Below you will find 22 luxury kitchen design inspirations, each broken down into what makes it work and how to adapt it to your own home. From statement islands to integrated technology, every idea includes specific product suggestions so you can bring the look home at a range of budgets.
These ideas suit full renovations and smaller refreshes alike. You do not need to gut your kitchen to borrow from them: new hardware, better lighting, or a stone backsplash can shift the whole feel. Read through, save the ideas that speak to you, and start with the one that solves your biggest frustration.
1. Marble-Clad Luxury Kitchen with Statement Island
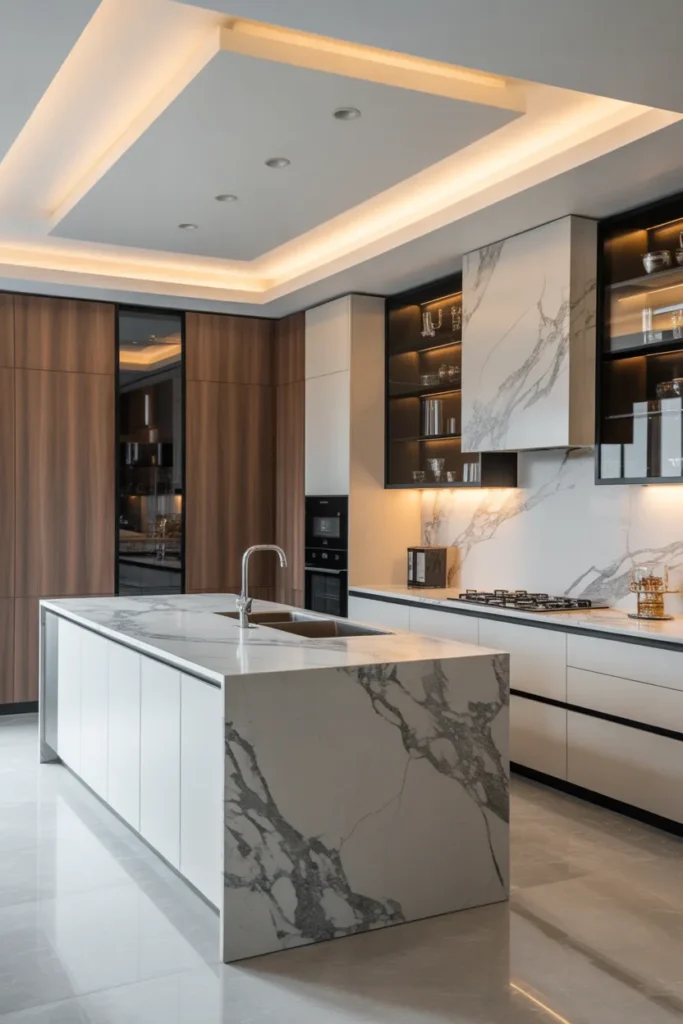
A marble clad kitchen with a statement island is the classic luxury move, and it earns the title. Real marble brings veining that no manufactured material fully copies, and wrapping it across the island and up the backsplash creates one continuous gesture. The island becomes the room’s sculpture and its workhorse at once. Keep the surrounding cabinetry quiet so the stone stays the star: flat panel cabinets in a soft white or warm gray let the veining do the talking. Scale matters here. The island should be generous but leave real walkways, and the marble slab should be chosen in person because veining varies wildly. Book matched slabs, where two pieces mirror each other, give the most dramatic effect on a large island front. Seal the stone and accept that it will develop character over time. Visit the yard with your cabinet door sample in hand so the stone and cabinetry agree. The two largest surfaces must harmonize.
Choose the slab in person: marble varies so much from slab to slab that choosing from a sample chip is a gamble. Visit the stone yard and look at full slabs in natural light. Photograph the ones you like and live with the photos for a few days. Check the veining direction, because the fabricator will cut along it. Ask about book matching for the island front, which mirrors two slabs for a symmetrical pattern. Confirm the finish: honed marble looks softer and hides etching better than polished. Get the slab reserved in writing before you finalize cabinet measurements, because the island dimensions follow the stone. Ask the yard about remnants for smaller pieces like a pastry board or windowsill. Matching offcuts stretch the luxury further.
Seal and maintain it: marble is porous, so sealing is not optional. Have the fabricator seal it at install and reseal every six to twelve months depending on use. Wipe up acids fast: lemon, wine, and vinegar etch the surface if they sit. Use cutting boards and trivets, and keep a stone safe cleaner under the sink instead of bleach sprays. Honed finishes are more forgiving than polished ones for daily life. If the maintenance sounds like too much, quartzite gives you marble like veining with much harder wear. Either way, the island stays the star of the room. Keep a small bottle of the sealer under the sink as a reminder. Seeing it prompts the routine before the stone looks thirsty.
- View full slabs at the stone yard in natural light before committing.
- Ask about book matching for a dramatic mirrored island front.
- Seal at install and reseal every 6 to 12 months; wipe acids quickly.
Shop This Look
2. Modern Luxury Kitchen with Dark Tones and Metallic Accents
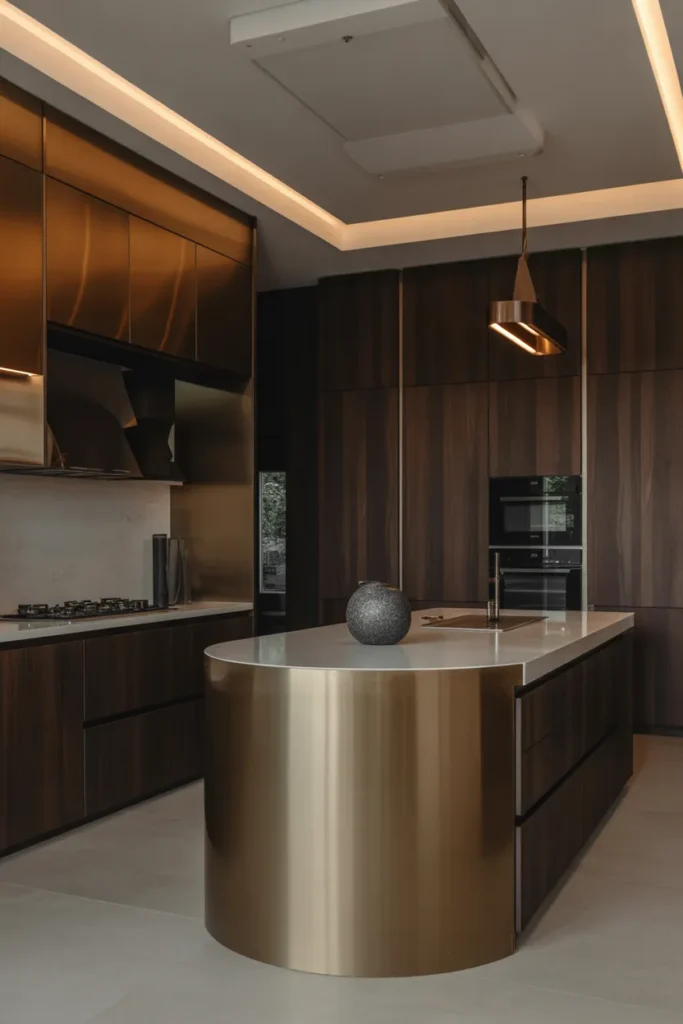
Dark tones with metallic accents create a luxury kitchen that feels moody and rich rather than bright and airy. Deep charcoal, espresso, or near black cabinetry grounds the room, while brass, copper, or champagne bronze hardware and fixtures add the glow. The contrast is what makes it work: without the metal, dark cabinets can feel flat; without the dark, the metal has nothing to play against. Balance the darkness with good lighting, because dark kitchens need more of it. Under cabinet strips, island pendants, and glass front cabinets with interior lights keep the room from feeling like a cave. A lighter countertop or backsplash between dark uppers and lowers adds a breathing band. This palette hides cooking wear beautifully and looks stunning in the evening, when the metallics catch the light. Test the dark cabinet color on a large board in your kitchen’s light before ordering. Small chips lie about dark colors.
Light it generously: dark kitchens need more light than light ones, so plan for it from the start. Add under cabinet LED strips for task light on the counters. Hang pendants over the island with real wattage, not just decorative bulbs. Consider glass front uppers with interior lighting to break up the dark runs. If the kitchen has a window, keep the treatment minimal to maximize daylight. Use 3000K warm white so the dark tones read rich rather than cold. Put the layers on separate dimmers so you can go from bright prep mode to moody dinner mode. Light is the ingredient that makes dark luxury work. Consider a dark range hood in the same finish to extend the moody palette upward. The vertical continuity looks custom.
Pick one metal and commit: mixed metals can work, but in a dark kitchen one dominant metal looks more expensive. Brass and champagne bronze warm up charcoal and black beautifully. Polished nickel or chrome suits a cooler, more modern dark palette. Repeat your chosen metal in the faucet, hardware, pendant details, and even small appliances if possible. Keep the metal finish consistent: all brushed or all polished, not a mix. This repetition is what reads as intentional design rather than a collection of parts. If you want a second metal, limit it to one small accent like bar stools legs. Keep small appliances in black or steel so the countertop stays in the palette. One white toaster can break the spell.
- Plan more lighting than a light kitchen: under cabinet, pendants, and glass fronts.
- Choose one dominant metal and repeat it in faucet, hardware, and fixtures.
- Add a lighter counter or backsplash band to keep dark cabinets from feeling heavy.
Shop This Look
3. Luxury Kitchen with Custom Wood Cabinetry and Stone Surfaces
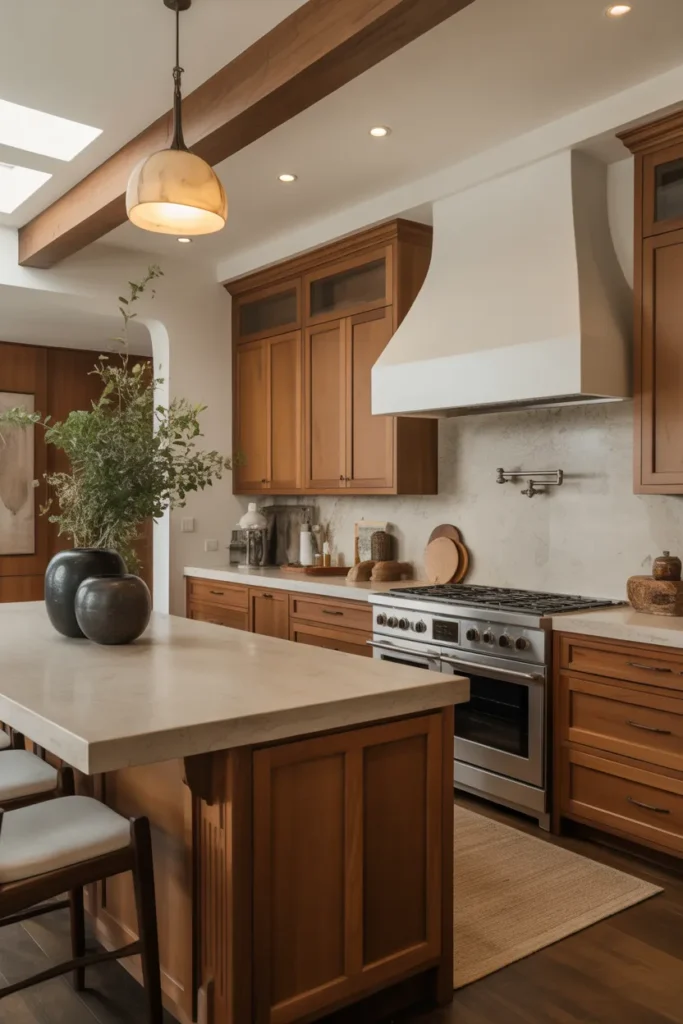
Custom wood cabinetry paired with stone surfaces is luxury that feels warm instead of cold. Wood brings grain, tone variation, and a crafted feel that painted cabinets cannot match. White oak, walnut, and rift sawn finishes are the current favorites, each with its own character. Pair the wood with a stone that complements rather than competes: a quiet quartzite or a honed marble with soft veining. The combination works because the materials are both natural and both age gracefully. Custom means the cabinets fit your space exactly, with interiors planned around how you cook: deep drawers for pots, vertical dividers for trays, a proper spice setup. That fitted feeling is a big part of what reads as luxury. It costs more than stock, but the daily ease pays back every time you open a drawer that was designed for what is inside it. Ask the cabinet maker for a sample door to live with for a week. Wood changes character as you see it daily.
Choose the right wood: each wood species sets a different tone. White oak is light, versatile, and takes stain evenly, which makes it the safe luxury pick. Walnut is darker and richer, dramatic but less forgiving with wear. Rift sawn oak shows straight grain with minimal cathedral patterns for a calm modern look. Ask to see large samples, not just chips, because grain varies. Consider how the wood will age: most woods deepen in color with light exposure. Match the wood tone to your floors carefully; too close looks like a failed match, while deliberate contrast looks designed. Get the finish in writing, including sheen level. Plan a dedicated tray divider near the dishwasher so unloading flows naturally. Small workflow details define custom quality.
Plan the interiors: custom cabinetry earns its price inside, not just outside. Map your actual items to each cabinet before the design is finalized. Deep drawers with peg systems for dishes, pull out shelves for small appliances, a tall narrow pull out for oils and spices near the range. Include electrical outlets inside an appliance garage so the counters stay clear. Soft close on every hinge and drawer slide is mandatory at this level. A well planned interior means everything has a home, which keeps the beautiful exterior uncluttered. Walk the designer through a real cooking session so nothing is missed. Oil the wood interiors once a year to keep them beautiful. The inside deserves care too.
- View large wood samples to judge grain; white oak is the versatile pick.
- Match wood tone to floors with deliberate contrast, not near matches.
- Map your real cookware to each cabinet interior before finalizing the design.
Shop This Look
4. Sleek White Luxury Kitchen with Architectural Lighting

A sleek white luxury kitchen with architectural lighting proves that white can be dramatic. The trick is treating light as a building material: cove lighting along the ceiling, under cabinet strips, toe kick glows, and pendants with sculptural form. In an all white kitchen, the lighting creates the shadows and highlights that give the room depth. Without it, white can feel flat; with it, the same room feels gallery like. Keep the cabinetry handleless or with minimal edge pulls so the lines stay clean. Choose a white with a hint of warmth so the room does not feel clinical under all that light. A single natural material, like a wood island base or a stone with soft veining, keeps the white from feeling sterile. This is minimalism done warmly, and it photographs beautifully because every surface bounces light. Dim the architectural layers separately from task lights for true mood control. Independence of layers is the luxury.
Layer architectural light: architectural lighting means light built into the structure, not just fixtures. Add LED coves where the ceiling meets the wall for a floating effect. Run strips under every upper cabinet and under the island overhang. Put a glow at the toe kick so the cabinetry seems to hover at night. Each layer needs its own switch or dimmer so you can compose the mood. Use high CRI LEDs so whites render true and food looks appetizing. Hide the LED channels with diffusers so you see glow, not dots. This built in light is what separates a luxury white kitchen from a plain one. Choose a simple pendant shape; in a white kitchen the light quality matters more than the fixture’s silhouette.
Warm up the white: the wrong white under bright light feels like a laboratory. Choose whites with warm undertones: soft ivory, warm bright white, or white with a whisper of beige. Test samples under your actual lighting, because showroom light lies. Balance the white with one warm material: a wood floor, oak island stools, or a brass faucet. Textiles help too: a runner in a natural fiber softens the hard surfaces. Keep the ceiling the same warm white so there is no visible line. The goal is a white kitchen that feels like morning light, not a dentist office. Keep the window treatments minimal to protect the daylight the design depends on. Every photon counts in white.
- Build light into the architecture: coves, under cabinet, and toe kick layers.
- Use high CRI LEDs with diffusers so you see glow instead of dots.
- Pick warm undertone whites and add one natural material for warmth.
Shop This Look
5. Open-Concept Luxury Kitchen with Grand Island Seating
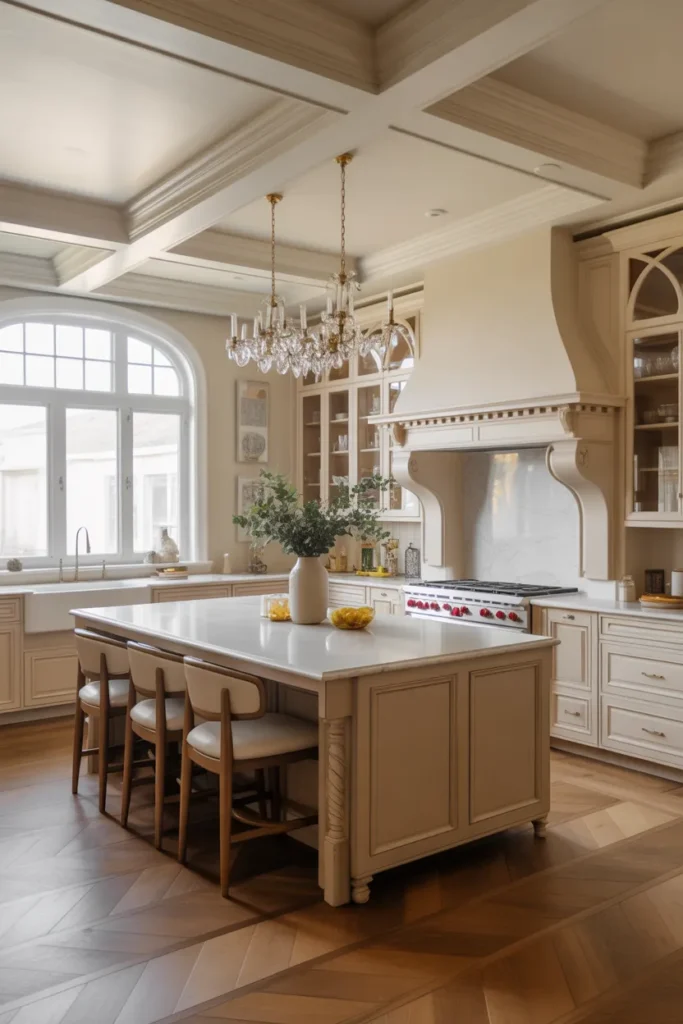
An open concept luxury kitchen with grand island seating turns cooking into a social event. The island is the anchor: deep enough for prep on one side and seating on the other, long enough to gather a crowd. A grand island usually runs 8 to 10 feet, with seating for four to six on comfortable counter stools. The open concept part means the kitchen flows into the living and dining areas with no walls breaking the sight lines. That flow demands coordination: the kitchen materials should speak to the adjoining rooms so the whole space feels like one home. Keep the island’s working side equipped and the seating side clean; the back of the island facing the living room should look like furniture, with paneling or a waterfall edge. This is the kitchen for people who entertain, and it works because the cook stays part of the conversation. Walk the island route with a laundry basket to test clearances in real life. If the basket fits, the layout works.
Size the island right: a grand island needs grand clearances. Allow 42 to 48 inches of walkway on the working sides and at least 36 inches behind the seating. The seating overhang should be 12 to 15 inches deep so knees fit comfortably. Counter height seating at 36 inches uses counter stools; bar height at 42 inches uses bar stools, so decide before ordering. Plan one outlet per seating section for laptops and phone charging, placed under the overhang. If the island houses the sink or cooktop, keep the seating to one side only. Measure twice, because an island that crowds the room ruins the open feel you are after. Choose stools with backs for the seating side if people linger over meals. Comfort extends the gathering.
Make the back beautiful: in an open concept home, the back of the island faces the living room all day. Treat it like furniture, not the back of a cabinet. Panel it, wrap it in the same stone as the top with a waterfall edge, or add open shelving for cookbooks and display. Hide the working clutter on the kitchen side: the sink, the dish rack, the small appliances. Run the prettiest materials on the public side. Add pendant lights above that look good from the living room too, since they read as living room decor. When the island looks finished from every angle, the open concept feels seamless. Add a discreet paper towel holder inside a nearby cabinet door. The seating side stays pristine.
- Allow 42 to 48 inches of walkway on working sides of a grand island.
- Give 12 to 15 inches of knee overhang for comfortable seating.
- Finish the living room facing side like furniture with paneling or waterfall stone.
Shop This Look
6. Contemporary Luxury Kitchen with Waterfall Stone Island

A waterfall stone island, where the countertop material flows down the sides to the floor, is one of the most striking moves in luxury kitchen design. The continuous stone creates a sculptural block that anchors the whole room. It works best with dramatic stone: bold veining or rich color that deserves the showcase. The mitered edge, where the top meets the side at a crisp 45 degree joint, is the detail that makes it look seamless. This is a fabricator skill check, so choose your stone shop by seeing their waterfall work in person. The waterfall sides also protect the island ends from kicks and scuffs better than cabinetry. Keep the rest of the kitchen calm so the island holds the spotlight. One waterfall island per kitchen is plenty; two would fight for attention. Photograph the slab before cutting and approve the layout digitally. You should see exactly where each vein lands.
Vet the fabricator: a waterfall edge lives or dies on the mitered joint. Ask the fabricator to show you completed waterfall islands, not just photos. The joint should be nearly invisible, with the veining aligned so the pattern flows from top to side. Ask how they reinforce the joint and what their policy is if it chips. Get the seam placement in writing before cutting starts. Thicker slabs, 3cm rather than 2cm, give a more substantial edge. A good fabricator will want to template the island in person rather than working from drawings alone. This is not the place to choose on price. Protect the waterfall edges during the rest of the renovation with padding. The crisp miter chips easily before handover.
Choose dramatic stone: a waterfall island wastes its potential on a quiet stone. This is the moment for bold veining, dramatic color, or striking pattern. Marble with strong movement, quartzite with vivid veins, or even a dark dramatic granite all earn the waterfall treatment. View the full slab and imagine it wrapping the island. Consider how the veining will align at the miter; the fabricator can plan the cut so the pattern continues. Keep surrounding surfaces quieter so the island dominates. If the budget allows only one splurge in the kitchen, many designers would put it here. Budget for the mitered edge as a separate line item; it is skilled labor worth paying for.
- Inspect the fabricator’s finished waterfall joints in person before hiring.
- Use 3cm slabs and align veining across the mitered edge.
- Pick a bold dramatic stone; quiet stone wastes the waterfall effect.
Shop This Look
7. Luxury Kitchen with Two-Tone Cabinetry and Gold Hardware
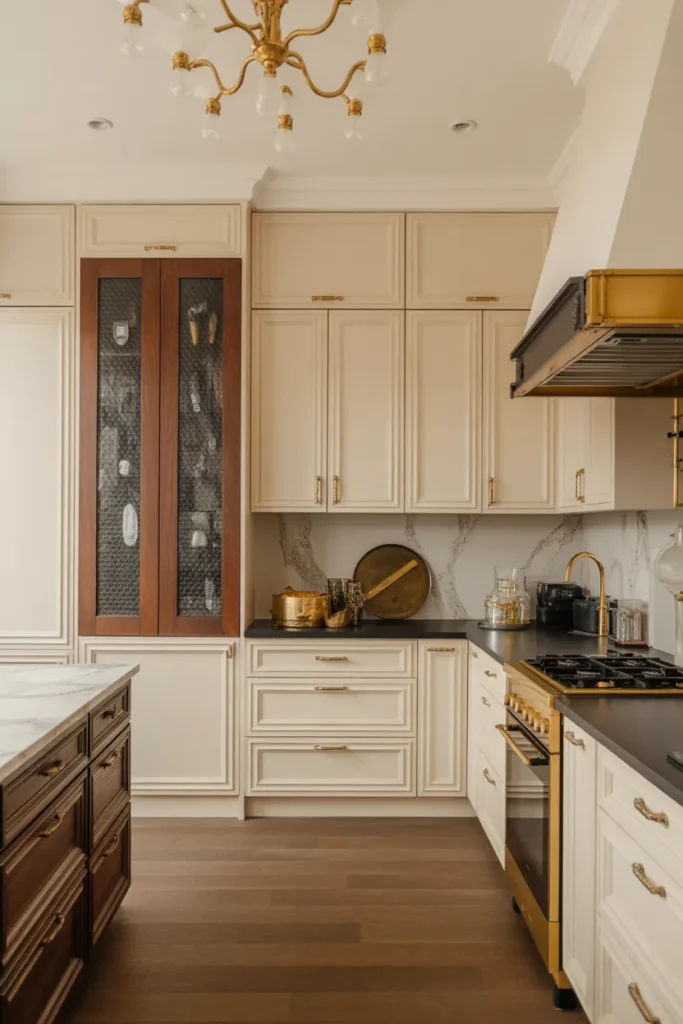
Two tone cabinetry with gold hardware is luxury with personality. The classic formula puts a darker color on the island or lower cabinets and a lighter shade up top, which grounds the room while keeping it bright. Navy and white, deep green and cream, charcoal and warm gray all work. The gold hardware is the jewelry: brass or champagne bronze pulls, knobs, and faucet that warm up the whole palette. The two tones need a clear logic, or the kitchen looks indecisive. Common splits: island different from perimeter, lowers different from uppers, or a tall pantry wall in an accent color. Keep the countertop and backsplash neutral so they bridge the two tones instead of adding a third voice. This approach gives you color without commitment to a fully colored kitchen, and repainting one section later is easy. Order hardware samples and test them against both cabinet colors before buying in bulk. Metal shifts against different paints.
Define the split logic: the two tones need a reason, or the kitchen looks random. The safest split is a colored island with a neutral perimeter; the island becomes the furniture piece. Another classic is darker lowers with lighter uppers, which grounds the room. A third option is an accent pantry or range wall in the bold color. Whatever you choose, apply it consistently: every cabinet in that zone gets the color. Keep the interior of glass cabinets neutral so dishes do not clash. Write the split into the cabinet order clearly, because miscommunication here is expensive. One logic, applied fully, looks intentional. Paint the island first as a test, since it is the boldest move. If you love it there, the rest follows.
Get the gold right: not all gold finishes are equal. Unlacquered brass develops a patina that many people love but some find unpredictable. Lacquered brass and champagne bronze stay consistent. Match the hardware finish to the faucet for cohesion. Test the finish against your cabinet colors in person, because gold can read very differently against navy versus white. Keep the gold to the jewelry: hardware, faucet, light fixtures. Large gold appliances or range hoods can tip into excess. When the gold is the consistent accent across a two tone kitchen, the whole room glows. Keep the ceiling bright white to lift the two tone palette. The ceiling is the unsung third color.
- Give the two tones a clear logic: island, lowers, or one accent wall of cabinets.
- Match hardware finish to the faucet for a cohesive jewelry layer.
- Keep counters and backsplash neutral to bridge the two cabinet colors.
Shop This Look
8. High-End Kitchen with Floor-to-Ceiling Cabinets
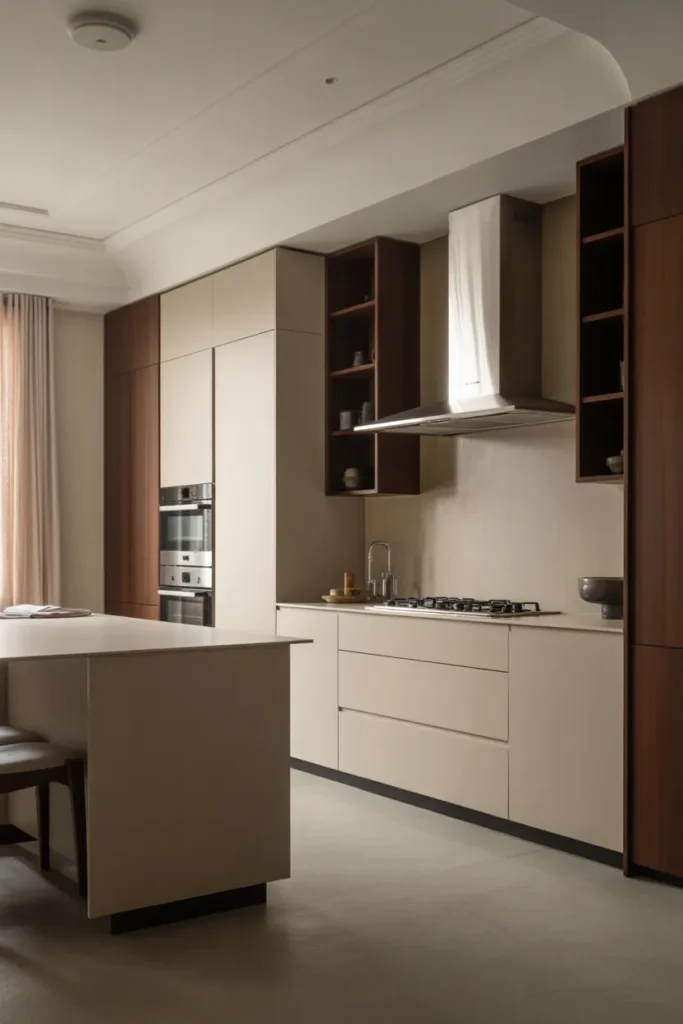
Floor to ceiling cabinets deliver luxury through sheer storage capacity and a tailored look. Running cabinetry all the way up eliminates the dust collecting gap above uppers and gives you a wall of seamless storage. The tall units are perfect for a pantry wall: deep enough for bulk items, fitted with pull outs so nothing gets lost. The look is architectural, almost like millwork, especially when the cabinets are flat panel with minimal hardware. To keep it from feeling like a wall of boxes, break the run with one open niche or a set of glass fronts with interior lighting. That single pause gives the eye a resting place and shows off beautiful dishes. This approach suits kitchens where storage is the priority and the cook wants everything behind closed doors. The result feels custom because it is so precisely fitted. Measure your tallest items before finalizing shelf heights. The top shelf should fit what you actually store up there.
Plan the pantry wall: a floor to ceiling run earns its keep as a pantry wall. Designate full height cabinets for food storage with pull out shelves so items at the back stay reachable. Include a tall narrow pull out for baking sheets and cutting boards. If the wall includes the fridge, panel it to match so the whole run reads as one. Add interior outlets in one cabinet for a charging drawer that hides phones and tablets. Keep daily items between knee and shoulder height; seasonal items can live at the very top with a step stool nearby. A well planned pantry wall can replace a walk in pantry in many homes. Add a step stool that lives in the pantry wall itself, perhaps on a hook inside a tall door. Access must be easy.
Break it with a niche: an unbroken wall of tall cabinets can feel imposing, so plan one deliberate interruption. A counter height niche with a stone backsplash creates a coffee or appliance station within the run. Glass front cabinets with interior lighting display dishes and add depth. An open shelf section at eye level holds cookbooks and a small plant. The break should be functional, not just decorative, so it earns its place. Light the niche separately so it glows in the evening. One well placed pause turns a storage wall into architecture. Keep a consistent gap between the cabinet tops and ceiling trim for a tailored fit. Precision reads as custom.
- Run cabinetry to the ceiling to kill the dust gap and maximize storage.
- Fit the tall run as a pantry wall with pull outs for full access.
- Break the run once with a lit niche or glass fronts for depth.
Shop This Look
9. Luxury Kitchen with Natural Stone Backsplash
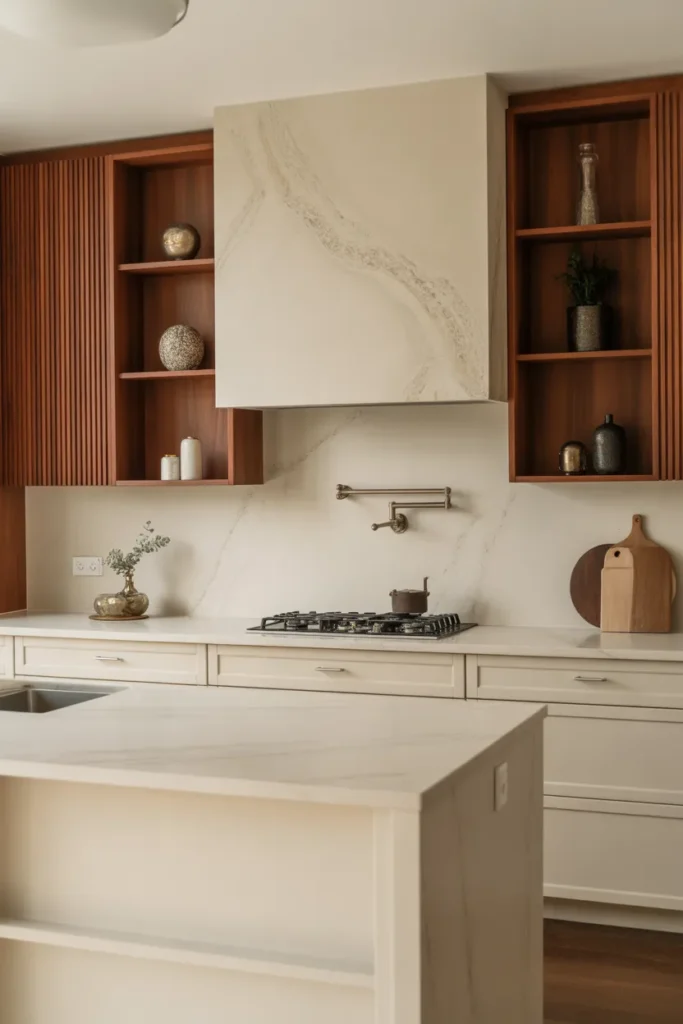
A natural stone backsplash brings the outdoors into a luxury kitchen in the most literal way. Instead of tile, a full slab of marble, quartzite, or travertine runs from counter to ceiling behind the range or sink. The veining becomes art, and there are no grout lines to clean. This works best as a single feature wall rather than around the whole kitchen; one dramatic slab has more impact than stone everywhere. Choose a stone that relates to your countertop: the same stone for total continuity, or a complementary one for contrast. The slab needs to be templated precisely around outlets and the range, so involve the fabricator early. Seal it like any natural stone. The result is a backsplash that looks like it was always meant to be there, because it was cut for exactly that spot. Seal the stone before the range is installed to avoid working around it. Bare stone seals more evenly.
Template it precisely: a slab backsplash has no grout to hide mistakes, so the templating must be exact. The fabricator should laser template after the cabinets and counters are installed, not before. Mark every outlet, switch, and fixture location on the template. Decide whether outlets sit in the stone or in the cabinet above; many luxury kitchens move them under the uppers to keep the slab clean. Confirm the slab thickness matches the countertop edge for a continuous look. Ask how the slab is supported behind the range, where heat is highest. Precision here is what makes the wall look effortless. Choose a simple edge profile so the veining, not the edge, is the detail. restraint lets the stone star.
Choose the feature zone: one stone wall is a feature; stone everywhere is just expensive. The classic spot is behind the range, where the cooking happens and the eye naturally goes. A full height slab behind the sink works too, especially with a window above. Keep the other walls in a quiet complementary tile or plaster so the stone holds the spotlight. If the budget allows, run the same stone up as a full height backsplash on the island side facing the room. Restraint with placement is what keeps the stone feeling special rather than expected. Photograph the installed slab for your records and future matching. Documentation helps years later.
- Laser template after cabinets and counters are installed for exact fit.
- Consider moving outlets under uppers to keep the slab unbroken.
- Limit the slab to one feature wall so it stays special.
Shop This Look
10. Minimalist Luxury Kitchen with Integrated Technology
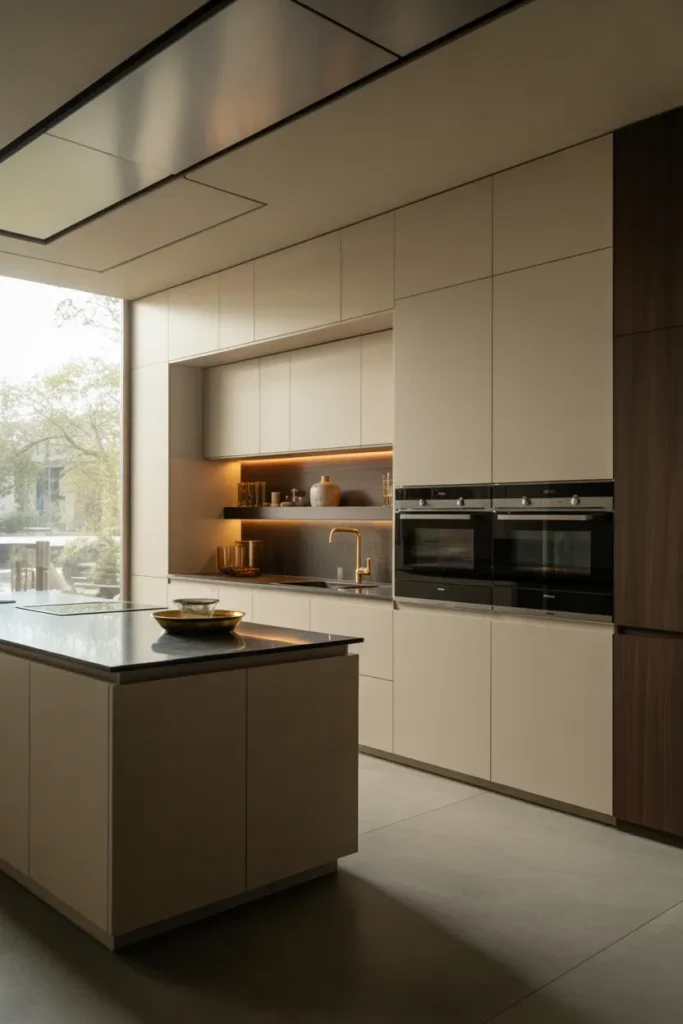
Integrated technology is the quiet luxury of the modern kitchen: everything works better, but nothing shows. Appliances disappear behind cabinet panels, so the fridge and dishwasher read as furniture. Touch to open drawers eliminate handles. Charging drawers hide the tangle of devices. Smart ovens preheat from your phone, and induction cooktops boil water in minutes with precise control. The luxury is in the absence of clutter and friction. Plan the technology during the design phase, because retrofitting is expensive. Run extra circuits and data lines while the walls are open. Choose one smart ecosystem so the devices talk to each other instead of each needing its own app. The best integrated kitchen feels almost analog: calm surfaces, hidden power, everything exactly where your hand expects it. Create a single page with all device logins and keep it in the appliance garage. Future you will need it.
Panel the appliances: panel ready appliances take cabinet fronts so they vanish into the run. The fridge becomes a tall cabinet, the dishwasher a drawer base. Order the panels with the cabinetry so the finish matches exactly. Check that the appliance accepts custom panels before buying; not all models do. Confirm the panel weight is within the appliance’s rating, especially for dishwashers. Integrated models cost more than freestanding, but the visual calm is the whole point. In a luxury kitchen, the fewer visible appliances, the more expensive the room looks. Test the touch to open drawers with wet hands before committing throughout. Real cooking conditions reveal flaws.
Wire for the future: technology changes faster than cabinets, so wire generously while walls are open. Run extra 20 amp circuits to the island and pantry for appliances you might add later. Add USB and standard outlets inside drawers for charging stations. Consider a dedicated circuit for a future steam oven or wine fridge. Run conduit to key spots so new cables can be pulled later without opening walls. This invisible infrastructure is the cheapest luxury you can buy during a renovation, and the most expensive to add afterward. Keep one traditional handle somewhere, like the pantry, as a backup. Total commitment can backfire.
- Order cabinet panels with the cabinetry for an exact finish match.
- Confirm panel ready compatibility and weight ratings before buying.
- Run extra circuits and conduit while walls are open for future tech.
Shop This Look
11. Luxury Kitchen with Sculptural Pendant Lighting
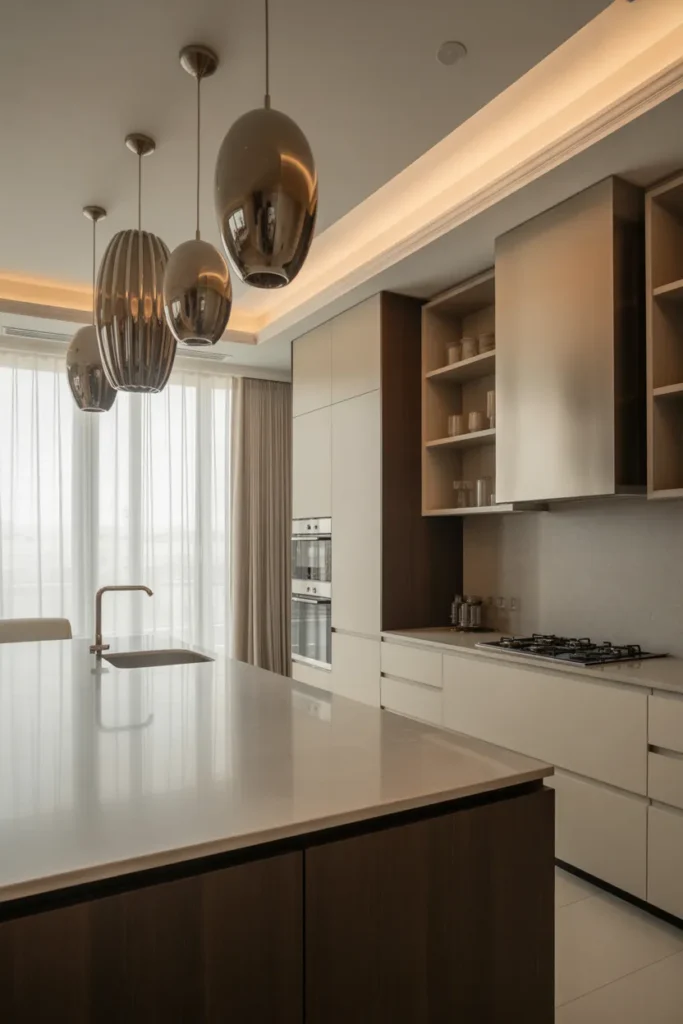
Sculptural pendant lighting turns the island into a gallery piece. Instead of three identical small pendants, one or two statement fixtures with real presence anchor the kitchen. Think oversized globes, hand blown glass clusters, or a linear chandelier with architectural form. The fixtures should be beautiful from every angle, because in an open kitchen they are seen from the living room too. Scale them to the island: the total fixture width should span about half to two thirds of the island length. Hang them 30 to 36 inches above the countertop so they light the work surface without blocking sight lines. Choose dimmable bulbs so the same pendants go from task lighting to dinner ambiance. This is the jewelry of the kitchen, and like jewelry, one great piece beats several small ones. Check the fixture’s light output in lumens, not just its looks. A beautiful dim pendant fails as task light.
Scale to the island: pendant scale is the difference between jewelry and clutter. For a single statement pendant over an island, the fixture diameter should be roughly one half to two thirds of the island width. For a linear fixture, its length should span about two thirds of the island length. Hang the bottom of the shade 30 to 36 inches above the counter. In kitchens with high ceilings, add a longer drop rather than a bigger shade. If the island seats people, make sure the fixtures do not hang in anyone’s sight line across the table. Measure the island, then shop with those numbers in hand. Install a second junction box when in doubt about placement; capping it is cheap. Flexibility during install is gold.
Make them dimmable: statement pendants work hardest when they can shift moods. Wire them on a dedicated dimmer separate from the recessed lights. Choose LED bulbs that dim smoothly without flicker; check the bulb and dimmer compatibility list. Warm dim bulbs that shift color temperature as they dim mimic candlelight beautifully. In the evening, dim the pendants low while keeping under cabinet strips on for a layered glow. The ability to go from bright prep to soft entertaining with one slider is everyday luxury. Clean glass fixtures quarterly, since kitchen grease dulls them faster than elsewhere. Clarity preserves the glow.
- Size fixtures to half or two thirds of the island length or width.
- Hang 30 to 36 inches above the counter, clear of sight lines.
- Wire pendants on their own dimmer with compatible warm dim LEDs.
Shop This Look
12. High-End Kitchen with Matte Finishes
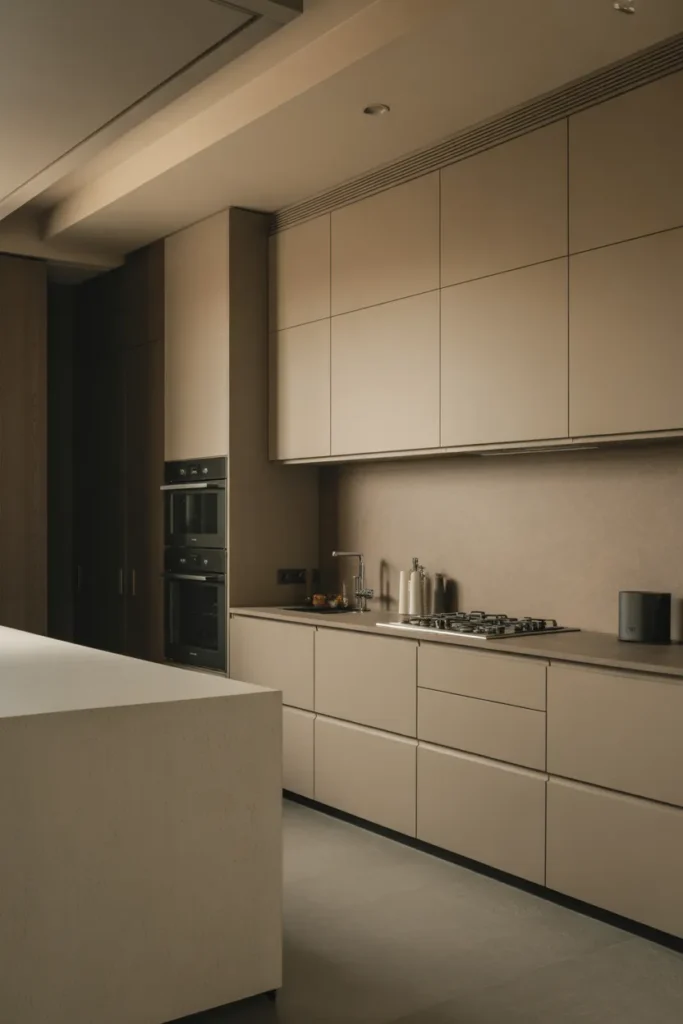
Matte finishes give a luxury kitchen a soft, modern calm that gloss cannot match. Matte cabinet paint, honed stone, brushed metals, and matte tile all absorb light instead of reflecting it, which makes the room feel quiet and expensive. Fingerprints show less on matte cabinetry than on gloss, a real advantage around cooking zones. The key is layering different matte textures so the room has depth: a matte cabinet, a honed counter, a brushed faucet, a soft plaster wall. If everything is the same flat finish, the room can feel dull; varied textures keep it interesting. Matte black fixtures against matte cabinetry need a slight tone difference to read, so test samples together. This is the finish palette of contemporary luxury: understated, tactile, and forgiving. Test matte samples with greasy fingers before committing; some mattes mark worse than others. Real life testing beats showrooms.
Layer matte textures: one matte surface is flat; four matte textures are rich. Combine matte painted cabinets with honed stone counters, brushed metal hardware, and a matte handmade look tile. Each surface absorbs light a little differently, creating subtle variation. Add one contrasting texture for relief: a wood cutting board, a woven runner, or leather stool seats. Keep the palette tight so the textures, not the colors, do the talking. Test the combination under your kitchen lighting, because matte surfaces shift more with light direction than gloss. The layered result feels calm but never boring. Keep a dedicated soft cloth for the matte surfaces so grit never scratches. The right tool protects the finish.
Maintain them gently: matte finishes need gentle care to stay beautiful. Wipe cabinets with a soft damp cloth and mild soap; avoid abrasive pads that polish the matte into shiny spots. Honed stone needs sealing like any natural stone. Brushed metals clean with a soft cloth; harsh chemicals can streak the finish. Keep a consistent cleaning routine rather than aggressive periodic scrubbing. The good news is that matte hides daily wear better than gloss, so gentle regular care is usually enough. Treat the finishes kindly and they will look new for years. Avoid placing matte black next to glossy black appliances; the clash reads as accidental. Commit to matte throughout.
- Combine four or more matte textures for depth: cabinets, stone, metal, tile.
- Add one contrasting texture like wood or leather for relief.
- Clean with soft cloths and mild soap; avoid abrasives on matte surfaces.
Shop This Look
13. Luxury Kitchen with Double Island Layout
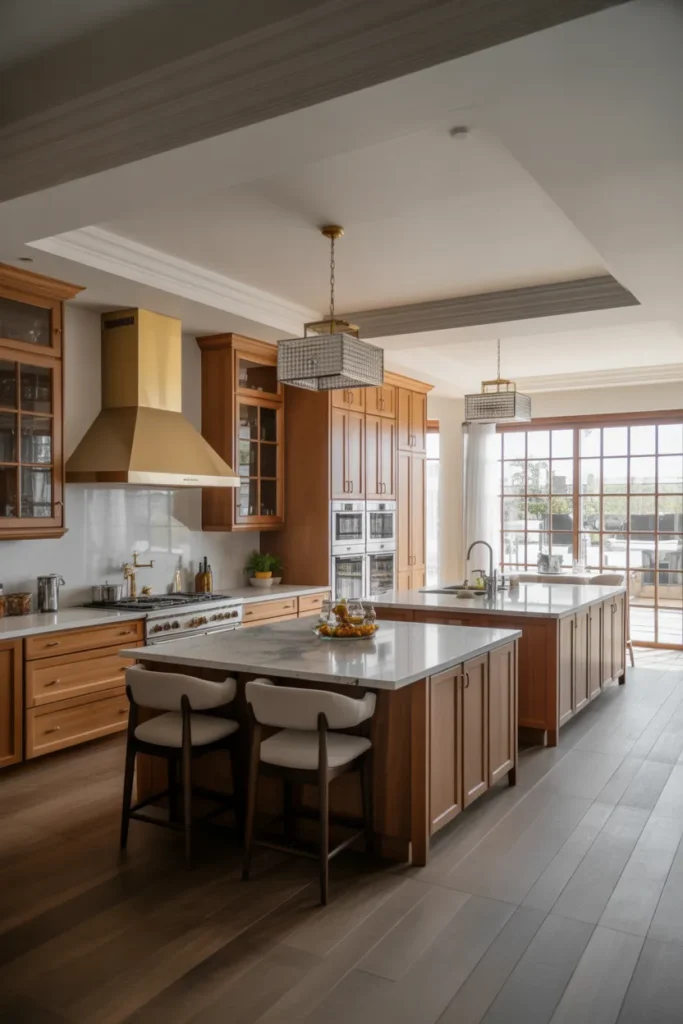
A double island layout is the ultimate luxury for large kitchens and serious entertainers. One island handles the work: sink, dishwasher, prep space. The second island handles the living: seating, serving, display. Separating the jobs means the cook’s mess never shares space with the guests’ wine glasses. The two islands need room to breathe: at least 42 inches between them and generous clearance on all sides. Design them as a pair, with related materials but distinct roles. The working island can be all business with durable surfaces; the social island gets the dramatic stone and the beautiful stools. This layout suits open concept homes where the kitchen is the main gathering space. It is a commitment of space and budget, but for the right home it transforms how the kitchen is used. Map the plumbing for both islands before the slab is poured or flooring laid. Underground mistakes are the most expensive.
Give each island a job: the double island only works when the roles are clear. Island one is the workhorse: sink, trash pull out, dishwasher, and prep space, positioned in the work triangle. Island two is the social hub: generous seating, a beverage fridge or wine storage, and serving space, facing the living area. Keep the messy functions on island one and the pretty functions on island two. Plan the plumbing and electrical for both before the floor goes in. When each island has a distinct purpose, the kitchen flows instead of duplicating itself. Give the social island a different countertop thickness for subtle distinction. Small differences signal the different roles.
Design them as a pair: two islands should look related but not identical. Use the same cabinet style with different finishes, or the same stone in different applications. The social island can carry the dramatic waterfall edge while the working island stays simple. Match the pendant lighting across both for rhythm, or give the social island the statement fixtures. Keep the heights consistent unless there is a reason to vary. The pair should read as a composed set, like furniture designed together. This coordination is what separates a luxury double island from two islands that happen to share a room. Plan where the holiday serving dishes live near the social island. Entertaining storage should be close to the action.
- Assign clear roles: one working island, one social island.
- Keep at least 42 inches between the islands and on all working sides.
- Coordinate materials as a pair with distinct finishes per role.
Shop This Look
14. Elegant Luxury Kitchen with Glass Cabinet Accents

Glass cabinet accents bring lightness and display to a luxury kitchen. A run of glass front uppers with interior lighting shows off beautiful dishes and breaks up long stretches of solid cabinetry. The glass can be clear for full display, frosted for a softer look, or antiqued mirror for drama. Interior lighting is what makes them glow in the evening and justifies the premium. Use glass strategically: flanking the range hood, at the ends of runs, or as a hutch style section in the pantry wall. Keep what is inside curated, because glass cabinets demand tidiness. Matching dish sets, glassware, and a few art objects look best. This is jewelry cabinetry: a little goes a long way, and the lit glass adds a depth that solid doors cannot. Dust the glass shelves weekly; glass shows dust more than wood. A quick wipe keeps the display crisp.
Light the interiors: interior lighting is non negotiable for glass cabinets. LED strips or puck lights at the front of each shelf eliminate shadows and make dishes glow. Wire them to the same dimmer as the under cabinet lights for coordinated mood. Choose warm white to flatter dishware. Hide the wiring in the cabinet frame so the light seems sourceless. Motion sensors inside deep cabinets are a nice touch. The lit interior is what transforms a glass cabinet from storage into a feature, especially in the evening when the rest of the kitchen dims. Store the everyday dishes in closed cabinets so the glass stays curated. The display is for the beautiful, not the daily.
Curate the contents: glass cabinets put your dishes on stage, so edit ruthlessly. Display matching sets, beautiful glassware, and serving pieces you actually love. Remove anything chipped, mismatched, or purely utilitarian to closed cabinets. Arrange by color or type for a calm look. Leave breathing room on each shelf; crowded glass cabinets look cluttered, not curated. If full display feels like pressure, frosted or seeded glass softens the view while keeping the light. The contents are part of the design, so treat them that way. Consider museum putty under lightweight objects in earthquake zones. Beauty should also be safe.
- Wire interior LEDs to the same dimmer as under cabinet lights.
- Display only matching sets and beautiful pieces; hide the rest.
- Use glass at run ends or flanking the hood for maximum effect.
Shop This Look
15. Grand Marble Island Luxury Kitchen
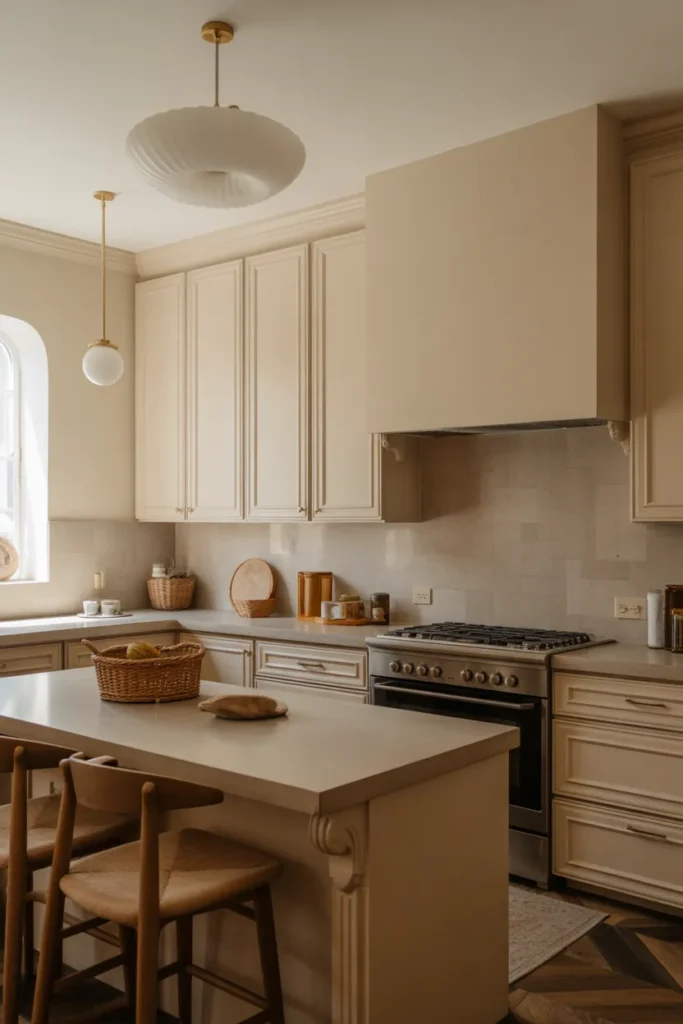
A grand marble island deserves its own mention because it is the single most requested luxury kitchen feature. Bigger than a standard island, often 9 to 12 feet, it becomes the room’s centerpiece and its main gathering spot. The marble should be spectacular: dramatic veining, book matched fronts, a thick mitered edge that shows off the stone. Support it properly, because stone this size is heavy; the cabinet base and floor need to be rated for the load. Plan seating on at least one long side, with proper knee clearance and outlets. Keep the surrounding kitchen quiet so the island dominates. This is a splurge, and it should feel like one every time you walk into the room. Done right, a grand marble island is the kitchen equivalent of a grand piano. Confirm the delivery path for slabs this size; some need a crane or window removal. Logistics can surprise.
Engineer the support: a grand marble island is extremely heavy, so the structure must be planned. Confirm the floor can carry the load, especially on upper levels. The cabinet base needs full support, not just perimeter framing. Use steel reinforcement inside the base for spans over 8 feet. The countertop overhang for seating needs corbels or steel brackets rated for stone. Involve the fabricator and a contractor early, before the cabinets are ordered. A sagging or cracked island is the most expensive mistake in this article; engineering prevents it. Plan the seam locations with the fabricator to hide them in the veining. Good seams disappear into the pattern.
Make it the gathering spot: a grand island should invite people to linger. Provide comfortable counter stools with backs for long sits, spaced about 24 inches apart. Add outlets under the overhang for laptops and chargers. Hang statement pendants above that dim for evening. Keep one section of the island clear of appliances so it works as a serving surface. The island becomes where homework happens, where friends perch with wine, where holiday prep spreads out. Design for lingering and the island earns its grandeur daily. Keep heavy small appliances off the cantilevered overhang sections. Weight limits protect the stone.
- Confirm floor and cabinet base can carry the stone load before ordering.
- Use steel reinforcement and rated brackets for long spans and overhangs.
- Space comfortable stools 24 inches apart with outlets under the overhang.
Shop This Look
16. High-End Black and Gold Kitchen Design
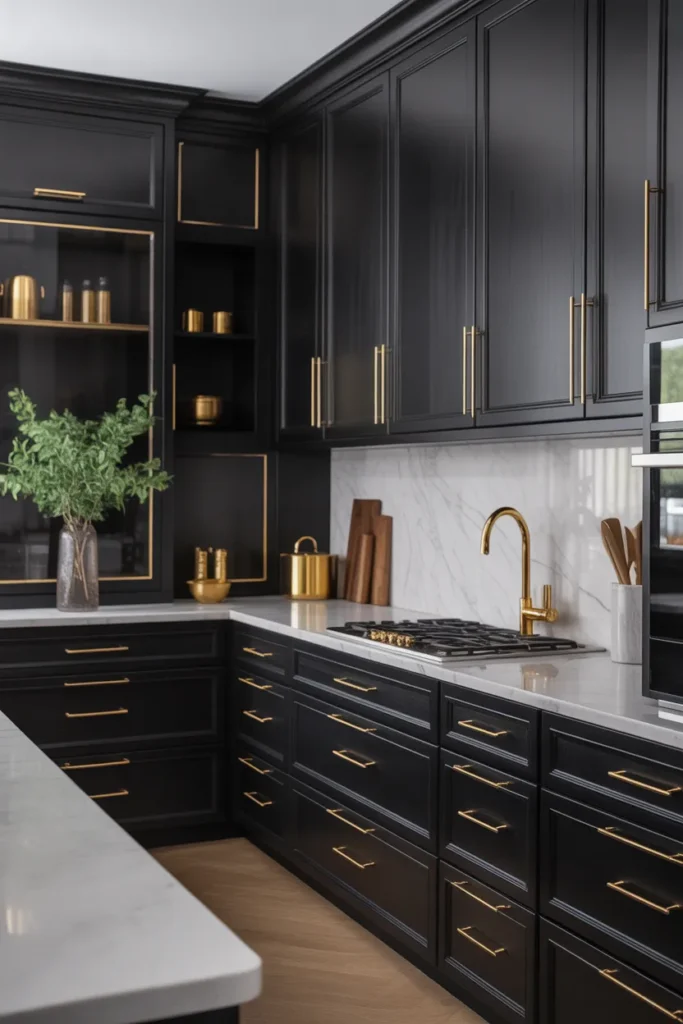
A high end black and gold kitchen is drama done right. Black cabinetry, black stone, black fixtures, with gold as the single warm accent throughout. The combination reads as evening wear: formal, confident, unmistakable. The black needs texture variation to avoid flatness: matte cabinets, honed stone, brushed black metal, maybe a black wood grain. The gold appears in the faucet, hardware, pendant details, and perhaps the range trim. Lighting is critical, because black absorbs it; layer generously with under cabinet strips and statement pendants. A white or light stone element, like a marble backsplash with gold veining, can keep the palette from going too dark. This is not a kitchen for the timid, but for those who love it, nothing else satisfies. Test the black palette at night under your planned lighting, since that is when it matters most. Daytime impressions mislead.
Vary the blacks: an all black kitchen fails when everything is the same black. Layer different blacks and near blacks: matte black cabinets, honed black granite or soapstone, blackened steel, black wood grain. Each absorbs light differently, creating depth. Test samples together under your lighting, because blacks shift with undertones. A slightly warm black cabinet with a cool black stone can clash, so keep undertones consistent. Add the gold as the bridge that ties the blacks together. The variation is subtle but it is what makes the kitchen feel rich instead of flat. Add one living element, like a small herb pot, to soften the drama. Life against the black and gold glows.
Light it like evening: black kitchens are at their best with layered evening lighting. Under cabinet strips keep the counters workable. Pendants with warm bulbs make the gold glow. Interior cabinet lighting adds depth to glass fronts. Keep a bright task mode for cooking and a low moody mode for entertaining. Dimmers on every layer are essential. Natural daylight will handle the daytime; design the lighting for the hours you actually entertain. When the gold catches the warm light against the black, the kitchen earns its drama. Keep the grout lines tight and dark so the tile disappears into the palette. Details sustain the illusion.
- Layer different black textures: matte, honed, brushed, wood grain.
- Keep black undertones consistent across cabinets and stone.
- Design lighting for evening entertaining with dimmers on every layer.
Shop This Look
17. Open-Concept Luxury Kitchen with Seamless Flow
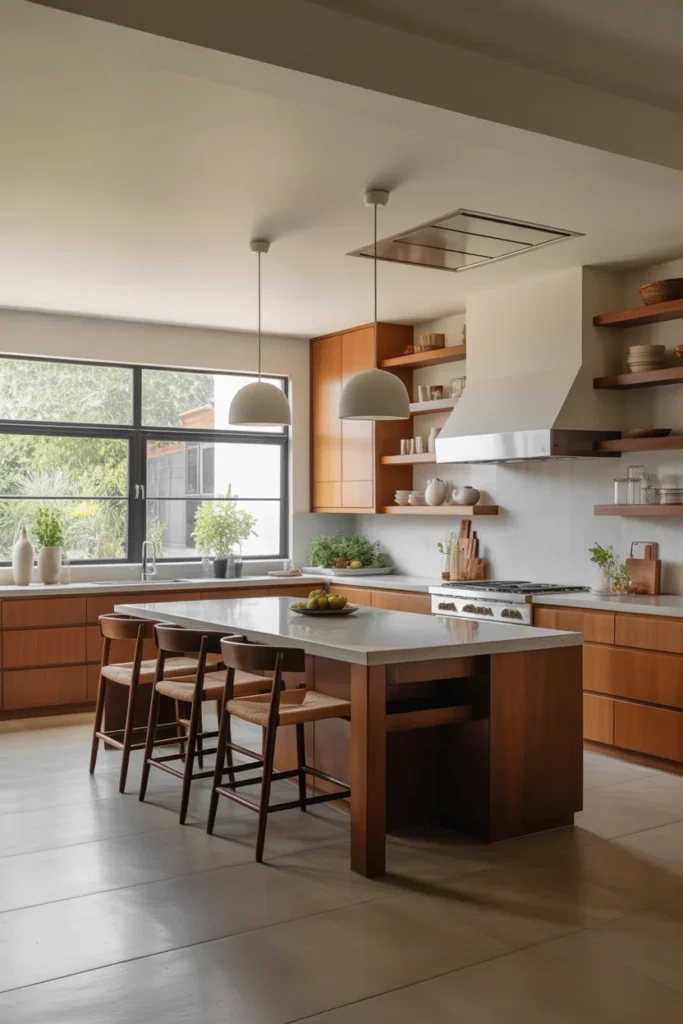
Seamless flow in an open concept luxury kitchen means the kitchen, dining, and living areas read as one composed space. The trick is continuity: the same flooring runs throughout, the kitchen palette echoes the living room, and sight lines stay open. The island often acts as the transition, with its public side finished like living room furniture. Appliance garages and panel ready appliances keep the kitchen side calm when viewed from the sofa. Lighting should be coordinated across zones so the whole space dims together in the evening. This is harder than it looks, because it requires the kitchen designer and the interior designer to work from the same palette. When it works, the home feels twice as large and entertaining becomes effortless, because the cook, the diners, and the loungers all share one space. Choose flooring with a matte finish to avoid competing reflections. The eye should glide, not bounce.
Run materials through: continuity is built from repeated materials. Extend the kitchen flooring into the living area with no threshold break. Repeat the island stone as a fireplace surround or bar top. Carry the cabinet wood tone into living room shelving. Use the same metal finish on kitchen hardware and living room light fixtures. These repetitions tell the eye that the zones belong together. Keep the palette to a tight family across all three areas. The result is a home that flows instead of a kitchen attached to rooms. Coordinate the switch plates and vent covers with the palette. Small metals matter in a seamless space.
Hide the work zone: seamless flow requires the kitchen’s working mess to disappear from the living room view. Plan an appliance garage for the coffee maker and toaster. Put the sink on the kitchen side of the island, not the living room side. Use panel ready appliances so nothing screams kitchen. Keep the living room facing side of the island pristine with closed storage. A quick evening tidy should take five minutes because everything has a hidden home. When the work zone vanishes, the open concept feels like one luxurious living space. Walk the full open space at night to check the lighting transitions. Zones should fade into each other.
- Run the same flooring through kitchen, dining, and living with no breaks.
- Repeat island stone and cabinet wood in adjoining rooms.
- Hide appliances and sink on the kitchen side; keep the public side pristine.
Shop This Look
18. Luxury Kitchen with Statement Lighting Fixtures
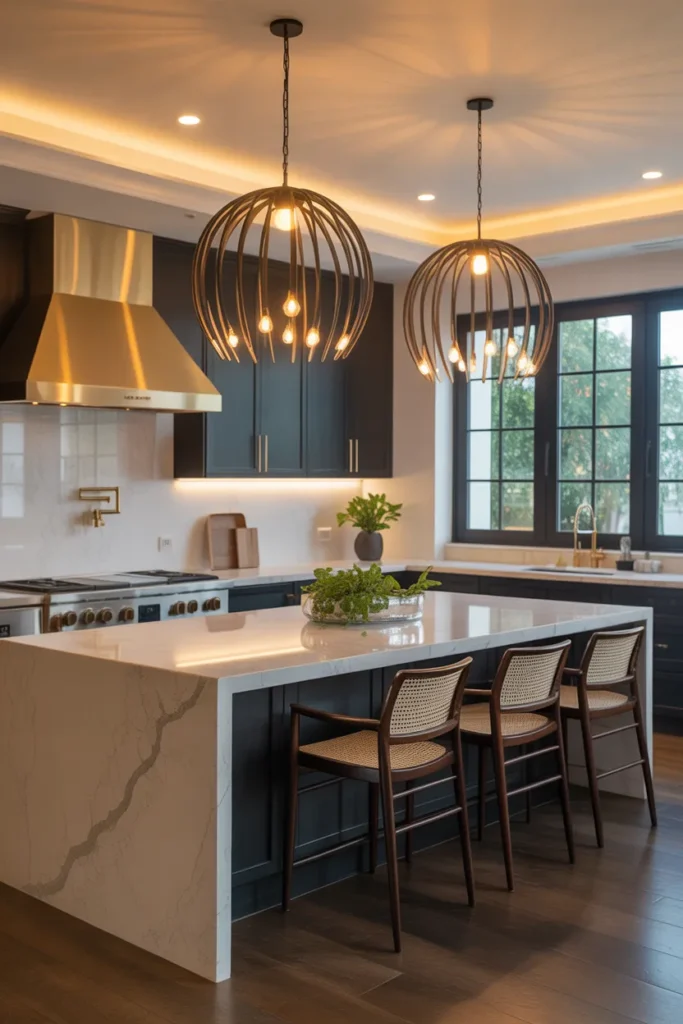
Statement lighting fixtures beyond the pendants give a luxury kitchen its after hours personality. A chandelier over the dining section of an open kitchen, sculptural sconces flanking the range hood, or a dramatic flush mount in a Butler’s pantry all add moments of delight. These fixtures are chosen for form as much as function: hand blown glass, alabaster shades, or bold geometric metalwork. They should relate to the island pendants without matching exactly; think family resemblance, not twins. Scale them to their zone, and keep them dimmable. In the evening, when the task lighting drops, these are the fixtures that make the kitchen feel like a restaurant. One or two statement moments are enough; more becomes a lighting showroom. Check the fixture’s scale from the living room view, not just the kitchen. Open concept means double duty.
Relate, don’t match: the statement fixtures should feel related to the island pendants without being identical. Share one element: the same metal finish, a similar glass type, or a complementary shape. A brass island pendant pairs with brass sconces in a different silhouette. A glass globe chandelier over the dining area echoes glass pendants without copying them. This family resemblance looks collected and confident. Exact matching sets can feel like they came from a single box. Give each zone its own personality within the same design language. Use LED filament bulbs where the bulb is visible for a warm vintage glow. The source should be as pretty as the shade.
Zone them separately: statement fixtures earn their keep on separate dimmers from the task lighting. In the evening, drop the recessed lights and let the chandelier and sconces carry the mood. During prep, bring the task layers up and let the statements idle. This zoning is what makes the kitchen transform between day and night. Label the switches clearly or use a smart system with scenes. The ability to shift the whole mood with one control is the luxury part. Keep a spare bulb for statement fixtures; unusual sizes are hard to find quickly. Preparation avoids dark weeks.
- Share one design element between pendants and statement fixtures.
- Give statement fixtures their own dimmers for evening mood.
- Limit statement moments to one or two per kitchen.
Shop This Look
19. Elegant Neutral-Toned Luxury Kitchen
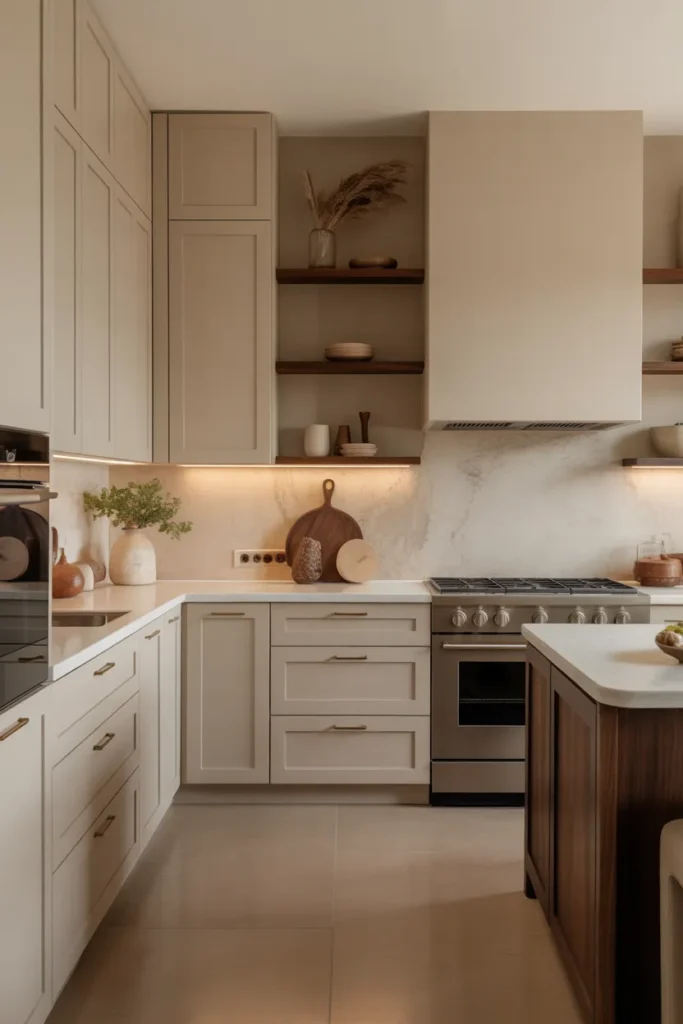
An elegant neutral toned luxury kitchen proves that beige can be breathtaking. Layered warm neutrals: ivory cabinets, greige stone, warm white walls, natural wood accents, create a kitchen that feels like cashmere. The luxury is in the quality of each neutral and the precision of their relationships. Undertones must agree, or the neutrals fight; test everything together in the room’s light. Texture does the work that color does in bolder kitchens: honed stone, brushed brass, woven stools, plaster walls. Keep the palette to three or four neutrals maximum. This kitchen never shouts, but it never dates either. It is the choice for people who want calm luxury that welcomes everyone. Introduce the palette through the rug first if repainting feels like a leap. Textiles are low commitment trials.
Mind the undertones: neutrals fail when undertones clash. A pink beige cabinet next to a yellow beige stone looks dirty, not layered. Gather all your samples: cabinet door, stone, tile, fabric, wood. View them together in the kitchen’s natural light at different times of day. Choose neutrals that share an undertone family: all warm, all cool, or all truly neutral. When in doubt, simplify to fewer neutrals. Two perfect neutrals beat four fighting ones. This discipline is the entire secret of the elegant neutral kitchen. Keep the wood tones light to preserve the airy neutral feeling. Dark wood can weigh beige down.
Invest in texture: without strong color, texture carries the design. Honed stone with soft movement, cabinet paint with a velvety matte finish, brushed brass with a soft glow, a handmade look tile with variation. Add natural fibers: linen roman shades, woven bar stools, a wool runner. Each texture catches light differently, creating the depth that color would otherwise provide. Touch the samples; luxury neutrals should feel as good as they look. The layered result is quiet but unmistakably rich. Edit wall decor to the same restraint as the palette; busy walls fight quiet color. Calm needs consistency.
- Test all neutral samples together in the room’s natural light.
- Keep undertones in one family: all warm, all cool, or truly neutral.
- Layer four or more textures so neutrals gain depth without color.
Shop This Look
20. Custom Luxury Kitchen with Built-In Appliances
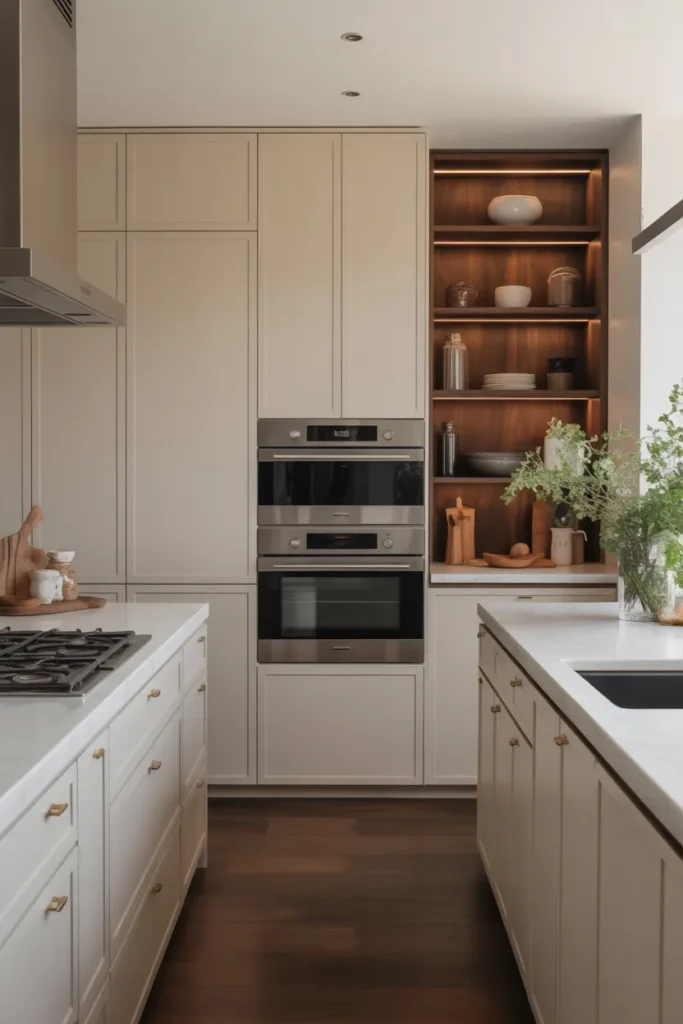
Built in appliances are the tailored suit of luxury kitchens: everything fits exactly, nothing sticks out. The range sits flush in the cabinetry, the fridge disappears behind panels, the microwave hides in a drawer, and the coffee system builds into the pantry wall. This precision requires planning the appliance suite before the cabinets are designed, because each unit has exact cutout dimensions and ventilation needs. The payoff is a kitchen with clean uninterrupted lines and a completely custom feel. Choose appliances for performance first, then confirm the built in options; a beautiful flush install of a mediocre oven is still mediocre. Coordinate the trim finishes across brands so the steel, black glass, or custom panels read as one suite. This is luxury through precision. Label the inside of each appliance cabinet with its cutout size for future reference. The next owner or repair tech will bless you.
Plan appliances first: built in appliances dictate the cabinet design, not the other way around. Select every appliance before the cabinet order: range, ovens, fridge, dishwasher, microwave drawer, coffee system. Record the exact cutout dimensions, ventilation clearances, and electrical needs for each. Share the spec sheets with the cabinet designer. Confirm delivery lead times, because built in appliances often have longer waits than stock. Changing an appliance after cabinets are built is extremely expensive. The order of operations is: appliances, then cabinets, then stone. Register every appliance warranty on installation day while the paperwork is at hand. Delayed registration is forgotten registration.
Coordinate the trims: mixed appliance brands can still look unified if the visible trims coordinate. Choose one trim story: all stainless, all black glass, or all panel ready. Check that handles and control panels look related across brands. Some manufacturers offer suite coordination; take advantage of it. If one appliance must differ, hide it: panel the fridge, drawer the microwave. The eye should travel across the kitchen without catching on a mismatched control panel. Cohesion in the details is what reads as luxury. Keep the appliance manuals in one binder near the pantry. Centralized docs save frantic searches.
- Select all appliances before ordering cabinets and share spec sheets.
- Confirm cutout dimensions, ventilation, and lead times early.
- Coordinate visible trims across brands or hide the outliers.
Shop This Look
21. Luxury Kitchen with Floor-to-Ceiling Cabinetry
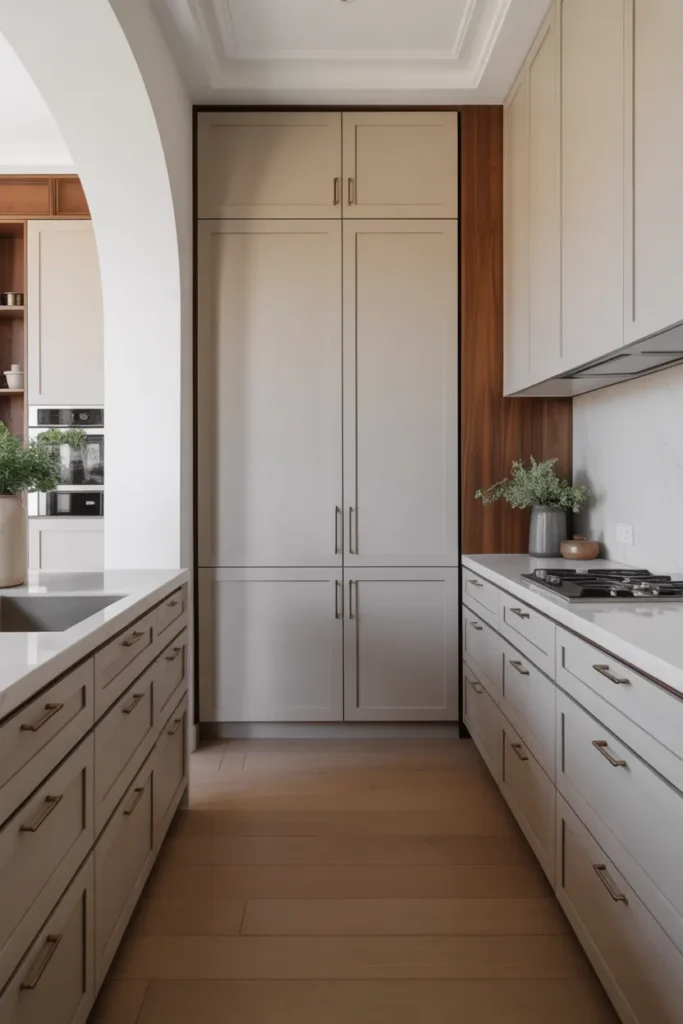
Floor to ceiling cabinetry, done a second way, shows how versatile the full height run can be. Here the emphasis is on the architectural look: flat panel cabinets in a rich finish running wall to wall and floor to ceiling, reading like custom millwork. The trick to avoiding monotony is rhythm: vary the depths slightly, with a shallow display section between deeper storage towers. Integrated lighting at the top washes the ceiling and makes the run feel lighter. Keep hardware minimal or use edge pulls so the planes stay clean. This treatment suits a galley kitchen or a single wall kitchen where one strong gesture organizes everything. It is storage as architecture, and it makes even a modest kitchen feel bespoke. Vary the depth of the display section by at least two inches for visible rhythm. Timid differences look like mistakes.
Vary the depths: a flat wall of identical cabinets looks like a warehouse; varied depths look like millwork. Step a display section back by a few inches between deeper storage towers. Make the section over the range shallower for the hood. Use a deeper base where the small appliances live. These small variations create shadow lines that give the run rhythm. Plan the depths on the elevation drawing before ordering. The variation should look deliberate, with consistent reveals. This is the difference between cabinets and architecture. Light the display section on its own switch for evening showcase. The glow should be independent.
Wash the ceiling with light: lighting at the top of a full height run transforms it. LED strips hidden in a pelmet wash the ceiling with a soft glow, making the cabinetry feel lighter and the ceiling higher. This light is separate from task lighting and runs on its own dimmer. In the evening, the glowing top edge makes the whole wall feel like it floats. Use warm white to keep the effect cozy. The hardware for this is inexpensive; the impact is outsized. It is the finishing touch that makes full height cabinetry feel luxurious rather than merely tall. Dust the top pelmet channel when you clean; hidden LEDs collect surprising dust. Maintenance keeps the magic.
- Vary cabinet depths to create shadow lines and rhythm.
- Add hidden LED strips at the top to wash the ceiling.
- Keep hardware minimal so the planes stay clean.
Shop This Look
22. Ultra-Modern Luxury Kitchen with Sleek Finishes
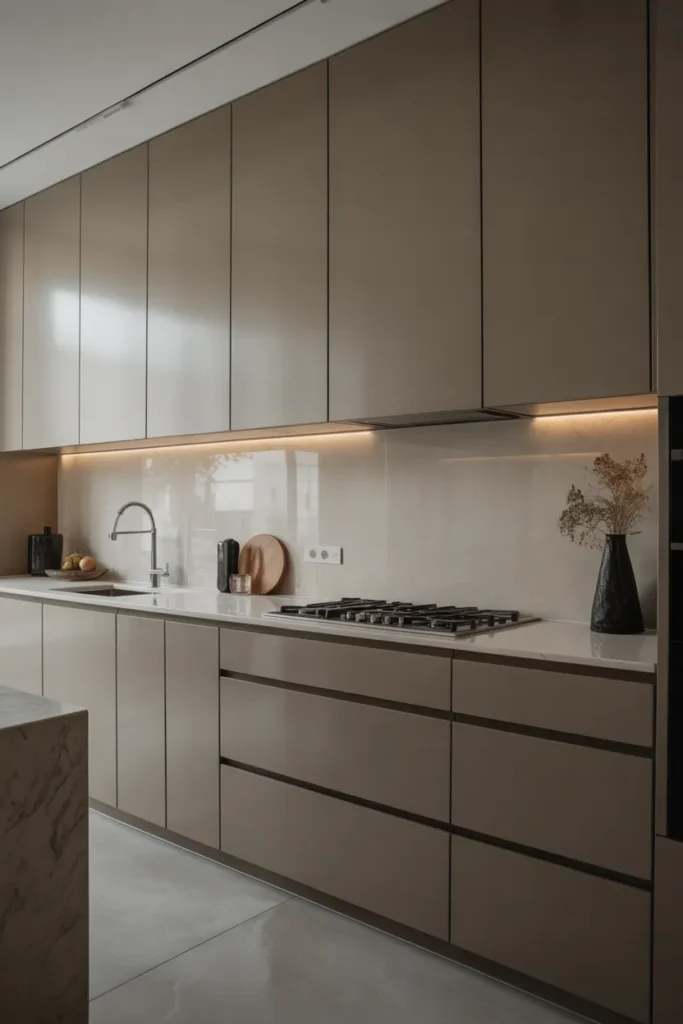
An ultra modern luxury kitchen with sleek finishes is the sharpest expression of contemporary design. Handleless cabinets with push to open mechanisms, waterfall edges, integrated everything, and a palette of two or three materials used with discipline. The surfaces are the stars: large format porcelain slabs with no grout lines, glass backsplashes, brushed metal accents. Technology hides completely. The room should feel like it was carved from a few perfect materials rather than assembled from parts. This style demands precision: gaps must be even, alignments perfect, because minimalism exposes every flaw. Hire installers with ultra modern experience and check their references. When it is done right, the kitchen feels like the future: calm, precise, and quietly spectacular. Remove one decorative item from the counters as a test of the discipline. Ultra modern punishes every extra object.
Demand precise installation: ultra modern kitchens expose every flaw, so the installation quality is everything. Gaps between handleless cabinets must be perfectly even. Waterfall miters must align. Large format slabs need lippage free setting. Vet installers by seeing their finished ultra modern work, not just their promises. Budget for the best tradespeople you can find; the design depends on them. Walk the finished kitchen with a critical eye before final payment. Precision is not a luxury upgrade here; it is the whole design. Choose a single beautiful fruit bowl as the only counter decor. One perfect object beats five good ones.
Limit the materials: discipline with materials is what makes ultra modern work. Choose two or three: a cabinet finish, a stone or porcelain, and one metal. Use them everywhere with no exceptions. The restraint creates the calm that defines the style. Every new material you add dilutes the effect. If you want warmth, let it come from one wood tone used consistently, not from a collection of accents. Write the material list down and check every purchase against it. Fewer materials, used perfectly, is the entire philosophy. Photograph the finished kitchen for insurance records while it is pristine. Documentation is practical luxury.
- Hire installers with proven ultra modern experience; check finished work.
- Keep gaps, miters, and alignments perfect; minimalism exposes flaws.
- Limit the palette to two or three materials used with total discipline.
Shop This Look
How to Start
Start by defining what luxury means for how you actually cook. If you host big dinners, prioritize the island and seating. If you cook daily for family, prioritize storage, lighting, and durable surfaces. Walk through your current kitchen and list the three things that frustrate you most. Those become the brief for every decision that follows.
Set the material palette before you shop for anything. Choose your stone, your cabinet finish, and your metal in one sitting, and carry samples with you. Luxury kitchens look cohesive because every choice refers back to the same small set of materials. When the palette is locked, individual decisions get easy.
Phase the work if the budget is tight. Lighting and hardware first, because they change the feel fast. Then the backsplash or island seating. Save full cabinet replacement for last, since refacing or repainting can buy you years. A phased plan still ends at the same kitchen.
- Define your cooking priorities and list the top three frustrations.
- Lock the material palette: stone, cabinet finish, and metal, before shopping.
- Phase the work: lighting and hardware first, cabinets last.
Shop This Look
Common Mistakes
- Choosing stone or finishes from a photo without seeing full slabs in person.
- Underlighting the kitchen with a single ceiling fixture instead of layered task lighting.
- Installing an island that is too big for the room, leaving less than 36 inches of clearance.
- Mixing too many metals and wood tones so the kitchen feels busy instead of calm.
- Skipping soft close hinges and full extension drawers to save money, then regretting it daily.
- Forgetting ventilation: a powerful quiet range hood matters more than a louder pretty one.
- Placing the sink, stove, and fridge too far apart, breaking the work triangle.
Frequently Asked Questions
What makes a kitchen look luxurious without a full renovation?
Cohesive materials and good lighting do most of the work. Swap dated hardware for a single metal finish, add under cabinet lighting, and upgrade the faucet. A stone or stone look backsplash behind the range creates a focal point for far less than new counters. Keep the palette tight and the counters clear.
Is marble practical for a busy kitchen?
Marble is beautiful but it etches and stains, so it suits people who accept patina. If you want the look without the maintenance, quartzite or high quality quartz gives similar veining with far less care. Seal natural stone regularly and wipe spills quickly. For more on pulling a whole home together, see these house interior design ideas.
How much clearance does a kitchen island need?
Leave at least 36 inches between the island and surrounding counters or walls, and 42 to 48 inches where two cooks pass or the dishwasher and oven doors open. An island that crowds the walkways makes the kitchen feel smaller no matter how beautiful the stone is.
What is the best lighting for a luxury kitchen?
Layer three types: recessed or flush ceiling lights for general light, pendants over the island for task and style, and under cabinet strips for counter work. Put each layer on its own dimmer. Warm white around 3000K keeps food looking appetizing and the room inviting.
Are matte finishes harder to maintain than glossy ones?
Matte cabinet finishes hide fingerprints better than gloss, which is a real plus around cooking zones. They can show grease smudges, so wipe with a soft damp cloth and mild soap. Avoid abrasive cleaners on any finish. Matte stone needs sealing like any natural stone.
The Finishing Touch
A luxury kitchen is really a well planned kitchen wearing beautiful materials. The islands, stone, and lighting in these ideas all serve the way people actually cook and gather. Borrow the moves that fit your space and your habits, and skip the ones that do not.
Keep your material samples together as you shop so every new choice stays in the family. Cohesion is what separates a luxury result from an expensive collection of parts.
For a look at where kitchen design is heading, Houzz covers the newest directions in 7 Kitchen Design Trends Seen at Milan’s EuroCucina 2026. Trends come and go, but good proportions and honest materials never date. Build for those and your kitchen will feel luxurious for years.