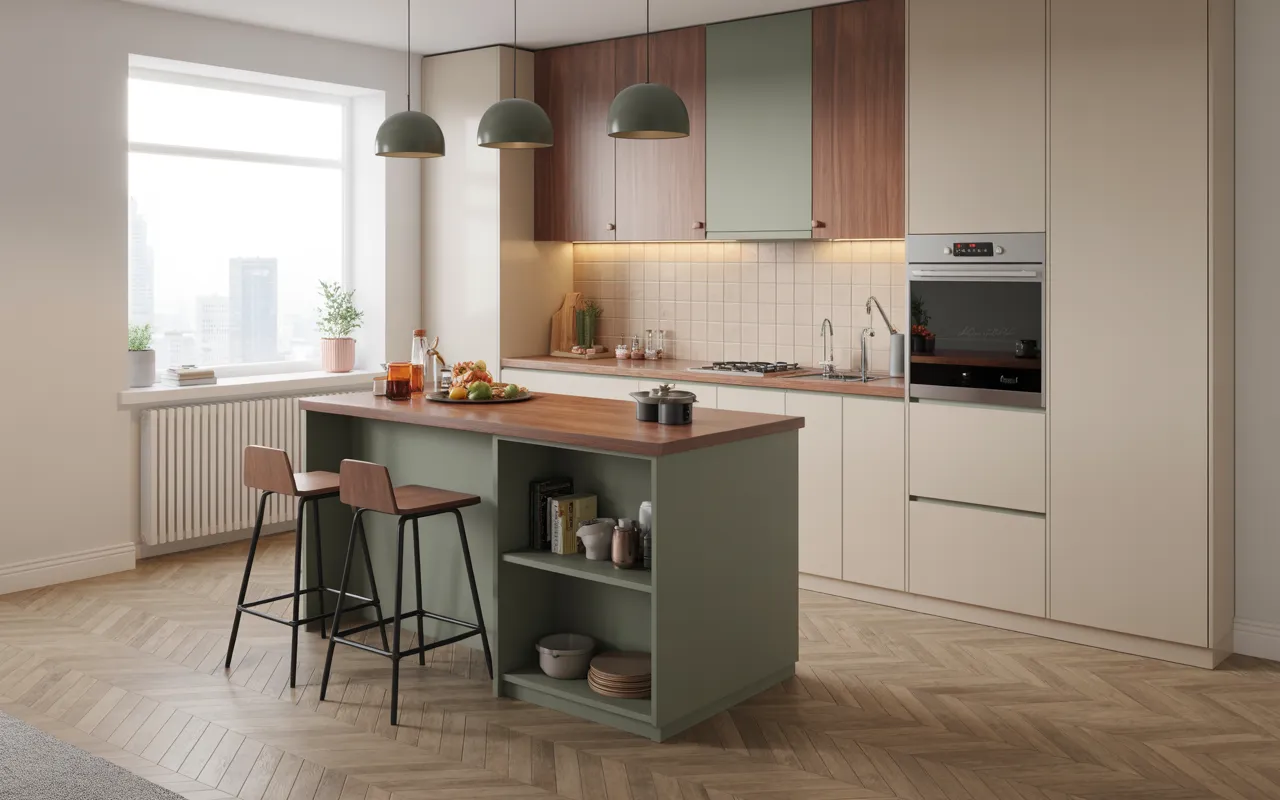
22 Apartment Kitchen Ideas with Smart Storage
An apartment kitchen is small, but small is not the problem. The problem is dead space: the gap above the fridge, the dark corner cabinet, the inches behind the door that nobody uses. This list is 22 ways to put every one of those inches to work.
None of these ideas require tearing out the kitchen. Most are organizers, add on storage, or small furniture that renters can use too. A few, like toe kick drawers or cabinet extensions, need a drill and a free afternoon, but nothing here demands a renovation crew.
Start with the spots that annoy you daily. If the pantry is chaos, fix that first. If there is no counter space, the fold down table or the rolling cart will change your cooking life. Work through the list, pick your battles, and the kitchen gets bigger without moving a single wall.
This post contains affiliate links. If you buy through them, I may earn a small commission at no extra cost to you.
1. Floor-to-Ceiling Cabinets for Maximum Storage
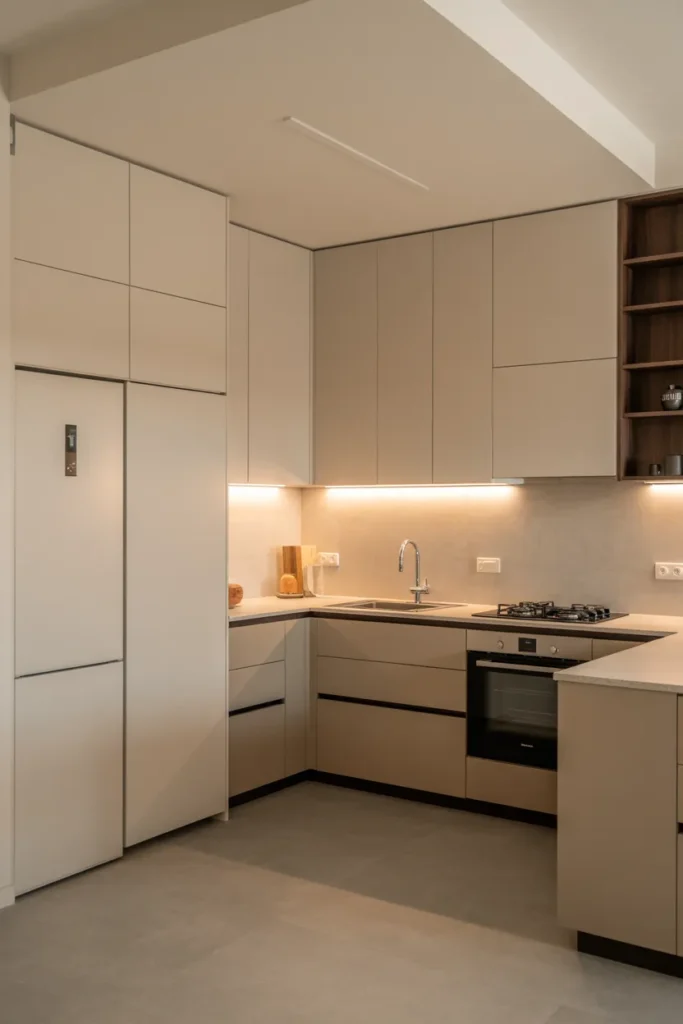
The space between the top of your cabinets and the ceiling is usually wasted, collecting dust and nothing else. Floor to ceiling cabinets reclaim all of it. In an apartment kitchen where every inch counts, that extra row of storage can hold the things you use monthly instead of daily.
Use the top wisely: Reserve the highest shelves for items you need a step stool to reach: holiday dishes, the turkey roaster, bulk paper goods. Keep daily items between knee and eye level. A sturdy folding step stool that hangs inside a pantry door makes the top shelf actually usable instead of decorative.
Keep it renter friendly: If you cannot replace cabinets, add stacking cabinets or open cubbies on top of the existing ones. They do not need to match perfectly; paint them the same color and they read as built in. Anchor anything tall to the wall so it cannot tip.
- Store monthly use items on the highest shelves, daily items at eye level.
- Keep a folding step stool nearby so top shelves stay usable.
- Anchor tall add on units to the wall for safety.
Shop This Look
2. Pull-Out Pantry for Narrow Spaces
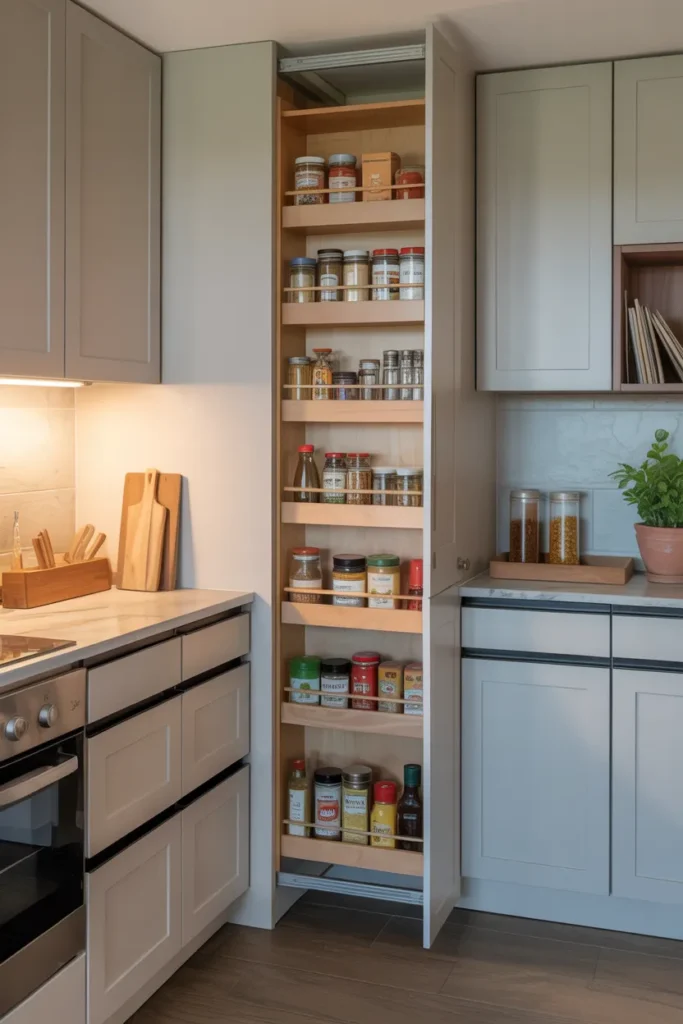
A pull out pantry turns a narrow 6 to 12 inch gap into full storage. Instead of losing cans in the back of a deep shelf, everything slides out to meet you. It is the single best fix for the awkward sliver of space beside the fridge or stove.
Measure twice: These units need exact width, so measure the gap at the top, middle, and bottom; walls are rarely straight. Leave clearance for the door or drawer front to swing. Most pull out pantries hold 100 pounds or more, which is plenty for cans and jars but not for a stand mixer.
Organize by zone: Put cooking oils and spices at the top near the stove, cans and jars in the middle, and heavy items like pet food at the bottom. Adjustable shelves matter more than the number of shelves. A lip or rail on each shelf stops bottles from tipping when you slide it.
- Measure the gap at top, middle, and bottom before buying.
- Check weight capacity; most suit cans and jars, not heavy appliances.
- Use shelf rails so bottles do not tip when sliding.
Shop This Look
3. Overhead Open Shelving for Everyday Essentials
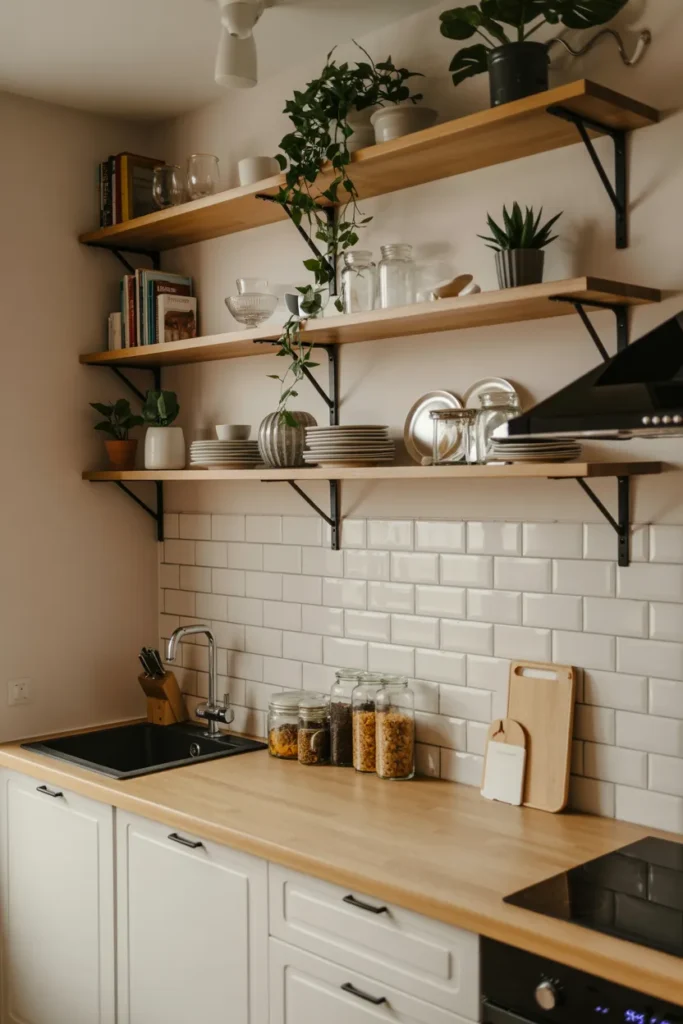
Overhead open shelving puts your everyday dishes and glasses where you can grab them without opening a door. It also forces a pleasant discipline: the shelves look good only when they hold things you actually use and like. In a small kitchen, it doubles as decoration.
Keep it honest: Only put on open shelves what you use weekly; everything else collects grease and dust. Matching or coordinated dishes look intentional, while a jumble of mugs looks like clutter. Limit each shelf to one row deep so nothing hides behind.
Mount it solid: Open shelves hold real weight, so anchor brackets into studs, not just drywall. A 1 inch thick shelf sags less than a thin one. Keep the lowest shelf at least 18 inches above the counter so you have working clearance underneath.
- Display only weekly use items to avoid grease and dust buildup.
- Anchor shelf brackets into wall studs for real weight.
- Keep shelves 18 inches above the counter for working clearance.
Shop This Look
4. Multi-Functional Kitchen Island with Storage
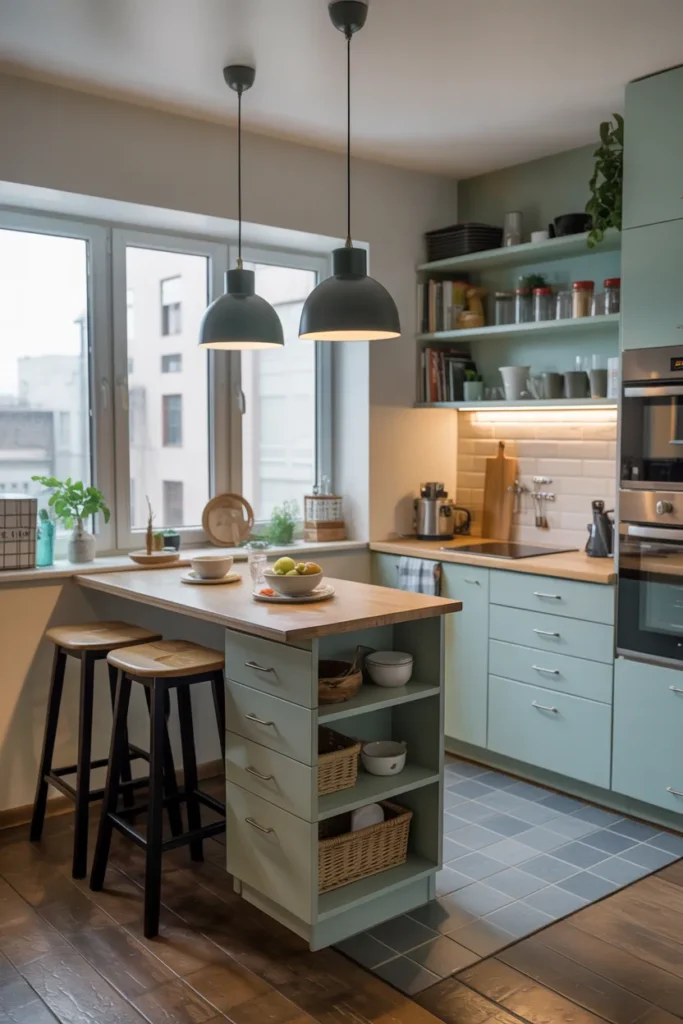
A kitchen island with storage underneath is the hardest working piece in an apartment kitchen. It adds counter space for prep, drawers or shelves for pots, and often seating on one side. One piece of furniture can replace a cart, a cabinet, and a small table.
Size it for the walkway: Leave at least 36 inches between the island and counters or appliances so doors and drawers open fully. In tight kitchens, a narrow 18 to 24 inch deep island still helps enormously. Locking casters let you roll it aside when you need the floor space.
Choose storage over looks: Open shelves on an island collect clutter fast, so prefer drawers and cabinets with doors. A towel bar on the side and hooks for utensils add function without bulk. If it has seating, make sure knee clearance is at least 15 inches deep or nobody will sit there comfortably.
- Leave 36 inches of walkway around the island for doors to open.
- Prefer drawers and closed cabinets over open island shelving.
- Use locking casters so the island can move when needed.
Shop This Look
5. Magnetic Wall Storage for Small Tools
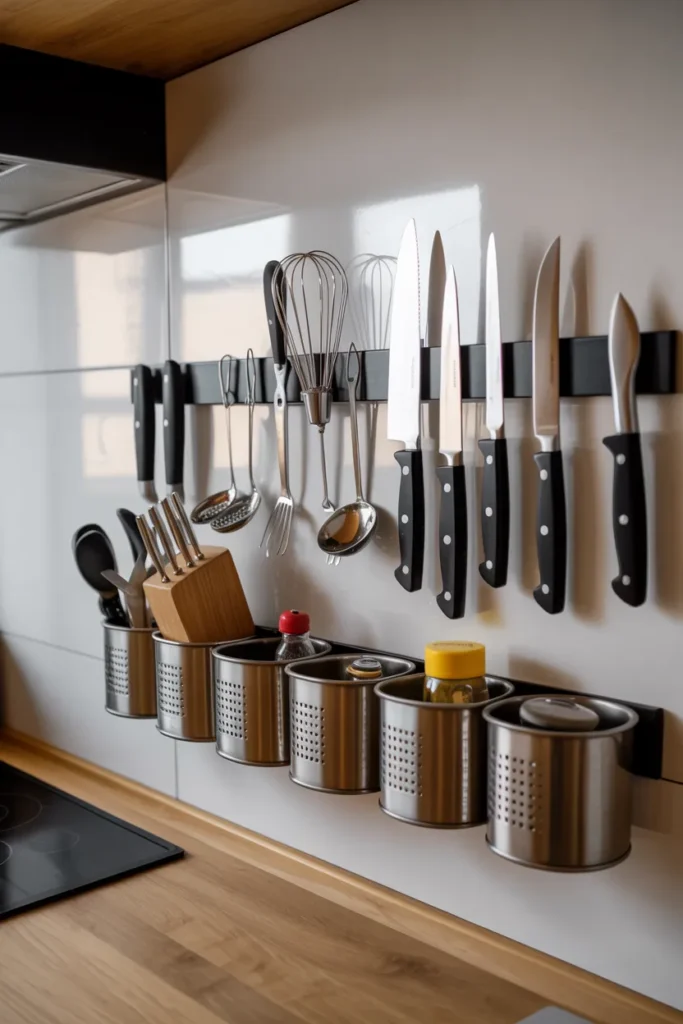
Magnetic wall storage turns a strip of backsplash or cabinet side into a home for knives, spice tins, and small tools. It frees a whole drawer and keeps sharp things visible and out of reach of kids rummaging in drawers. It also looks sharp in a modern kitchen.
Mount it right: A magnetic knife strip must be screwed into a stud or solid backing; a loaded strip is heavy and a fall means falling knives. Keep it away from the stove’s heat and out of the main splash zone. Small magnetic spice tins stick to any metal surface, including the side of the fridge.
Keep it minimal: A magnetic strip with five knives looks clean; one crammed with fifteen tools looks chaotic. Limit it to what you use constantly. Wipe the strip when you wipe the counters, because kitchen grease settles on it like everything else.
- Screw magnetic strips into studs; a loaded strip is heavy.
- Keep strips away from stove heat and heavy splash zones.
- Limit the strip to daily use tools to avoid visual clutter.
Shop This Look
6. Under-Sink Organizers for Hidden Efficiency

The cabinet under the sink is usually a mess of pipes with cleaning bottles shoved around them. Under sink organizers built around the plumbing turn that awkward space into tidy, reachable storage. It is a 30 minute project with a big daily payoff.
Work around the pipes: Measure around the drain and supply lines before buying; most organizers are designed with a U shape or adjustable parts for this. A pull out drawer unit beats stacked shelves because you can reach the back without kneeling and digging. Line the cabinet floor with a waterproof mat first.
Store smart: Keep only sink related items here: dish soap, sponges, trash bags, the plunger. Cleaning chemicals for the rest of the house belong elsewhere. A small tension rod across the cabinet gives you a place to hang spray bottles by their triggers.
- Choose U shaped organizers designed to fit around plumbing.
- Line the cabinet floor with a waterproof mat before organizing.
- Hang spray bottles from a small tension rod inside the cabinet.
Shop This Look
7. Tall Slim Pantry Cabinet
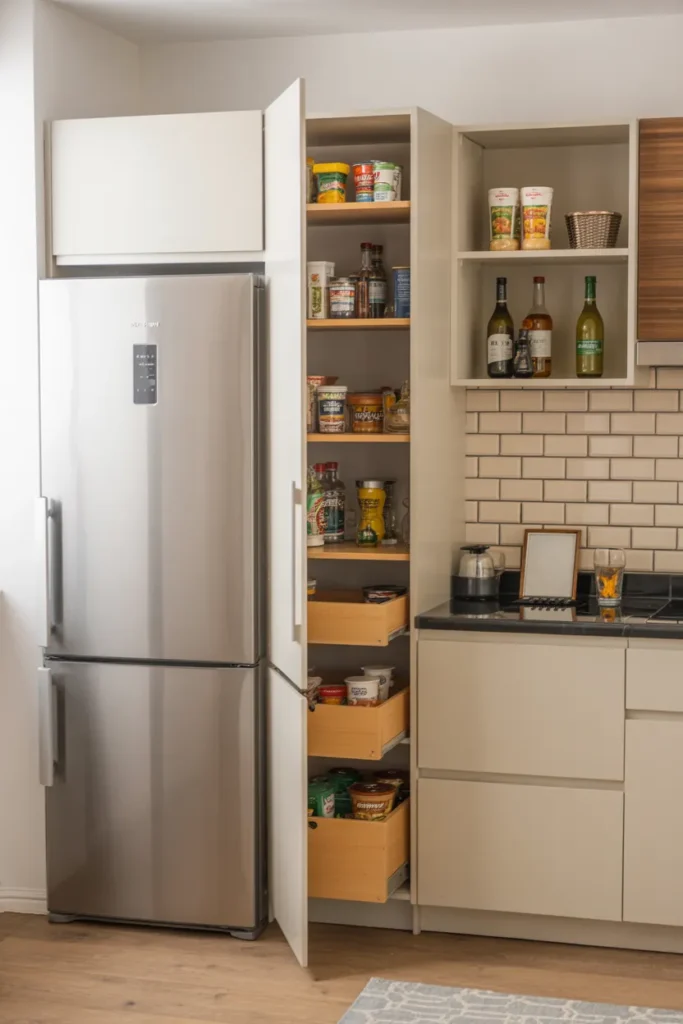
A tall slim pantry cabinet, 12 to 18 inches wide, fits where nothing else does: the end of a counter run, beside the fridge, in that dead corner. It holds a surprising amount because it goes floor to ceiling and everything is shallow enough to see.
Go shallow on purpose: Deep pantries lose food in the back; a 12 inch deep cabinet means you can see everything at a glance. Adjustable shelves let you fit cereal boxes up top and cans below. Door mounted racks double the capacity for spices and packets.
Light it: A tall narrow cabinet gets dark inside, so stick a motion sensor light at the top. Battery puck lights work fine and take a minute to install. Being able to see everything is what stops food from expiring unnoticed in the back.
- Choose 12 to 18 inch wide cabinets so nothing gets lost in back.
- Add door mounted racks to double spice and packet storage.
- Install a motion sensor light inside dark tall cabinets.
Shop This Look
8. Corner Cabinet with Rotating Shelves
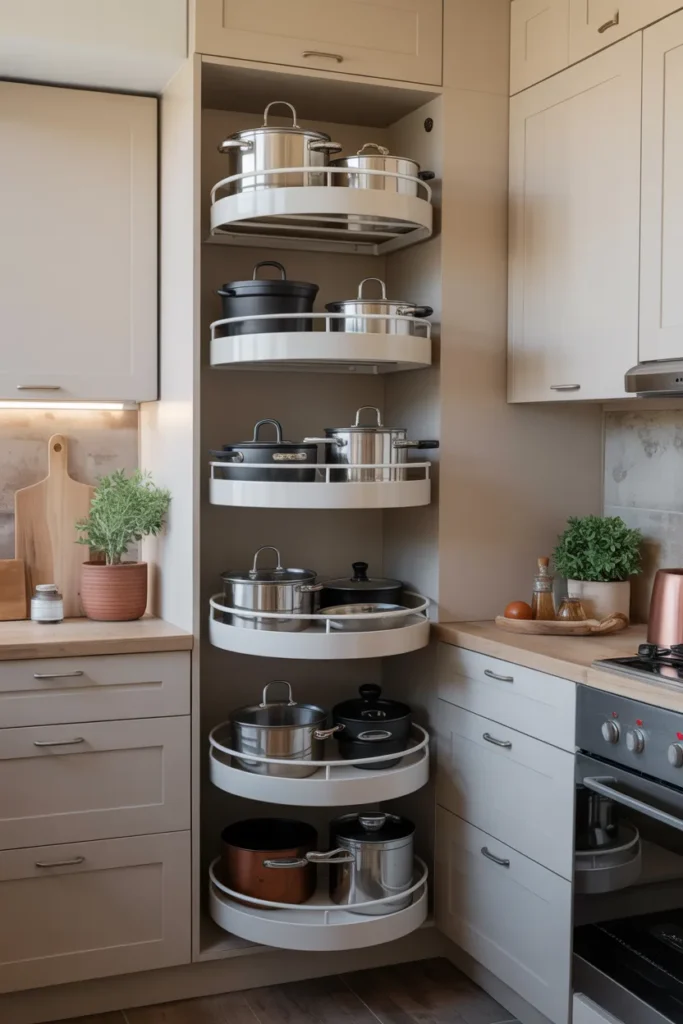
Corner cabinets are where pots go to disappear. A rotating shelf, the classic lazy Susan or a kidney shaped pull out, brings the back of the corner to the front. It converts the most hated cabinet in the kitchen into genuinely useful storage.
Pick the right mechanism: A simple two tier lazy Susan is cheap and reliable. Blind corner pull outs that swing the back shelves forward cost more but use the space fully. Measure the door opening carefully; corner mechanisms need specific clearances and not every unit fits every cabinet.
Load it sensibly: Put heavy items like Dutch ovens on the bottom tier and lighter things up top. Do not overload past the weight rating or the rotation gets stiff. Round containers waste less space on a round turntable than square ones do.
- Measure the door opening before buying any corner mechanism.
- Put heavy pots on the bottom tier, lighter items up top.
- Use round containers on round turntables to waste less space.
Shop This Look
9. Over-the-Door Storage Racks
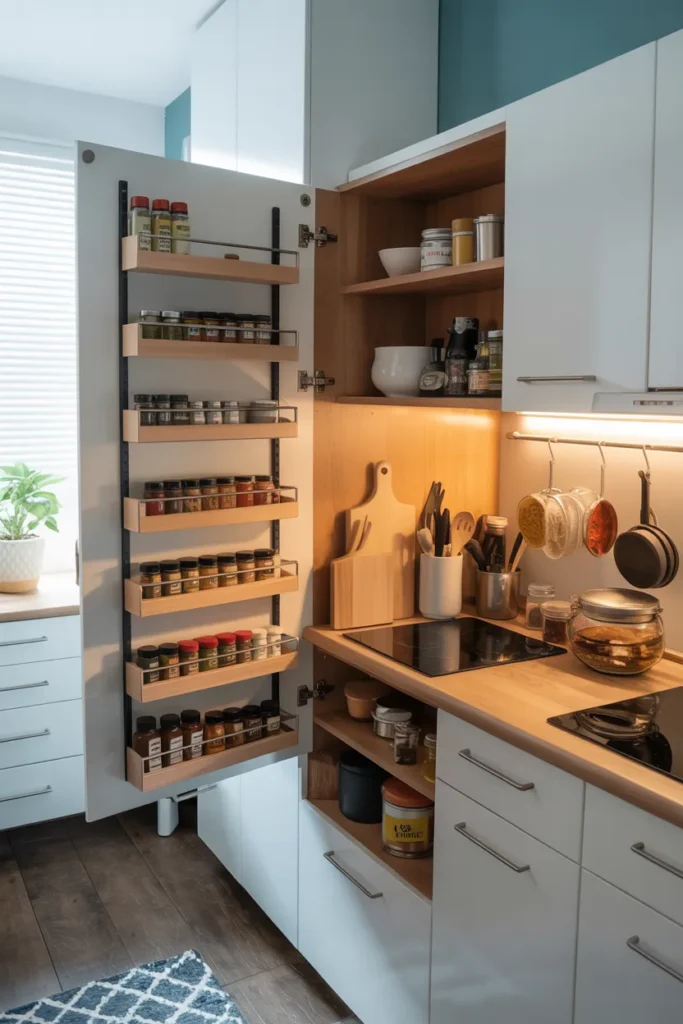
The back of a pantry or cabinet door is free real estate. Over the door racks hold spices, wraps, foil, and cleaning supplies without taking a single inch of shelf space. They install in seconds and come off just as fast when you move.
Check the clearance: The door must still close with the rack loaded, so measure the gap between the door and the shelves inside. Slim racks, 3 to 4 inches deep, fit most doors. If the door has panels, choose a rack with adjustable hooks that clear the molding.
Distribute weight: A door full of heavy cans strains hinges over time, so keep the heavy stuff on shelves and the light stuff on the door: spices, packets, wraps, plastic bags. Tighten hinge screws yearly if the door gets heavy use.
- Measure door to shelf clearance before buying a rack.
- Choose slim 3 to 4 inch racks so doors still close.
- Keep heavy cans on shelves, light items on the door.
Shop This Look
10. Stackable Storage Bins Inside Cabinets
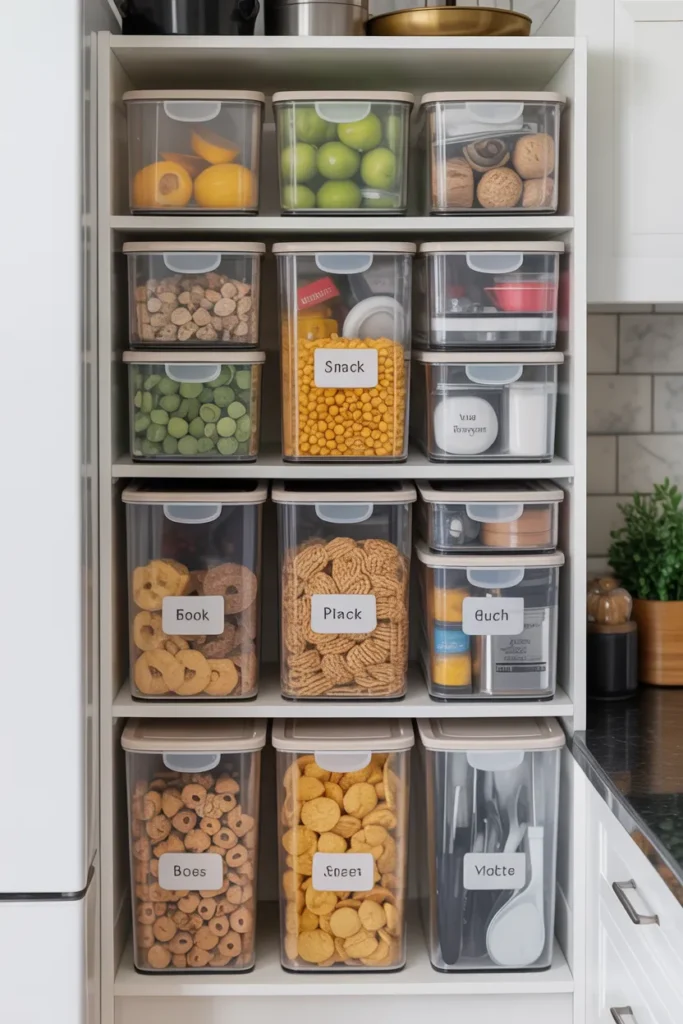
Stackable bins turn deep cabinets into organized columns. Instead of one dark cavern where snacks vanish, you get labeled zones you can pull out like drawers. They are cheap, they need no tools, and they work in any cabinet.
Size to the shelf: Measure shelf height and depth, then buy bins that leave a finger of clearance. Clear bins let you see contents without pulling them out. Handles on the front make them function like drawers, which is the whole point.
Label everything: A label maker or even masking tape and a marker keeps the system alive after the novelty wears off. One bin per category: snacks, baking, canned goods, backstock. When a bin is empty, that is your signal to restock, not to expand into chaos.
- Measure shelf height and depth so bins fit with clearance.
- Choose clear bins with front handles that work like drawers.
- Label each bin by category to keep the system working.
Shop This Look
11. Drawer Dividers for Organized Utensils
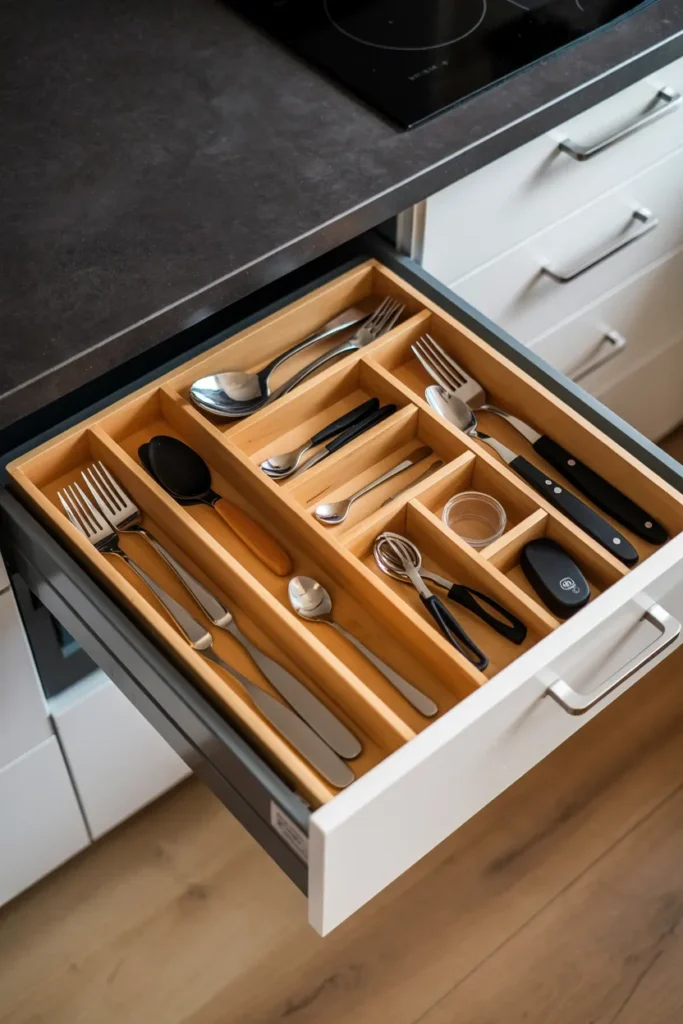
Kitchen drawers become junk drawers the moment utensils have no assigned home. Drawer dividers give every tool a slot, so the drawer stays organized even when you are cooking fast and tossing things back in. It is a five minute fix that lasts for years.
Get adjustable dividers: Spring loaded or expandable dividers fit any drawer without screws, which renters appreciate. Bamboo looks nice and resists moisture better than raw wood. For deep drawers, a two layer insert doubles the usable space for flat tools.
Edit first: Before installing dividers, pull everything out and get rid of duplicates and broken tools. Most kitchens have three vegetable peelers and no one knows why. Dividers work best when the drawer holds only what you actually use.
- Use spring loaded dividers that need no screws.
- Declutter the drawer before installing any organizer.
- Add a two layer insert in deep drawers for flat tools.
Shop This Look
12. Hanging Pot Rack to Free Cabinet Space
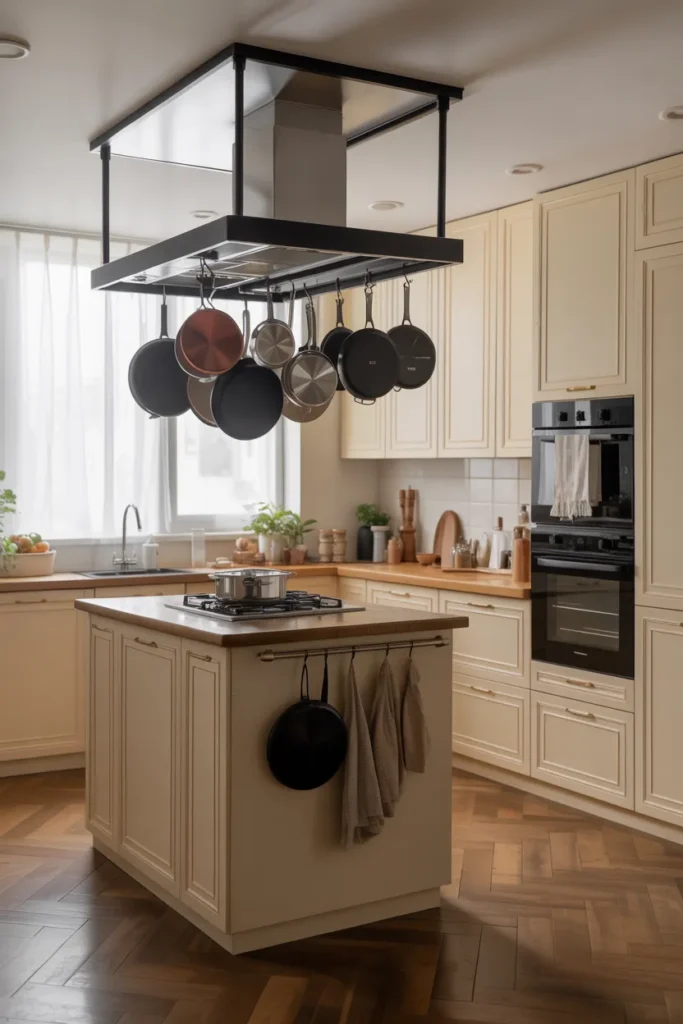
Pots and pans eat cabinet space faster than anything else. A hanging pot rack moves them overhead, freeing an entire cabinet for food or dishes. It also puts cookware at arm’s reach, which genuinely changes how cooking feels.
Hang it from structure: A loaded pot rack is heavy, so it must anchor into ceiling joists, never just drywall. A wall mounted rack on a solid backsplash area is easier for renters. Keep the lowest pot above head height so nobody walks into cast iron.
Keep it curated: Hang only the pans you use weekly; the fondue pot you use yearly belongs in storage. Matching or similar finishes look intentional. Wipe the rack when you wipe counters, because airborne grease coats everything in a kitchen over time.
- Anchor ceiling racks into joists, never drywall alone.
- Keep the lowest hanging pot above head height.
- Hang only weekly use cookware; store the rest elsewhere.
Shop This Look
13. Built-In Appliance Garage
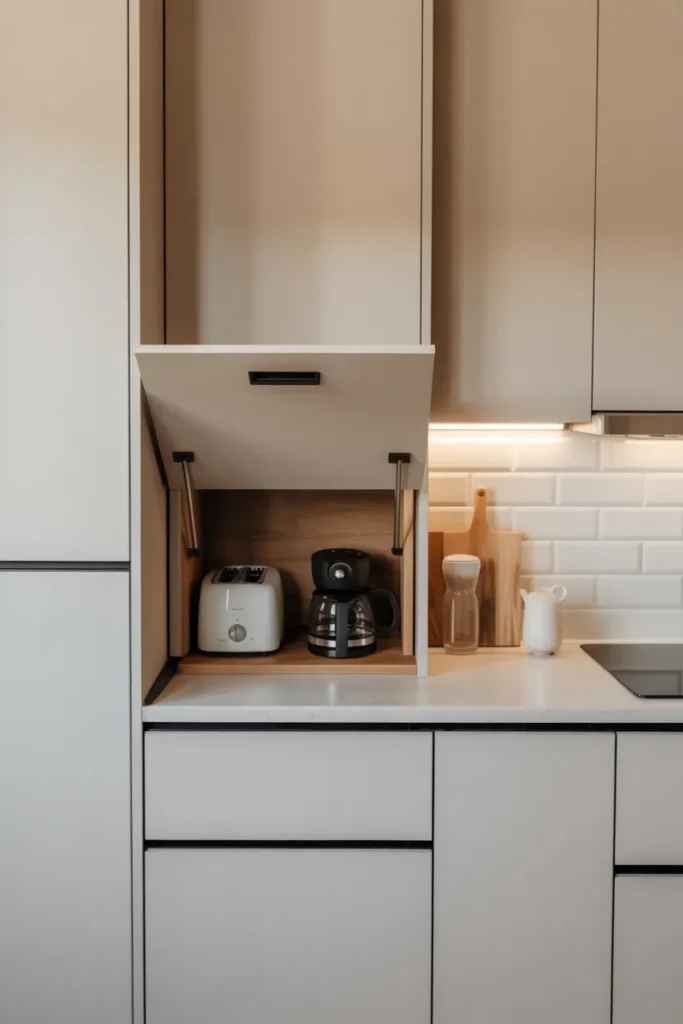
Small appliances multiply on counters until there is no room to actually cook. An appliance garage, a cabinet with a roll up or lift up door, hides the toaster, coffee maker, and blender while keeping them plugged in and ready. The counter stays clear without any daily hauling.
Plan the outlet: The garage needs power inside, so have an electrician add an outlet or use a cabinet near an existing one. A tambour door that rolls up needs no swing clearance, which matters in tight kitchens. Ventilation slots prevent heat buildup from toasters.
Limit the residents: An appliance garage works when it holds the three things you use daily. If it becomes a graveyard for the bread maker and the juicer, it is just a new junk drawer. Be honest about what earns counter adjacent space.
- Ensure a power outlet inside the garage cabinet.
- Use a roll up door to avoid swing clearance issues.
- Limit it to daily use appliances, not occasional gadgets.
Shop This Look
14. Toe-Kick Drawers for Hidden Storage
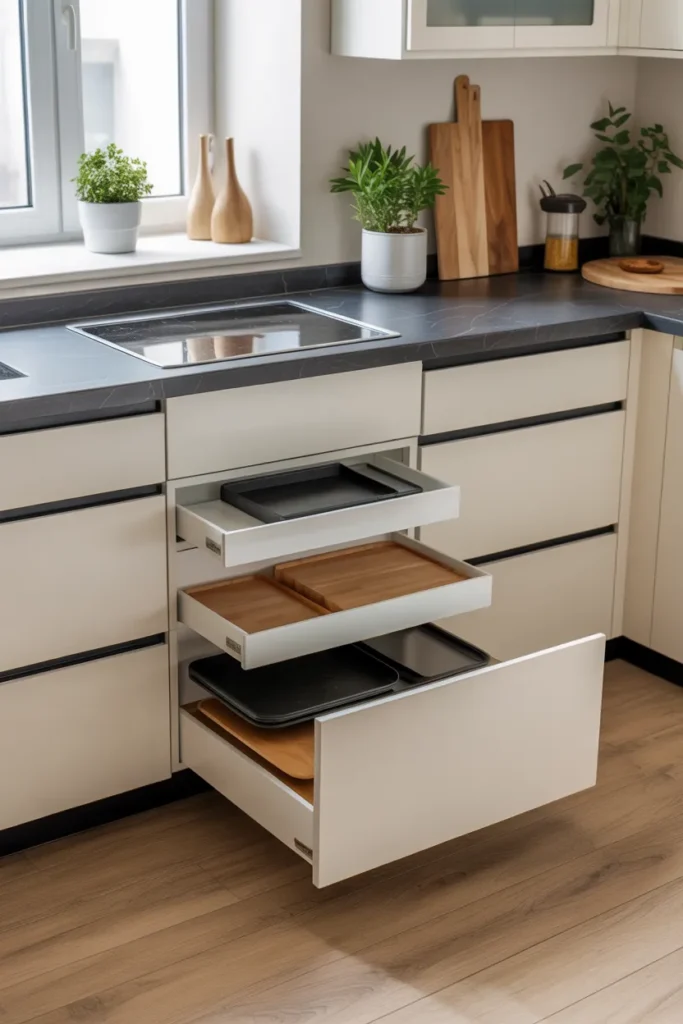
The toe kick, that recessed strip at the bottom of your cabinets, hides 3 to 4 inches of depth across the whole kitchen. Toe kick drawers turn it into slim storage for baking sheets, placemats, and serving trays. It is invisible storage that costs no floor space.
Check feasibility: Toe kick drawers need a flat floor and enough recess depth; measure before ordering kits. They work best on straight cabinet runs. The drawer fronts match your cabinet finish so they disappear when closed.
Store flat things: This space is shallow, so it suits sheet pans, cutting boards, table linens, and pet bowls. A push to open mechanism avoids handles that would catch your toes. Keep the contents light; the drawers are slim, not structural.
- Measure recess depth and floor flatness before ordering kits.
- Store flat items like sheet pans and placemats.
- Use push to open fronts so nothing catches your toes.
Shop This Look
15. Wall-Mounted Pegboard Organizer
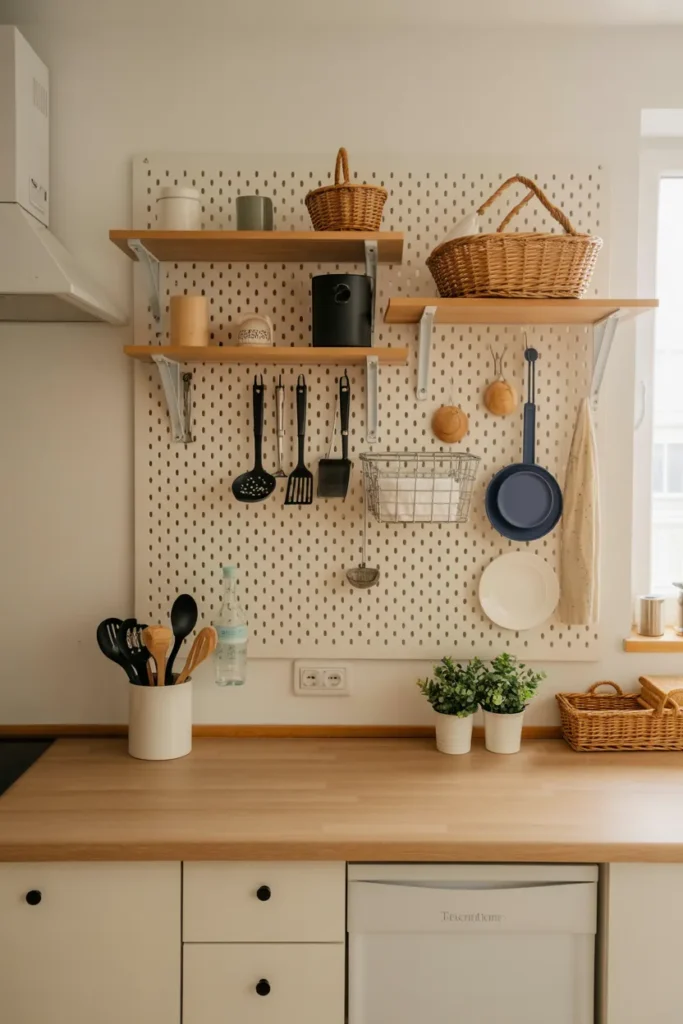
A wall mounted pegboard turns an empty wall into flexible storage for utensils, pans, and gadgets. Hooks move wherever you need them, so the layout evolves with your cooking. It is cheap, it installs in an hour, and it looks great in the right kitchen.
Frame it off the wall: Pegboard needs a gap behind it for the hooks, so mount it on furring strips or a frame. In a kitchen, use a sealed or metal pegboard; raw hardboard swells with humidity. Stainless pegboard panels look sharp and wipe clean.
Arrange by reach: Hang daily tools at arm height near the stove or prep zone. Heavy items go on double hooks low and secure. Trace tool outlines on the board if you want the satisfying everything has a home look, or skip it and just hang things where they land.
- Mount pegboard on furring strips for hook clearance.
- Use sealed or stainless panels that resist kitchen humidity.
- Place daily tools at arm height near the cooking zone.
Shop This Look
16. Pull-Out Trash and Recycling Bins

Trash and recycling bins sitting out eat floor space and look messy. Pull out bins inside a cabinet hide them completely and keep smells contained. A double bin setup makes sorting recycling effortless instead of a chore.
Size the bins: Measure the cabinet interior and the door opening; bins must clear both. A 35 quart bin suits most households; go bigger only if you cook a lot. Soft close slides stop the whole cabinet from slamming when you kick it shut with full hands.
Manage the smell: Use bins with lids and take trash out on schedule, since hidden trash is easy to forget. A charcoal filter or baking soda box inside the cabinet helps. Line bins with sturdy bags that actually fit; a bag that slips down defeats the purpose.
- Measure cabinet interior and door opening before buying bins.
- Choose soft close slides to avoid slamming.
- Use lidded bins and deodorizers to manage hidden smells.
Shop This Look
17. Overhead Cabinet Extensions Above the Fridge
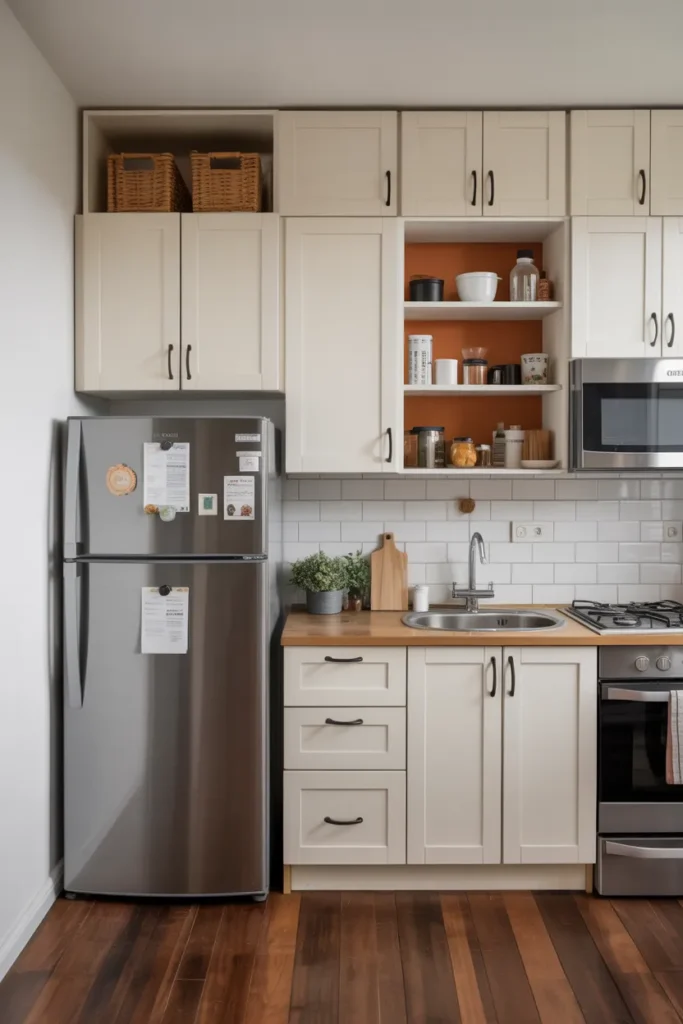
The cabinet space above the fridge is deep, high, and usually wasted on a dusty void. Overhead extensions, extra cabinets stacked above the existing ones, turn it into real storage for bulky rarely used items. It finishes the kitchen’s look too, making it feel built in.
Mind the depth: Above fridge cabinets are deep, so add pull out trays or bins to reach the back. Store lightweight bulky things here: picnic supplies, the punch bowl, small appliances you use seasonally. Heavy items overhead are a bad idea for everyone.
Match the fronts: New cabinet fronts should match the existing ones as closely as possible; take a door to the store for comparison. If a perfect match is impossible, paint the whole run one color for a deliberate look. Add under cabinet lighting beneath for a finished feel.
- Add pull out trays to reach the back of deep above fridge cabinets.
- Store lightweight bulky items overhead, never heavy ones.
- Match new fronts to existing cabinets or repaint the whole run.
Shop This Look
18. Rolling Cart for Flexible Storage
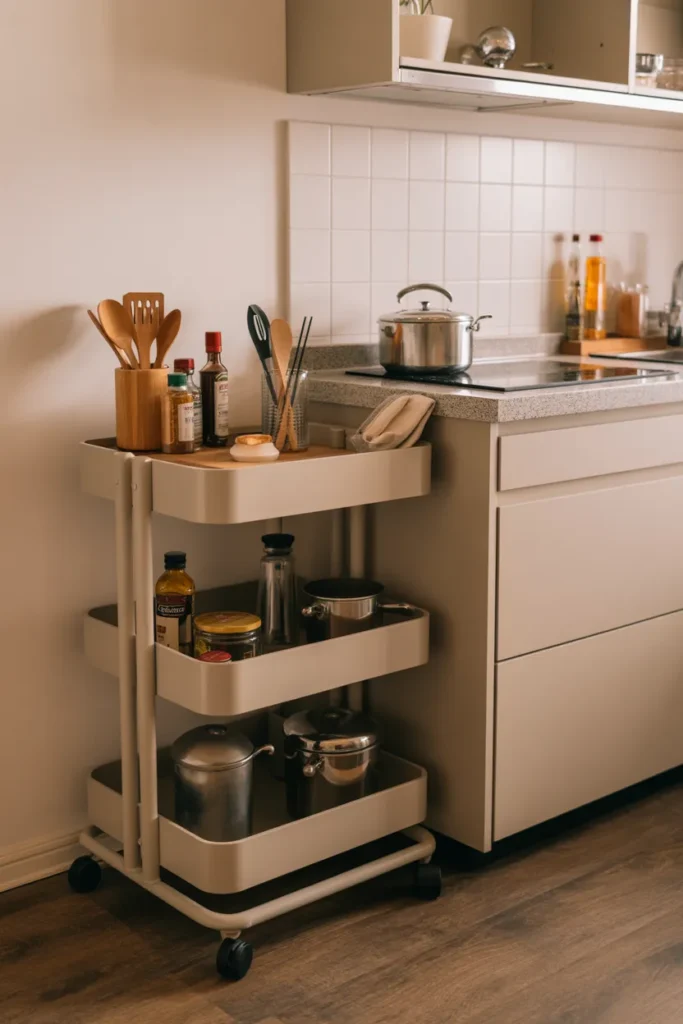
A rolling cart is the apartment kitchen’s secret weapon: extra counter, extra storage, and it moves wherever the work is. Roll it to the stove for prep, to the table for serving, to the wall when you need floor space. No installation, no commitment.
Pick the right size: Measure your doorways and the gaps it must pass through. A cart with a butcher block top doubles as a cutting surface. Drawers beat open shelves for containing clutter; a mix of both is ideal.
Lock it in place: Good casters with locks are non negotiable; a cart that drifts while you chop is dangerous. Two locking wheels minimum, four is better. Keep the heaviest items on the bottom shelf so it stays stable when rolling.
- Measure doorways and gaps the cart must roll through.
- Choose locking casters on at least two wheels.
- Store heavy items on the bottom shelf for stability.
Shop This Look
19. Glass Cabinet Doors for Visual Openness

Glass cabinet doors make a small kitchen feel bigger because your eye travels through them instead of stopping at a flat front. They also nudge you toward tidiness, since the contents are visible. It is a classic trick for opening up a closed in kitchen.
Retrofit, do not replace: You rarely need new cabinets; a carpenter or handy homeowner can swap solid fronts for glass fronts, or you can remove doors entirely for open shelving. Frosted or reeded glass hides clutter while still passing light. Keep the glass clean; fingerprints show fast.
Style the insides: With glass fronts, cabinet interiors become display. Use matching dishes, line shelves with a runner, and add a small puck light inside for evening glow. Corral small items in bins so the view stays calm instead of chaotic.
- Swap solid fronts for glass instead of replacing cabinets.
- Use frosted or reeded glass to pass light while hiding clutter.
- Add interior puck lights and matching dishes for a styled look.
Shop This Look
20. Built-In Drawer Spice Organizer
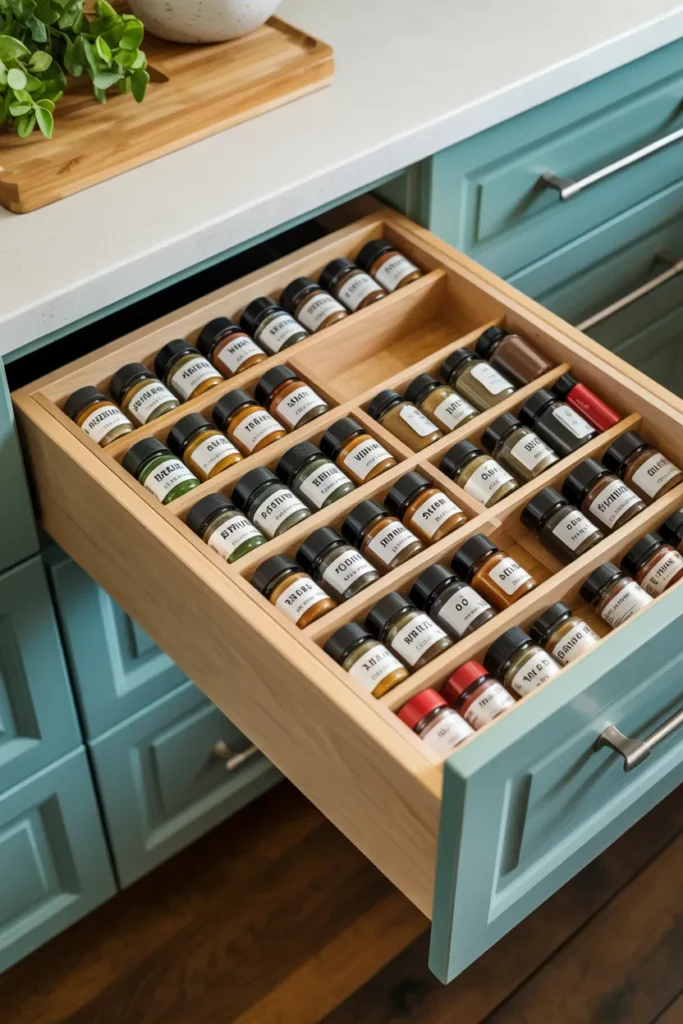
Spice chaos, twenty jars in a deep drawer or a cabinet where you can read only the front row, ends with a built in drawer organizer. Tiered inserts lay every jar label flat and visible, so you grab the cumin without a treasure hunt. It is a small upgrade with daily returns.
Measure the drawer: Tiered inserts need specific drawer depths, so measure before buying. A 3 inch deep drawer fits standard jars lying at an angle. If your drawer is shallow, a stepped insert still beats jars standing in rows.
Decant for uniformity: Same size jars in a drawer look tidy and fit the tiers perfectly. A label on each lid keeps identification instant. Alphabetize if you are that person; group by cuisine if you are not. Either system beats random.
- Measure drawer depth before buying tiered inserts.
- Use uniform jars so every tier fits perfectly.
- Label lids for instant identification.
Shop This Look
21. Fold-Down Wall Table for Extra Prep Space
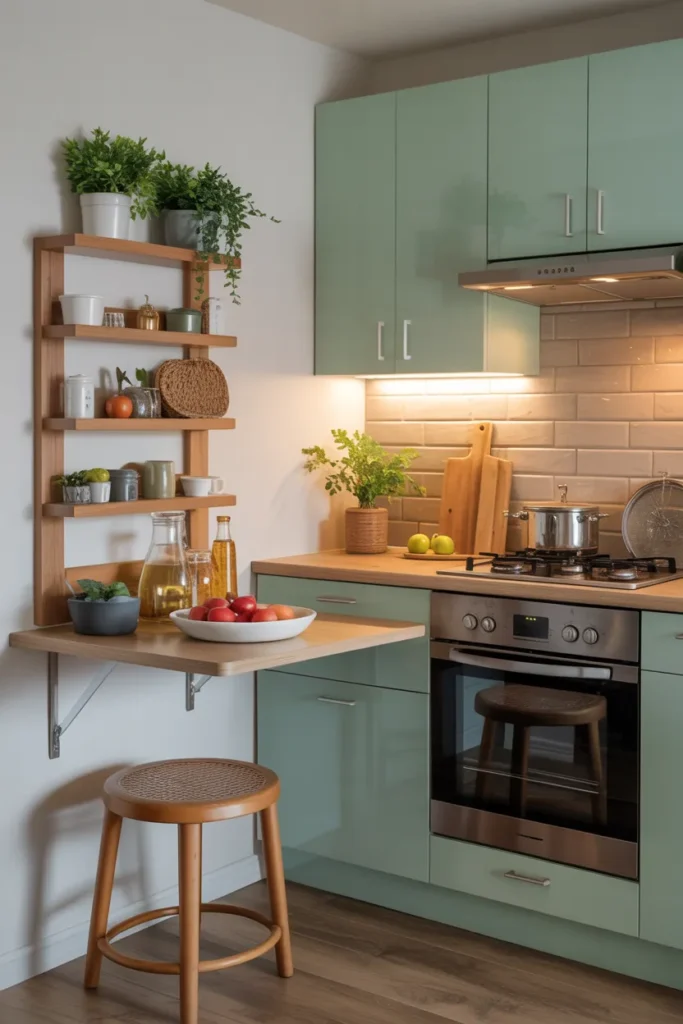
A fold down wall table gives you a full size prep or dining surface that vanishes when you are done. Up for dinner, down for floor space. In a studio apartment, it can be the difference between eating at the counter and having a real table.
Mount into studs: A loaded table puts serious force on its hinges and brackets, so it must anchor into studs or solid masonry. Folding brackets rated for the table size are essential; do not improvise with shelf brackets. Test the mechanism empty before trusting it with dinner.
Finish both sides: The underside becomes wall art when folded up, so finish it nicely or mount a mirror or chalkboard on it. A small lip on the outer edge stops things sliding off. Keep the swing zone clear of chairs and walkways.
- Anchor folding brackets into studs or solid masonry.
- Use brackets rated for the table’s size and load.
- Finish the underside so it looks good folded up.
Shop This Look
22. Hidden Pull-Out Cutting Board
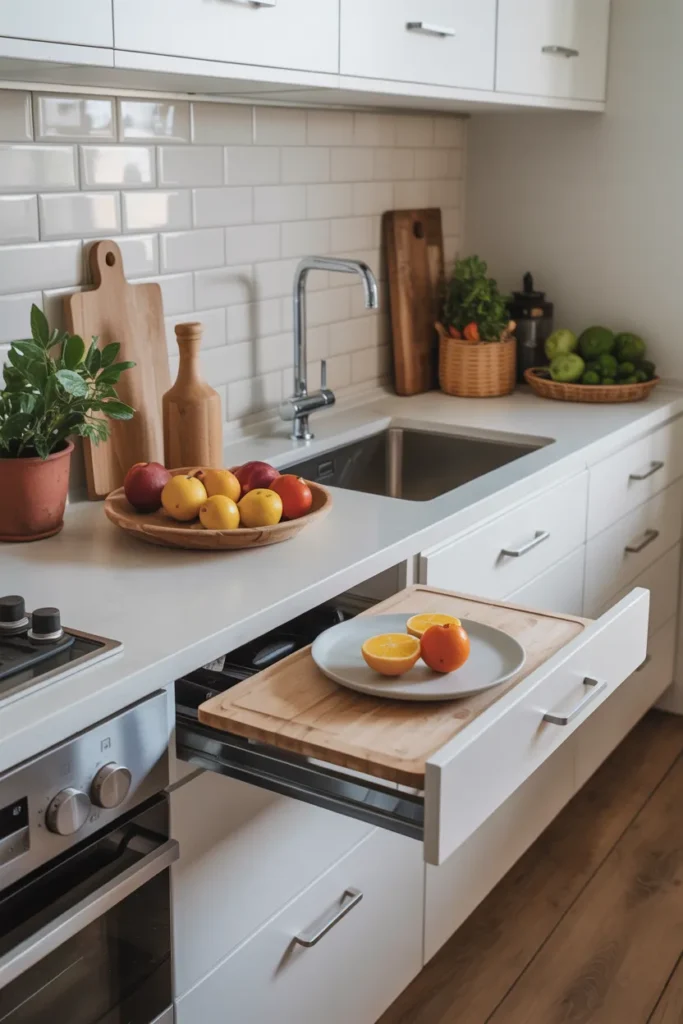
A hidden pull out cutting board slides out from under the counter like a drawer, giving you extra prep space exactly where you need it. Push it back and the counter is clear. It is one of those features people show off to guests because it feels clever.
Check the fit: These install in a standard drawer opening or under the countertop, so measure the available slot. Butcher block inserts handle knife work; thinner boards suit serving. Make sure it clears the cabinet door below when extended.
Keep it food safe: Oil a wood board monthly with food grade mineral oil so it does not dry and crack. Pull it fully out to clean; crumbs collect in the tracks. A board with a juice groove contains mess from tomatoes and melons.
- Measure the drawer opening or under counter slot before buying.
- Choose butcher block for knife work, thin boards for serving.
- Oil wood boards monthly with food grade mineral oil.
Shop This Look
How to Start
Start with the single most annoying spot in your kitchen. The drawer that jams, the cabinet where cans vanish, the counter with no room to chop. Fixing one pain point first gives you a win that motivates the rest, and it tells you which type of storage actually helps you.
Work in zones: Do the cooking zone next to the stove, then the prep zone, then the pantry. Buying organizers zone by zone stops you from ordering a cart full of gadgets that do not fit. Measure every space before you buy anything; apartment kitchens punish guessing.
Keep it reversible: If you rent, favor tension rods, over the door racks, rolling carts, and freestanding shelves. Save the drilled in solutions for your own place. Either way, declutter before you organize; no product fixes a drawer full of things you do not use.
- Fix the most annoying spot first for an early motivating win.
- Organize zone by zone and measure every space before buying.
- Declutter before organizing; products cannot fix excess stuff.
Shop This Look
Common Mistakes
- Buying organizers before measuring; apartment cabinets are never standard sizes.
- Overloading wall mounted racks and shelves beyond their weight ratings.
- Filling new storage with duplicates instead of decluttering first.
- Blocking ventilation or appliance doors with carts and islands.
- Choosing open shelving for rarely used items that collect grease and dust.
- Ignoring the vertical space above cabinets, the fridge, and doors.
- Installing permanent solutions in a rental without checking the lease first.
Frequently Asked Questions
What is the best storage for a very small apartment kitchen?
Start vertical: over the door racks, wall mounted pegboard, and magnetic strips use walls instead of floor space. A rolling cart adds counter and storage that moves out of the way. Inside cabinets, pull out drawers and tiered organizers make deep spaces reachable. Measure everything first; small kitchens punish wrong sizes.
How can I add storage to a rental kitchen without drilling?
Use over the door racks, tension rods inside cabinets, freestanding shelf units, rolling carts, and magnetic strips with strong adhesive backing. Stackable bins and drawer dividers need no tools at all. Command style hooks hold light utensils on walls and cabinet sides without damage.
Where should I put small appliances in a tiny kitchen?
Keep only daily use appliances accessible; store the rest elsewhere. An appliance garage or a dedicated cabinet shelf hides the toaster and coffee maker while keeping them plugged in. The top of the fridge works for light rarely used items. If an appliance has not been used in three months, it does not earn kitchen space.
How do I organize deep kitchen cabinets so nothing gets lost?
Convert deep shelves into pull out drawers or use handled bins that slide out like drawers. Tiered risers lift back rows into view. Store by zone and label everything. The rule is simple: if you cannot reach it or see it, you will not use it, so bring the back of the cabinet to the front.
What is a good next step after basic kitchen organization?
Once the basics are handled, look at bigger upgrades like a small kitchen remodel guide to plan layout changes, lighting improvements, and cabinet upgrades that make a compact kitchen work even harder.
The Finishing Touch
An apartment kitchen gets big through attention, not square footage. Every idea here reclaims space that was already yours: the air above the cabinets, the back of a door, the inches under the counter. Pick the three that match your biggest annoyances and start there.
To calibrate your eye before you buy, browse this Houzz collection of small kitchen ideas and notice how real compact kitchens use vertical space and hidden storage. Save the layouts that resemble your kitchen and use them as a shopping list.
Then do the smallest project this weekend. Hang the over the door rack, install the drawer dividers, roll in the cart. Small kitchens reward fast action because every fix is a large percentage of the whole room. Start now and cooking dinner will feel different by next week.