21 Small Kitchen Remodel Ideas for Smart Spaces
A small kitchen is not a failed kitchen. Some of the best cooking happens in tight spaces, because everything is within reach and there is nowhere for clutter to hide. The problem is never the square footage itself. It is the dead corners, the dark cabinets, the wasted vertical space, and the layout that fights you every time you cook. These 21 ideas fix exactly those things, one practical change at a time.
This guide covers storage that hides in plain sight, layouts that open up tight floor plans, lighting that makes the room feel bigger, and compact appliances that do real work without eating the counter. Every idea is chosen for small kitchens specifically, not just kitchens in general. You will not find suggestions here that assume you have a twelve-foot island or a walk-in pantry.
Whether you own and are planning a full remodel or you rent and need changes you can undo, there is something here for you. Start with the ideas that solve your biggest daily frustration, whether that is counter space, cabinet space, or just the feeling that the walls are closing in. Small kitchens reward smart choices more than big budgets.
This post contains affiliate links. If you buy through them, I may earn a small commission at no extra cost to you.
1. Open Shelving to Create Visual Space


Open shelving creates visual space because your eye travels to the wall instead of stopping at a cabinet door. In a small kitchen, replacing even one run of upper cabinets with open shelves can make the whole wall feel lighter and the room feel wider. It also forces a useful discipline: you keep out only what you actually use, which means the shelves stay functional instead of decorative. Daily dishes, glasses, and a few pretty bowls are all this needs.
Keep it shallow: Shelves 10 to 12 inches deep hold dinner plates without jutting into the room. Anything deeper becomes a dust collector for things you cannot reach. Solid wood shelves bring warmth, while painted shelves in the wall color nearly disappear. Mount them into studs, because a shelf of stoneware is heavy, and use brackets that suit your style, from invisible floating hardware to simple black metal.
Edit ruthlessly: Open shelves only work when they are curated. If a shelf fills with mismatched mugs and expired spices, it makes the kitchen feel messier than cabinets would. Keep daily items on the shelves and move the rarely used pieces into closed storage. A good test: if you have not touched it in a month, it does not belong on display. The shelves should look like a shop you love, not a storage unit.
- Keep shelves 10 to 12 inches deep so plates fit without the shelf jutting into the room.
- Mount into studs; a shelf full of stoneware is heavier than it looks.
- Display only what you use weekly; move rarely touched items to closed cabinets.
Shop This Look
2. Compact Kitchen Island with Storage


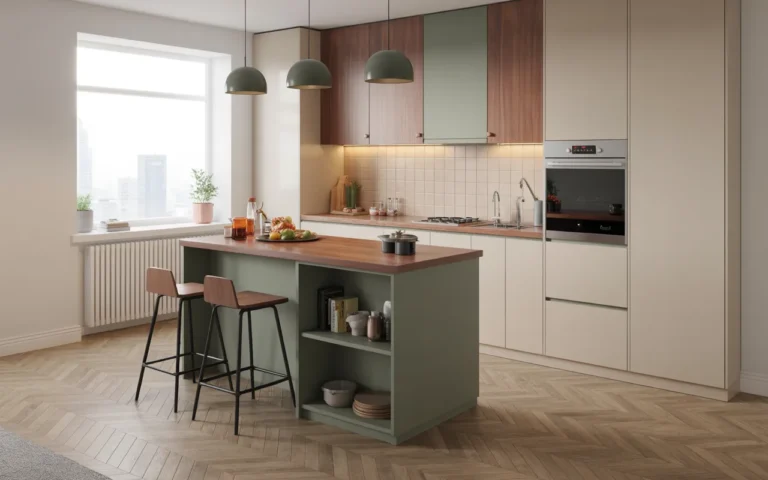
A compact kitchen island with storage gives you the two things small kitchens lack most: counter space and a place to put things. The trick is sizing it to the room. You need at least 36 inches of clearance on all working sides, 42 if more than one person cooks. A 24 by 48 inch island fits many small kitchens and still holds a surprising amount inside. Look for models with shelves, drawers, or cabinets on at least two sides so no face is wasted.
Size it honestly: Measure your clearances with painter’s tape on the floor before you buy or build. Walk the routes you take daily, from fridge to sink to stove, and make sure the island does not block them. If a fixed island crowds the room, a rolling island gives you the same storage and counter but moves aside when you need floor space. Be honest about whether you need seating too; a 12-inch overhang eats into the storage depth.
Work every side: The best compact islands serve double duty. One side holds drawers for utensils and linens, the other holds open shelves for cookbooks or a microwave. A butcher-block top adds prep space that doubles as a serving station. If your kitchen lacks a pantry, dedicate one full side of the island to food storage with pull-out bins. Every face of the island should earn its footprint.
- Keep 36 inches of clearance on all working sides, 42 inches if two people cook.
- Tape the footprint on the floor and walk your daily routes before committing.
- Use every face: drawers on one side, shelves or bins on the other.
Shop This Look
3. Light Color Palette for a Spacious Feel


A light color palette makes a small kitchen feel spacious because light colors reflect light instead of absorbing it. Whites, soft grays, pale blues, and light wood tones push the walls visually outward. This does not mean the kitchen has to be boring or all-white. It means the large surfaces, meaning cabinets, walls, and backsplash, stay light, while you add personality through smaller things like hardware, textiles, and a plant or two.
Layer the lights: A light palette works through layers, not one flat color. Try white uppers with pale wood lowers, or warm white walls with a soft gray backsplash. Slight variation keeps the room from feeling sterile. Keep the contrast low between the big surfaces; high contrast chops a small room into pieces. Save the bold color for one accent you can change cheaply, like bar stools or a runner rug.
Mind the undertones: Whites are not all the same, and mismatched undertones make a light kitchen feel dirty instead of fresh. Pick one undertone family, warm or cool, and carry it through paint, tile, and counters. Test large swatches in your kitchen’s actual light, because showroom lighting lies. North-facing kitchens need warmer whites to avoid feeling chilly; south-facing rooms can handle cooler tones.
- Keep large surfaces light and low-contrast; add personality through hardware and textiles.
- Stick to one undertone family, warm or cool, across paint, tile, and counters.
- Test large swatches in your kitchen’s real light; north-facing rooms need warmer whites.
Shop This Look
4. Floor-to-Ceiling Cabinets for Maximum Storage


Floor-to-ceiling cabinets turn the most wasted zone in a small kitchen, the space above your head, into real storage. That upper band is perfect for things you use rarely: holiday platters, the turkey roaster, bulk paper goods. Taking cabinets to the ceiling also eliminates the dust-collecting gap on top, which makes the kitchen easier to clean and look at. The room feels taller and more finished, like the cabinetry was built for the space rather than dropped in.
Zone by height: Organize by how often you reach. Daily items live between knee and shoulder height. Weekly items go a little higher or lower. The top band, above comfortable reach, is for the rarely used stuff. Keep a sturdy step stool nearby, not buried in a closet, or the top cabinets become dead space. Label the high shelves if it helps; out of sight should not mean out of mind.
Keep it accessible: Tall cabinets need good hardware to stay usable. Pull-down shelf mechanisms bring high contents to you and are worth it for the main upper run. On the doors, use soft-close hinges so tall doors do not slam. If the ceiling is very high, consider a rolling library ladder for charm and function, but only if you have the floor space to park it. Otherwise a folding step stool tucked beside the fridge does the job.
- Store rarely used items up high and keep a step stool within reach, not buried away.
- Add pull-down shelf mechanisms to the main upper run so high storage stays usable.
- Take cabinets to the ceiling to kill the dust gap and make the room feel taller.
Shop This Look
5. Glass Cabinet Doors for Depth


Glass cabinet doors create depth because they turn a solid wall of boxes into something with dimension. Your eye reads through the glass to the back of the cabinet, which makes the wall feel inches deeper than it is. They also break up the monotony of closed cabinetry and give you a display zone for pretty dishes. In a small kitchen, swapping just the doors on one bank of uppers, rather than the whole kitchen, is often enough to change the feel.
Light the inside: Glass doors earn their keep when the cabinet interior is lit. Small LED puck lights or strip lights inside turn the cabinet into a display case and add ambient light to the whole kitchen. Without interior light, glass doors just show dark clutter. Keep what is inside edited and matching; a jumble of plastic containers behind glass defeats the purpose. Decant dry goods into clear jars for the prettiest effect.
Choose the glass: Clear glass shows everything, so it demands tidiness. Frosted or seeded glass hides a multitude of sins while still letting light through, which makes it the practical choice for most people. Leaded or reeded glass adds texture and works beautifully in traditional kitchens. Whatever you pick, keep the frames slim so the glass does the visual work, not the woodwork.
- Add LED lighting inside glass cabinets; unlit glass just shows dark clutter.
- Pick frosted or seeded glass if you want the depth without the pressure of perfect tidiness.
- Swap doors on one bank of uppers first; you rarely need to convert the whole kitchen.
Shop This Look
6. Pull-Out Pantry for Hidden Storage


A pull-out pantry turns a narrow sliver of space into serious food storage. These tall, slim units slide out on heavy-duty rails to reveal shelves on both sides, using a gap as narrow as six inches. They fit beside the fridge, between cabinets, or in that awkward filler strip every kitchen seems to have. In a small kitchen without a walk-in pantry, a pull-out unit can hold the bulk of your dry goods within arm’s reach of the prep zone.
Load it smart: Put heavy items like oils and cans low, where the rails handle the weight best, and light items like spices and packets up high. Use the door-side shelves for slim things like spice jars and the inner shelves for boxes and bags. Do not overload past the weight rating; smooth glide is the whole point, and an overstuffed pull-out that sticks is worse than no pantry. Decant into uniform containers so everything is visible at a glance.
Measure twice: Pull-out pantries are precision products, and the cabinet opening has to match the unit. Measure the width, height, and depth of your gap, then buy the unit that fits, not the one you wish fit. Check that the pull-out clears adjacent handles and door swings when extended. Soft-close slides are worth the upgrade; a pantry that slams every time you close it gets old fast.
- Put heavy cans and oils low on the pull-out and light spices high for smooth gliding.
- Measure the exact gap before buying; these units need a precise cabinet opening.
- Choose soft-close slides so the pantry shuts quietly every time.
Shop This Look
7. Compact L-Shaped Layout


A compact L-shaped layout is the most efficient use of a small kitchen’s walls. Two runs of cabinets meeting at a corner give you generous counter and storage while leaving the rest of the floor open. The open side is the gift: it holds a small table, a cart, or just breathing room, and it keeps the kitchen from feeling boxed in. The L also creates a natural work triangle with short steps between sink, stove, and fridge.
Own the corner: The inside corner of an L is where small kitchens lose space, so give it a job. A lazy Susan, a pull-out corner unit, or even well-planned corner shelves keep it from becoming a black hole. Plan the corner before the straight runs, because it dictates the cabinet sizes on both sides. If the corner is truly awkward, a diagonal sink or cooktop base can turn it into the hardest-working spot in the kitchen.
Keep one side open: Resist the urge to fill the open leg of the L with more cabinets. That openness is what makes the layout work in a small space. Use it for a slim dining table, a rolling cart, or simply clear floor that lets two people pass. If you need the storage, choose shallow pieces, twelve inches deep, that hold plenty without closing off the room. The L-shape’s power is restraint on the third side.
- Give the inside corner a real job with a lazy Susan or pull-out corner unit.
- Leave the open leg of the L free for a table, cart, or clear passage.
- Keep the sink-stove-fridge triangle tight so every step counts.
Shop This Look
8. Rolling Cart for Flexible Counter Space


A rolling cart gives you flexible counter space that appears when you need it and disappears when you do not. Roll it to the stove for extra prep room, to the table for serving, or against the wall when the kitchen needs to breathe. In a small kitchen, flexibility beats permanence; a cart adapts to cooking, entertaining, and cleaning in ways a fixed island cannot. Choose one with a solid top, real storage below, and locking casters.
Lock it down: Locking casters are non-negotiable on a kitchen cart, because a cart that drifts while you chop is dangerous. Test the locks in the store if you can; cheap casters slip. The top should be heat-safe or paired with trivets, since you will set hot pans down in a hurry. Butcher block tops are forgiving and can be sanded back to new, while stainless tops handle heat and wipe clean.
Give it a home: A rolling cart only works if it has a parking spot. Measure a home base, beside the fridge, at the end of a counter run, or in a nearby nook, where it lives when not in use. Without a spot, the cart becomes clutter that you trip over. Style the cart intentionally too; since it moves around the kitchen, it should look good from every angle, not just the front.
- Insist on locking casters; a drifting cart is dangerous during prep.
- Pick a butcher block or stainless top that handles heat and wipes clean.
- Designate a parking spot so the cart never becomes hallway clutter.
Shop This Look
9. Minimalist Cabinet Hardware


Minimalist cabinet hardware keeps a small kitchen visually quiet. When pulls and knobs disappear, or shrink to slim bars, the cabinetry reads as one calm surface instead of a field of metal dots. This matters more in small rooms, where every visual interruption makes the space feel busier. Edge pulls, slim bar handles, or push-to-open latches all achieve the effect. The result is a kitchen that feels larger because there is less for the eye to snag on.
Sweat the grip: Minimalist hardware still has to work with wet, greasy hands. Test the grip before you commit to a whole kitchen of edge pulls; some look great and feel terrible. Bar pulls need enough clearance behind them for fingers, usually at least an inch and a quarter. Push-to-open latches are the cleanest look of all but show fingerprints on the cabinet fronts, so they suit households that wipe down often.
Stay consistent: Pick one hardware style and use it everywhere, because mixing minimal and decorative hardware in a small kitchen looks indecisive. If you choose slim black bars, carry them to every door and drawer. Match the finish to one other element, like the faucet or the light fixtures, so the hardware feels connected to the room. Consistency is what makes minimalism read as a choice rather than an absence.
- Test hardware grip with wet hands before committing to a whole kitchen.
- Leave at least an inch and a quarter of finger clearance behind bar pulls.
- Use one hardware style everywhere so the minimalism reads as intentional.
Shop This Look
10. Corner Shelves to Maximize Dead Space

Corner shelves rescue the dead space where two walls meet and cabinets fear to go. A set of floating corner shelves turns an awkward angle into display and storage for dishes, plants, or cookbooks. Unlike corner cabinets with their dark unreachable depths, corner shelves keep everything visible and within reach. They work especially well at the end of a counter run or above a corner sink, where traditional uppers would crowd the space.
Float them right: Corner shelves need solid mounting on both walls, so find the studs before you drill. Keep the shelves shallow, eight to ten inches, so they do not overwhelm the corner. Stagger two or three shelves with enough height between them for what you plan to store; measure your tallest item first. A small lip or rail on open corner shelves keeps things from sliding off in the night.
Style the angle: Corners are naturally shadowy, so keep corner shelf styling light and simple. A trailing plant softens the angle beautifully, and a small lamp or LED strip underneath the lowest shelf banishes the gloom. Group items in odd numbers and leave breathing room; crammed corner shelves look like the clutter you were trying to avoid. The corner should feel like a discovery, not a dumping ground.
- Mount into studs on both walls; corner shelves carry real weight.
- Keep shelves eight to ten inches deep so they suit the corner without crowding it.
- Add light under the lowest shelf; corners are naturally shadowy.
Shop This Look
11. Under-Cabinet Lighting for Brightness


Under-cabinet lighting is the single highest-impact upgrade for a small kitchen. It banishes the shadows that upper cabinets cast on your counters, which instantly makes the workspace feel bigger and safer. Food prep gets easier, the backsplash glows, and the whole kitchen feels finished. LED strips or pucks are cheap, easy to install, and sip electricity. If you do nothing else from this list, do this.
Place it forward: Mount the lights toward the front edge of the upper cabinets, not against the wall, so the light washes the full depth of the counter. Lights stuck at the back leave the front of the counter in shadow, which is exactly where you chop. A simple aluminum channel with a diffuser gives you a clean line of light with no visible dots. Hardwire to a wall switch if you can; plug-in with a remote is the renter-friendly fallback.
Tune the color: Choose warm white, around 2700 to 3000K, for a cozy kitchen that flatters food. Cool white looks clinical and makes the room feel like a laboratory. If your kitchen doubles as a workspace, tunable lights that shift from bright day to warm evening are worth the small premium. Put the under-cabinet lights on their own switch or dimmer so you can light just the counters for a midnight snack run.
- Mount lights near the front edge of uppers so they wash the full counter depth.
- Use an aluminum channel with diffuser for a clean line without visible dots.
- Pick warm white around 2700 to 3000K; cool white feels clinical in a kitchen.
Shop This Look
13. Compact Appliances for Space Efficiency


Compact appliances free up the counter and cabinet space that full-size models devour. A slim dishwasher, a 24-inch range, or an apartment-size fridge can save inches everywhere, and inches are everything in a small kitchen. Modern compact appliances are not the sad compromises they used to be; many match full-size performance in a smaller box. The key is choosing the right compact, not just the smallest one.
Prioritize the workhorses: Spend your appliance budget on what you use daily. If you cook every night, the range matters more than the dishwasher. If you reheat more than you roast, a good microwave-convection combo earns its counter space. Measure your actual cookware against compact ovens and fridges before buying; a fridge that cannot hold your pizza box or a sheet pan will annoy you forever. Read the interior dimensions, not just the exterior ones.
Hide what you can: Panel-ready compact appliances disappear behind cabinet fronts and make a small kitchen look seamless. A dishwasher drawer instead of a full unit, a microwave tucked into a shelf, and a fridge with cabinet panels all reduce visual clutter. Even without panels, choosing appliances in one finish, all stainless or all black, calms the room. Mixed appliance finishes chop a small kitchen into visual pieces.
- Read interior dimensions before buying; a fridge that cannot fit a sheet pan will frustrate you.
- Spend the budget on the appliance you use daily, not the one that looks impressive.
- Keep all appliances in one finish so the small kitchen reads as calm, not chopped up.
Shop This Look
13. Floating Counter Extension


A floating counter extension adds prep or dining space without legs eating your floor. Mounted to the wall or to existing cabinetry, it juts out where you need it and leaves the floor clear underneath, which keeps the kitchen feeling open. It can serve as a breakfast bar, a laptop perch, or extra chopping room during big cooking sessions. When closed or folded, some versions disappear entirely against the wall.
Support it properly: A floating counter is only as good as its brackets. Use heavy-duty folding or fixed brackets rated well above your expected load, anchored into studs, because people will lean on it. The counter should not flex when you press down hard; flex means the brackets are undersized. For stone or thick wood tops, consider a steel support frame hidden underneath rather than simple brackets.
Mind the edge: The front edge of a floating counter is at hip height in a traffic path, so round it or ease it to avoid bruises. Keep the depth modest, sixteen to twenty inches, so it serves its purpose without becoming a barrier. If it doubles as seating, leave knee clearance of at least fifteen inches deep and thirty inches wide per person. A counter that is uncomfortable to sit at becomes a shelf, not a table.
- Anchor heavy-duty brackets into studs; the counter must not flex under leaning weight.
- Ease or round the front edge since it sits at hip height in the traffic path.
- Allow fifteen inches of knee depth per person if the extension doubles as seating.
Shop This Look
14. Vertical Spice Rack


A vertical spice rack turns the chaos of a spice cabinet into a single glance. Mounted inside a cabinet door, on a narrow wall, or as a pull-out beside the stove, it keeps every jar visible and reachable. In a small kitchen, spices are the classic clutter culprit: too many small jars for any drawer. Going vertical solves it by using wall or door space that would otherwise sit empty, and it keeps spices near the cooking zone where they belong.
Keep them near heat, not in it: Spices want to live near the stove for convenience but not above it, where heat and steam kill their flavor fast. The inside of a cabinet door beside the range is ideal. A magnetic rack on the side of the fridge works too, as long as it is not the side facing the oven. Whatever you choose, keep jars away from direct sun, which fades both color and potency.
Decant and label: A vertical rack only looks good with uniform jars, so decant into matching containers and label everything. Buy jars in one size that fits your rack, and keep a funnel handy for refills. Alphabetize if you are that person; at minimum, group baking spices apart from savory ones. Date the bottoms when you fill them, because ground spices fade after about a year and whole spices after two or three.
- Mount the rack near the stove but never above it; heat and steam kill spice flavor.
- Decant into uniform labeled jars so every spice is visible at a glance.
- Date jars when filled; ground spices fade after about a year.
Shop This Look
15. Pull-Out Cutting Board


A pull-out cutting board hides inside a drawer or under the counter and slides out when you need extra prep space. It is the small kitchen’s secret weapon: invisible until the moment you need it, then instantly a stable chopping surface. Some versions sit over a trash pull-out so scraps sweep straight into the bin. It costs little, installs easily, and gives you back counter inches exactly when they matter most.
Choose the surface: Solid wood or bamboo boards are kind to knives and can be sanded back to new, which makes them the best long-term choice. Plastic inserts are cheaper and dishwasher safe but scar faster. Whatever the material, the board should lock firmly when extended; a wobbly board is worse than no board. Oil wooden boards monthly so they do not dry out and crack in the kitchen’s heat cycles.
Place it wisely: The pull-out board belongs in your main prep zone, usually between the sink and the stove, where chopping actually happens. A board installed across the kitchen from the action will sit unused. If you can, position it above the trash pull-out so peelings and trimmings go straight down. Keep it clear of clutter; a pull-out board buried under the mail is just another drawer.
- Pick a wood or bamboo board that locks firmly; a wobbly surface is worse than none.
- Install it in the main prep zone between sink and stove, where chopping happens.
- Oil wooden boards monthly so heat cycles do not dry and crack them.
Shop This Look
16. Sliding Pantry Doors

Sliding pantry doors save the swing space that hinged doors waste. In a tight kitchen, a pantry door that swings out can block the main walkway or smack into the fridge. Sliding doors, whether barn-style on a rail or pocket doors that vanish into the wall, give you full access without claiming floor space. They also look intentional and modern, turning the pantry into a design feature rather than an afterthought.
Pick your slide: Barn doors on an exposed rail are the easiest retrofit and suit farmhouse and industrial styles. Pocket doors disappear completely but need wall cavity space and are a bigger project. Bypass sliders, where two panels slide past each other, work in the tightest spots. Whatever style you choose, make sure the track is rated for the door’s weight and install a soft-close or soft-open mechanism so the doors glide instead of slam.
Keep it accessible: The point of the pantry is daily use, so the doors should open with one hand while you hold a bag of groceries. Avoid heavy solid doors that need a shove; lighter panels with good hardware win. If the pantry is deep, add interior lighting on a door switch so you can actually see what is inside. A sliding door that sticks or a dark pantry interior will train you to stop using it.
- Choose a track rated for your door’s weight and add soft-close so doors glide quietly.
- Make sure doors open one-handed; you will often have groceries in the other arm.
- Add interior lighting on a door switch so a deep pantry stays usable.
Shop This Look
17. Corner Lazy Susan Cabinets

Corner lazy Susan cabinets make the darkest, deepest corner of your kitchen actually usable. Instead of a black hole where pans go to disappear, a rotating two-tier shelf brings everything to the front with a spin. Modern versions are far better than the wobbly Susans of the past, with sturdy trays and smooth bearings. In a small kitchen, reclaiming a corner cabinet effectively adds a whole cabinet of storage you already paid for.
Upgrade the mechanism: If your corner cabinet has a sad original lazy Susan, replacing just the mechanism transforms it. Look for full-round or D-shaped trays with raised rims so nothing slides off mid-spin. Kidney-shaped designs use the corner space most efficiently. Check the weight rating against what you plan to store; cast iron belongs on lower, sturdier tiers. A smooth, quiet spin is the difference between using it and ignoring it.
Zone the tiers: Give each tier a category so the corner stays organized. Heavy pots and pans low, mixing bowls and small appliances up top. Use the door-mounted storage too, since many corner systems waste the door face. Avoid the temptation to cram; a lazy Susan packed so tight it cannot spin is just an expensive dark corner again. Leave finger room around the trays.
- Choose trays with raised rims so items do not slide off mid-spin.
- Put heavy pots low and light bowls high, respecting the weight rating.
- Leave finger room around trays; an overpacked Susan cannot spin.
Shop This Look
18. Compact Under-Sink Organizers

Compact under-sink organizers tame the most chaotic cabinet in the kitchen. Pipes make the under-sink space awkward, but stackable shelves, sliding baskets, and door-mounted caddies work around them. In a small kitchen, this cabinet often holds cleaning supplies plus overflow, so organizing it frees space elsewhere. The goal is simple: everything visible, everything reachable, nothing stacked three deep behind the pipes.
Work around the pipes: Measure around your actual plumbing before buying organizers, because every under-sink is different. U-shaped sliding baskets straddle the pipes, and narrow stackable shelves fit beside them. A tension rod across the cabinet holds spray bottles by their triggers, using the air space up top. Keep a small tray under everything to catch leaks; finding a leak early saves the cabinet floor.
Contain the chemicals: Keep cleaning products in a caddy you can lift out whole, so wiping the cabinet takes seconds. If you have kids or pets, this is the cabinet that needs a child lock, full stop. Store only what you use under the sink; the rest belongs in a utility closet. And check for moisture regularly, since slow drips under sinks destroy cabinets silently. A water alarm the size of a coin gives cheap peace of mind.
- Measure around your actual pipes before buying; every under-sink layout differs.
- Use a caddy for cleaners so you can lift everything out to wipe the cabinet.
- Add a child lock and a small water alarm for safety and early leak detection.
Shop This Look
19. Fold-Down Wall Table

A fold-down wall table gives you a dining or work surface that vanishes when you need the floor. Mounted to the wall, it flips up for meals, homework, or laptop work, and folds flat when the kitchen needs to be just a kitchen. In a studio or one-wall kitchen, this can be the difference between eating at the counter and eating like a person. It is also one of the most renter-friendly options if you use a freestanding folding version.
Mount it solid: A wall-mounted table holds dinner, elbows, and leaning weight, so it needs studs and serious brackets. Test it with more weight than you expect before trusting it with a hot casserole. Folding brackets should lock positively in the up position; if the lock feels vague, upgrade the hardware. The table surface should be easy-clean, because it will double as extra prep space whether you plan it or not.
Pair the seating: A fold-down table needs seating that folds or stacks away too, or you have just moved the clutter. Folding chairs that hang on the wall, stools that tuck under the counter, or a bench that slides beneath the table keep the system working. When everything folds, the kitchen transforms in under a minute from dining room to workspace to open floor. That flexibility is the whole point.
- Anchor into studs with locking brackets; test with more weight than a dinner before trusting it.
- Choose an easy-clean surface since the table will double as prep space.
- Pair with folding or stacking seating so the whole setup disappears together.
Shop This Look
20. Light-Reflecting Backsplash

A light-reflecting backsplash bounces light around a small kitchen and makes the walls feel farther away. Glossy subway tile, mirrored tile, or metallic finishes all catch both natural and artificial light and throw it back into the room. The effect is strongest opposite a window or under good under-cabinet lighting. Beyond the brightness, a reflective backsplash adds a layer of polish that makes budget cabinets look more expensive.
Pick your shine: Handmade-look glossy tiles give a soft, varied reflection that feels artisanal. Mirrored tiles maximize the bounce but show every splash and fingerprint, so they suit low-splatter zones. Metallic or mother-of-pearl finishes split the difference with shimmer and forgiveness. Keep the grout lines thin and the color light; dark grout on a reflective tile kills the glow you are paying for.
Keep it cleanable: Reflective surfaces show grime, so choose a backsplash you will actually wipe. Glossy ceramic wipes clean in seconds, which is why classic subway tile remains the practical winner. Seal natural stone backsplashes, since cooking splatter stains unsealed stone fast. And run the backsplash to the underside of the uppers with no gaps; a painted strip between tile and cabinet collects grease and looks unfinished.
- Choose glossy or metallic finishes that bounce light; keep grout thin and light.
- Wipe down regularly; reflective surfaces show every splash.
- Run tile to the underside of uppers with no painted gaps in between.
Shop This Look
21. Multi-Functional Kitchen Cart

A multi-functional kitchen cart is the Swiss army knife of small kitchens. Part storage, part prep surface, part serving station, it changes jobs through the day. Morning coffee bar, afternoon prep station, evening serving cart for guests. The best ones combine a solid top with drawers, shelves, and a towel bar, so every inch works. Unlike built-ins, a cart can move to where the action is, which in a small kitchen is everywhere.
Stack the functions: Assign the cart a primary and secondary job so it never becomes a junk surface. Primary might be coffee station, with the machine, mugs, and beans always aboard. Secondary is overflow prep during cooking. Use the lower shelves for the current project’s tools and the drawers for linens or wraps. When every level has a purpose, the cart stays organized through the chaos of real cooking.
Style the top: Since the cart is visible from everywhere in a small kitchen, its top should look intentional. A tray corrals the coffee gear, a small plant softens the utilitarian feel, and keeping the back half clear preserves the prep function. Avoid letting the cart become the landing pad for mail and keys; once it does, you have lost a workstation. Treat the top like prime counter real estate, because that is what it is.
- Assign each level a job, like coffee gear up top and prep tools below, so it stays organized.
- Corral small items on a tray so the top looks intentional, not cluttered.
- Protect the top from becoming a mail landing pad; it is prime counter space.
Shop This Look
How to Start
Start by watching how you actually use the kitchen for a week. Notice where you bump into things, where clutter piles up, and which cabinet you avoid because it is too dark or too deep. Your real frustrations are a better brief than any magazine photo. Write down the top three pain points; those decide which ideas from this guide matter most for your space.
Next, measure everything and sketch the layout, even roughly. Note the clearance around doors, the swing of the fridge, and the dead corners. Many small-kitchen wins, like a pull-out pantry or a fold-down table, depend on inches, and guessing leads to returns. A tape measure and ten minutes save you from buying the wrong size cart or shelf.
Finally, do the cheap, high-impact changes first. Under-cabinet lighting, decluttered open shelving, and a light-reflecting backsplash can transform how the kitchen feels before you spend on cabinets or appliances. Save the structural changes for phase two, once you know how the quick wins changed your daily routine.
- Track your real frustrations for a week and let the top three pain points set your priorities.
- Measure the space and sketch the layout before buying anything; small kitchens punish guesswork.
- Do lighting, decluttering, and surface updates first; save structural changes for phase two.
Shop This Look
Common Mistakes
- Filling every wall with closed upper cabinets, which makes a small kitchen feel like a tunnel instead of a room.
- Choosing dark cabinet colors and finishes that absorb light, when the room needs every bit of brightness it can get.
- Ignoring the vertical space above eye level, leaving the most useful storage zone in a small kitchen completely empty.
- Buying full-size appliances for a compact kitchen, then losing the counter space you actually cook on.
- Skipping under-cabinet lighting, so the counters sit in shadow even when the overhead light is on.
- Letting corners become dead zones instead of fitting them with lazy Susans, pull-outs, or corner shelves.
- Remodeling around looks alone without watching how you move, cook, and store things in the real space first.
Frequently Asked Questions
What is the best layout for a very small kitchen?
The L-shaped and galley layouts waste the least space in small kitchens. An L-shape keeps one side open for movement and fits a small table or cart, while a galley puts everything within a step or two. Avoid U-shapes in tight rooms unless you have the width, because they eat floor space fast. Whatever you choose, keep the sink, stove, and fridge in a tight triangle.
How can I add storage without making my kitchen feel cramped?
Go vertical and go hidden. Floor-to-ceiling cabinets, pull-out pantries, and under-cabinet organizers add storage without taking floor space. Open shelving works too, but keep it edited and shallow so it reads as display rather than clutter. The rule is simple: every new storage spot should hide its contents or show them beautifully.
Are open shelves practical in a small kitchen?
Yes, if you are honest about your habits. Open shelves keep daily dishes within reach and make the wall feel lighter than closed cabinets. They do collect grease and dust near the stove, so keep them for dishes and glasses you use often, not for rarely touched decor. If you hate dusting, mix one run of open shelves with closed cabinets elsewhere.
What colors make a small kitchen look bigger?
Light, low-contrast palettes make walls recede and the room feel larger. Whites, soft grays, pale wood tones, and light-reflecting backsplashes all help. That does not mean everything must be white; a single darker accent, like a navy island or black hardware, adds depth as long as the overall scheme stays light. Keep contrast calm and let light do the work.
Where can I find more layout ideas for tight kitchens?
Once you have picked your storage and lighting upgrades, the next step is getting the floor plan right. These kitchen layout ideas walk through arrangements that squeeze more function out of small footprints, so pair them with the remodel tips above for a complete plan.
The Finishing Touch
A small kitchen remodel succeeds when every inch has a job and nothing fights you. Open shelving where you need air, closed storage where you need calm, light where you work, and a layout that lets you move. None of these ideas requires a big kitchen. Each one just asks the small kitchen you have to work a little smarter.
Before you commit to the bigger changes, spend an evening browsing real small kitchens for proof that your plan works in practice. This Houzz gallery of small kitchen ideas is full of compact spaces done well, and it is a good place to sanity-check colors, layouts, and storage against real homes.
Then start with the win you will feel tomorrow morning. Stick-on under-cabinet lights, a rolling cart, a cleared counter, these take an afternoon and change how the kitchen feels immediately. The full remodel can follow. Small kitchens do not need grand gestures. They need a dozen small smart ones, and this guide just gave you twenty-one.