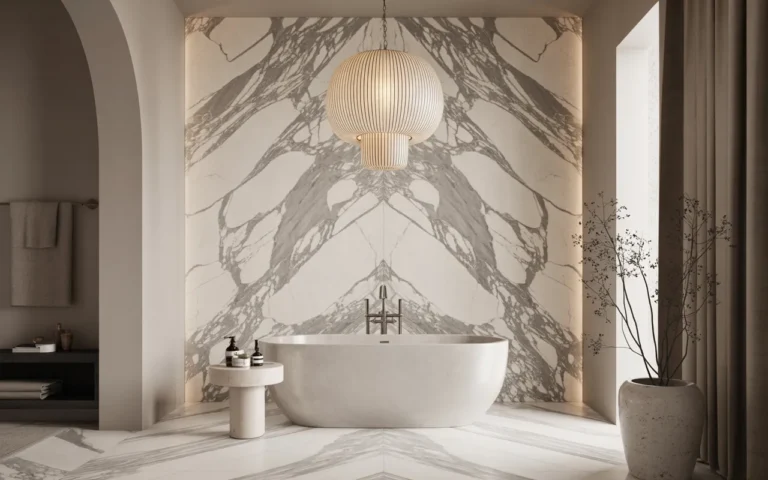
22 Small Bathroom Tile Ideas for Tiny Bathrooms
Choosing a small bathroom tile is one of those decisions that feels minor until you live with it every single morning. I have seen tiny bathrooms look twice as big with the right tile, and I have seen expensive renovations look tired because the grout color was wrong. Most of the looks in this roundup cost roughly 3 to 12 dollars per square foot for materials, so the tile itself rarely breaks the budget. Labor does, and that is worth knowing before you fall in love with a complicated pattern.
Prices vary by brand, finish, and where you shop, and handmade or natural stone tiles run higher than basic ceramic. Below you will find 22 ideas that actually work in tight spaces, each with honest notes on cost, grout, and what to watch out for. Every idea also comes with a small shopping list so you can price things out before you commit.
One personal observation before we start: the bathrooms that age best are not the boldest ones. They are the ones where the tile, grout, and fixtures were chosen as a set instead of one dramatic piece surrounded by afterthoughts. Keep that in mind as you scroll, and you will end up with a small bathroom that still makes you happy five years from now.
This post contains affiliate links. If you buy through them, I may earn a small commission at no extra cost to you.
1. White Subway Tiles for a Clean Look

White subway tile is the classic 3 by 6 inch ceramic rectangle, usually laid in a running bond pattern. It has been around for over a century and still works because it reflects light and keeps walls visually quiet. Basic white subway tile costs roughly 3 to 8 dollars per square foot, which makes it one of the cheapest ways to tile a whole small bathroom without it looking cheap.
Grout matters: Pick your grout color after you see the tile on the wall, not before. A bright white grout gives a seamless look, while light gray adds gentle definition. Dark grout with subway tile shows every uneven edge, and budget tile is rarely perfectly straight. One honest warning: glossy subway tile shows water spots, so keep a squeegee in the shower if you tile the walls there.
Scale it right: This is the safest choice for first-time renovators, rental upgrades, and anyone thinking about resale value. It suits every style from farmhouse to modern because it acts as a background, not a statement. If you want personality, add it with paint, a bold mirror, or patterned floor tile, and let the subway tile do the quiet work.
- Order a few sample tiles first and check them in your bathroom lighting.
- Use 1/16 inch spacers for tight, modern grout lines.
- Seal the grout after installation to slow down staining.
Shop This Look
2. Hexagonal Floor Tiles

Hexagon tiles arrive on mesh sheets, usually in 1 or 2 inch pieces, and they give a small floor texture and grip without a busy pattern. They handle the curves and tight corners of a tiny bathroom better than square tile. White or marble-look hex sheets cost roughly 5 to 14 dollars per square foot, which keeps most small floors affordable.
Sheet size: Lay full sheets dry across the floor first and shift them until the cut tiles land in the corners, not in the doorway where everyone looks. Small hexagons forgive slightly uneven floors, which is a gift in older homes. One honest warning: all those grout lines need sealing, and white grout on a floor shows dirt fast, so choose a mid-tone grout unless you genuinely mop every week.
Contrast level: This suits vintage-style bathrooms, laundry and bath combos, and anyone who wants character on the floor while the walls stay plain. It is not ideal if you hate grout maintenance, because hex floors have more grout than almost any other option. Pair them with simple white wall tile so the floor is the only pattern in the room.
- Dry-lay every sheet before mixing any mortar.
- Choose a mid-tone grout to hide everyday dirt.
- Seal the grout once it has fully cured.
Shop This Look
| SHEETS | GROUT | SEALER |
|---|---|---|
| White hexagon mosaic tile | Gray sanded grout | Penetrating tile sealer |
| Shop → | Shop → | Shop → |
3. Vertical Stacked Subway Tiles

This is the same classic subway tile, but stacked in straight vertical columns instead of the usual brick pattern. The vertical lines pull the eye upward, which helps ceilings feel taller in a cramped bathroom. It costs the same as standard subway, roughly 3 to 8 dollars per square foot, because it is the same tile laid differently.
Level lines: Stacked layouts expose crooked lines immediately, so use a laser level or a long spirit level for every column, starting from the most visible wall. Check your first row twice before the mortar sets, because everything builds off it. One honest warning: this layout demands very consistent grout joints, so buy spacers and use them on every single tile, not just most of them.
Height play: This layout was made for bathrooms with 8-foot or lower ceilings, narrow shower stalls, and skinny accent strips behind the vanity. If your walls are already tall, the vertical lines can feel stretched, so balance them with a horizontal element like a wide mirror or a long vanity.
- Snap a plumb line before setting the first column.
- Start tiling on the wall people see first.
- Keep grout joints identical with spacers throughout.
Shop This Look
4. Mosaic Tile Accent Wall

One wall, usually the shower back wall or the wall behind the vanity, gets a full mosaic treatment while everything else stays simple. Mosaic sheets cost roughly 6 to 18 dollars per square foot, and limiting the drama to one wall keeps the total reasonable. This is how you get a focal point without tiling the whole room in pattern.
One wall only: Choose the wall you see first when you walk through the door, and run the mosaic from floor to ceiling for the strongest effect. A half-height accent tends to look unfinished. One honest warning: a mosaic accent wall in the shower needs proper waterproofing behind it, and every brand cuts sheets a different size, so order one extra sheet for pattern matching at the edges.
Light angle: This is best for windowless bathrooms that need a focal point, and for renters using peel-and-stick mosaic panels that come off later. Skip it if the bathroom already has patterned floor tile. Two patterns in a tiny room compete with each other, and neither one wins.
- Pick the most visible wall for the accent.
- Order one extra sheet for edge matching.
- Waterproof shower walls before tiling.
Shop This Look
5. Large-Format Neutral Tiles

These are tiles 12 by 24 inches or bigger with a plain neutral face. Fewer grout lines means the walls and floor read as one calm surface, which visually expands a small bathroom better than almost any other trick. Large-format porcelain costs roughly 4 to 12 dollars per square foot, very reasonable for the impact.
Fewer seams: Big tiles demand a flat substrate, so budget for floor leveling compound or extra thinset work underneath. Skipping this step is the main reason large tiles fail. One honest warning: large tiles are heavy and awkward for a first-time DIYer, and lippage, where one edge sits higher than the next, is common without a leveling clip system. This is the one layout where paying for help often pays for itself.
Tone choice: This suits modern and minimalist bathrooms, and anyone who wants the room to feel calm rather than decorated. Warm greige tones keep it from feeling cold. It is not the pick for vintage lovers, since the whole point is a deliberately plain surface.
- Level the substrate before laying large tiles.
- Use a leveling clip system to prevent lippage.
- Pick warm neutrals to avoid a cold feel.
Shop This Look
6. Marble Look Porcelain Tiles

Porcelain printed to look like Carrara or Calacatta marble, at a fraction of real marble’s price and with none of the staining worry. Marble-look porcelain costs roughly 4 to 10 dollars per square foot, compared with 15 dollars and up for the real stone. You get the veining without the maintenance anxiety.
Vein match: Unbox every tile and dry-lay them so the veining flows across the wall instead of repeating awkwardly. Budget prints repeat the same pattern every few tiles, and the repeat becomes obvious on a large surface. One honest warning: polished finishes are slippery on floors, so use a matte or textured finish underfoot and save the polished tiles for walls.
Matte or polished: This is made for anyone who wants a luxury look on a mid-range budget, and it photographs beautifully for resale listings too. If you are a purist about natural materials, the print will bother you up close, so look at a full-size sample in person before you order.
- Dry-lay tiles to plan the veining flow.
- Use matte finish on floors, polished on walls.
- Check the print repeat on a large sample first.
Shop This Look
7. Light Gray Herringbone Tiles

Rectangular tiles set in the classic zigzag herringbone pattern, in a soft light gray. The pattern adds movement and makes narrow bathrooms feel wider because the eye keeps following the zigzag across the surface. Tile costs roughly 4 to 10 dollars per square foot, but labor runs higher because of all the angled cuts.
Direction pull: Run the herringbone points toward the longest sight line, usually from the door straight to the back wall, and snap a center line before you set anything. The pattern looks intentional only when it is centered. One honest warning: herringbone wastes about 15 percent more tile than a straight layout, so order extra, and DIY mistakes show fast in this pattern.
Room width: This is perfect for long narrow bathrooms, galley-style layouts, and shower floors that need visual interest without color. If the room already has patterned wallpaper or bold fixtures, the herringbone may be too much movement competing for attention.
- Snap a center line to keep the pattern balanced.
- Order 15 percent extra tile for angled cuts.
- Point the pattern toward the longest sight line.
Shop This Look
8. Penny Round Floor Tiles

Small round tiles, about three quarters of an inch across, sold on mesh sheets. They are a vintage classic that grips well underfoot, which makes them ideal for shower floors and small bath floors where slipping is a worry. Penny rounds cost roughly 5 to 12 dollars per square foot.
Grout upkeep: All those tiny circles mean a lot of grout, and grout is the part that gets dirty first. Use a grout with stain resistance and plan to seal it yearly. One honest warning: dark penny tile with white grout looks beautiful in photos and is exhausting in real life, since every grout line shows soap scum. Choose your contrast level carefully.
Spacing tool: This suits retro and cottage bathrooms, kids’ bathrooms, and shower floors where slip resistance matters most. It is not great for anyone who wants a low-maintenance floor. The look rewards people who actually enjoy tending to details.
- Use stain-resistant grout between the rounds.
- Seal the grout yearly to slow discoloration.
- Keep contrast low if you hate frequent cleaning.
Shop This Look
9. Vertical Mosaic Shower Tiles

Mosaic sheets run vertically in the shower, either as full walls or as a stripe feature against plainer tile. The vertical direction makes the shower feel taller, which matters in a small stall with a low ceiling. Shower mosaic costs roughly 7 to 16 dollars per square foot.
Sheet alignment: Vertical sheets can drift sideways as the adhesive grabs, so work in small sections and check for plumb often. A sheet that starts straight can wander half an inch by the bottom. One honest warning: mosaics in showers need full mortar coverage behind them, no shortcuts, or tiles pop off within a year. Back-butter the sheets if your wall is not perfectly flat.
Shower zone: This is made for small shower stalls, tub surrounds, and anyone tiling a shower for the first time, since small sheets are forgiving of small mistakes. If your shower gets heavy daily use from several people, pick a mosaic with fewer grout lines to cut down on maintenance.
- Work in small sections and check plumb often.
- Back-butter sheets on uneven walls.
- Waterproof the shower walls before tiling.
Shop This Look
| MOSAIC | MEMBRANE | NIPPERS |
|---|---|---|
| Vertical mosaic shower tile | Waterproofing membrane | Tile nippers |
| Shop → | Shop → | Shop → |
10. Soft Beige Stone Tiles

Natural-look stone tile in warm beige tones, either real stone or porcelain that mimics it convincingly. Beige warms up a small bathroom that all-white tile can leave feeling cold and clinical. Porcelain versions cost roughly 6 to 15 dollars per square foot, while real stone runs higher.
Variation batch: Stone-look tiles vary a lot from box to box, so mix tiles from several boxes as you lay them to avoid one dark patch in the middle of a wall. This takes five extra minutes and makes a huge difference. One honest warning: real stone is porous and needs sealing before grouting and again after, and it will stain if you skip that step. Porcelain versions skip most of this fuss.
Warmth check: This suits bathrooms with warm wood vanities, brass fixtures, and anyone who finds all-white bathrooms sterile. If your bathroom gets no natural light, pair beige tile with strong lighting or it can read dull instead of warm.
- Mix tiles from several boxes while laying.
- Seal real stone before and after grouting.
- Pair beige tile with strong lighting.
Shop This Look
11. Diagonal Floor Tiles

Square tiles rotated 45 degrees so they run diagonally across the floor. The diagonal lines trick the eye into reading the floor as wider than it really is, a classic small-room trick. Tile costs the same as a straight layout, roughly 3 to 10 dollars per square foot, but you will waste more on cuts.
Layout waste: Plan on 15 to 20 percent overage instead of the usual 10, because every edge tile needs an angled cut and mistakes eat tile fast. Measure twice, cut once, and keep a few spares for future repairs. One honest warning: diagonal layouts in very small bathrooms can look busy if the tile itself has strong pattern, so keep the tile plain and let the layout do the work.
Sight lines: This works best in square-ish small bathrooms where the door opens onto the full floor, because the effect is strongest when you see the whole surface at once. In a bathroom chopped up by fixtures, the diagonal gets lost, so save this trick for open layouts.
- Order 15 to 20 percent extra tile for angled cuts.
- Keep the tile itself plain and simple.
- Center the layout on the doorway view.
Shop This Look
12. Soft Blue Ceramic Wall Tiles

Ceramic wall tile in a muted powder or sea-glass blue. Blue reads as clean and calm in a bathroom, and it pairs naturally with white fixtures without feeling cold. Blue ceramic costs roughly 4 to 11 dollars per square foot, about the same as any colored ceramic.
Glaze test: Blues shift a lot under different lighting, so tape a sample to the wall and look at it in the morning and at night before committing. What looks serene at noon can look gray and flat under warm evening bulbs. One honest warning: bold or bright blues can feel dated fast, while dusty muted blues age well, so when in doubt go one shade grayer than your first instinct.
Color pair: This suits coastal, cottage, and kids’ bathrooms, and anyone who wants color without committing to a loud pattern. It works beautifully with chrome and brushed nickel fixtures. If you plan to sell soon, keep the blue to one wall or the shower so buyers can picture their own style.
- Test samples in morning and evening light.
- Choose dusty muted blues over bright ones.
- Pair with chrome or brushed nickel fixtures.
Shop This Look
13. Textured 3D Wall Tiles

Wall tiles with raised geometric or wave patterns that catch light and shadow as you move. In a small bathroom, one textured wall adds depth without any color or pattern, which keeps the room calm. 3D tiles cost roughly 8 to 20 dollars per square foot, so most people use them on a single wall.
Dust factor: Texture collects dust and, in a bathroom, hairspray and moisture residue, so plan to wipe the wall down now and then with a damp cloth. It is not hard, just a chore flat tile does not have. One honest warning: 3D tiles are thicker than flat tile, which complicates edges and corners, so buy matching trim pieces or plan a clean caulked edge from the start.
Backdrop role: This is made for powder rooms, the wall behind a floating vanity, or a shower accent wall where light rakes across it. It is not the choice for a rental or a kids’ bathroom where walls take abuse. One textured wall is enough. Two in a tiny room starts to feel like a cave.
- Limit 3D tile to one accent wall.
- Buy matching trim for the thicker edges.
- Wipe the texture down periodically.
Shop This Look
14. White and Gray Geometric Tiles

Patterned tiles in white and gray, like encaustic-look or printed geometric designs. They give a small floor big personality and hide everyday dirt better than plain white tile ever could. Patterned porcelain costs roughly 5 to 14 dollars per square foot.
Pattern scale: In a tiny bathroom, pick a medium-scale pattern. Very small patterns turn into visual noise, and very large ones get chopped up by the toilet and vanity before the design can read. One honest warning: patterned tile needs careful layout so the design centers nicely, and the pattern repeat means ordering all your tile from the same batch really matters.
Balance points: This suits entry-style powder rooms, vintage remodels, and anyone whose style leans bold. Keep the walls plain white so the floor is the undisputed star. If you get bored of patterns easily, be honest with yourself, because this is a five-year commitment at least.
- Choose a medium-scale pattern for tiny rooms.
- Order all tile from the same batch.
- Keep walls plain white for balance.
Shop This Look
15. Glossy White Wall Tiles

High-gloss white ceramic that bounces light around the room. In a windowless bathroom this is one of the cheapest brightness upgrades you can make, and it works in any style. Glossy white wall tile costs roughly 3 to 9 dollars per square foot.
Reflection plan: Gloss shows every imperfection in the wall behind it, so wall prep matters more than the tile itself. Skim, sand, and prime before you tile. One honest warning: glossy tile plus glossy paint plus a big mirror can feel like a dentist’s office, so add one matte or wood element, like a wooden stool or matte black fixtures, to warm it up.
Lighting need: This is made for dark bathrooms, basement baths, and rentals where you want maximum brightness for minimum money. Pair it with warm-toned lighting, around 2700 to 3000K, so the white glows instead of glaring.
- Prep walls carefully before tiling.
- Add one matte or wood element for warmth.
- Use warm-toned bulbs to soften the gloss.
Shop This Look
16. Vertical Rectangular Tiles

Longer rectangular tiles, like 4 by 12 or 3 by 12 inches, set vertically on the wall. They read more modern than classic subway, and the vertical lines add a sense of height. Costs run roughly 4 to 11 dollars per square foot depending on finish.
Proportion play: Longer tiles need flatter walls, since any bow in the wall shows along the full length of the tile. Check your walls with a straightedge before you buy anything. One honest warning: vertical rectangles on every shower wall can make the space feel like a corridor, so consider one feature wall with plain tile elsewhere.
Ceiling height: This suits bathrooms with standard or low ceilings and modern or transitional style. It works beautifully behind a vanity as a backsplash that runs all the way to the ceiling. If your bathroom is already tall and narrow, a horizontal layout will balance the proportions better.
- Check wall flatness with a straightedge first.
- Run tile to the ceiling behind the vanity.
- Keep other walls plain to avoid a corridor feel.
Shop This Look
17. Neutral Pebble Shower Floor

Real or faux river pebbles on mesh sheets for the shower floor. They feel wonderful underfoot, drain well between the stones, and give the shower a spa-like texture that flat tile cannot match. Pebble sheets cost roughly 6 to 16 dollars per square foot.
Drain slope: Pebbles need a properly sloped shower pan underneath, and the grout between stones must be packed completely full so water does not sit in pockets. This is not a step to rush. One honest warning: natural pebbles vary in height, which can feel lumpy, and dark grout between light pebbles is hard to keep even. Sliced flat pebbles are more comfortable and much easier to clean than fully round ones.
Foot feel: This is made for primary bathrooms where the shower is a daily ritual, and for anyone who loves natural materials enough to maintain them. It is not ideal for kids or elderly users who need a perfectly even surface. Seal the stones and the grout well, since this floor stays wet.
- Choose sliced flat pebbles over round ones.
- Pack grout fully between every stone.
- Seal stones and grout after installation.
Shop This Look
18. Light Beige Travertine Tiles

Real travertine in light beige, with its soft pitted texture and warm tone. It brings an old-world feel that porcelain copies cannot quite match. Travertine costs roughly 7 to 16 dollars per square foot, plus the cost of sealing it properly.
Sealing routine: Travertine must be sealed before grouting so the grout does not stain the pits, then sealed again after installation, and resealed about once a year. This is non-negotiable maintenance. One honest warning: travertine etches on contact with acidic cleaners, so no vinegar or harsh bathroom cleaners, ever. Use a pH-neutral cleaner only.
Fill holes: This suits Mediterranean and traditional bathrooms and anyone who loves natural stone enough to care for it. Choose filled and honed travertine for floors, since it is smoother and less of a trip hazard, and save the unfilled rustic look for walls. If low maintenance is the priority, a travertine-look porcelain gives you the warmth without the upkeep.
- Seal before grouting and again after.
- Use only pH-neutral cleaners on travertine.
- Choose filled and honed stone for floors.
Shop This Look
19. Mini Brick Tiles

Small brick-shaped tiles, thinner and smaller than classic subway, often in handmade-look finishes with soft edges. They give walls a crafted, artisan texture that suits cottage and farmhouse bathrooms. Mini brick tiles cost roughly 6 to 15 dollars per square foot.
Mini grid: The small size means a lot of grout lines, so keep the grout color close to the tile color for a calm, cohesive look. High contrast grout turns all those little bricks into visual static. One honest warning: handmade-look tiles vary slightly in size, which is part of the charm but makes spacing tricky. Buy extra and accept a little wobble in the lines, or the installation will drive you crazy.
Mortar bed: This suits farmhouse, cottage, and artisan-style bathrooms, especially as a shower surround or vanity backsplash. It is not the pick for ultra-modern spaces. The texture rewards close-up viewing, so use it where people actually stand near the wall.
- Match grout color closely to the tile.
- Buy extra tile for size variation.
- Use it where walls are viewed up close.
Shop This Look
20. Soft Gray Concrete Look Tiles

Porcelain printed to look like poured concrete or cement, in a soft approachable gray. It gives an industrial-modern edge without real concrete’s sealing headaches and cold feel. Concrete-look porcelain costs roughly 4 to 11 dollars per square foot.
Edge chip: Darker grays show chips more than lighter ones, so handle the tiles gently during installation and keep a few spares for future repairs. A chipped dark tile is hard to hide. One honest warning: concrete looks can read cold and flat in a small space, so warm it up with wood, plants, or warm lighting, or the bathroom starts to feel like a basement.
Mood check: This is made for modern, industrial, and minimalist bathrooms. It hides dust and water spots far better than white tile, which is a real everyday advantage. If your style leans traditional or cozy, this will feel wrong no matter how practical it is, so trust your gut.
- Handle tiles gently and keep spares.
- Add wood or plants to warm up the gray.
- Use warm lighting to avoid a cold feel.
Shop This Look
21. Soft Pastel Mosaic Tiles

Small mosaic tiles in soft pastel shades like blush, mint, or powder blue, often mixed together on the sheet. They add gentle color that keeps a small bathroom light and cheerful instead of heavy. Pastel mosaics cost roughly 6 to 15 dollars per square foot.
Color rhythm: Mixed-color sheets can look randomly blotchy if one color dominates, so dry-lay the sheets and rotate them until the mix feels even across the wall. It takes a few minutes and the result is much calmer. One honest warning: pastels show grout haze badly, so wipe carefully during grouting and do a final haze-remover pass. White grout keeps pastels looking fresh.
Neutral anchor: This suits kids’ bathrooms, vintage-inspired powder rooms, and anyone who wants color that stays soft. Anchor the pastels with white fixtures and at least one neutral surface so the room does not feel like candy. If you might sell within a few years, keep the pastels to the shower or a single wall.
- Dry-lay sheets to balance the color mix.
- Use white grout to keep pastels fresh.
- Remove grout haze with a final wipe-down.
Shop This Look
| MOSAIC | GROUT | NIPPERS |
|---|---|---|
| Pastel mosaic tile sheets | White unsanded grout | Mosaic tile nippers |
| Shop → | Shop → | Shop → |
22. White Marble Hexagon Tiles

White marble, or marble-look porcelain, cut into hexagon shapes for the floor or shower. It combines two classics, marble and hex, into one elegant surface that works in traditional and modern bathrooms alike. Real marble hex costs roughly 12 to 25 dollars per square foot, while porcelain versions run 6 to 14.
Sheet seams: Marble hex sheets can show visible seams where one sheet meets the next, so stagger the sheet joints like brickwork and step back often to check the overall look. Catching a seam early is easy, fixing it later is not. One honest warning: real marble stains and etches, so seal it thoroughly and keep acidic products off it. In a busy family bathroom, the porcelain version saves a lot of worry.
Vein softness: This suits elegant traditional and transitional bathrooms, and primary baths where you want a high-end floor. Keep the walls simple so the hex floor gets to shine. If the budget is tight, use the real marble hex on the floor only and a marble-look large tile on the walls.
- Stagger sheet joints to hide seams.
- Seal real marble thoroughly before use.
- Keep walls simple to let the floor shine.
Shop This Look
| HEXAGONS | SEALER | GROUT |
|---|---|---|
| Marble hexagon tile | Marble impregnating sealer | White unsanded grout |
| Shop → | Shop → | Shop → |
How to Start
Start with samples, not with a full order. Pick two or three favorites from this list and get full-size samples of each, then tape them to your bathroom wall for a few days. Tile looks completely different under your own lighting than it does in a showroom, and this one step prevents most expensive regrets.
Measure your bathroom carefully, wall by wall, and sketch it on paper with the door swing and fixture locations marked. Tile stores and installers price by the square foot, so knowing your real numbers keeps quotes honest. Add 10 percent overage for straight layouts and 15 to 20 percent for diagonal or herringbone patterns.
Before you buy anything else, take one small shopping trip for the basics. You do not need the tile yet. You need the tools and supplies that let you test layouts and protect your work, and all of it fits under sixty dollars.
- Tile spacers in the size that matches your planned grout lines.
- A small bag of grout in your chosen color to test against samples.
- A grout float, a sponge, and a spray bottle of grout sealer.
Once the samples have lived on your wall for a few days and you have picked a winner, order the full tile quantity plus overage, and schedule the work. Do not start demolition until every box of tile is sitting in your home. Backordered tile has stalled more bathroom projects than any other single cause.
Shop This Look
Common Mistakes
- Skipping samples: Ordering a full bathroom of tile from a phone photo is how people end up with the wrong shade of gray. Always get physical samples and view them in your own bathroom light.
- Choosing grout last: Grout covers up to 10 percent of a tiled surface, and the wrong color can ruin the right tile. Pick grout and tile together, as a pair.
- Forgetting overage: Cuts, breakage, and future repairs all eat tile. Running short mid-project means a second batch that may not match the first.
- Ignoring slip ratings: Polished wall tile on a shower floor is a fall waiting to happen. Check the slip rating and use matte or textured tile underfoot.
- Skipping waterproofing: Tile and grout are not waterproof. Behind every shower tile there needs to be a proper waterproof membrane, or water damage is just a matter of time.
- Mixing too many patterns: A patterned floor plus a mosaic accent wall plus a textured tile reads as chaos in a small room. One star per bathroom is the rule.
- Starting demo before tile arrives: A gutted bathroom with backordered tile is miserable. Have every box delivered and inspected before the first tile comes off the wall.
Frequently Asked Questions
What is the best tile size for a small bathroom?
There is no single best size, but two approaches work reliably. Large-format tiles with minimal grout lines make walls and floors read as one calm surface, which visually expands the room. Small mosaics and hexagons add grip and character, especially on floors. Both beat medium square tile, which tends to look neither spacious nor detailed.
Should small bathroom tile be light or dark?
Light tile is the safer default because it reflects light and makes tight spaces feel open. That said, a dark floor with white walls, or one dark accent wall, can look stunning in a small bathroom. The key is contrast with intent. An all-dark tiny bathroom with no window is the one combination to avoid.
How much does it cost to tile a small bathroom?
Materials for most of the looks in this article run roughly 3 to 15 dollars per square foot, and a typical small bathroom needs 60 to 120 square feet of tile including overage. Labor often costs as much as the materials or more, especially for patterns like herringbone. Get at least two quotes, and ask whether waterproofing and demolition are included.
Can I use peel-and-stick tile in a bathroom?
Peel-and-stick works well for walls outside the shower, like a vanity backsplash or an accent wall, and it is a great renter-friendly option. It does not belong inside the shower or on the floor, where constant water and foot traffic will lift it. For wet zones, real tile with proper waterproofing is the only answer.
Where can I find more bathroom tile inspiration?
If you want to explore beyond small bathrooms, take a look at these bathroom tile ideas for more styles, layouts, and color combinations. Browsing a wider set of ideas first makes it easier to spot the look you keep coming back to, which is usually the right one.
The Finishing Touch
Before you commit, do one final check. Lay your chosen tile samples on the floor and tape one to the wall, then live with them for three full days. Look at them in morning light, evening light, and with the bathroom light on. If you still love the choice on day three, it is the right one.
If something feels off but you cannot name it, change one thing: the grout color. Nine times out of ten, the tile is fine and the grout is the problem. A grout sample board held next to your tile will tell you in seconds whether you need lighter, darker, warmer, or cooler.
Your one action for today is simple. Order two or three full-size samples of your favorite look from this list and pick up the under-sixty-dollar starter supplies from the How to Start section. That small step turns a vague plan into a real project.
A small bathroom rewards careful choices more than big spending. The right small bathroom tile, chosen with your lighting and your habits in mind, will make the room feel bigger every day you use it. For more visual ideas on making compact spaces feel larger with tile, this Houzz guide to 7 tile ideas to make a small bathroom feel bigger is worth a look before you finalize your layout.