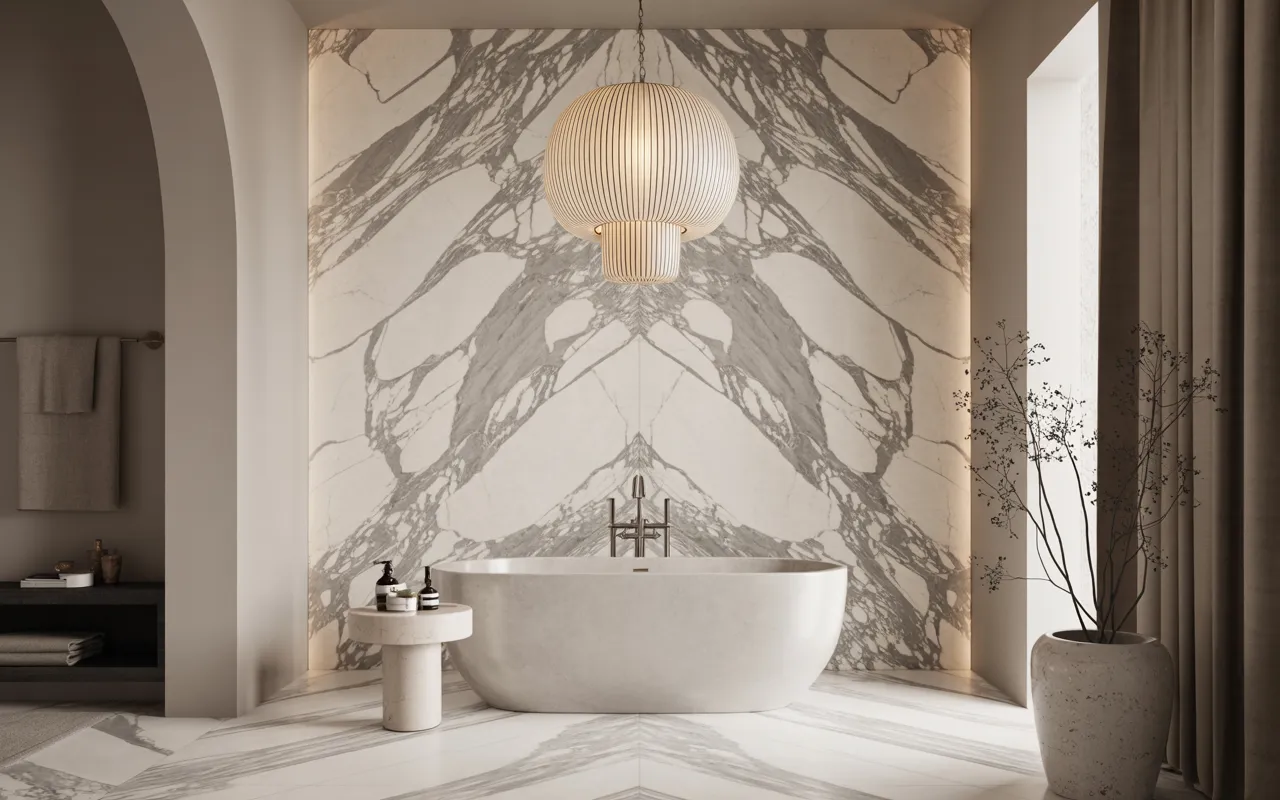
23 Luxury Bathroom Inspirations with Marble Touch
Marble never really goes out of style in a bathroom. It has been the material of grand hotels, old European villas, and spa retreats for centuries, and it still reads as luxury the moment you walk in. But a marble bathroom can go wrong fast. Too much of it and the room feels cold and echoey. The wrong finish and it stains within a year. These 23 ideas show how to use marble with intention, so every surface earns its place.
This guide covers full marble walls, statement floors, vanities, showers, tub surrounds, and the small fixtures that make the stone look expensive instead of flat. Each idea pairs a marble surface with the right metal, wood tone, or lighting choice, because marble on its own is only half the design. You will also find practical notes on sealing, grout, and slip resistance, the unglamorous details that decide whether your bathroom still looks good in five years.
If you are planning a full remodel, use this as a design shortlist to bring to your contractor. If you are renting or on a tight budget, several ideas work with peel-and-stick tile, paint, and fixture swaps that cost a fraction of real stone. Either way, start with the ideas that match your bathroom’s size and light, and build from there.
This post contains affiliate links. If you buy through them, I may earn a small commission at no extra cost to you.
1. White Marble Walls with Gold Fixtures
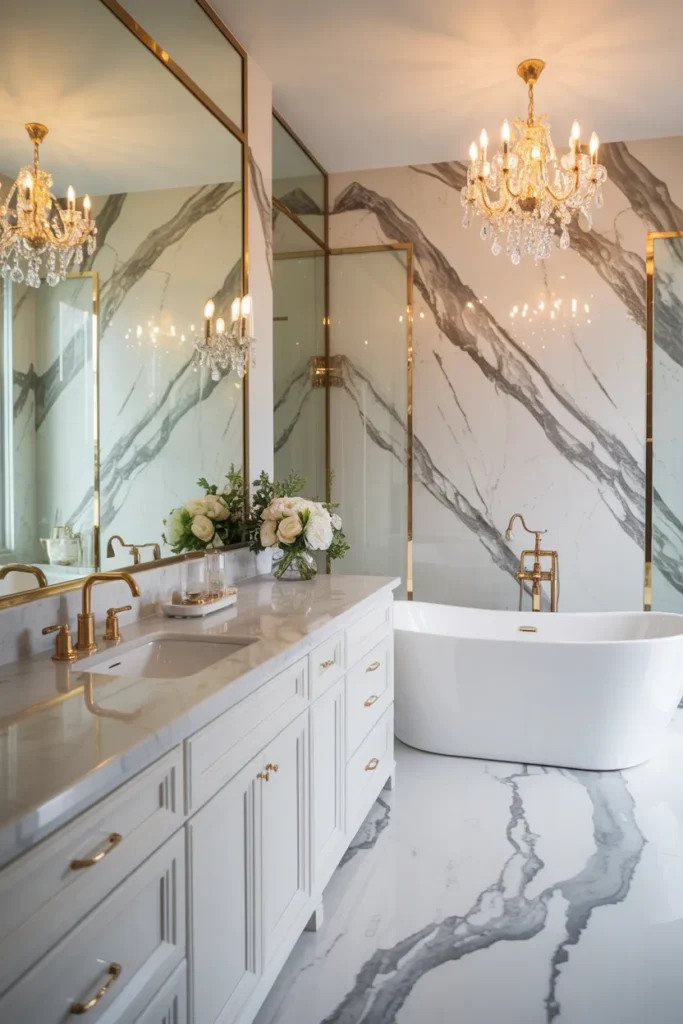
White marble walls with gold fixtures are the classic luxury bathroom formula, and they work because the contrast is built in. The cool white stone recedes, the warm metal steps forward, and your eye reads the whole room as intentional. This combination suits bathrooms of almost any size, but it shines in rooms with decent natural light, where the veining in the marble gets a chance to show. Large-format tiles keep the grout lines quiet so the stone reads as one continuous surface rather than a grid.
Pair it right: Brushed gold reads softer than polished gold and hides water spots better, which matters on a faucet you touch daily. Keep the gold to fixtures, lighting, and mirror frames, and let everything else stay white, glass, or clear. If your budget is tight, a gold faucet and a gold-framed mirror deliver most of the effect for a fraction of a full fixture swap. Avoid gold-look plastic accessories; the finish chips and the illusion collapses fast.
Keep it simple: White marble walls need very little decoration, so resist the urge to fill every shelf. A single orchid, a folded stack of white towels, and one tray for daily bottles is plenty. Busy styling fights the calm the marble creates. For the walls themselves, choose a marble with soft gray veining rather than dramatic gold veining, so the stone and the fixtures complement instead of competing.
- Seal white marble walls on install day and reseal yearly, since light stone shows stains faster than dark stone.
- Use large-format tiles on the main walls to minimize grout lines and make the room feel bigger.
- Match your gold finish across faucet, shower trim, and lighting so the metal looks chosen, not random.
Shop This Look
2. Black Marble Statement Bathroom

A black marble statement bathroom is for people who want drama instead of calm. Dark stone with white or gold veining turns even a modest bathroom into something that feels like a boutique hotel. It works best in bathrooms with strong lighting, because black surfaces absorb light and need help. Overhead spots, a backlit mirror, and a window or two keep the room from feeling like a cave. This is not a low-commitment look, but it photographs beautifully and never feels generic.
Ground the drama: Black marble needs at least one light element to keep it from closing in. A white vessel sink, a light wood bench, or a large light-colored rug gives the eye somewhere to rest. Gold or brass fixtures warm the whole scheme and look far more expensive against black stone than chrome does. Keep the ceiling and at least one wall light, because an all-black box feels smaller than it is.
Light it well: Plan for three layers of light in a black marble bathroom, meaning overhead, mirror, and accent. A dimmer on every circuit is worth the small extra cost, because black stone looks best when you can tune the mood. Backlit mirrors are especially effective here, since the glow against dark tile creates the floating effect that makes the look feel designed rather than just dark.
- Hone black marble rather than polishing it, because polished black shows every water spot and fingerprint.
- Add a light-colored element like a white tub or pale rug so the dark stone has contrast to play against.
- Put every light on a dimmer; black marble bathrooms need adjustable light to shift from morning to evening.
Shop This Look
3. Marble Vanity with Double Sink Elegance
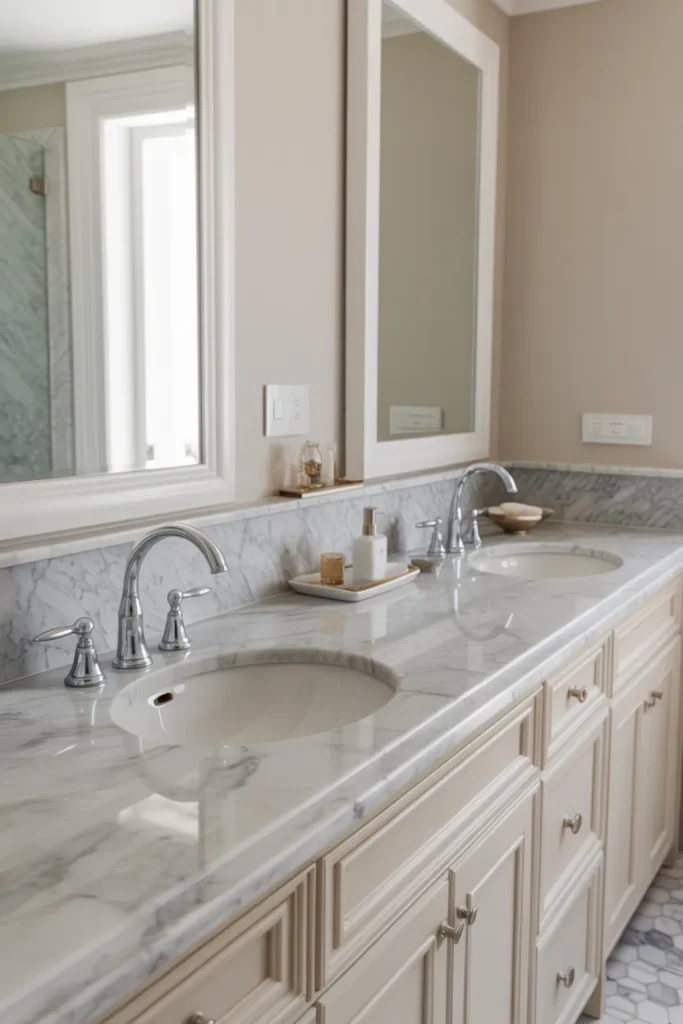
A marble vanity with double sinks is the workhorse of luxury bathrooms. Two people get ready at once without elbowing each other, and the long stretch of stone gives the room its sense of occasion. This idea needs a wall at least 60 inches wide, with 72 being the comfortable sweet spot. The marble top should be one continuous slab if your budget allows, because a seam down the middle breaks the veining and cheapens the effect. Undermount sinks keep the stone surface clean and easy to wipe.
Double the function: Give each sink its own mirror and its own light, even if the vanity is one long unit. Two framed mirrors look more considered than one giant slab of glass, and separate sconces mean each person gets flattering light. Add a drawer stack between the sinks for shared items like hair tools, and keep daily bottles in the drawers, not on the stone. Clear counters are what make double vanities look luxurious.
Mind the details: The edge profile of the marble top changes the whole feel, so choose it deliberately. A simple eased edge reads modern and clean, while an ogee edge leans traditional. Match your faucet spread to the sink cutouts before the stone is fabricated, because drilling marble twice is a good way to crack it. And seal the area around each faucet base carefully, since that is where water sits and stains start.
- Allow at least 60 inches of wall width for a double vanity, 72 inches for real elbow room.
- Choose undermount sinks so the marble top stays one wipeable surface with no rims to trap grime.
- Confirm faucet spread and drill holes before fabrication; you cannot easily redrill marble later.
Shop This Look
4. Marble Walk-In Shower with Glass Enclosure
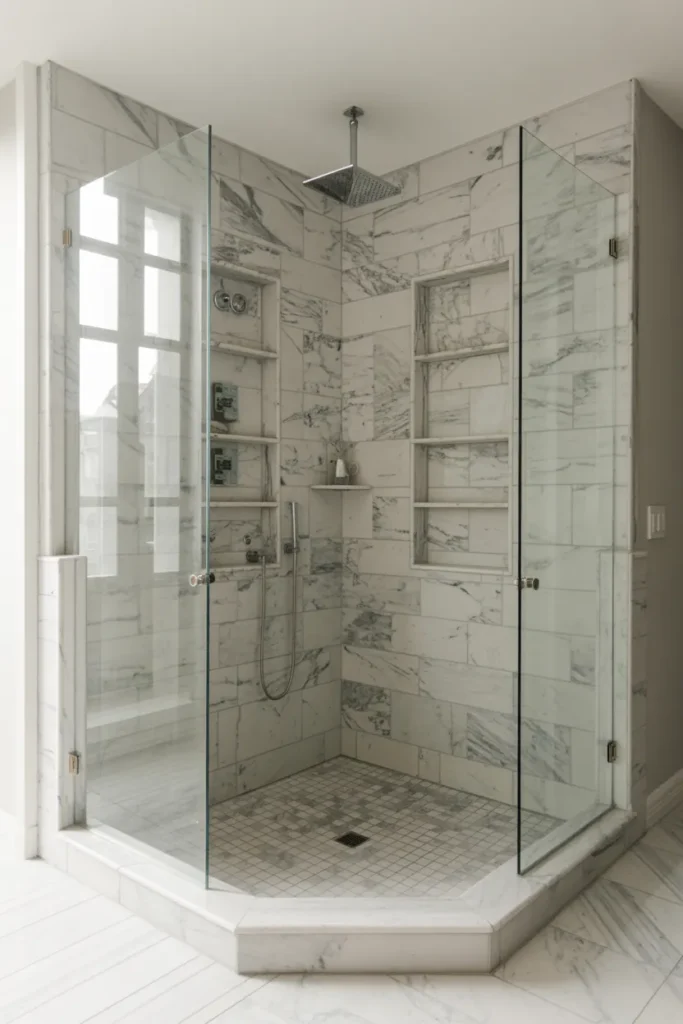
A marble walk-in shower with a glass enclosure is the closest most homes get to a spa. Removing the curb and the curtain opens the sightline across the whole bathroom, which makes the room feel twice as large. Marble on the shower walls gives you that continuous stone envelope, and the frameless glass keeps it visible instead of hiding it behind a door. This is a bigger project than a simple tile refresh, since curbless showers need the floor built up or cut down for drainage, but the payoff is daily.
Frame it clean: Frameless glass with minimal hardware is the right partner for marble walls, because chunky frames chop up the view you paid for. A single fixed panel with a small return is often enough; you do not always need a door. Keep the glass treated with a protective coating so hard water does not etch it, and squeegee after showers. The marble stays the star when the glass disappears.
Mind the water: A walk-in shower lives or dies on drainage and waterproofing. The floor needs a proper slope to a linear or center drain, and the waterproofing membrane has to run up the walls, not just sit under the tile. Use a honed or textured marble on the shower floor for grip, never polished. A built-in niche lined in the same marble keeps shampoo bottles from cluttering the ledge and looks like it was carved from the wall.
- Use honed or tumbled marble on the shower floor for traction; polished stone is dangerously slick when wet.
- Waterproof behind the tile and up the walls, and confirm the slope to the drain before tile goes in.
- Add a marble-lined niche for bottles so nothing sits on the floor or a corner caddy.
Shop This Look
5. Marble Accent Wall Behind Freestanding Tub

A marble accent wall behind a freestanding tub turns the bath into the room’s artwork. Instead of spreading stone everywhere, you concentrate it on the one wall the tub sits against, which gives you maximum drama for the cost of one wall. Book-matched slabs, where two mirror-image pieces meet at the center, create a butterfly veining effect that looks like it belongs in a gallery. Even standard tile laid in a simple stack pattern works when the tub in front of it is sculptural.
Center the tub: The tub should sit on the visual centerline of the accent wall, with equal breathing room on both sides. Push it too close to one side and the composition falls apart. Leave at least a few inches between the tub rim and the wall for cleaning access. A floor-mounted tub filler in a finish that echoes your other fixtures anchors the setup and avoids awkward wall plumbing on a stone feature wall.
Soften the stone: A full marble wall can feel hard, so layer something soft in front of it. A small wooden stool with a folded towel, a trailing plant on a high shelf, or a textured bath mat breaks up the stone without hiding it. Warm lighting aimed at the wall, like a picture light or two small sconces, brings out the veining after dark and makes the whole corner glow.
- Center the freestanding tub on the accent wall with equal space on both sides for a balanced composition.
- Use a floor-mounted tub filler so you avoid cutting plumbing into the feature wall.
- Aim warm light at the marble wall to bring out the veining in the evening.
Shop This Look
6. Gray Marble Flooring with White Walls
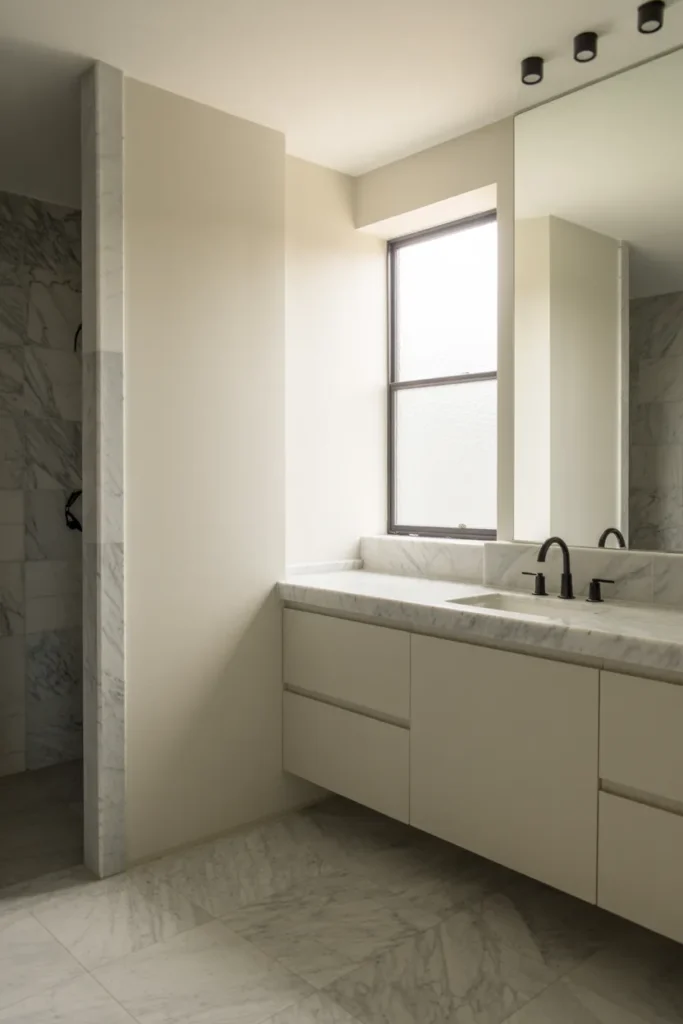
Gray marble flooring with white walls is the quiet luxury option. The gray stone grounds the room without the starkness of pure white, and white walls bounce light around to keep everything airy. This pairing is forgiving: gray marble hides dust and water spots better than white, and white walls make even a windowless bathroom feel brighter. It is also one of the most resale-friendly combinations you can choose, since it reads clean and neutral to almost every buyer.
Balance the tones: The trick is keeping the gray of the floor and the white of the walls in conversation. Pull one warm element into the room, like a wood vanity, brass hardware, or a woven basket, so the palette does not go icy. If your gray marble has warm veining, echo it with warm metals; if it is cool gray, chrome or matte black keeps the story straight. Consistency in undertone is what makes gray and white feel designed.
Seal the deal: Floors take more abuse than walls, so sealing matters even more here. Use a penetrating sealer rated for stone floors, and reseal on schedule, especially around the toilet base and the shower entry where water lingers. Choose a grout color close to the tile so the floor reads as one surface, and pick a grout with stain resistance built in. Radiant floor heating under marble is a genuine luxury that also helps the floor dry faster.
- Pick gray marble with undertones that match your metal finish, warm with brass, cool with chrome.
- Use a stain-resistant grout in a tone close to the tile so the floor reads as one surface.
- Consider radiant heating under the marble; it dries the floor faster and feels incredible.
Shop This Look
7. Marble Countertops with Wooden Accents
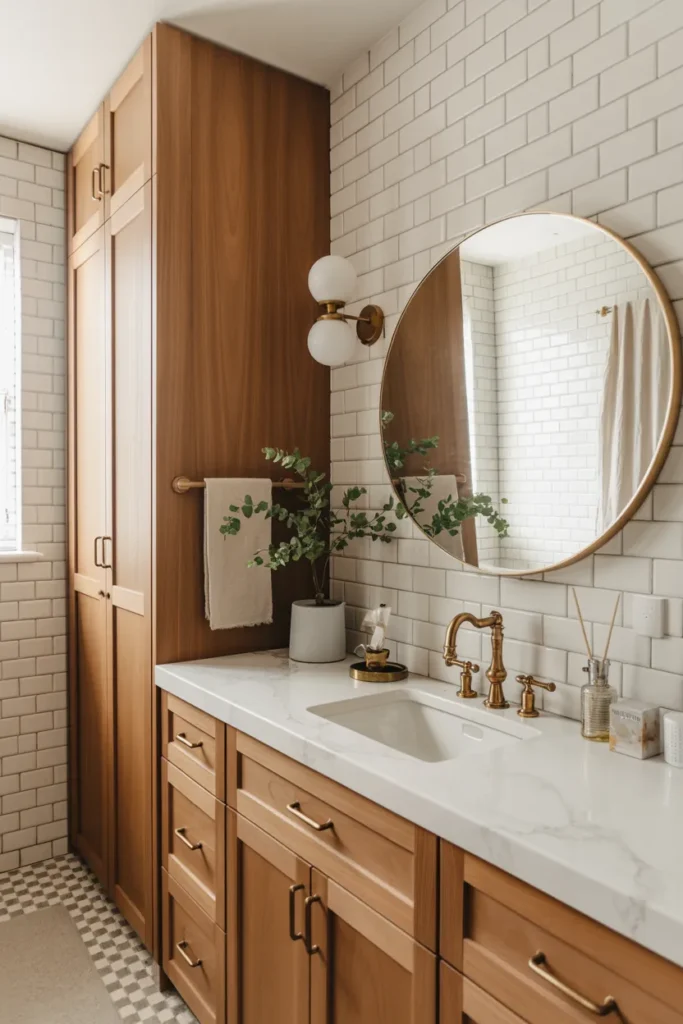
Marble countertops with wooden accents bring warmth into a material that can feel cold on its own. The combination works because each material covers the other’s weakness: marble brings the polish and the veining, wood brings the warmth and the texture. A white oak or walnut vanity under a Carrara top is the classic pairing, but open wood shelving beside a marble counter works too. This idea suits bathrooms that need to feel welcoming rather than showroom-perfect.
Warm the palette: Let the wood be the warm note and keep everything else restrained. If your vanity is walnut, your mirror frame and a small stool can echo it, but the walls and floor should stay quiet. Sealed and finished wood handles bathroom humidity fine, but keep it away from direct splash zones like the inside of the shower. A marine-grade finish on any wood near water is cheap insurance.
Choose honest materials: Real wood next to real marble ages gracefully, while imitation wood print next to real stone looks off within a year. If the budget is tight, spend on the marble counter and use a simple painted vanity in a warm greige instead of fake wood grain. Honest materials at a lower price point always beat expensive-looking fakes that do not hold up.
- Keep wood vanities and shelves out of direct splash zones; use marine-grade finish on any wood near water.
- Echo the wood tone in one or two small accents, then keep walls and floors quiet.
- Pair warm-veined marble with warm woods and cool-veined marble with pale woods for a coherent palette.
Shop This Look
8. Marble Subway Tiles in Shower Area
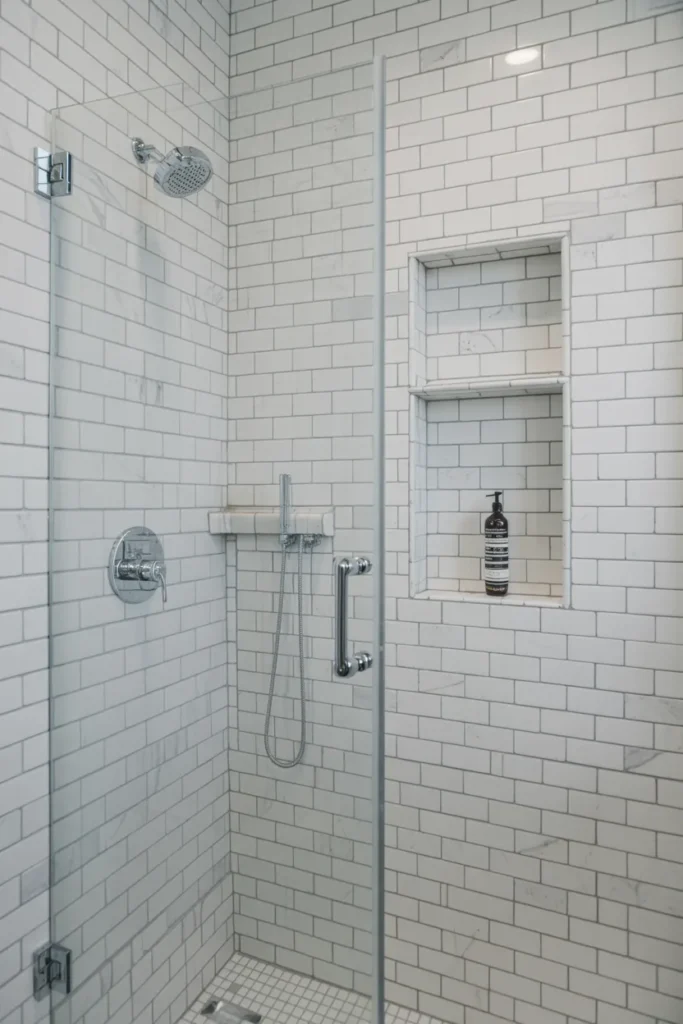
Marble subway tiles in the shower area take a familiar shape and elevate it with real stone. The subway format is forgiving to install, easy to clean, and timeless enough that you will not hate it in ten years. In marble, the small format means every tile shows a different slice of veining, which gives the wall a lively, handcrafted feel that large slabs cannot. It is also one of the more affordable ways to get real marble into a shower, since small tiles cost less per square foot than slabs.
Grout with care: Grout choice makes or breaks a marble subway shower. A light gray grout that sits between the tile tones keeps the veining visible without drawing a harsh grid. Seal the grout as well as the tile, because shower grout is where mildew starts. Epoxy grout costs more but resists stains dramatically better than cement grout, and in a shower that difference pays for itself.
Scale it right: The classic 3×6 subway is safe, but larger formats like 4×12 make a small shower feel less busy. Running bond is the timeless layout; stacked vertical reads more modern. Take the tile all the way to the ceiling rather than stopping at an arbitrary line, because a full-height marble wall looks intentional and protects the drywall above. A slim marble pencil trim or a simple Schluter edge finishes the exposed edges cleanly.
- Run marble subway tile to the ceiling for a finished look that also protects the wall above.
- Choose epoxy grout in showers; it resists mildew and staining far better than cement grout.
- Seal both the marble and the grout, since shower grout lines are the first place problems show.
Shop This Look
9. Marble Bathtub Surround
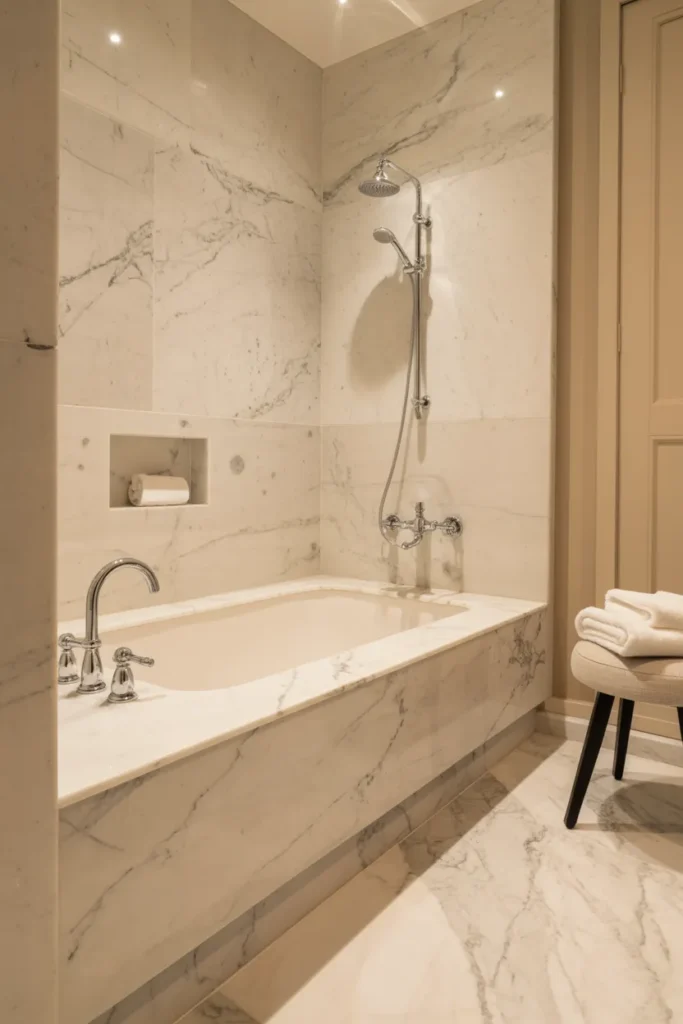
A marble bathtub surround frames the tub the way a mat frames a painting. Whether your tub is a drop-in set into a deck or a freestanding model with a stone-clad base, the surround gives the whole bathing zone a finished, built-in feel. This is a smart place to use marble because the tub area is a visual focal point but takes less stone than full walls. The surround also gives you a wide deck for candles, a book, and a glass of whatever you are drinking.
Build a ledge: A generous tub deck, at least six inches wide, is what makes a surround feel luxurious instead of cramped. It holds everything you want within reach and gives the stone room to show. Slope the deck very slightly toward the tub so water drains back instead of pooling. If you are cladding a drop-in tub, carry the same marble down the front apron for a monolithic look.
Pick the profile: The edge of the tub deck is a detail people touch, so make it comfortable. A soft eased edge feels good against arms and is safer than a sharp arris. For the vertical faces, large tiles or slabs minimize grout lines where water sits. Seal every horizontal surface well, because the deck is where bath oils and soaps collect, and that is exactly what stains marble.
- Make the tub deck at least six inches wide so it holds candles and books comfortably.
- Slope the deck slightly toward the tub so water drains instead of pooling on the stone.
- Seal horizontal marble surfaces extra well; bath oils and soaps stain faster than plain water.
Shop This Look
10. Marble Accent Flooring with Neutral Walls
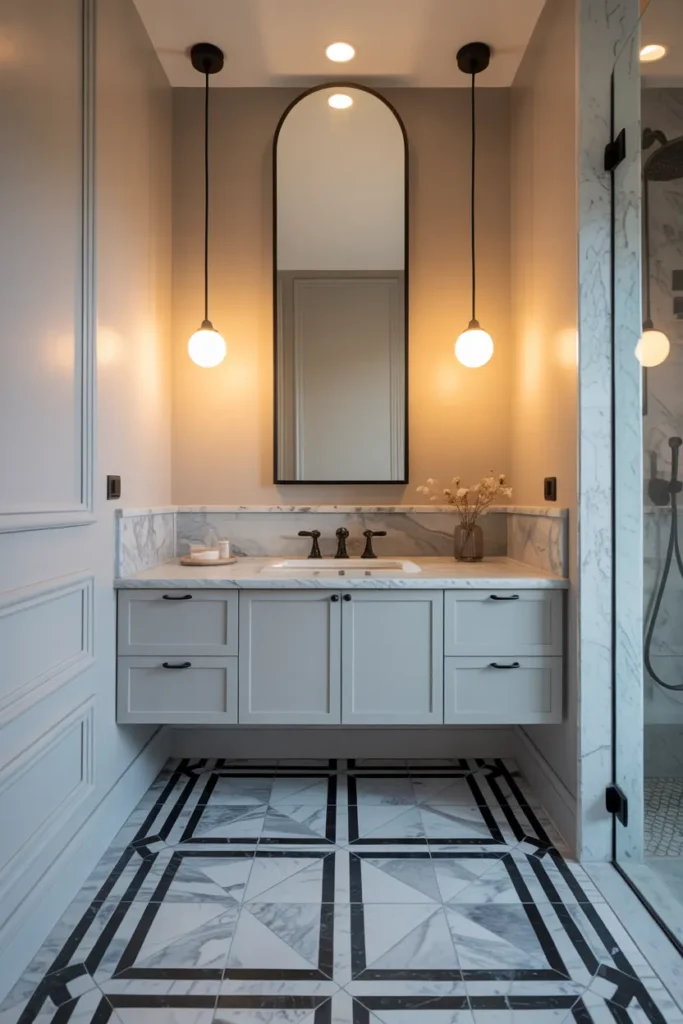
Marble accent flooring with neutral walls flips the usual formula: the drama goes underfoot and the walls stay calm. A bordered marble floor, a medallion, or a bold veined stone in the center of the room gives you a luxury moment you see every time you walk in. Neutral walls in warm white or greige keep the room from feeling busy and let the floor be the single star. This works especially well in powder rooms and primary baths where the floor is fully visible.
Let the floor lead: When the floor is the feature, everything else should step back. Choose simple wall tile or paint, a quiet vanity, and minimal pattern elsewhere. A bordered floor design, where a contrasting marble frames the field tile, looks custom without requiring a fully patterned floor. Keep the border width proportional to the room; a chunky border in a tiny powder room overwhelms, while a thin one in a big bath disappears.
Keep walls quiet: Neutral does not have to mean flat white. A warm greige, a soft plaster finish, or large-format neutral tiles give the walls enough presence to balance a strong floor. Repeat one tone from the floor’s veining in the wall color to tie the room together. And remember that a statement floor needs good lighting to be appreciated; a dark hallway bath with one dim bulb wastes the whole investment.
- Make the floor the single pattern in the room; keep walls, vanity, and textiles plain.
- Size any border or medallion to the room so it reads as intentional, not cramped.
- Light the floor well; a statement floor in a dim room is money you cannot see.
Shop This Look
11. Marble Wall Panels with Floating Vanity
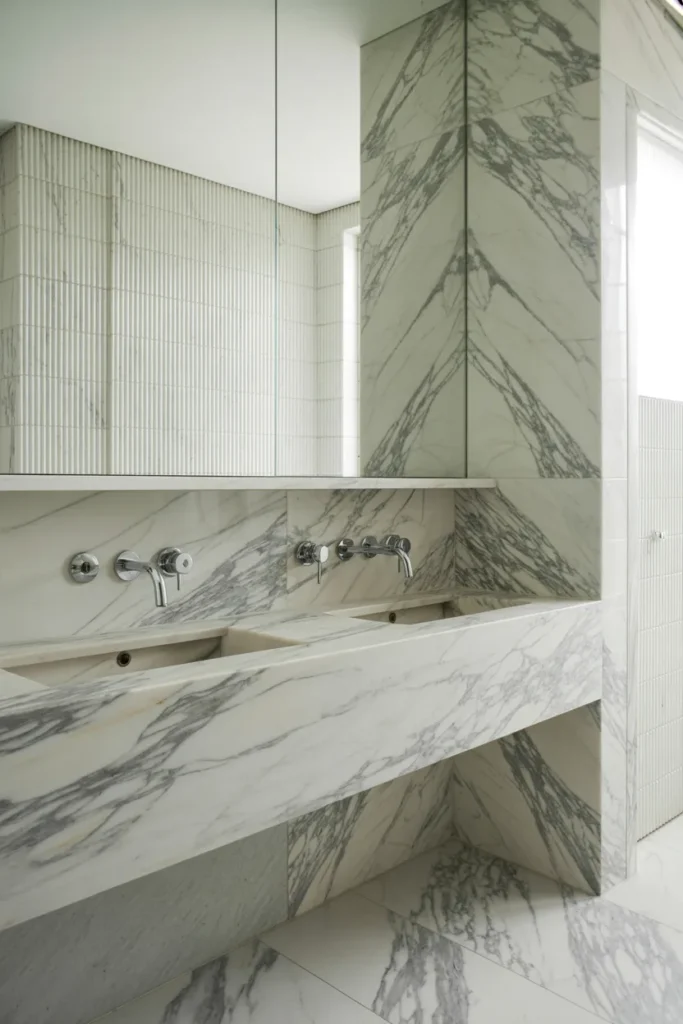
Marble wall panels with a floating vanity create the sleekest version of a luxury bathroom. Large panels mean almost no grout lines, so the marble reads as continuous slabs, and the floating vanity exposes the floor beneath, which makes the room feel bigger. The combination is unapologetically modern and works best when every line in the room is straight and every surface is uncluttered. This is the look of high-end hotel bathrooms, and it translates well to homes with simple architecture.
Float it: A floating vanity needs a properly reinforced wall, so plan the blocking before the tile goes up, not after. The payoff is a floor you can mop straight through and a vanity that looks like it hovers. Keep the vanity depth a little shallower than standard, around 18 to 20 inches, so it does not dominate a modest bathroom. Under-vanity LED strip lighting adds the floating effect after dark and doubles as a nightlight.
Hide the plumbing: The clean look depends on plumbing you cannot see. Bottle traps in a matching finish, in-wall carriers for wall-hung toilets, and faucets mounted cleanly through the marble keep the lines pure. This is not the place for exposed industrial plumbing. Every visible pipe should either be beautiful or gone, so coordinate with your plumber early about what shows and what hides.
- Install wall blocking for the floating vanity before tile goes up; retrofitting is expensive.
- Add LED strip lighting under the vanity for the floating effect and a built-in nightlight.
- Use large-format panels to minimize grout lines so the marble reads as continuous.
Shop This Look
12. Marble Flooring with Black Accents
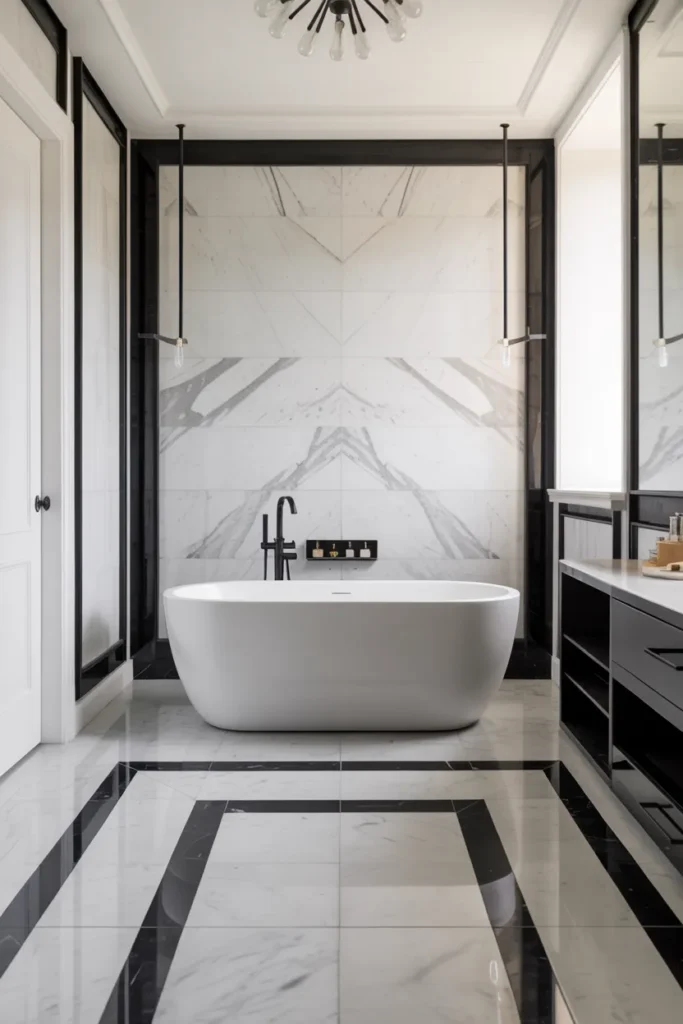
Marble flooring with black accents is the tailored suit of bathroom design. The light stone keeps the room bright, the black hardware, mirror frames, and shower trim give it structure and edge. This pairing is more forgiving than an all-black bathroom but still feels deliberate and modern. It works in traditional homes too, because black accents read as classic as well as contemporary. The key is using black as punctuation, not as the main text.
Contrast on purpose: Decide exactly which elements go black and repeat them. Faucets, shower frame, mirror frame, cabinet pulls, and one light fixture in matte black create a rhythm. Keep the black finishes consistent; mixing matte black with glossy black in the same sightline looks accidental. The marble floor stays the light, calm base that lets the black accents pop without overwhelming.
Repeat the black: Black accents need to appear at least three times to look intentional. A single black mirror in an otherwise chrome bathroom reads as a mistake. Spread the black across the room, high, middle, and low, so the eye travels. A black-framed mirror, black faucets, and black shelf brackets do the job. Keep textiles neutral so they do not introduce a third story.
- Repeat black in at least three places, high, middle, and low, so it reads as a scheme.
- Keep all black finishes in the same sheen; do not mix matte and gloss in one sightline.
- Let the marble floor stay the light base; black should punctuate, not dominate.
Shop This Look
13. Marble Countertop with Brass Fixtures
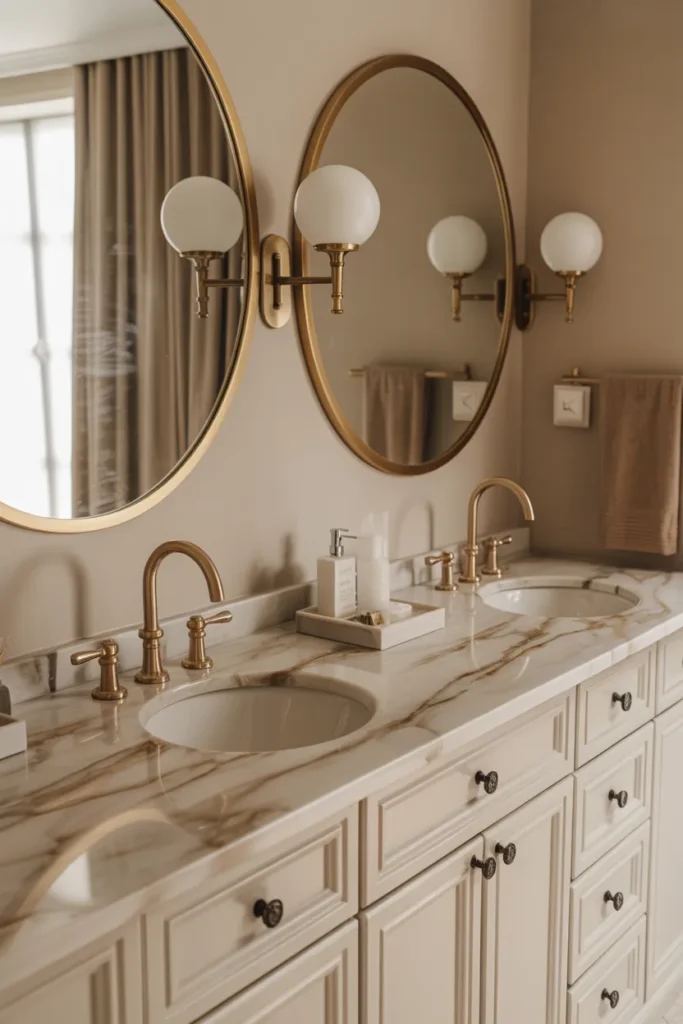
A marble countertop with brass fixtures glows in a way chrome never will. Brass brings warmth and a slightly vintage feel that makes white marble look richer, and unlacquered brass develops a patina over time that many people love. This pairing suits traditional, transitional, and even modern bathrooms, because brass is one of those finishes that bridges styles. The countertop itself can be simple; the brass is doing the decorative work.
Match the metals: Brass, gold, and bronze are cousins, not twins, so pick one and commit. Unlacquered brass will darken and spot with a living finish, which is the point for some and a dealbreaker for others; lacquered brass stays bright and needs less attention. Whichever you choose, carry it through the faucet, the mirror frame, the cabinet pulls, and the lighting so the metal story is coherent.
Mind the undertone: Marble has undertones too, and they need to get along with the brass. Warm white marble with beige or gold veining loves brass. Cool gray-veined marble can fight it, making both look slightly off. Hold your brass sample against the marble sample in daylight before you commit. Five minutes with samples saves five years of mild regret.
- Decide between living-finish and lacquered brass before buying; one patinas, the other stays bright.
- Carry the brass through faucet, mirror, pulls, and lighting for a coherent metal story.
- Check marble undertones against the brass in daylight; warm with warm, cool with cool.
Shop This Look
14. Marble Shower Walls with Matte Fixtures

Marble shower walls with matte fixtures are the modern luxury standard. The soft, non-reflective hardware lets the stone be the only thing that shines, which keeps the whole shower feeling calm and architectural. Matte black is the most popular choice, but matte brass and matte nickel work the same way. This combination is also practical: matte finishes hide water spots and fingerprints far better than polished chrome, so the shower looks cleaner between cleanings.
Go matte: Commit to matte across every shower component, meaning the showerhead, the controls, the drain cover, and any grab bars. One shiny piece in a matte shower sticks out like a sore thumb. Matte finishes are coatings, so clean them with mild soap only and skip anything abrasive, which can wear the finish off over time. Quality matters here; cheap matte coatings chip.
Texture the walls: Since the fixtures are deliberately quiet, give the marble walls some interest through format or finish. A honed finish reads softer than polished, and a stacked or herringbone layout adds pattern without adding color. Keep one wall as the feature, usually the back wall you face, and let the side walls be simpler. A tiled bench in the same marble turns the shower into a real retreat.
- Keep every shower component in the same matte finish; one polished piece breaks the effect.
- Clean matte fixtures with mild soap only; abrasives wear the coating off.
- Give the walls interest through tile layout or honed finish since the fixtures stay quiet.
Shop This Look
15. Marble Vanity with Large Backlit Mirror
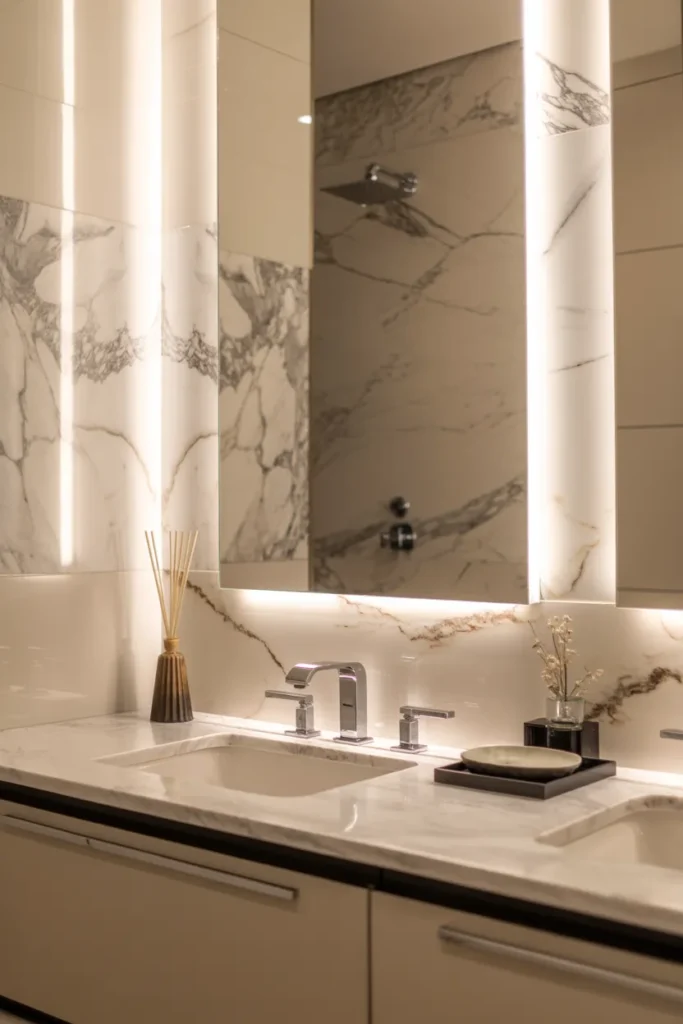
A marble vanity with a large backlit mirror is the fastest way to make a bathroom feel like a five-star hotel. The mirror does two jobs: it bounces light around the room, and the backlight creates a halo that flatters faces far better than overhead downlights. Against marble, the glow picks up the veining and makes the whole wall feel alive. This is also one of the most renter-friendly luxury moves, since many backlit mirrors simply hang on the wall.
Backlight it: Look for a mirror with adjustable color temperature, so you can shift from bright daylight for makeup to warm glow for evening baths. The light should wash the wall behind the mirror, not blast forward into your eyes. Hardwire it to a dimmer if you can; plug-in models work but the cord needs hiding. Size the glow to the mirror, since a thin halo on a huge mirror looks lost.
Size the mirror: Bigger is almost always better with backlit mirrors, because the light needs surface area to make an impact. A mirror that spans most of the vanity width doubles the sense of space. Round mirrors soften a marble wall with strong veining, while rectangular ones echo the architecture. Keep the marble behind the mirror simple; busy veining plus a glowing mirror plus clutter equals visual noise.
- Choose a backlit mirror with adjustable color temperature for makeup light by day and warm glow by night.
- Span most of the vanity width with the mirror to double the sense of space.
- Hardwire to a dimmer when possible; hide cords on plug-in models.
Shop This Look
16. Marble Bathtub with Floor-to-Ceiling Windows

A marble bathtub with floor-to-ceiling windows is the dream bathroom, full stop. Natural light on stone is unmatched, and a view turns an ordinary soak into an event. This idea demands planning around privacy and waterproofing: the window needs to be operable or fixed with proper flashing, the glass should be tempered, and privacy glass or shades are non-negotiable unless your neighbors are deer. Position the tub to face the view, not the door.
Frame the view: Treat the window like artwork and keep the framing minimal so the glass does the talking. A deep marble windowsill gives you a shelf for a plant or candles and ties the window into the stone palette. Keep window treatments simple, meaning a top-down bottom-up shade or frosted film on the lower half, so you keep light and lose the sightlines. The tub filler should be low and sleek so it does not block the view.
Protect the glass: Windows in wet zones need proper waterproofing around the frame, or you will be replacing rotted trim in a few years. Tile the window surround in the same marble or use a solid stone jamb for a watertight finish. Ventilation matters even more with big glass, since condensation on cold windows runs down onto sills. A good exhaust fan and a quick squeegee habit protect the whole assembly.
- Use tempered glass and proper flashing for any window in the splash zone of a tub.
- Add privacy with frosted film or top-down shades that keep the light but block sightlines.
- Tile the window surround in marble or stone for a watertight, cohesive finish.
Shop This Look
17. Marble Shower Floor with Matching Walls
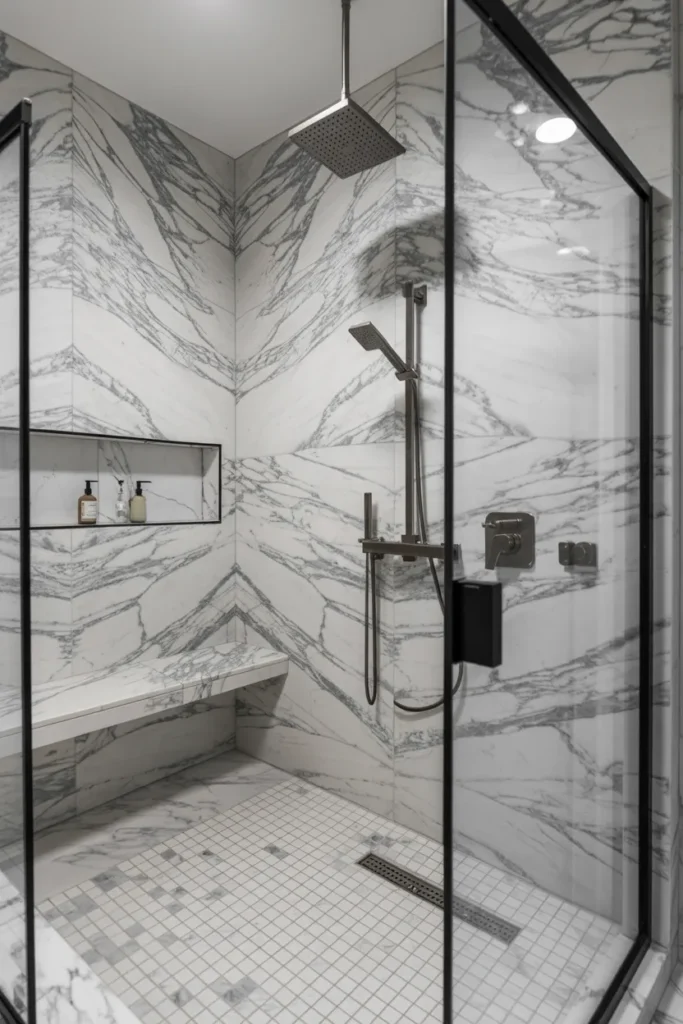
A marble shower floor with matching walls creates the enveloping stone box that defines true spa bathrooms. When the floor flows into the walls in the same material, the shower feels carved rather than built, and the whole bathroom reads as one continuous space. This works best with smaller-format marble on the floor for slope and grip, and larger pieces on the walls, all cut from the same stone so the veining relates. The effect is quiet but unmistakable.
Slope it right: A curbless marble shower needs precise sloping to the drain, typically a quarter inch per foot, and small mosaic tiles conform to that slope far better than large ones. A linear drain at the back wall lets you run larger tiles on the floor with a single-plane slope, which is the cleanest look. Whatever drain you choose, flood-test the pan before a single tile is set; finding a leak under marble is nobody’s idea of fun.
Match the drain: The drain cover is a small detail with outsized visibility on a marble floor. Tile-in drain covers that accept a piece of your floor tile make the drain nearly disappear, which is the luxury move. If you prefer a visible cover, match its finish to your shower fixtures exactly. And seal the shower floor more often than the walls; it takes the most water, soap, and foot traffic in the room.
- Use small marble mosaics on the shower floor so the tile conforms to the drainage slope.
- Flood-test the shower pan before tiling; leaks under marble are expensive to fix.
- Choose a tile-in drain cover so the drain disappears into the marble floor.
Shop This Look
18. Marble Accent Wall with Gold Mirror
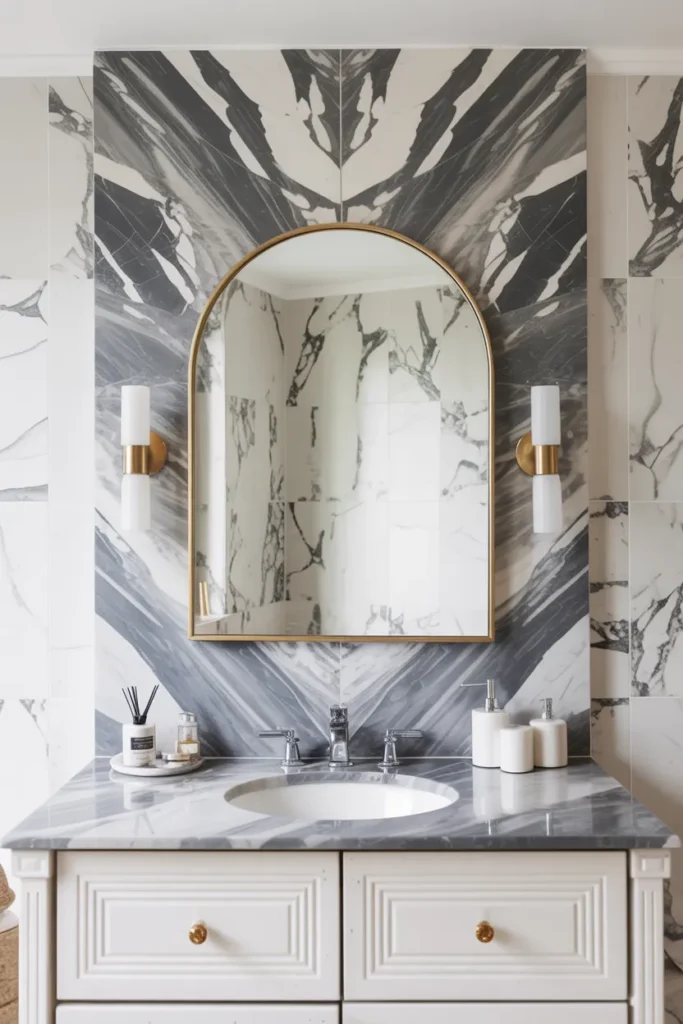
A marble accent wall with a gold mirror is a study in warm minimalism. The stone provides texture and movement, the gold mirror provides the glow and the reflection, and nothing else needs to compete. This is an ideal approach for powder rooms, where one wall and one mirror can carry the entire design. The mirror should be generously sized; a small mirror on a big marble wall looks timid. Round or arched shapes soften the straight lines of stone particularly well.
Hang with intent: Center the mirror on the wall and hang it at a height that works for the room’s main users, with the center around eye level. In a powder room, hang it slightly higher since people mostly check their reflection standing. Use a proper wall anchor rated for the mirror’s weight, because marble walls and tile need masonry anchors, not drywall screws. A floating mount with no visible hardware keeps the look clean.
Reflect the light: Position the mirror to catch and bounce the room’s best light source, whether that is a window or a pair of sconces. Flanking sconces at face height give the most flattering light and turn the mirror into a proper vanity station. Keep the marble wall behind the mirror free of other decor; the mirror is the art. One small shelf or a slim console below gives you a landing spot without cluttering the composition.
- Size the mirror generously; a small mirror on a large marble wall looks timid.
- Use masonry anchors for marble and tile walls, never drywall screws.
- Flank the mirror with sconces at face height for the most flattering light.
Shop This Look
19. Double Marble Sinks with Open Shelving
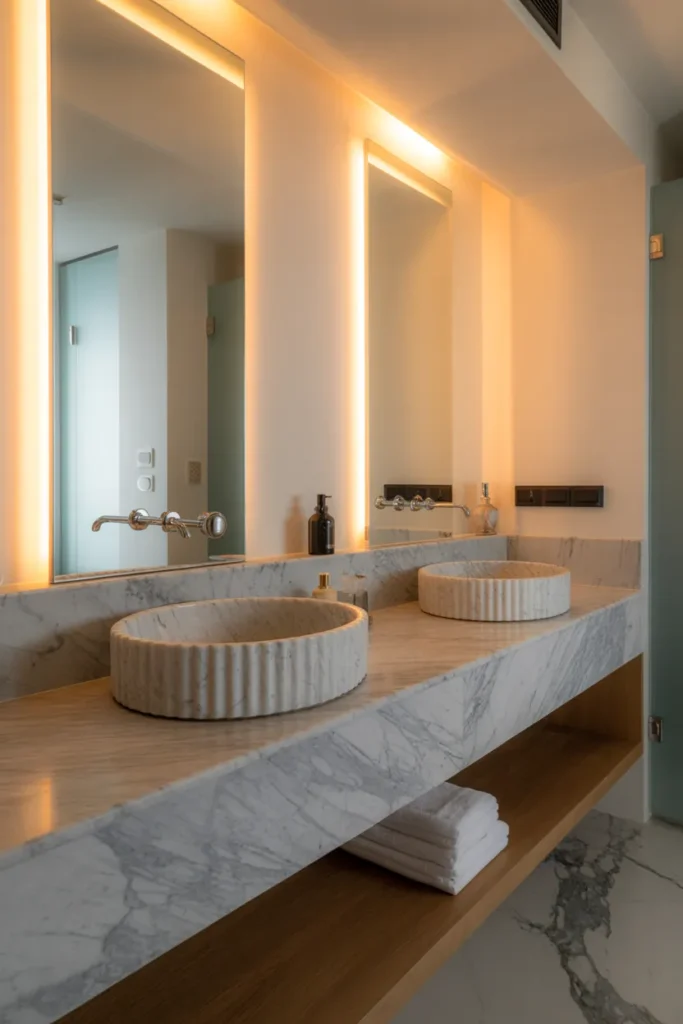
Double marble sinks with open shelving underneath trade hidden storage for display, and in the right bathroom it looks fantastic. The two vessel or undermount sinks sit on a long marble slab, and open wood or metal shelves below hold folded towels, baskets, and the pretty bottles. This works best in a primary bathroom used by adults who can keep shelves tidy, or in a powder room where the sinks are more for show. It is not the choice for a kids’ bathroom full of plastic bottles.
Style the shelves: Open shelving is a styling commitment, so treat it like one. Fold towels in matching sets, decant ugly packaging into simple bottles, and use baskets to corral the less photogenic necessities. Leave some negative space; shelves packed edge to edge look like storage, not design. The marble slab on top should stay mostly clear, with just a soap dispenser and maybe a small plant.
Keep it edited: The discipline of open shelving is the edit. Once a quarter, pull everything off and put back only what earns its place. If real life overwhelms the look, add a couple of lidded boxes or drawers to the shelving unit for the chaos, keeping the styled items on the open tiers. Honest storage that you actually maintain beats aspirational styling that lasts a week.
- Decant toiletries into matching bottles so open shelves look styled, not cluttered.
- Leave negative space on shelves; packed shelves read as storage, not design.
- Add a few lidded boxes to the shelving for the less photogenic necessities.
Shop This Look
20. Marble Flooring with Brass Inlays
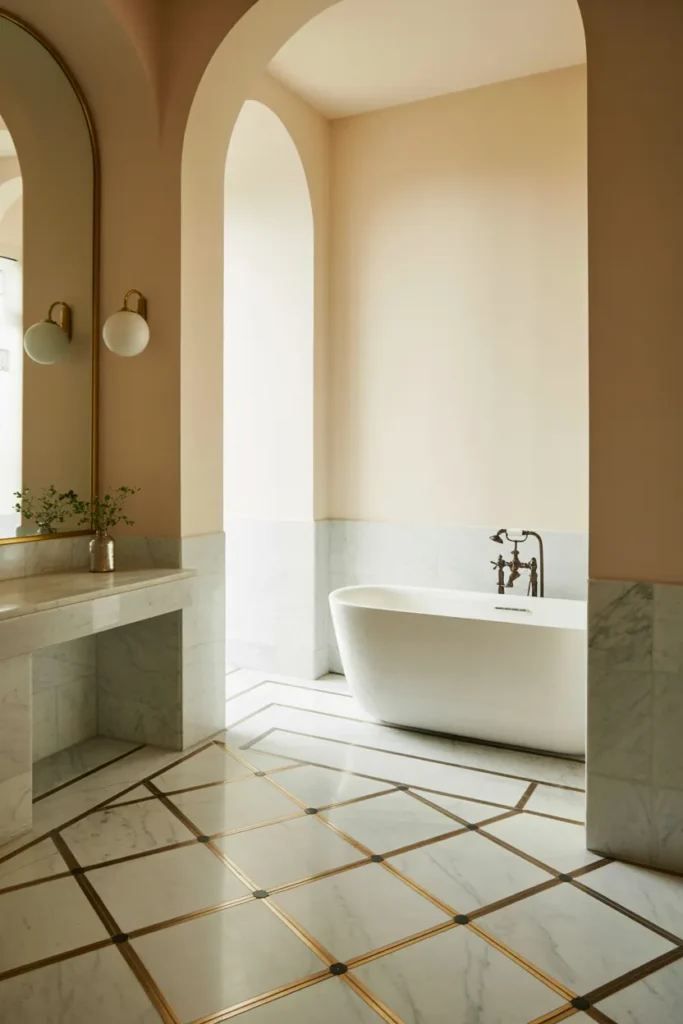
Marble flooring with brass inlays is old-world luxury done right. Thin brass strips set into the stone create borders, grids, or custom patterns that make the floor look like it was designed, not just tiled. This is a high-end detail with a high-end installation cost, since the inlay work is precise, but the result is a floor that looks like it belongs in a historic hotel. It works best in larger bathrooms where the pattern has room to breathe.
Inlay with restraint: One inlay motif is enough. A brass border around the field tile, or a simple grid, gives you the custom look without turning the floor into a maze. Keep the brass strips thin, around a quarter inch, so they read as lines rather than bands. The pattern should be symmetrical and centered on the room’s main axis, usually the line from the door to the vanity or tub.
Polish the brass: Brass inlay in a floor will patina with foot traffic and cleaning, which can be beautiful if you expect it. Seal the stone well, because the joints around metal strips are vulnerable to moisture. Clean with pH-neutral stone cleaner; harsh chemicals discolor brass. If the idea of living-finish metal underfoot worries you, brass-look porcelain borders give a similar effect with zero maintenance.
- Keep the inlay to one motif, like a border or simple grid, so the floor stays elegant.
- Center the pattern on the room’s main axis for a symmetrical, intentional look.
- Seal around the metal strips well; those joints are the most moisture-vulnerable spots.
Shop This Look
21. Marble Countertop with Minimalist Fixtures
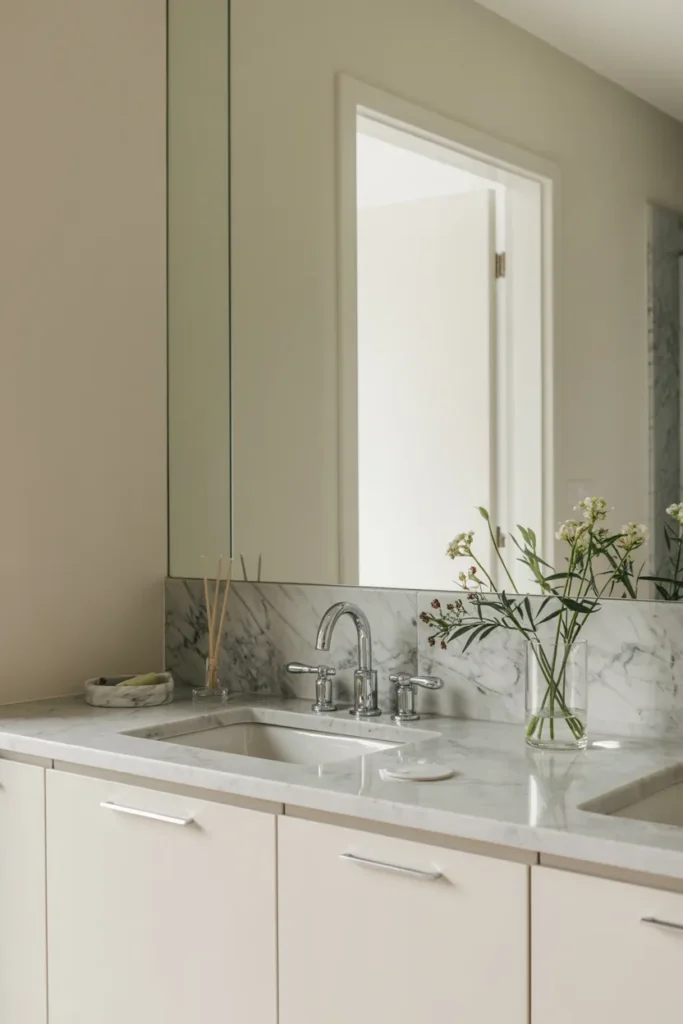
A marble countertop with minimalist fixtures is luxury through subtraction. The stone gets the spotlight, and the faucet is a quiet, sculptural object rather than a statement. Think single-lever mixers with clean lines, wall-mounted spouts with no visible hardware, or simple cylindrical taps. This approach suits modern and Scandinavian bathrooms especially well, where every element is reduced to its essence. It also ages gracefully, because there is no trendy hardware to date it.
Edit the hardware: Minimalist does not mean cheap, and this is where fixture quality shows. A well-made single-lever faucet operates smoothly and holds its finish; a cheap one feels tinny and spots immediately. Choose fixtures with the fewest possible parts and seams, since every joint is a place for grime. Wall-mounted faucets keep the counter completely clear, which is the ultimate minimalist move.
Let the stone speak: With quiet fixtures, the marble needs to be the interesting part, so choose a slab or tile with beautiful veining. A dramatic Calacatta on a simple vanity with a plain faucet is the whole design, and it works. Keep the styling equally restrained: one soap dispenser, one small tray, nothing else. The luxury here is the confidence to leave space empty.
- Invest in fixture quality; minimalist designs show cheap hardware immediately.
- Consider wall-mounted faucets to keep the marble counter completely clear.
- Choose marble with strong veining since the stone carries the whole design.
Shop This Look
22. Marble Wall with Floating Shelves
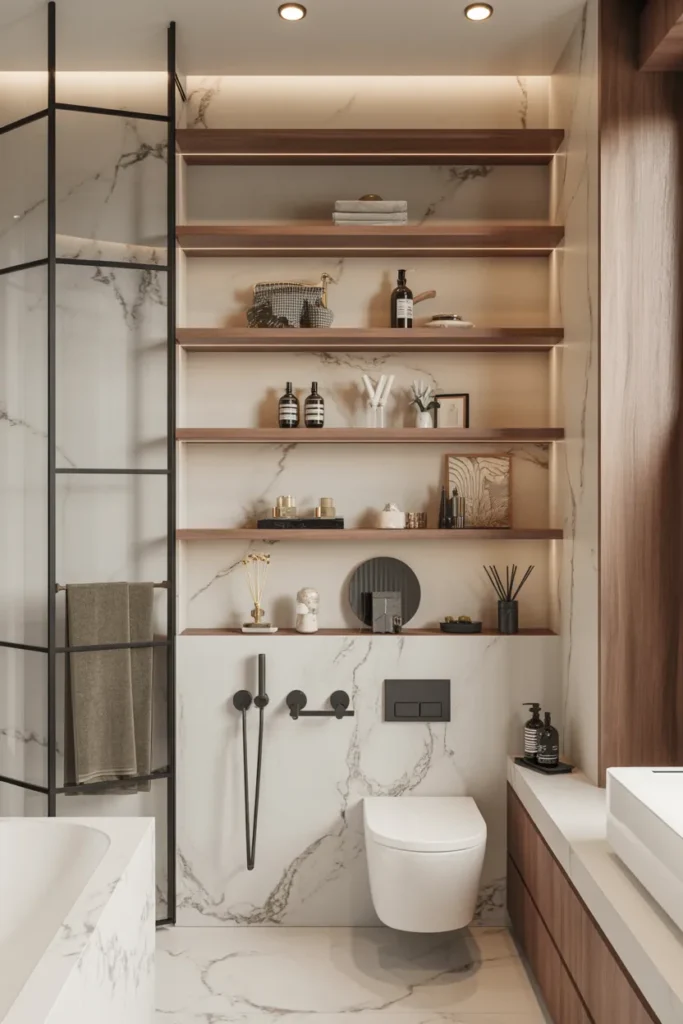
A marble wall with floating shelves gives you display space without the visual weight of cabinets. The shelves, in glass, wood, or marble itself, seem to hover against the stone, holding towels, plants, and pretty bottles. This is perfect for bathrooms that need storage but cannot handle bulky furniture, and for anyone who enjoys styling. The marble wall behind makes even simple folded towels look deliberate.
Anchor the shelves: Floating shelves on a marble wall need serious anchors, since stone and tile do not hold screws the way drywall does. Use the right masonry anchors and check the weight rating; a shelf of folded towels is heavier than it looks. Keep shelves level with a laser, because a crooked shelf against a straight stone wall is painfully obvious. Two shelves are usually enough; three starts to look like a bookcase.
Style in threes: Group shelf items in odd numbers and vary heights for a natural look. A stack of folded towels, a small plant, and a candle make a classic trio. Repeat one color or material across the shelves to tie them together. And keep the marble visible; the shelves are the supporting act, so do not pack them so full that the stone disappears behind clutter.
- Use masonry anchors rated for the real weight; folded towels are heavier than they look.
- Level shelves with a laser; crooked shelves show badly against straight stone.
- Style in odd-numbered groups and leave the marble visible behind them.
Shop This Look
23. Marble Bathtub Surround with Statement Lighting

A marble bathtub surround with statement lighting is the finale because it combines the two most powerful tools in bathroom design: stone and light. The marble gives the tub zone its material richness, and a dramatic pendant, a pair of sconces, or integrated LED strips give it after-dark magic. This is the setup that makes guests say something when they walk in. It works in any bathroom with a tub worth showing off, from compact alcoves to sprawling primary suites.
Light the surround: The lighting should graze the marble, not blast it. A pendant hung low over one end of the tub, wall sconces that wash the surround, or LED strips tucked under a tub deck all create glow without glare. Use warm color temperature, around 2700K, because cool light on marble feels clinical. Put the feature lighting on its own dimmer so bath time gets its own mood.
Dim it down: Every light in a luxury bathroom should dim, but the tub lighting most of all. Bright light is for cleaning; dim warm light is for soaking. If you are using LED strips, choose a high-CRI, waterproof rated product so colors look true and the strips survive the humidity. Hide the strip itself and show only the glow; visible LED dots cheapen the effect instantly.
- Graze marble with warm light around 2700K; cool light on stone feels clinical.
- Put tub feature lighting on its own dimmer for a dedicated bath-time mood.
- Hide LED strips and show only the glow; visible dots cheapen the effect instantly.
Shop This Look
How to Start
Begin with one marble moment, not the whole room. Pick the surface that gets the most visual attention in your bathroom, usually the shower wall, the vanity top, or the floor, and design everything else around it. Ordering a few large samples and living with them for a week tells you more than any photo. Watch how the veining looks in your morning light and your evening light before you commit.
Next, lock in your metal finish and stick to it. Marble pairs beautifully with gold, brass, matte black, and polished chrome, but mixing three finishes in one small room makes the stone look busy. Choose one metal for faucets, shower trim, mirror frames, and hardware. If you want a second metal, keep it to tiny accents like a soap dispenser or a tray.
Finally, plan the unglamorous layers before tile goes up. Waterproofing behind shower walls, a sloped shower floor, sealed grout lines, and a stone sealer on first install are what separate a luxury bathroom from a future repair bill. Talk through each of these with your installer and get them in writing.
- Order large marble samples and view them in your bathroom’s actual light, morning and evening, before buying.
- Choose one primary metal finish for all fixtures and repeat it at least three times so the room feels intentional.
- Confirm waterproofing, slope, grout sealing, and stone sealer with your installer before any tile is set.
Shop This Look
Common Mistakes
- Covering every surface in the same marble, which flattens the veining and makes the room feel like a cold box instead of a designed space.
- Skipping sealer on first install, then wondering why the vanity top has rings and the shower floor has dark patches a year later.
- Choosing polished marble for the shower floor, where it turns dangerously slick the moment it gets wet.
- Mixing gold, chrome, and black fixtures in one small bathroom, so no single finish gets a chance to look deliberate.
- Picking grout that is too dark or too light for the tile, which either hides the veining or draws a harsh grid over it.
- Installing marble-look porcelain in the shower but real marble on the vanity, where the color mismatch shows up under the same light.
- Forgetting ventilation, because marble and steam need a good exhaust fan or the stone and grout will age twice as fast.
Frequently Asked Questions
Is real marble worth it in a bathroom, or should I use marble-look porcelain?
Real marble has depth and variation that porcelain still cannot fully copy, and it is the right call for vanity tops and accent walls in a primary bathroom. For shower floors and high-traffic rental bathrooms, marble-look porcelain is the smarter pick, because it needs no sealing and handles daily use without fuss. Many designers mix both, real stone where eyes land and porcelain where feet land.
How do I keep marble from staining?
Seal it on installation day and reseal once a year, and wipe up anything acidic like toothpaste, citrus, or certain soaps quickly. Use a pH-neutral stone cleaner instead of vinegar or bleach-based sprays, which etch the surface over time. Honed finishes hide etching better than polished ones, so they are more forgiving in family bathrooms.
What metal finish looks best with white marble?
Warm metals like brushed gold and unlacquered brass bring out the warmth in white marble and make the room feel expensive. Matte black gives a sharper, more modern contrast, while polished chrome keeps things crisp and classic. Pick one and repeat it across faucets, shower trim, and lighting for a pulled-together look.
Can I use marble in a small bathroom without overwhelming it?
Yes, and small bathrooms are actually where marble earns its keep, because one dramatic wall or floor has outsized impact in a tight space. Keep the marble to a single feature, like the shower wall or the floor, and leave the other surfaces plain. Large-format tiles with fewer grout lines help a small room feel bigger, not busier.
What goes well with a marble bathroom in the rest of the home?
A marble bathroom pairs naturally with calm, natural materials elsewhere, so rooms with soft greens, warm woods, and linen textures sit comfortably next to it. If you like that layered natural look, browse these soft green bathroom designs for ideas that bridge the gap between stone and softer finishes.
The Finishing Touch
Marble does the heavy lifting in a luxury bathroom, but the finish comes from restraint. One strong stone moment, one metal repeated with confidence, lighting that flatters instead of flattens, and the discipline to leave some surfaces quiet. That is the difference between a bathroom that photographs well once and one you still love brushing your teeth in every morning.
Before you buy anything, pull your samples together on one board: the tile, the metal finish, the grout, and a swatch of your wall color. If they look calm together in daylight and lamplight, your plan is solid. For more real-world examples of how designers layer marble with metal and wood, browse this Houzz collection of marble tile bathroom ideas and save the ones that match your palette.
Then start small if you need to. A new faucet, a backlit mirror, or a sealed marble tray on the vanity can shift the whole mood of the room for very little money. Luxury is rarely about doing everything at once. It is about doing the right few things well, and marble rewards that approach more than almost any other material.