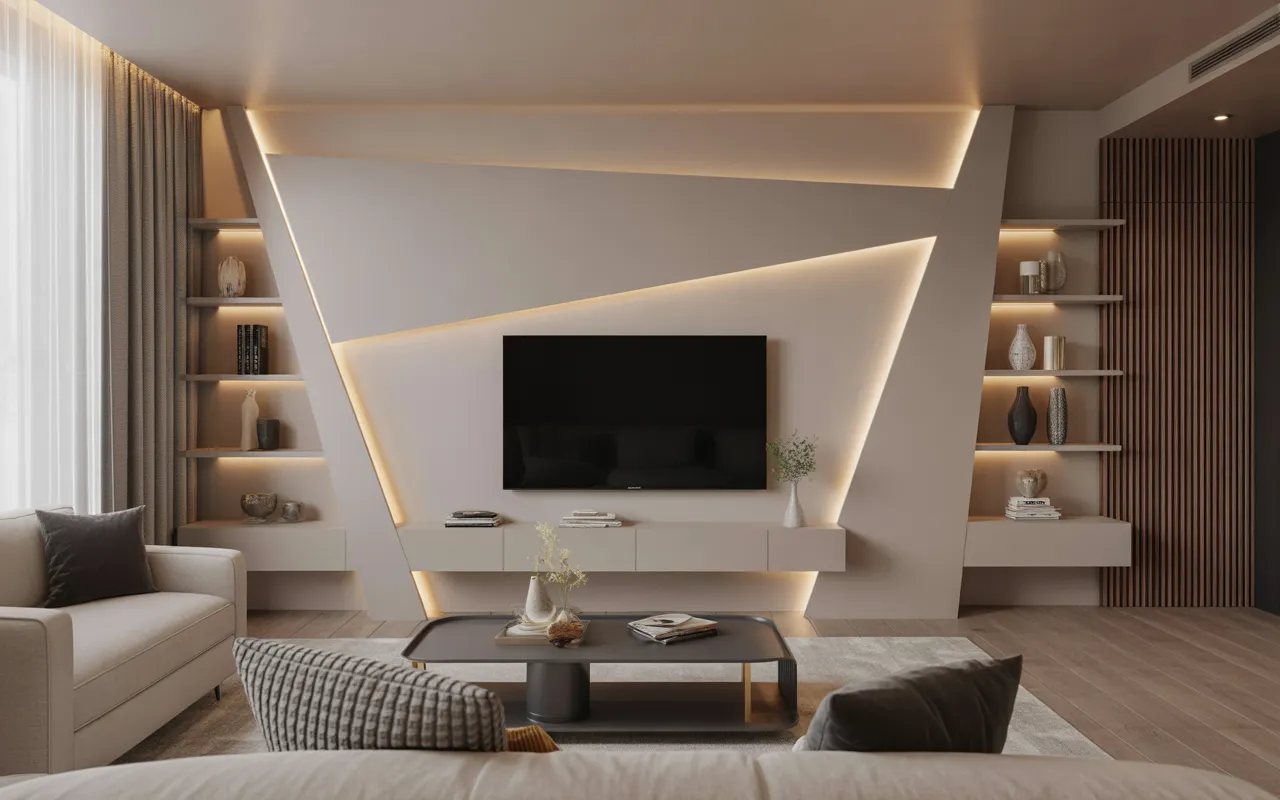
24 TV Wall Design Ideas to Transform Your Living Room
The TV wall is the one spot in the living room everyone looks at, whether you mean it or not. A plain TV on a bare wall reads as unfinished. A thought-out wall behind it reads as designed. That gap between the two is usually smaller than people expect: a coat of paint, a few wood panels, or a floating shelf can do it. Most of the ideas below cost between $40 and $300 and take a weekend or less.
This list has 24 TV wall designs, from minimalist floating setups to stone, marble, wood slats, and geometric paint. Each one keeps the same idea headings and images as the original article. The text is rewritten with practical detail: what the look needs, what it typically costs, and what to watch out for while you build it.
Before you pick one, note two things. First, measure your TV and your wall, and check the mount’s weight rating against both. Second, plan cable routing before you start, because fishing wires through a finished wall is ten times harder than doing it first. With that settled, here are the ideas.
This post contains affiliate links. If you buy through them, I may earn a small commission at no extra cost to you.
1. Minimalist Floating TV Wall
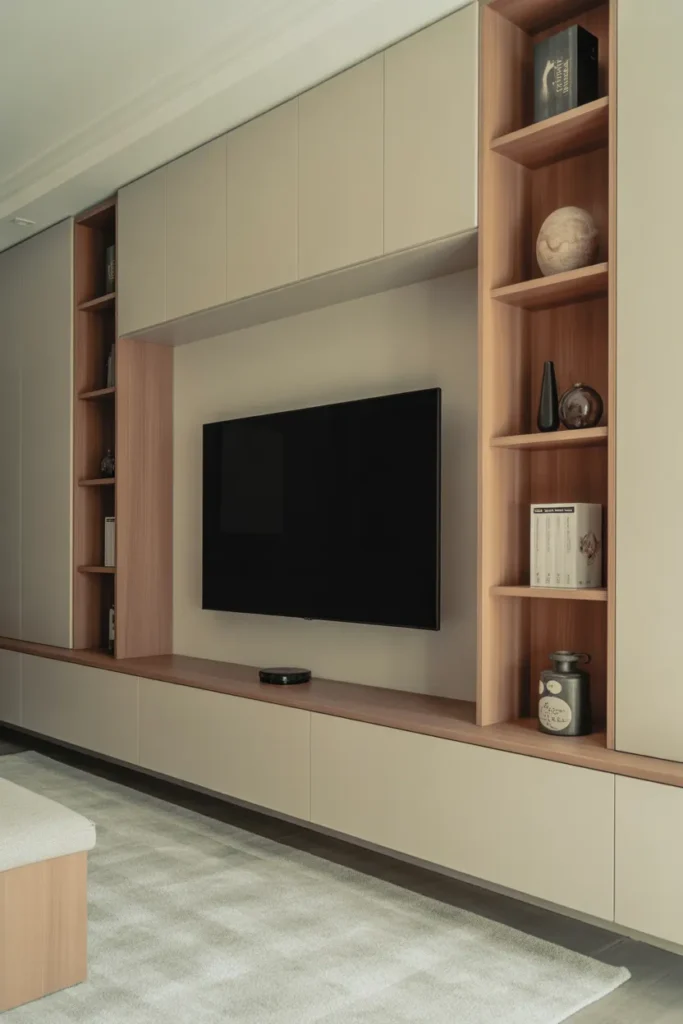
A floating TV wall works because it removes everything that is not needed. The TV mounts flat, a slim shelf or console floats below, and the cables disappear. With nothing touching the floor, the room looks larger and cleaning underneath takes seconds. The look suits small living rooms best, where every visual break counts. Cable concealment is what makes or breaks this design: an in-wall kit or a slim raceway keeps the back clean.
Budget runs about $60 to $200 for the pieces that matter. A low-profile mount is $25 to $50, a floating shelf or console runs $40 to $120, and an in-wall cable kit is around $30. Paint the wall a light neutral first, because a flat backdrop keeps the floating pieces looking intentional rather than stuck on. Viewing height matters more than people think: the center of the screen should sit at eye level from your sofa, usually 42 to 48 inches off the floor.
Keep styling on the shelf light. One low plant, a small stack of books, or a single sculptural object is enough. Crowding the shelf defeats the purpose and turns minimalist into cluttered. If you need storage, choose a floating console with doors so the gear stays hidden and the top stays clear.
- Mount the TV so the screen center hits eye level from your main seat, not higher.
- Use one long low shelf instead of several small ones to keep the line clean.
- Route cables through an in-wall kit before the shelf goes up, not after.
Shop This Look
2. Wooden Panel TV Wall
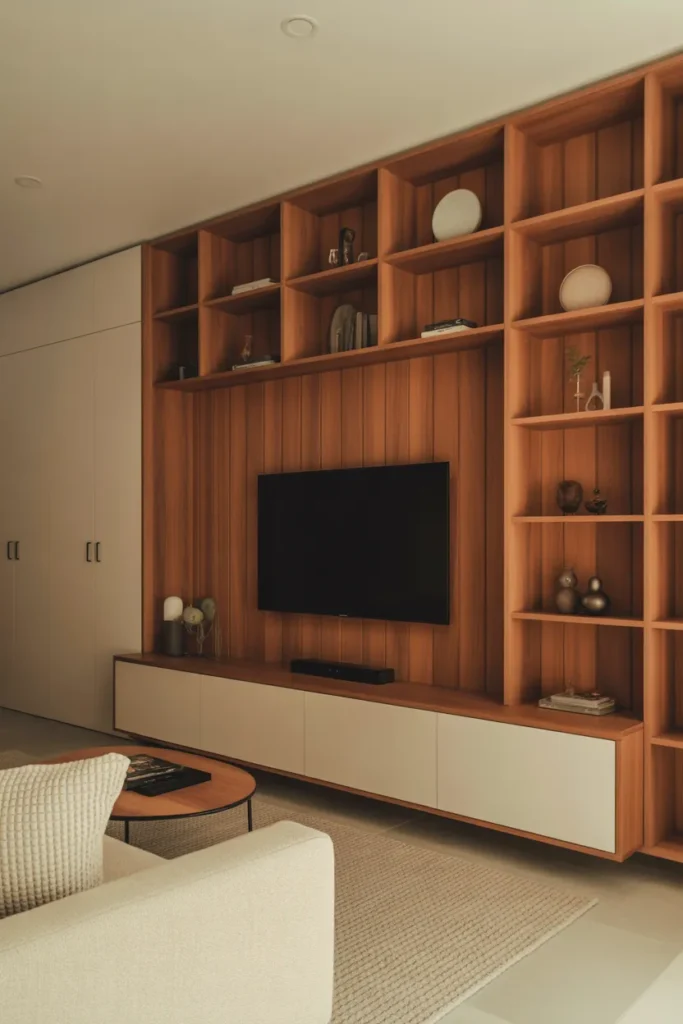
Wood panels give the TV wall warmth that paint alone cannot. Walnut, white oak, and natural pine are the tones that work most often, because they sit well with both modern and traditional furniture. You can use real wood planks, wood-look PVC panels, or acoustic slat panels that double as sound treatment. Expect $80 to $300 depending on the material: peel-and-stick wood panels are the cheapest route, while real oak slats cost more but look better up close. Wood tone should echo something else in the room, like the floor or a coffee table, so the wall feels connected to the space.
Panel depth changes the whole effect. Flat panels read calm and modern. Slatted panels with a felt backer add shadow lines and texture that look rich even when the TV is off. Whichever you choose, leave a gap or a hidden channel behind the panels for cables, because retrofitting wire paths through finished wood is miserable. Mount the TV bracket into the wall studs through the panels, not into the panels themselves, or the weight can pull them loose over time.
Lighting sells this look. A warm LED strip above or behind a floating wood section makes the grain glow in the evening. Keep decor on nearby shelves simple: wood is already doing the visual work, so glass, linen, and one or two low plants are enough.
- Match the panel tone to your floor or largest wood furniture piece for a coherent room.
- Plan a cable channel behind the panels before you attach the first one.
- Anchor the TV mount into studs through the panels, never into the panel material alone.
Shop This Look
3. Marble Accent TV Wall
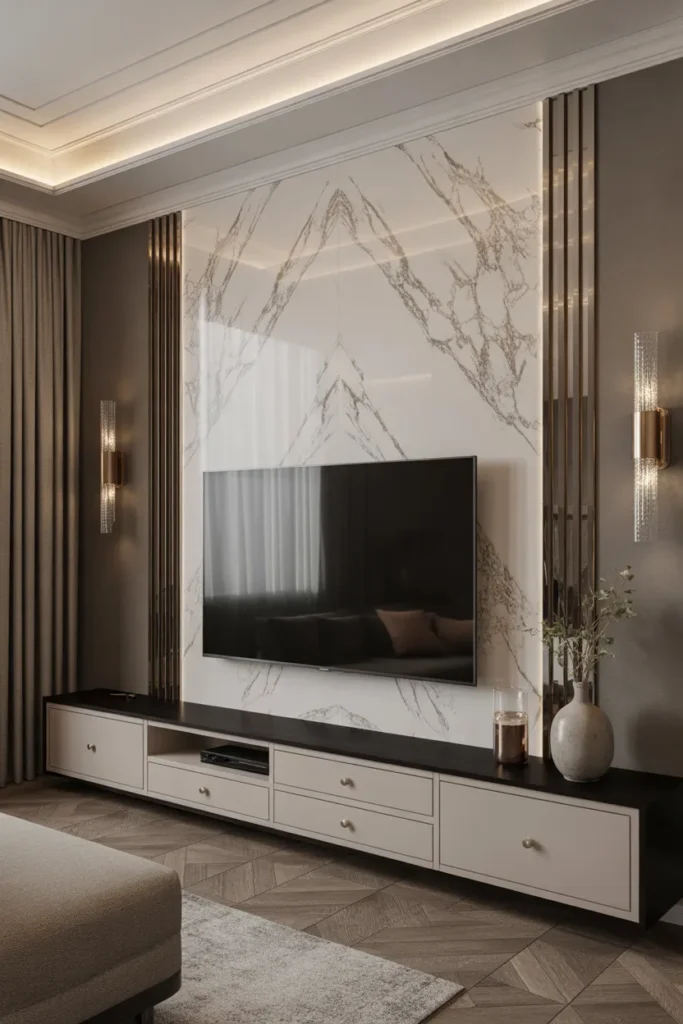
Marble reads as expensive even when it is not. Real marble slabs are pricey and heavy, but most people get the same look with marble-look porcelain panels or high-quality peel-and-stick marble wallpaper, which lands the whole project between $40 and $150. Porcelain panels are the better pick behind a TV: they are rigid, easy to wipe, and the printed veining has gotten convincing. Marble-look porcelain also handles the heat from electronics without complaint, which paper-based options do not always do.
Vein direction is the detail that separates a good install from a cheap-looking one. Run the veining vertically so the eye travels up, and keep panels aligned so veins continue across seams instead of breaking randomly. A black or deep charcoal TV on white marble gives strong contrast, which is why this pairing shows up everywhere. Keep the rest of the wall bare: marble is the decoration, and adding art or shelves on top of it fights the material.
One honest note: glossy marble-look panels can reflect room light and create glare near the screen. If your room gets a lot of daylight, pick a honed or matte finish instead. It still reads as marble but keeps the viewing experience calm.
- Run veining vertically and align seams so the pattern continues across panels.
- Choose a matte or honed finish if the wall faces windows to cut glare.
- Keep the marble section free of shelves and art so the material stays the focus.
Shop This Look
4. Stone Feature TV Wall
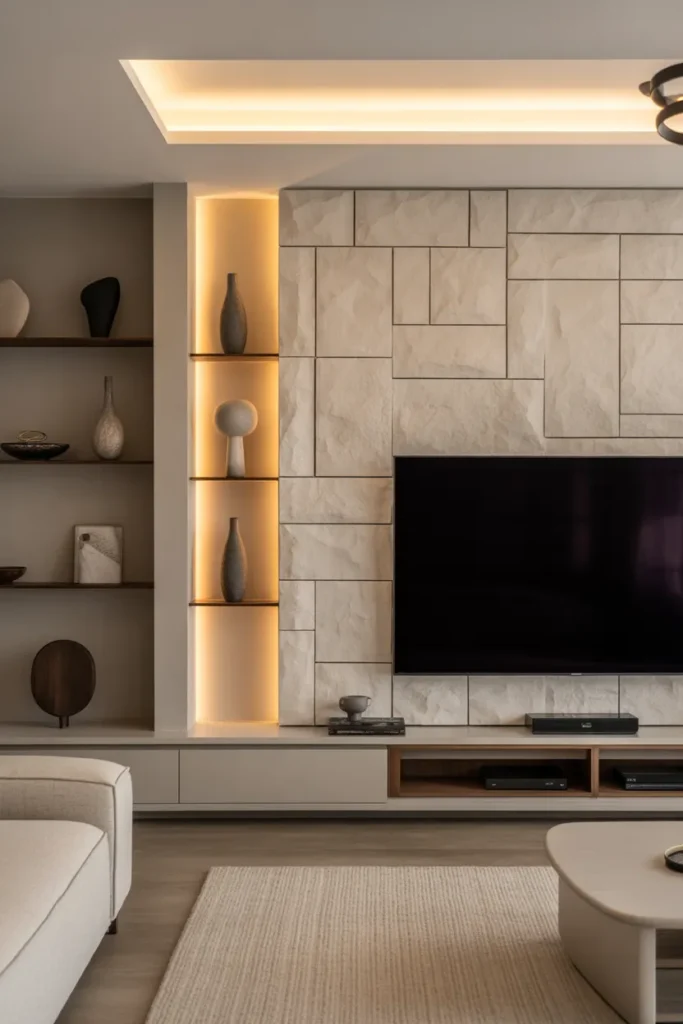
A stone feature wall turns the TV area into the architectural anchor of the room. Stacked stone veneer, in natural or manufactured form, adds texture and depth that flat materials cannot match. Real stone veneer runs $100 to $300 for a TV-sized section, while lightweight faux panels cost less and go up with adhesive. Stone veneer panels are the practical choice for most DIYers because they are lighter, easier to cut, and still read as real stone from seating distance.
The TV bracket must anchor into the wall studs, not the stone, so plan the mount location before the stone goes up. Mark stud positions and keep a small access plan for cables: many people run conduit behind the stone so wires can be replaced later without tearing anything down. Sealing the stone matters if it is natural or porous; a spray sealer keeps dust out of the crevices and stops the surface from darkening with handling.
Balance the roughness with softness nearby. A stone wall plus a leather sofa plus a metal coffee table can feel cold, so add a rug, linen curtains, or a fabric throw to warm it. One or two picture lights washing across the stone at night makes the texture look even better than it does in daylight.
- Locate studs and mount the TV bracket into them before installing the stone.
- Run cable conduit behind the stone so wires can be serviced later.
- Seal natural stone to keep dust and oils out of the texture.
Shop This Look
5. Contemporary Painted TV Wall
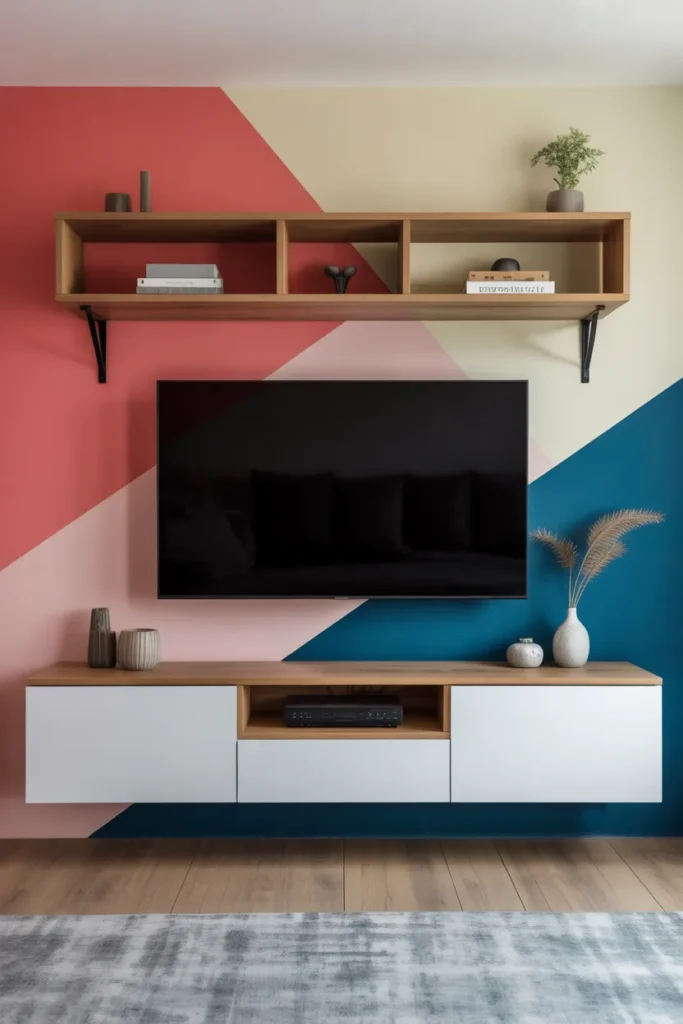
Paint is the cheapest way to make a TV wall look designed, and a contemporary color does the heavy lifting. Deep navy, forest green, charcoal, or warm terracotta all frame a black screen well, because the TV stops looking like a floating black hole and starts looking like part of the composition. A gallon of quality paint plus supplies lands between $40 and $80. Finish choice matters more than the color name: matte or eggshell hides wall imperfections and kills glare, while satin reflects light and shows every bump.
Contemporary here means restraint. One color, clean edges, no stencils or murals. Paint the full wall behind the TV, and consider wrapping the color onto the side return or the ceiling edge for a cocooning effect that designers use in media rooms. Edge lines need to be crisp, so spend the money on good painter’s tape and pull it while the final coat is still slightly tacky for the sharpest line.
Sample before you commit. Paint a 2-foot square and look at it in morning, afternoon, and evening light, because contemporary darks shift a lot between daylight and lamplight. If the color feels too heavy once dry, a lighter rug and pale curtains balance it without repainting.
- Sample a large swatch and check it in daylight and lamplight before painting the whole wall.
- Use matte or eggshell finish to hide imperfections and avoid glare near the screen.
- Pull painter’s tape while the last coat is tacky for a crisp edge line.
Shop This Look
6. Floating TV Wall with LED Backlighting
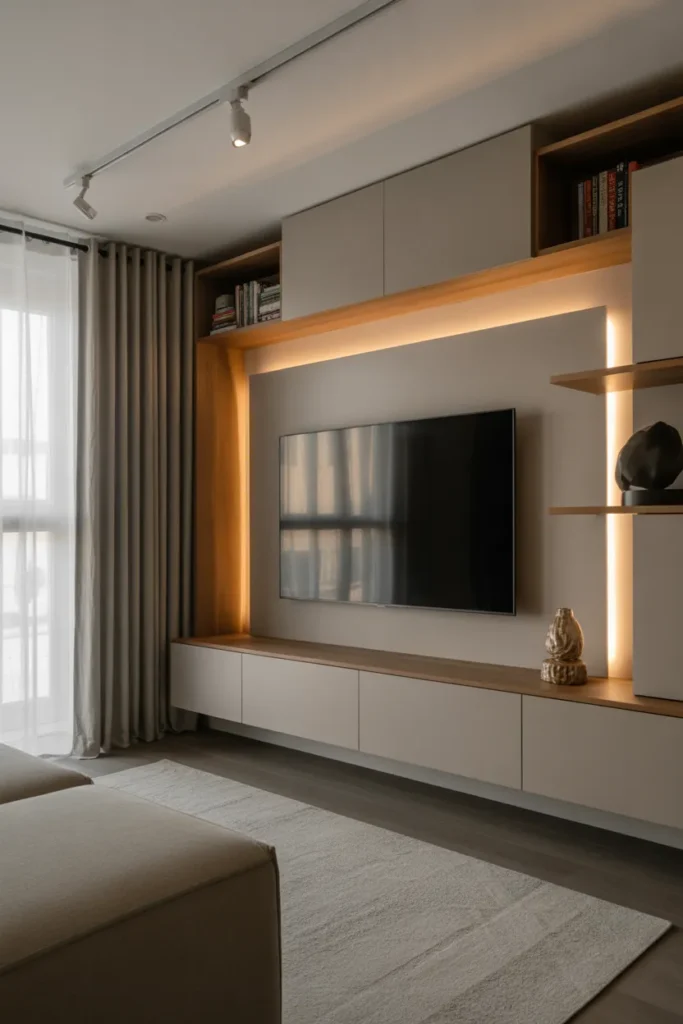
LED backlighting behind the TV or a floating panel does two jobs at once: it looks high-end, and it is easier on the eyes. The soft glow around the screen, called bias lighting, reduces the contrast between a bright screen and a dark room, which cuts eye strain during evening viewing. A good strip kit costs $15 to $40, and the whole upgrade usually stays under $150 even with a dimmer. Bias lighting works best in a warm white around 2700K to 4000K; avoid rainbow color modes for regular watching, because colored light on the wall is distracting.
Placement is simple but specific. Stick the strip 2 to 3 inches in from the TV’s edge on the back of the set, or behind the perimeter of a floating panel, so the light washes the wall evenly. Power routing is the part people forget: the strip’s power supply needs to hide somewhere, usually behind the TV or inside the floating console, with the USB or plug running to the nearest outlet.
Get a strip with a remote or app dimmer. Full brightness is great for showing off the wall, but for movies you will want it low. If your TV has a USB port that powers off with the set, plug the strip there and the backlight will follow the TV automatically.
- Mount LED strips 2 to 3 inches from the TV edge so the glow spreads evenly.
- Use warm white 2700K to 4000K for comfortable viewing instead of color modes.
- Hide the power supply behind the TV or console and plug into a switched outlet or USB.
Shop This Look
7. Rustic Wood TV Wall
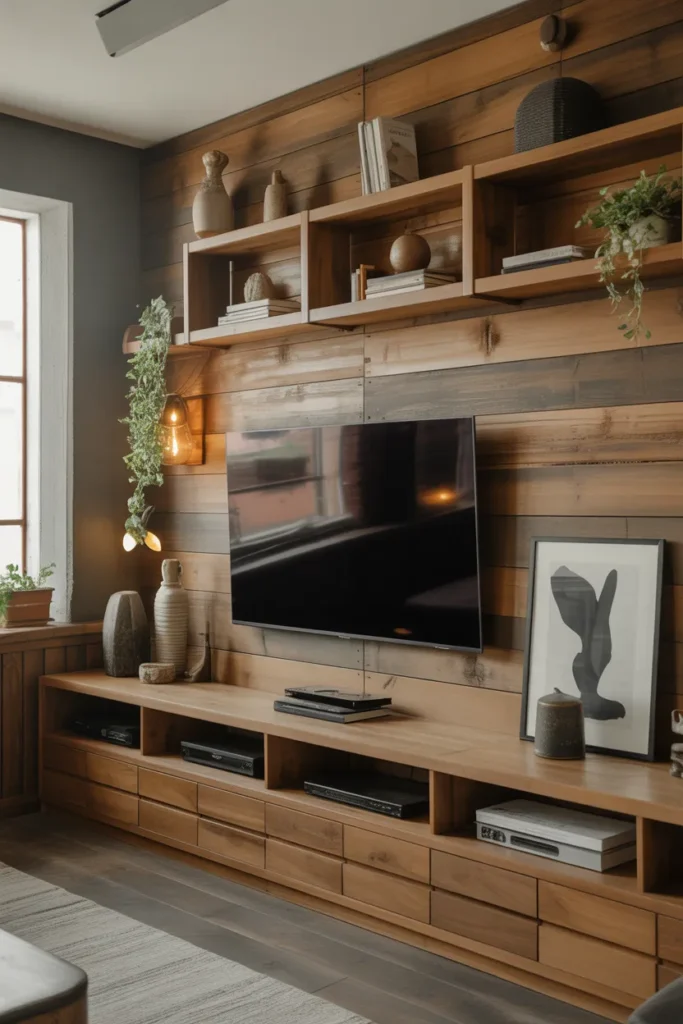
A rustic wood wall leans on texture and variation: mixed plank tones, visible grain, and a finish that looks aged rather than polished. Reclaimed-style planks or peel-and-stick barn wood panels get you there for $60 to $200 for a TV-sized wall. Real reclaimed lumber costs more and needs cleaning and sealing, so most people use manufactured planks that mimic the look without the splinters. Reclaimed planks look best when the tones vary plank to plank, so mix boards from different boxes instead of installing them in order.
Stud anchoring is non-negotiable here. Wood planks are decor, not structure, so the TV mount must go through them into the studs behind. Mark your studs first, then install planks around the mount location, or leave the mount plate exposed behind the TV where it will not be seen. Sand any rough edges or raised grain on the planks, especially near walkways, so nobody catches a sleeve.
Rustic does not have to mean cabin. Pair the wood wall with a simple black TV, a linen sofa, and one iron or black metal accent, and it reads modern-rustic instead of themed. Keep the rest of the room’s wood tones in the same warm family so the wall feels deliberate.
- Mix planks from different boxes so the tones vary naturally across the wall.
- Mount the TV bracket into wall studs through the planks, not into the planks.
- Sand rough edges and seal the wood so it is safe to touch and easy to dust.
Shop This Look
8. Marble TV Wall with Minimal Shelving
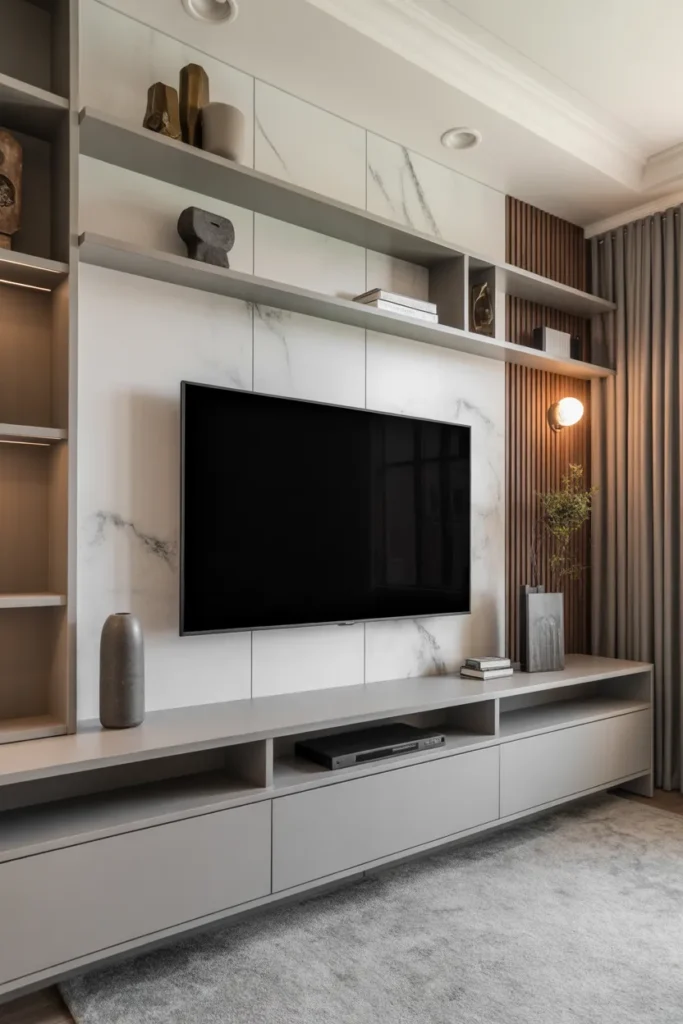
This is the marble look with restraint: a marble backdrop plus one or two small floating shelves, and nothing else. The shelves hold a plant, a book stack, or a small sculpture, while the marble does the talking. Budget sits around $80 to $250: marble-look panels or wallpaper for the wall, plus two quality floating shelves. Negative space is the whole point here, so resist the urge to fill every shelf. Empty space is what makes the few objects look curated.
Shelves on a marble-look wall need to look like they float. Hidden-bracket shelves in white, light wood, or brushed brass all work, and the bracket hardware must be rated for the shelf plus whatever sits on it. Shelf load is easy to underestimate: a shelf holding books needs a bracket rated well above the book weight, or it will sag within a year. Keep heavy items low and near the wall.
Style in odd numbers and keep the palette tight. Three small objects in white, glass, and one warm tone beat a crowded shelf every time. If the marble has gold veining, echo it once with a brass frame or vase, and stop there.
- Limit the wall to one or two shelves and leave generous empty space around them.
- Check the hidden bracket’s weight rating before loading shelves with books.
- Style in odd numbers with a tight palette that echoes the marble’s veining once.
Shop This Look
9. Textured Stone TV Wall
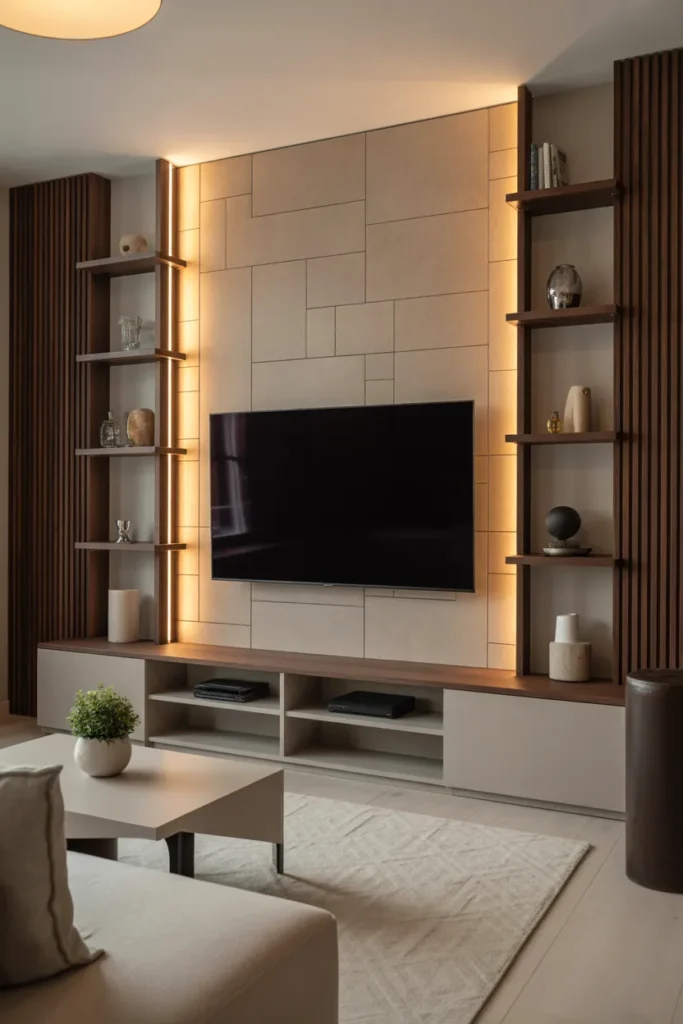
Textured stone, like travertine-look or limestone-look 3D panels, adds a sculptural quality that flat stone veneer does not. The raised and recessed surfaces catch light differently through the day, so the wall keeps changing. 3D stone-look panels run $100 to $300 for a TV wall, with most installs landing in the middle. Texture depth varies by product, so order one sample panel first and hold it against the wall in your actual light before buying the full set.
These panels need a flat, clean wall to bond to, and most install with construction adhesive plus a few screws. Lighting angle makes or breaks the effect: a light washing across the surface from the side or above throws shadows that show off the texture, while flat front light makes it look dull. A pair of small picture lights or a track head aimed across the wall is all it takes.
Because the wall is busy on its own, keep everything else quiet. A floating console in a plain finish, one low plant, and the TV are enough. Dust will collect in the grooves over time, so plan on a soft brush or vacuum attachment every few months.
- Order one sample panel and test it in your room’s light before buying in bulk.
- Aim a light across the surface from the side to throw shadows that show the texture.
- Keep furniture and decor plain so the textured wall stays the star.
Shop This Look
10. Painted Accent TV Wall
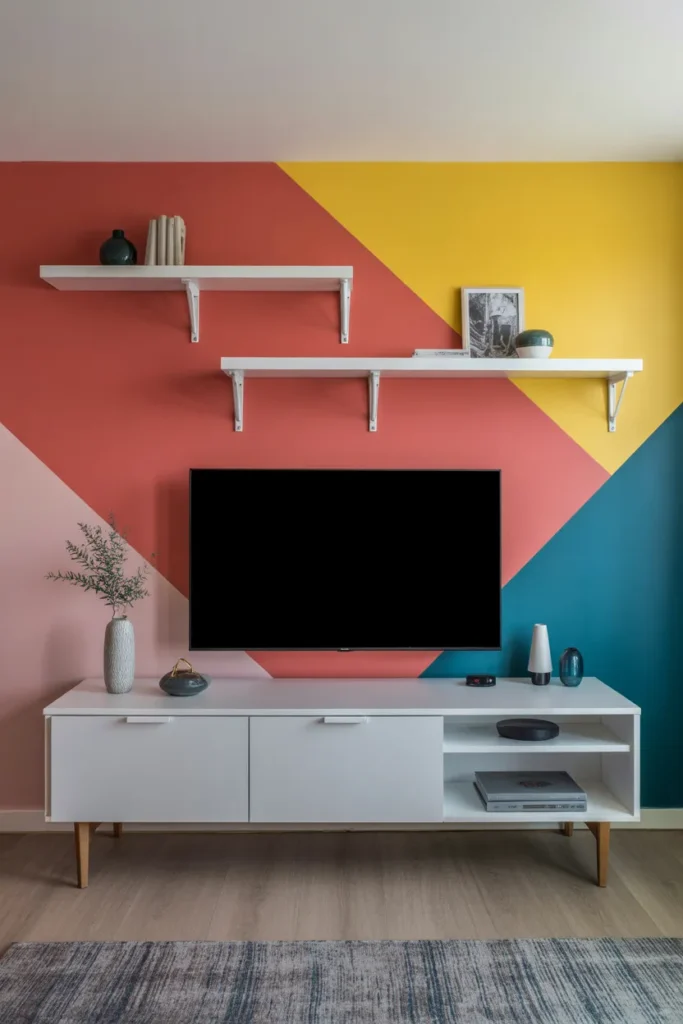
An accent wall is the classic renter-friendly move, and behind a TV it earns its keep. One bold wall gives the black screen a frame of color, so the TV reads as part of the design instead of a gadget on a blank wall. Paint and tape cost $40 to $70 total, and it is a one-day job. Color undertone is where people go wrong: a grey with blue undertone next to warm beige furniture will clash quietly, so compare the swatch against your sofa, rug, and curtains before you paint.
Pick a color with some depth. Muted terracotta, sage, deep teal, or warm charcoal all hold a TV well. Bright primary colors tend to fight the screen and tire the eye. Sheen should stay flat or eggshell; anything glossier will show roller marks and reflect the TV’s own light back at you.
Keep the rest of the room neutral so the accent wall stays the focal point. If the color feels strong after drying, give it a weekend: dark accent walls almost always look better once furniture and lighting are back in place.
- Compare paint swatches against your sofa, rug, and curtains to match undertones.
- Choose flat or eggshell sheen to avoid reflections near the screen.
- Keep surrounding walls neutral so the accent wall holds the focus.
Shop This Look
11. Floating TV Wall with Wood Accents
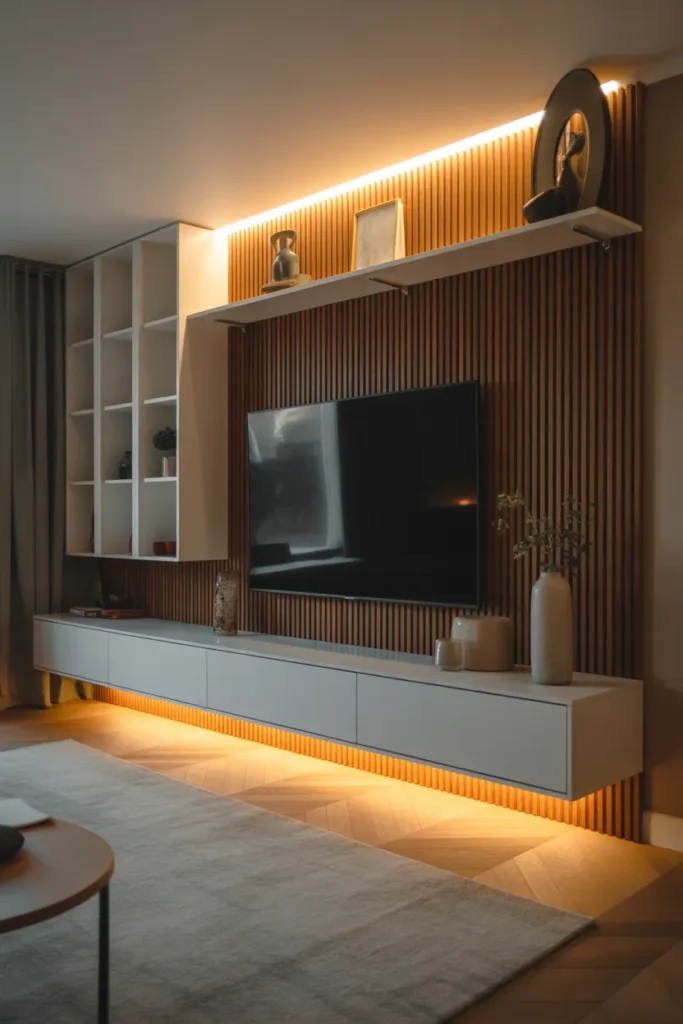
This design splits the difference between minimalist and warm: a floating panel or console in a clean finish, warmed up with wood accents on the sides, below, or as a floating shelf. The wood softens the black rectangle of the TV without covering the whole wall in timber. Budget runs $70 to $220 depending on how much wood you use: a pair of floating wood shelves is the cheapest entry, while a full floating panel with wood side columns costs more. Panel balance matters: the panel or shelf arrangement should be slightly wider than the TV so the composition looks anchored, not floating awkwardly.
White oak and light walnut are the safest wood picks because they work with grey, beige, and white walls alike. Wood grain direction should be consistent across all the wood pieces; mixing horizontal grain on the shelf with vertical grain on the side panels looks accidental. Run cables behind the panel or through a raceway before the wood goes up.
One wood tone is enough. If your floor is already wood, pick an accent tone that is a step lighter or darker than the floor so the pieces read as related but not identical. Add a low green plant to the shelf and the wall is done.
- Make the panel or shelf arrangement slightly wider than the TV for a balanced look.
- Keep wood grain direction consistent across every wood piece on the wall.
- Choose a wood tone one step lighter or darker than your floor, not an exact match.
Shop This Look
12. Marble and Gold Luxe TV Wall
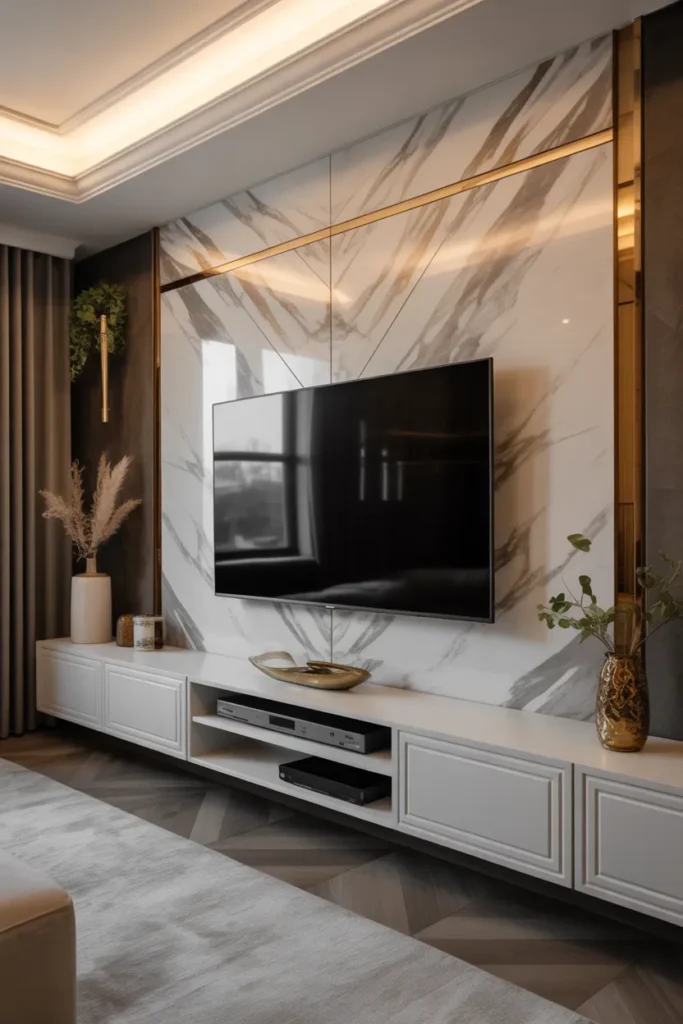
Marble plus gold is the luxury shorthand, and it works behind a TV because the two materials balance each other: cool stone, warm metal. Use marble-look panels for the wall and bring gold in through sconces, shelf brackets, a picture light, or a thin brass trim line. The wall itself costs $40 to $150 in marble-look material, and gold accents run $30 to $150 depending on how many you add. Brass finish should be brushed or satin, not polished mirror gold; brushed reads expensive, polished reads costume.
Restraint is everything with luxe. Two gold pieces on the wall are plenty: a pair of sconces flanking the TV, or one picture light above and one small shelf with a brass object. Vein contrast guides the marble choice: white marble with grey veining suits brushed gold best, while dark marble with gold veining can carry slightly richer brass tones.
Keep the TV frame black or dark; a silver frame fights the gold. A velvet or linen sofa in a neutral tone completes the look without competing. If the gold starts feeling like too much, remove one piece. Luxe walls improve when you take something away.
- Choose brushed or satin brass finishes rather than polished gold.
- Limit gold to two pieces on the wall so the marble stays dominant.
- Keep the TV frame dark so it does not compete with the metal accents.
Shop This Look
13. Stone Accent TV Wall
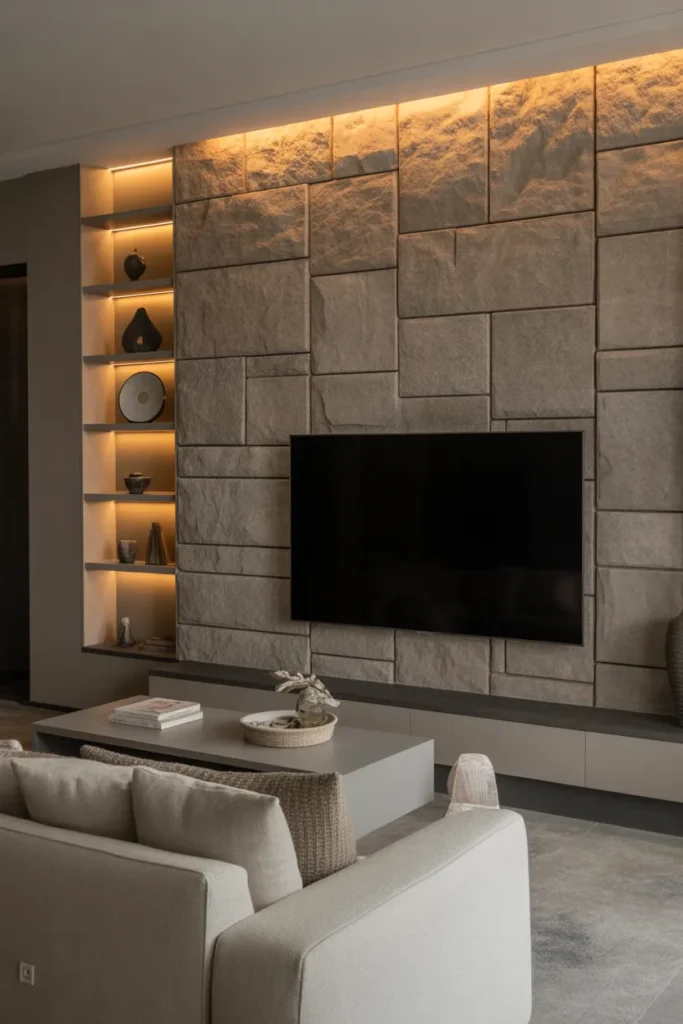
Instead of cladding the whole wall, a stone accent covers just the TV zone: a section slightly wider than the screen, with the rest of the wall painted. This saves money and keeps the room from feeling heavy. A TV-sized stone section runs $90 to $250 in veneer or faux panels. Accent width is the key measurement: make the stone section 6 to 12 inches wider than the TV on each side, so the screen sits comfortably inside the stone field with room to breathe.
Where the stone meets the painted wall, add a simple trim edge or a slim metal profile. A raw cut edge looks unfinished, and trim gives the accent a deliberate border. Transition trim in black, brass, or painted wood all work; match it to something else in the room, like the TV frame or shelf brackets, so it looks planned.
Paint the surrounding wall a quiet neutral so the stone section reads as the feature. The same cable and mounting rules apply as a full stone wall: mount into studs, plan wire paths first, and seal natural stone.
- Size the stone section 6 to 12 inches wider than the TV on each side.
- Finish the stone-to-paint edge with trim or a metal profile for a clean border.
- Paint surrounding walls a quiet neutral so the accent section stands out.
Shop This Look
14. Geometric Painted TV Wall
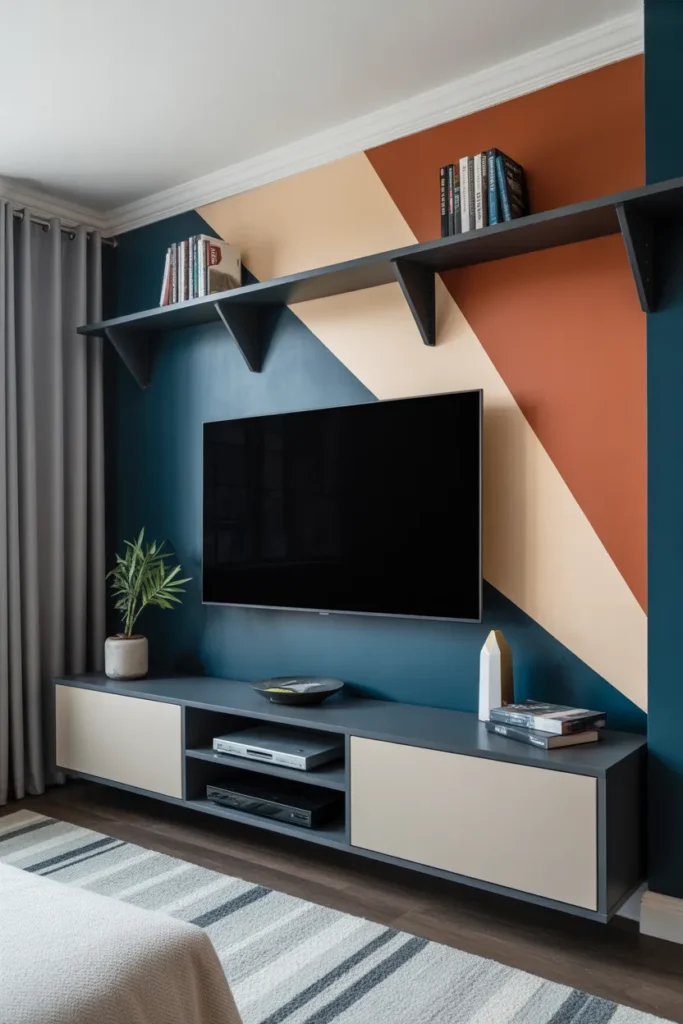
Geometric paint turns the TV wall into graphic art: large triangles, arches, color blocks, or a half-wall split in two tones. It costs $40 to $90 in paint and tape, and the impact per dollar is hard to beat. The trick is scale: big simple shapes suit a TV wall, while small fussy patterns fight the screen. Layout grid comes first: sketch the design on paper with measurements, then transfer it to the wall with a level and pencil before any tape goes down.
Two colors are enough, three at most. A dark shape behind the TV with a lighter field around it naturally centers the screen, and the TV becomes part of the geometry. Tape lines need quality tape pressed down firmly; paint can bleed under loose tape and ruin the crisp edges the design depends on. Pull tape while the paint is tacky, and touch up any bleeds with a small artist brush.
Keep furniture lines simple so the wall stays the graphic moment. A low console in a solid color that matches one of the paint tones ties the whole composition together.
- Sketch the design to scale on paper and transfer it with a level before taping.
- Limit the palette to two or three colors so the geometry stays readable.
- Press tape down firmly and pull it while the paint is tacky for crisp lines.
Shop This Look
15. Minimalist Black TV Wall
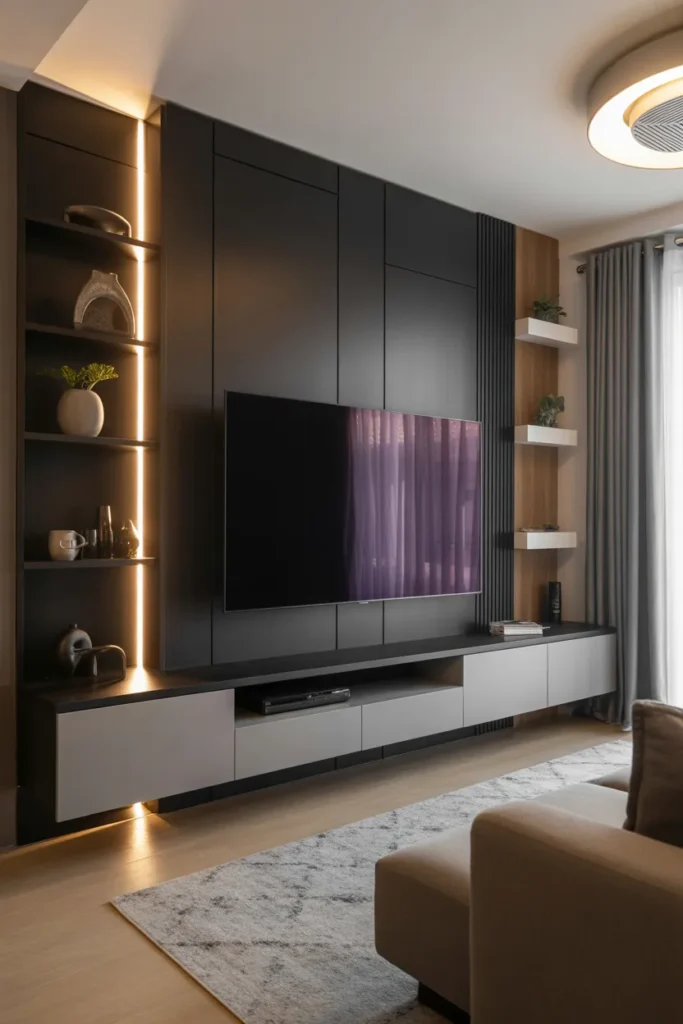
A black wall makes the TV disappear. When the screen is off, it melts into the background; when it is on, the dark surround makes the picture look richer. This is one of the cheapest ideas on the list at $40 to $80 for paint and supplies, and it suits modern and moody living rooms alike. Black undertone is the decision that matters: soft blacks with warm undertones feel cozy, while blue-black reads colder and more dramatic. Compare swatches against your flooring before choosing.
Minimalist means the wall carries the design alone, so the paint job has to be clean. Two coats over primer, cut in carefully at the ceiling and corners, and no decor competing on the wall itself. Screen blend is the payoff: a wall-mounted TV on a black wall looks built in rather than hung, especially with a slim mount that holds it close.
Add one warm light source, like a floor lamp with a warm bulb, so the black wall does not make the room feel like a cave. Light flooring or a pale rug keeps the contrast balanced. Dust shows more on black, so keep a microfiber cloth handy.
- Pick the black’s undertone to match your room: warm black for cozy, blue-black for drama.
- Mount the TV close to the wall with a slim mount so it blends into the background.
- Add one warm light source and keep floors or rugs light to balance the darkness.
Shop This Look
16. Floating TV Wall with Backlit Panels
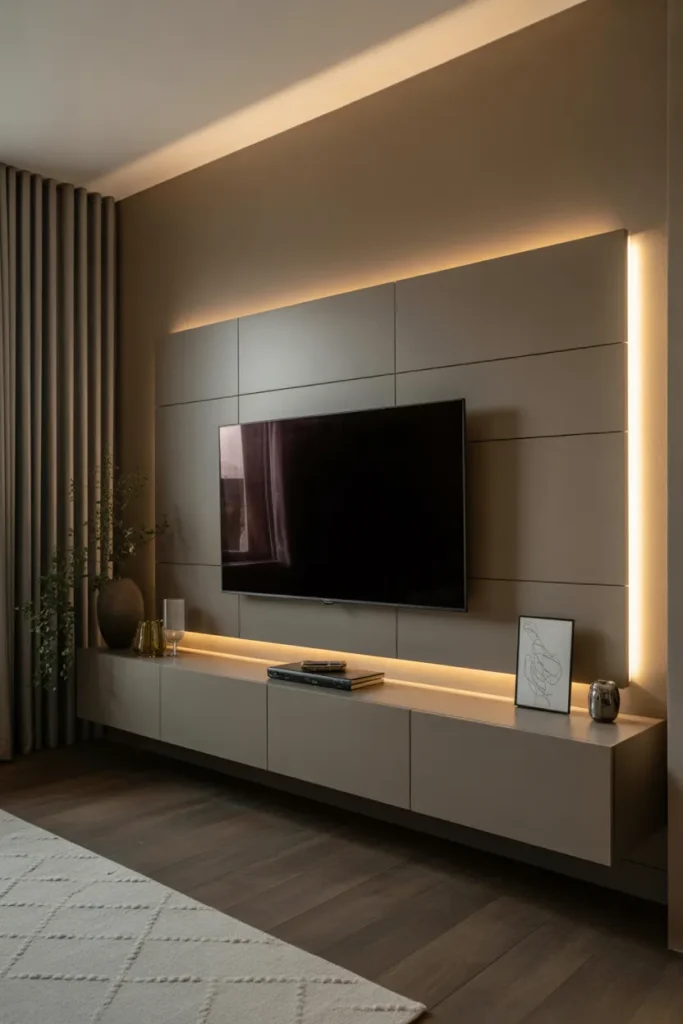
Backlit panels take the floating TV wall a step further: instead of lighting just the TV, whole wall panels glow from behind. The panels, usually MDF or acoustic felt, sit slightly off the wall with LED strips hidden in the gap, so each panel gets a halo of light. Materials and LEDs run $100 to $280 for a TV-sized arrangement. Panel spacing creates the effect: leave a consistent 1-inch gap behind each panel and the light washes out evenly instead of pooling in spots.
Aluminum LED channels with diffusers give a cleaner line of light than bare strips, and they protect the LEDs. Diffused glow is what you are after: the diffuser softens the individual LED dots into one smooth band. Wire the strips to a dimmer plug or smart controller so you can drop the brightness for movies and raise it when showing off the wall.
Keep the panel color quiet. White, warm grey, or light wood lets the glow read clearly, while dark panels swallow the light. One console below and the TV centered complete it; the wall lighting is the decoration.
- Leave a consistent 1-inch gap behind panels so the LED glow spreads evenly.
- Use aluminum channels with diffusers for a smooth band of light instead of dots.
- Connect the strips to a dimmer so brightness can drop for movie nights.
Shop This Look
17. Wooden Slat TV Wall
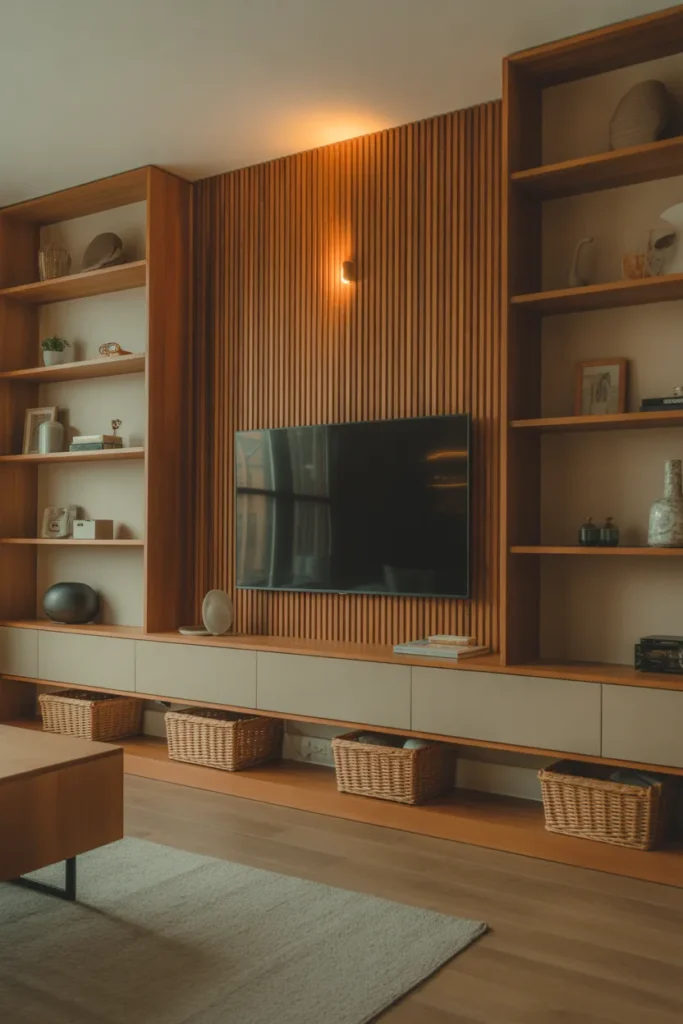
Vertical wood slats, sometimes called fluted panels, are everywhere right now, and the TV wall is their natural home. The repeating vertical lines add height to the room and give the black screen a textured backdrop that looks good even when the TV is off. Slat panel kits cost $80 to $280 for a TV wall depending on wood species and whether they include an acoustic felt backer. Slat spacing sets the mood: tight slats read modern and tailored, wider gaps with visible backer read more relaxed.
The backer color changes the whole look. Black felt behind oak slats gives high contrast and drama; matching wood-tone backer gives a calmer, tonal effect. Backer color is worth deciding with a sample in hand, because photos do not show how much light the felt absorbs. Cut panels to fit around outlets with a fine-tooth saw, and use outlet extender spacers so the plates sit flush on the finished surface.
Mount the TV on a slim bracket centered on the slats. Vertical slats behind a wide TV create a pleasing contrast of lines, and the eye reads the whole wall as one designed surface. Add a low console in a solid finish to ground it.
- Choose tight slats for a tailored modern look or wider gaps for a relaxed feel.
- Decide the backer color with a physical sample, since felt absorbs more light than photos show.
- Use outlet extender spacers so plates sit flush on the finished panel surface.
Shop This Look
18. Stone Feature TV Wall with Floating Shelves
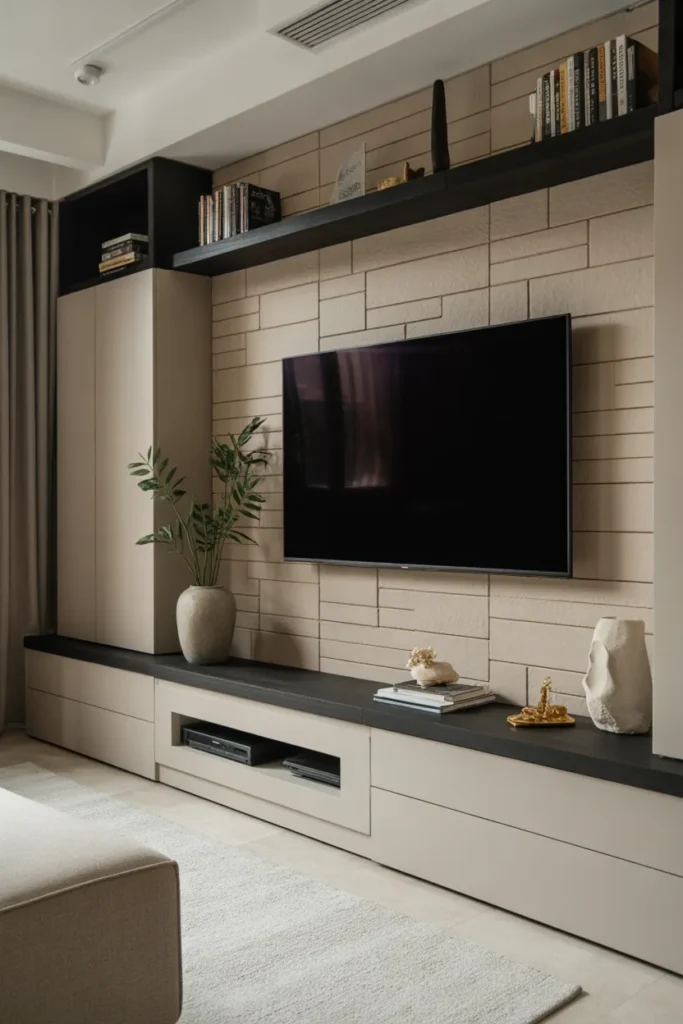
Stone plus floating shelves combines two strong ideas: the texture of the stone wall and the function of display space. Wood shelves against stone is the classic pairing, because the warm wood softens the cool stone. Budget runs $120 to $300: stone veneer or panels for the wall, plus solid wood shelves with proper brackets. Shelf brackets must be heavy-duty and anchored into studs, since stone plus wood shelves plus objects add up to real weight.
Plan the shelf positions before the stone goes up. Mark stud locations, decide shelf heights, and run any cables for the TV at the same time. Stone weight is the other consideration: natural veneer is heavy, so check that your wall can take the combined load, or use lightweight faux panels that give the look without the pounds.
Stagger the shelves at different heights on one or both sides of the TV rather than lining them up symmetrically; it looks more natural against organic stone. Keep shelf decor low and simple: a trailing plant, a few books, one framed photo. The stone is already the texture story.
- Mark studs and fix shelf heights before installing the stone wall.
- Anchor shelf brackets into studs with hardware rated above the total shelf load.
- Stagger shelves at varied heights and keep decor low so the stone stays visible.
Shop This Look
19. Geometric Patterned TV Wall
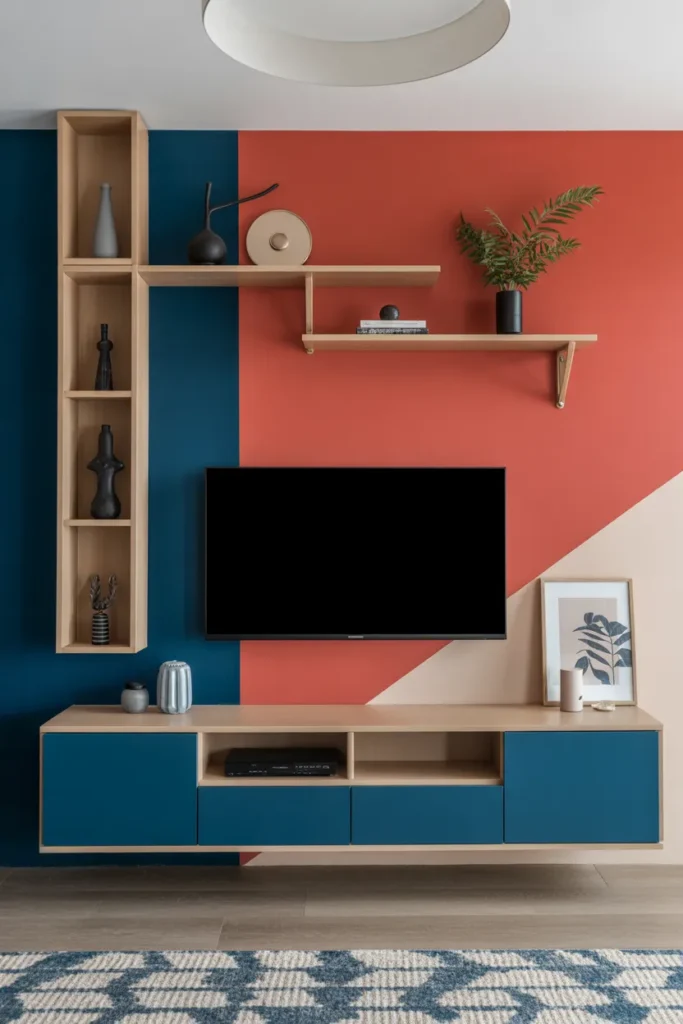
Geometric patterned wallpaper gives you the graphic look without the taping and painting. Modern geometric prints, from bold art-deco fans to quiet tone-on-tone hexagons, sit well behind a TV because the pattern continues behind the screen and makes the whole wall feel designed. Peel-and-stick wallpaper runs $50 to $150 for a TV wall, and it is forgiving to install. Pattern scale is the main choice: large-scale patterns suit large walls and read calm, while small busy patterns can buzz visually behind a screen.
Seam alignment matters more than people expect. Plan the layout so a seam does not land right at the TV’s edge where it will catch the eye; center the pattern’s main motif behind the screen instead. Order one extra roll beyond the calculator’s estimate, because pattern matching wastes more paper than plain walls.
Pick up one color from the wallpaper for the console or a nearby cushion to tie the wall to the room. If the pattern is bold, keep the TV on a simple mount with no extra wall decor; if it is subtle, one small shelf is fine.
- Choose a large pattern scale for calm walls; avoid small busy prints behind screens.
- Center the pattern’s main motif behind the TV and keep seams away from its edges.
- Order one extra roll to cover waste from pattern matching.
Shop This Look
20. Minimalist Grey TV Wall
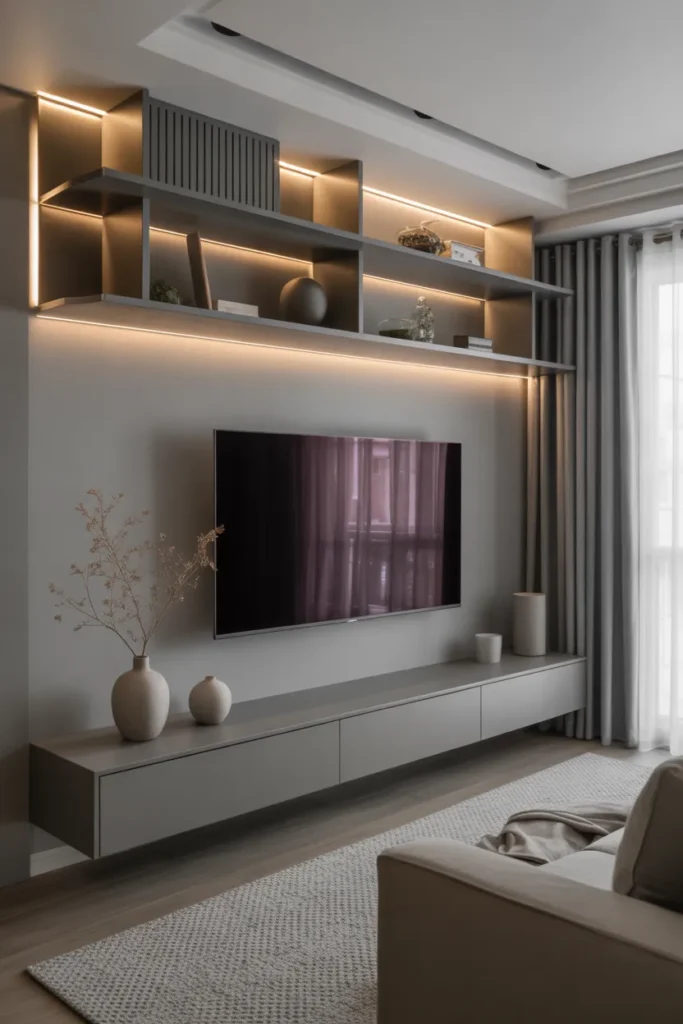
Grey is the quiet workhorse of TV walls: it recedes, it suits every TV finish, and it never fights your furniture. A minimalist grey wall with one floating console and the TV mounted cleanly is the safest design on this list, and at $40 to $80 it is also one of the cheapest. Grey undertone decides whether the room feels warm or cold, so test the swatch against your light: warm greys (greige) suit beige and wood rooms, cool greys suit white and chrome rooms.
Minimalist grey can go flat if everything is the same tone, so layer two or three greys: a mid-tone wall, a darker console, a lighter rug. Tone layering keeps the wall interesting without adding any pattern or decor. Add texture through fabric, a knit throw, a bouclé cushion, a low-pile rug, so the simplicity reads as soft rather than empty.
The TV practically disappears into a mid-grey wall when off, which is the whole appeal. Keep cables hidden and the console top clear, and the wall does its job with almost nothing on it.
- Match the grey’s undertone to your room: warm greige for wood tones, cool grey for white and chrome.
- Layer two or three grey tones across wall, console, and rug to avoid a flat look.
- Add texture through throws and cushions so the minimalism reads as soft.
Shop This Look
21. Floating White TV Wall with Cabinets
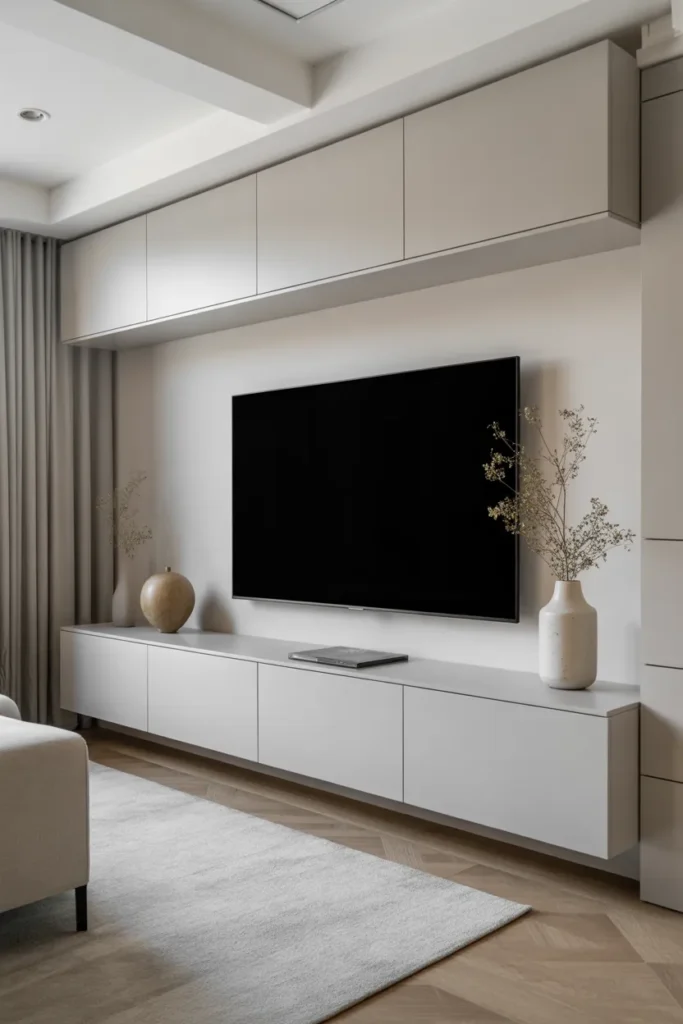
Floating white cabinets below or beside the TV give you closed storage without the bulk of a floor-standing unit. Consoles, routers, game controllers, and remotes all hide behind clean white doors, and the TV wall stays calm. Wall-mounted cabinet units run $150 to $300 for a TV-width arrangement, plus mounting hardware. Cabinet depth is the spec to check: 12 to 14 inches deep is enough for most media gear and keeps the cabinets slim against the wall.
Handleless fronts with push-to-open latches look best because there is nothing to break the clean lines. Handleless fronts also mean no knobs catching on sleeves in tight rooms. Mount every cabinet into studs with proper wall anchors; a loaded floating cabinet is heavy, and drywall anchors alone will fail.
Leave a ventilation gap or use a vented cabinet for anything that runs hot, like a cable box or console. Drill a cable pass-through in the cabinet back so wires reach the TV without dangling. One small plant or a low stack of books on top is all the styling this wall needs.
- Choose cabinets 12 to 14 inches deep so media gear fits without bulk.
- Anchor every cabinet into studs; a loaded floating cabinet is too heavy for drywall anchors.
- Ventilate hot electronics and drill cable pass-throughs in the cabinet backs.
Shop This Look
22. Black Matte TV Wall
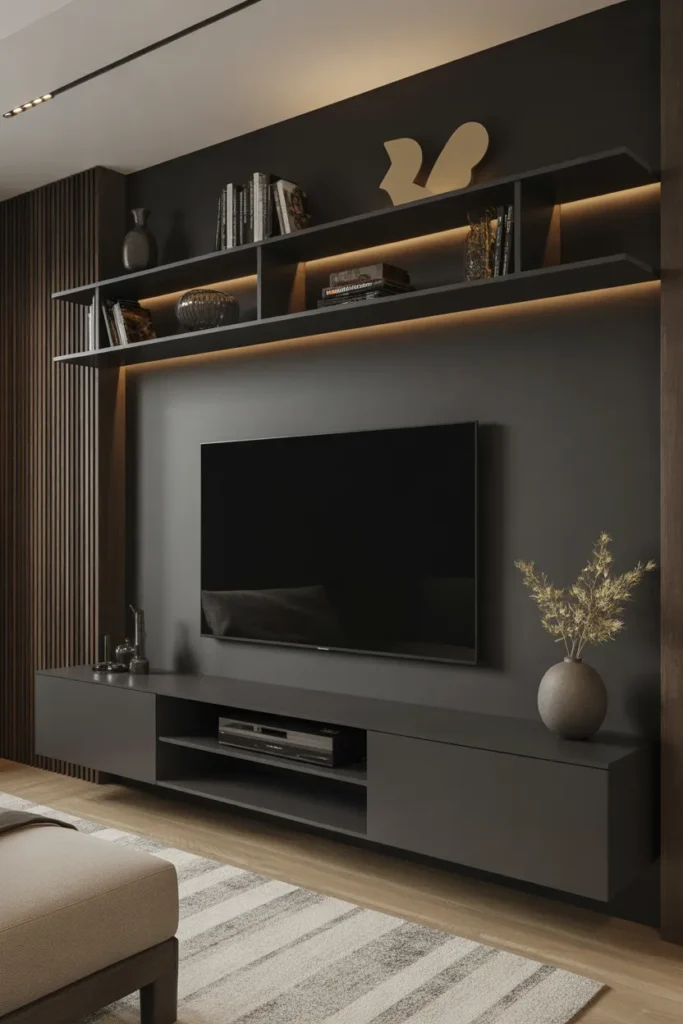
Matte black is black without the shine. Unlike satin or semi-gloss, a matte finish absorbs light instead of reflecting it, which means no glare bouncing off the wall and no roller marks showing. The wall recedes completely and the TV picture looks like it is floating. Paint and supplies cost $40 to $80. Matte finish also forgives wall imperfections better than any other sheen, which is handy because dark paint shows every flaw in a gloss.
The trade-off is maintenance: dust and fingerprints show more on matte black than on lighter walls. Dust visibility means keeping a microfiber cloth nearby and wiping the wall every few weeks, especially near light switches and the TV mount. Avoid touching the wall; even clean hands leave marks on matte black.
One piece of art or one floating shelf in a light finish gives the eye somewhere to rest. A light wood frame or an oak shelf against the black wall creates the contrast that makes this look feel designed rather than just dark.
- Use a true matte finish to absorb light and hide wall imperfections.
- Keep a microfiber cloth handy; dust and fingerprints show on matte black.
- Add one light-wood frame or shelf so the wall has a point of contrast.
Shop This Look
23. Rustic Wooden TV Wall
This take on rustic wood goes lighter: horizontal boards with a whitewashed finish, like weathered shiplap, instead of dark reclaimed planks. The whitewash keeps the wood texture visible while letting the wall stay bright, so it suits rooms that need warmth without darkness. Boards plus whitewash stain run $60 to $200 for a TV wall. Whitewash mix is just paint diluted with water, about one part paint to two parts water, brushed on and wiped back so the grain shows through.
Board direction changes the room’s proportions: horizontal boards make the wall feel wider, which suits narrow living rooms. Leave a hairline gap between boards so each one reads individually; butted-tight boards look like a flat panel and lose the shiplap character. As with any wood wall, the TV mount goes through the boards into the studs.
A whitewashed wood wall pairs well with black, linen, and greenery. Add a simple wood mantel shelf below the TV for a soundbar and a couple of objects, and the wall has everything it needs.
- Run boards horizontally to make a narrow room feel wider.
- Mix whitewash as one part paint to two parts water and wipe back for visible grain.
- Leave a hairline gap between boards so each one reads as shiplap.
Shop This Look
24. Geometric Floating TV Wall
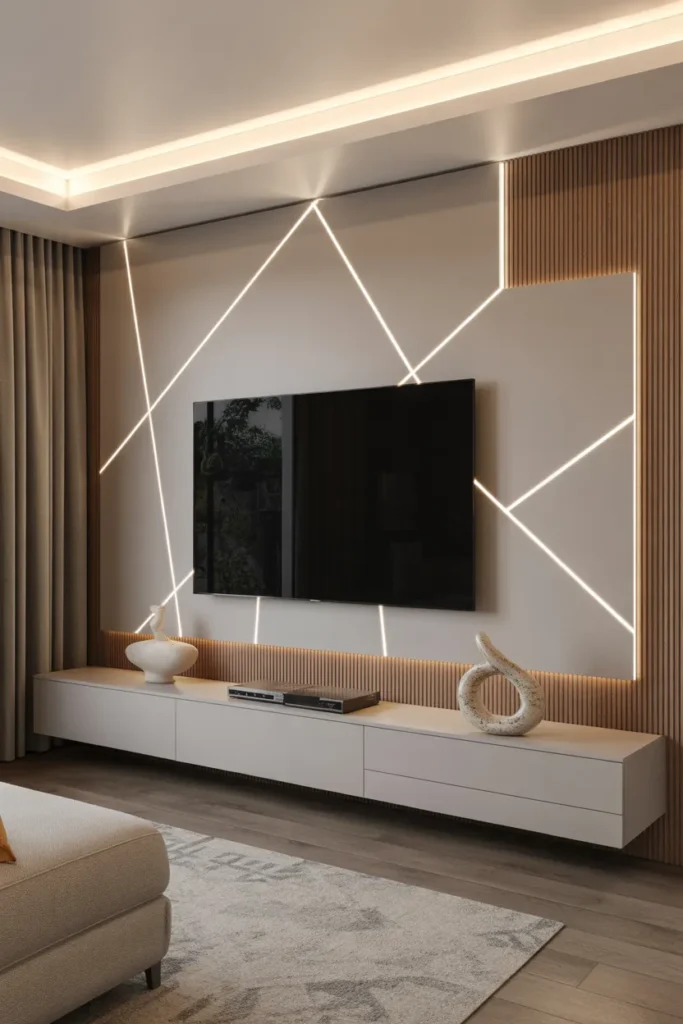
The last idea combines two trends: floating panels cut into geometric shapes, arranged asymmetrically around the TV. Angled or hexagonal panels mounted off the wall create shadow lines and depth, and LED strips tucked behind the panel edges make the shapes glow at night. Panels, paint, and LEDs run $90 to $250. Panel shape is the design decision: keep shapes large and few, because small scattered pieces look busy behind a screen.
Mount panels with standoff hardware or wood battens so they float an inch or two off the wall; the gap is what creates the shadow line that makes the geometry read. Shadow lines do the visual work here, so keep the wall behind the panels a quiet solid color and let the edges speak. Run LED strips behind the panel perimeters if you want the evening glow, with the driver hidden behind the largest panel.
Arrange the composition on the floor first. Lay out the panels, set the TV in the middle, step back, and adjust until the balance feels right. Photograph the layout from your sofa position before mounting anything, because what looks good up close can feel off from across the room.
- Keep geometric panels large and few so the composition stays calm behind the screen.
- Float panels an inch or two off the wall to create the shadow lines that define the shapes.
- Lay out the full arrangement on the floor and photograph it from sofa distance first.
Shop This Look
How to Start
Start with measurements, not shopping. Measure your TV’s width and the wall, note the viewing distance from your sofa, and find your studs with a stud finder. These four numbers decide almost everything: mount type, panel sizes, shelf spans, and whether your idea fits the wall at all. Most TV walls fail before they start because someone bought materials for a wall they never measured.
Next, settle the cables. Decide whether wires will run through the wall, through a surface raceway, or behind a panel, and buy the kit for that route before you mount anything. If you are renting, a paint-on raceway is the answer; if you own, an in-wall kit gives the cleanest result. Either way, routing first is the rule that saves the most grief.
Then work in this order: prep and paint the wall, install panels or cladding, mount the bracket into studs, hang the TV, route and connect cables, then add shelves and decor last. Testing the TV and all inputs before the final cable tidy is worth the extra ten minutes.
- Measure the TV, the wall, the viewing distance, and mark every stud before buying anything.
- Choose and buy your cable routing kit before the mount goes up, not after.
- Work in order: wall prep, cladding, bracket, TV, cables, then shelves and decor last.
Shop This Look
Common Mistakes
- Mounting the TV too high: the screen center should sit at eye level from your sofa, around 42 to 48 inches off the floor, not above the fireplace line.
- Skipping the stud check: TV mounts and floating cabinets anchored only into drywall will fail, sometimes taking the wall with them.
- Leaving cables for last: wires routed after the wall is finished always look worse and cost more to fix than routing them first.
- Choosing a mount that cannot hold the TV’s weight: check the mount’s rating against your TV’s actual weight, not just its screen size.
- Overcrowding shelves and surfaces: a TV wall with too much decor competes with the screen and looks cluttered instead of designed.
- Picking glossy finishes near the screen: satin and gloss paint or panels reflect light and create glare that matte finishes avoid.
- Forgetting ventilation: cable boxes, consoles, and routers sealed inside cabinets overheat, so leave air gaps or use vented fronts.
Frequently Asked Questions
What is the best color to paint behind a TV?
Dark, muted colors work best because they make the black screen blend in: charcoal, deep navy, forest green, and warm greige are the safest picks. Matte or eggshell finish keeps glare down. Avoid bright whites behind the TV, since the contrast between a glowing screen and a white wall causes eye strain in dark rooms.
How high should I mount my TV on the wall?
Mount it so the center of the screen sits at eye level from your main seat, which is usually 42 to 48 inches from the floor to the screen center. The most common mistake is mounting too high. Sit on your sofa, have someone hold the TV or a cardboard cutout at different heights, and mark the spot that feels natural before drilling.
Can I mount a TV on a stone or panel wall?
Yes, but the mount must anchor into the wall studs behind the cladding, never into the stone, wood, or panels themselves. Mark your stud positions before installing the wall material, and keep a cable path planned at the same time. For heavy natural stone, confirm the wall can carry the combined weight of stone plus TV.
How do I hide TV cables without opening the wall?
Use a paintable surface raceway that runs from the TV down to the console or outlet; once painted to match the wall, it nearly disappears. In-wall cable kits give a cleaner result but need a small drywall cut behind the TV and near the outlet. If you are building a full media wall, running cables behind the panels is the neatest option of all. For more wall setup ideas, see our media wall ideas.
Is LED backlighting behind the TV worth it?
For evening viewing, yes. Bias lighting reduces the contrast between a bright screen and a dark room, which eases eye strain and makes the picture look richer. A warm white strip around 2700K to 4000K with a dimmer costs under $40 and takes minutes to install. Skip color-changing modes for regular watching, since colored light on the wall distracts from the screen.
The Finishing Touch
Once the TV is mounted and the cables are hidden, the wall is 90 percent done, and the last 10 percent is restraint. Step back to your sofa and look at the wall the way you will actually see it every day. If something pulls your eye away from the screen, it is probably too much: remove one object before you add anything.
Lighting is the finishing touch that most people skip. A dimmable warm light near the TV wall, whether a backlight strip, a pair of sconces, or a floor lamp with a warm bulb, changes how the wall looks after dark and makes evening viewing easier on the eyes. Set it once and leave it; good TV wall lighting should be forgettable in the best way.
If you want more professional inspiration before you start, Houzz has a solid roundup of designer approaches in 8 Ideas for a Stylish Entertainment Center, with real rooms showing how designers integrate the TV into the wall design. Pick the idea from this list that fits your budget and your wall, measure twice, and enjoy the result every time you sit down.